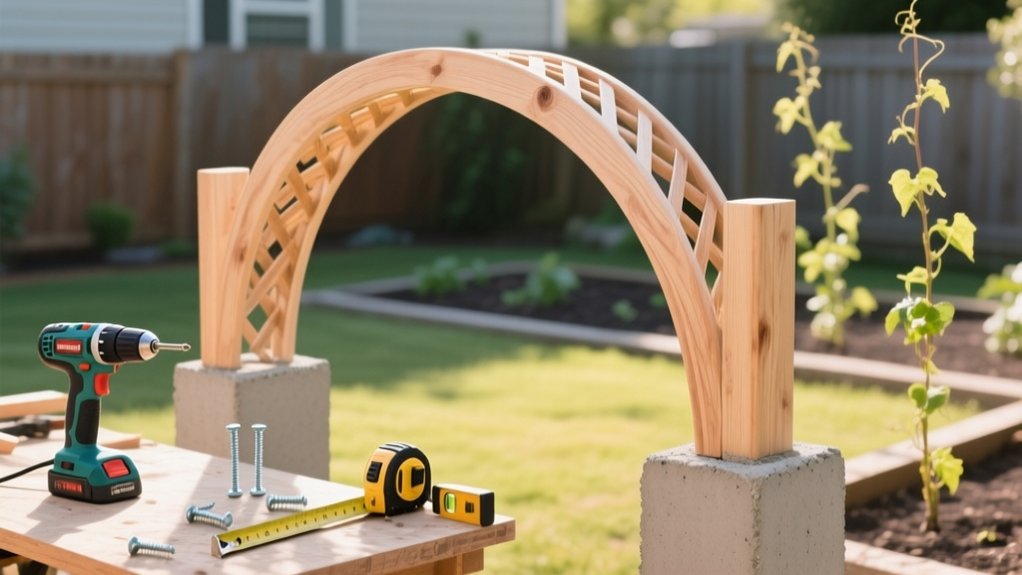
Build your archway trellis 900–1,200mm wide and 2,100–2,300mm high, and site it clear of doors and at least 150mm from fences or walls for airflow. Mark out with pegs and string, then set UC3b treated posts plumb and square, anchoring them securely. Cut and seal all end grain, pre-drill, and assemble a simple two-post and top-beam frame with stainless or hot-dip galvanised fixings. Fit treated lattice with 3–5mm movement gaps and kerf for curves. Next, you’ll refine the arch, infill, and long-term protection.
Key Takeaways
- Plan dimensions and placement, keeping 150mm clearance from walls and avoiding doors, gates, and roof overhangs.
- Use exterior-rated timber and corrosion-resistant fixings; seal all cuts and end grain before assembly.
- Dry-fit the frame on a flat surface, checking square, plumb, and level with diagonals, clamps, and temporary braces.
- Anchor posts securely, then tighten bolts and leave 3–5mm clearance for seasonal timber movement before fixing infill.
- Measure and cut lattice per bay, kerf for curves if needed, and screw every 200–250mm with pre-drilled holes and flush fixings.
Choose Archway Trellis Size, Location, and Clearance
Before you cut any timber, you’ll need to pin down the archway trellis’s overall size, exact position, and the clearances it must maintain.
Set the internal width to suit typical UK paths: 900–1,200mm for a wheelbarrow, and height at 2,100–2,300mm so taller users pass beneath safely. Allow extra headroom if you’ll train climbers that droop.
Site it where posts won’t foul doors, gates, or shed roofs, and check it won’t block sightlines at driveways. Maintain at least 150mm clearance from fences and walls for airflow and future maintenance.
Mark the footprint with pegs and string, then verify square and plumb points. Align it to frame key views for Garden aesthetics and to screen overlooked areas for Privacy enhancement.
Pick a Simple Archway Trellis Design and Layout
Although ornate arches look impressive, you’ll get a stronger, easier build by choosing a simple layout: two straight posts set in line, a square or gently curved top beam, and lightweight infill (horizontal battens, diagonal braces, or a 50–100mm trellis grid) to support climbers without turning the structure into a sail.
Keep everything symmetrical so you can measure once and replicate cuts, and aim for clear sightlines through the arch on narrow UK paths. Mark your layout full-size on the ground with string lines, then confirm the opening stays consistent from base to head.
- Choose a flat-faced arch or shallow curve to suit standard bending radii and neat joints.
- Place Decorative elements only where they won’t snag stems or reduce airflow.
- Check Plant compatibility: vigorous roses need wider spacing; clematis prefers closer grid.
Choose Weatherproof Materials, Hardware, and Tools
Since an archway trellis lives in constant wet–dry cycles, you’ll get a longer-lasting build by specifying exterior-rated timber (FSC UC3b treated softwood or, better, naturally durable larch/Douglas fir/oak).
Use corrosion-resistant fixings (A2/A4 stainless or hot-dip galvanised), and weatherproof adhesives and finishes (D4 PU glue plus an end-grain preservative and a microporous exterior stain) matched to UK conditions.
Select rust-proof fasteners sized for structural joints: 5–6 mm coach screws or structural wood screws with matching washers, plus exterior-rated angle brackets where needed. Avoid bright zinc indoors-only fixings.
Choose weather-resistant coatings with UV inhibitors for south-facing sites, and verify compatibility with treated timber.
Use a corded drill/driver, impact driver, countersink, square, clamps, and a stainless bit set to prevent cam-out and stripped heads.
Cut, Seal, and Prep the Trellis Parts
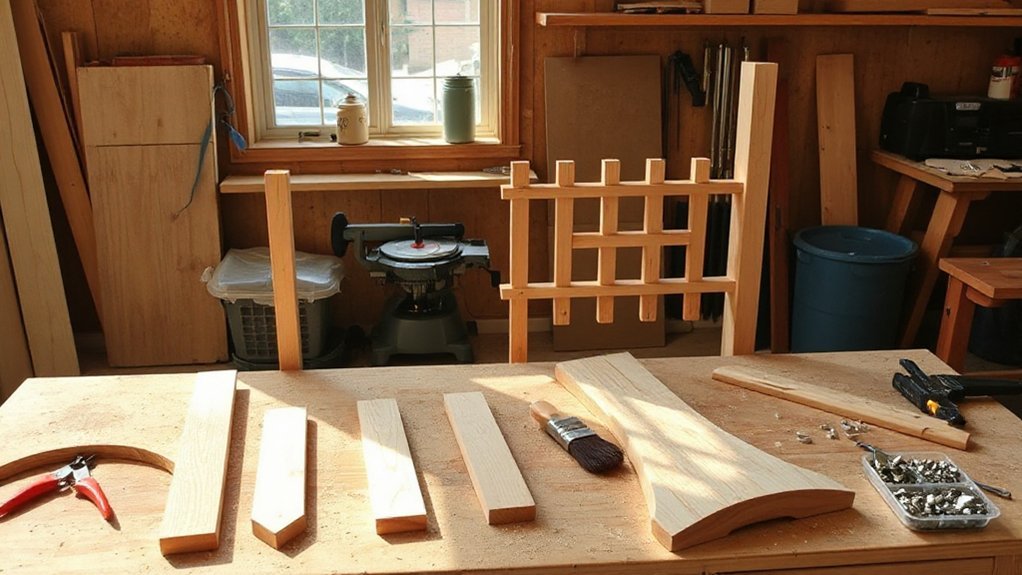
With exterior-rated timber, stainless/galv fixings, and compatible finishes chosen, you can now cut each member to size and lock in durability by sealing fresh faces and end grain straight away. Mark out from a single datum edge, then crosscut with a sharp fine-tooth blade to minimise breakout. Plane or sand saw marks, ease arrises with a 2–3 mm chamfer, and drill pilot holes to prevent splitting.
Apply Wood treatment before assembly: flood end grain and any notches, then wipe off runs. Use proven sealing techniques—two coats on end grain, one on faces—using a brush to work finish into pores. Let parts dry on stickers in a ventilated shed.
- Square, tape, and marking knife for repeatable lines
- Brush, disposable gloves, and rags for clean sealing
- 120–180 grit and a block for crisp edges
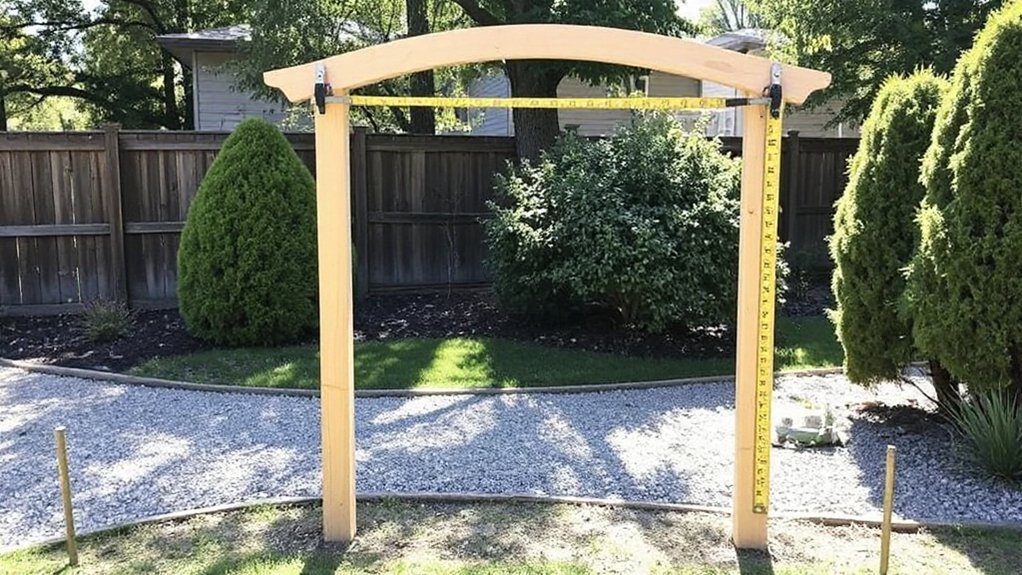
Assemble the Archway Trellis Frame Plumb and Level
Set your uprights on a flat base and square them to the cross members by matching diagonal measurements before you fix any fasteners.
Check each post with a spirit level for plumb and confirm the top span is level, packing with treated shims where needed to correct twist or fall.
Once everything reads true, clamp the joints and lock the frame alignment with pilot-drilled fixings so it can’t rack during the remaining build.
Square The Uprights
Once you’ve dry-fitted the archway frame, square the uprights before you commit to fixings, because even a small twist will throw the whole trellis out of plumb.
Measure both diagonals between opposite corners of the rectangular frame; adjust the uprights until the diagonal measurements match.
Clamp across the frame with quick-grip clamps or temporary battens, then recheck the diagonals after each tweak.
- Use a framing square at each base corner to confirm a true 90° before tightening clamps.
- Tack on a temporary diagonal brace (scrap 25 x 50mm) to lock the geometry while you drill.
- Set decorative finials or post caps aside until you’ve drilled clean, centred pilot holes.
When you’re happy, mark the joint lines with a pencil so you can return everything to the same position after drilling.
Check Plumb And Level
Your frame should now sit square on the bench, so move it to its final position and check it stands plumb and level before you fit any permanent fixings. Set it on firm ground or paving, not loose soil, and pack under the feet with treated shims if needed.
Use a 1.2m spirit level on each upright front-to-back and side-to-side; adjust until the bubble centres. Check the header rail is level across the span, then measure diagonals between opposite corners to confirm it hasn’t racked during handling.
If you’re adding decorative finials, dry-fit them now and re-check verticals, as their weight can tip a light frame. Keep all adjustments minimal so you don’t crack your paint finish later.
Lock Frame Alignment
Although the frame may look true, you need to lock that alignment before you drill or bolt anything, otherwise it’ll creep out of square under load and wind. Clamp each joint, then re-check plumb with a 600 mm spirit level and confirm the bases sit level on their pads.
Measure diagonals corner-to-corner; they must match, or you’ll twist the arch and ruin garden aesthetics. Use temporary bracing to hold the geometry while you mark fixings.
In UK weather, allow for wet timber movement, so don’t rely on friction alone.
- Fit a diagonal batten brace and screw it lightly so you can adjust.
- Pack low points with treated shims, not loose soil.
- Tighten clamps, then drill pilot holes before final bolts for structural stability.
Anchor the Archway Trellis and Attach Lattice for Vines
Once your frame’s plumb and level, you’ll lock it in by securing each post to galvanised post anchors or concrete-in shoes. Checking fixings are rated for UK weather exposure and wind load.
Tighten bolts and re-check alignment before backfilling or setting resin, so the arch won’t rack over time.
Then you’ll attach exterior-grade lattice with stainless or galvanised screws and washers, spacing it evenly to give vines solid, repeatable tie-off points.
Secure Posts With Anchors
Before you fix the archway permanently, lock each post down with the correct ground anchor so the frame can’t rack under wind load or the weight of mature climbers.
For reliable Post stabilization, set out the base positions, check plumb with a spirit level, then install anchors to suit your soil and paving. Choose Anchor types based on UK conditions: clay needs deeper bite, while patios rely on bolt-through fixings into solid substrate.
- Use galvanised post spikes for firm, well-drained soil; drive them square and keep the post off standing water.
- Use metpost concrete-in anchors where frost heave is likely; pour to the manufacturer’s depth and cure fully.
- Use resin-set threaded studs for slabs; drill, clean, inject, and torque to spec.
Attach Lattice For Vines
With the posts now locked into their anchors and staying plumb, you can stiffen the archway trellis and give climbers something to grip by fitting lattice panels between the uprights and up the curve.
Measure each bay, then cut pressure-treated softwood lattice with a fine-tooth blade to minimise breakout. Offer it up with 3–5 mm clearance for seasonal movement, then fix using stainless or exterior-coated screws and penny washers every 200–250 mm, pre-drilling to prevent splitting.
If you’re bending lattice around the arch, kerf the back or use thinner panels and add intermediate battens for support. Keep fixings flush so ties don’t snag during Vine maintenance.
Align diamonds consistently and cap edges with trim to sharpen Trellis aesthetics.
Frequently Asked Questions
What Climbing Plants Work Best on an Archway Trellis in My Climate?
You’ll choose clematis, honeysuckle, or climbing roses for most UK climates; use wisteria only in sheltered sites. Prioritise Climbing plant selection by aspect and hardiness, and guarantee Soil preparation with compost, drainage, and mulch.
Do I Need a Building Permit or HOA Approval for an Archway Trellis?
You might not need a permit, yet you can still need HOA consent. Check local building codes: height, foundations, boundary offsets. Factor design considerations, wind loading, and electrics. Ask your council’s planning team.
How Do I Winterize an Archway Trellis to Prevent Frost Damage?
You winterize it by cleaning, drying, then sealing trellis materials with exterior wood preservative; tighten fixings, add frost-proof paint to decorative archways, and anchor posts below frost line. Remove climbers, wrap joints, cover.
How Can I Add Lighting or Hanging Planters Without Weakening the Structure?
Like threading a needle, you’ll add solar lighting using UV-stable cable ties on cross-braces, and mount decorative hanging baskets on load-rated hooks fixed into uprights, spreading weight evenly; don’t drill through primary joints.
What’s the Best Way to Repair a Leaning or Rotting Archway Trellis Later?
You’ll fix lean by re-setting posts in concrete and bracing; you’ll treat rot by cutting back to sound timber and scarfing in pressure-treated splices. Prioritise DIY maintenance and Material selection: UC4 softwood, stainless fixings.
Conclusion
You’ve sized the arch, chosen a straightforward layout, and built a plumb, level frame with weatherproof timber, stainless fixings, and sealed cuts for UK conditions. Once you’ve anchored posts below the frost line (or to bolt-down shoes on a slab) and fixed the lattice, you’re ready for climbers. For example, a Bristol terrace garden used a 900 mm clear opening and 2.1 m headroom, then trained a rose and clematis for reliable coverage.