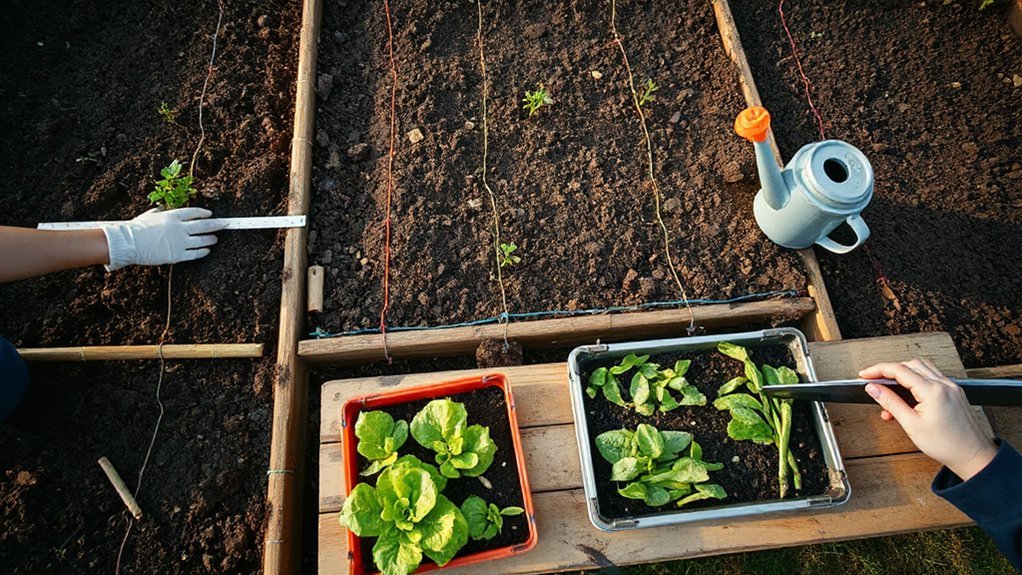
Planning a vegetable patch, start with where you’ll use it: near the kitchen and water, on level, well-drained ground, and away from tree roots. Confirm 6–8+ hours of direct sun by mapping light through the day, then place tall crops on the north side and heat lovers near warm walls. Test soil first, top-dress 1–2 inches of compost, and amend only as results suggest. Add north-edge trellises, drip irrigation, and 2–3 inches of mulch for steady growth—next you’ll see how to rotate and succession-plant for nonstop harvests.
Key Takeaways
- Place beds near water and the kitchen, in level, well-drained soil, away from tree roots and heavy shade.
- Map sunlight across seasons; reserve 6–8+ hour zones for fruiting crops and partial-sun areas for greens and herbs.
- Test soil before planting; correct pH, add 1–2 inches compost, and apply only nutrients recommended by results.
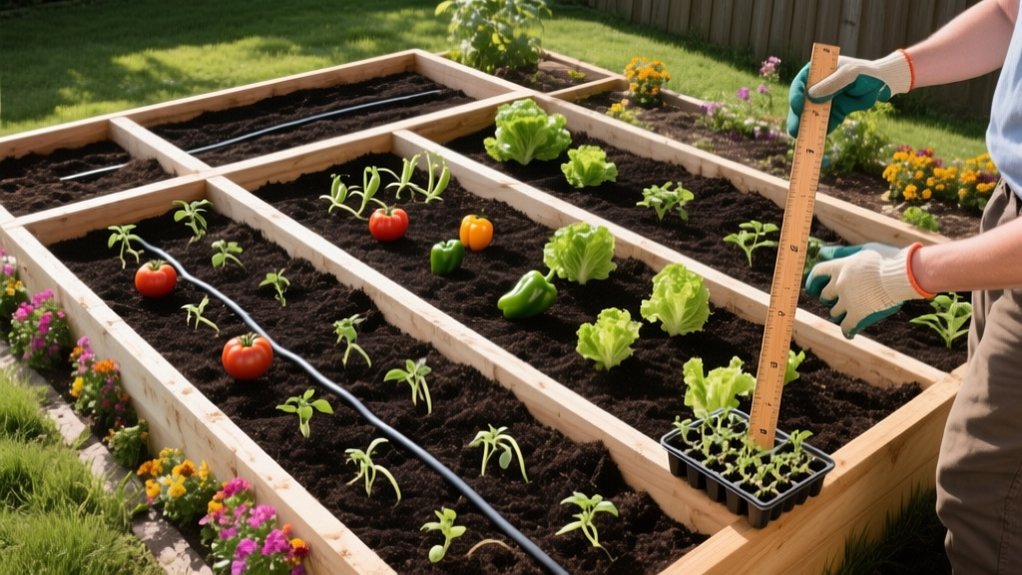
- Plan bed sizes, paths, and spacing for maintenance time; keep tall crops on the north side and label for rotation.
- Use trellises plus drip irrigation and mulch; succession-sow fast crops every 10–14 days for continuous harvests.
Choose the Best Spot for Your Vegetable Patch
If you choose your patch’s location carefully, you’ll solve most growing problems before they start. Place beds close to your kitchen and a water source so you’ll harvest often and irrigate fast. Pick a level area that drains well; avoid low spots where cold air and water settle.
Leave room for paths, a wheelbarrow turn, and future bed expansion, then align beds to simplify planting lines and drip layout. Keep the patch away from tree roots and overhanging branches that steal moisture and drop debris.
Use the spot to support Companion planting: cluster compatible crops so you can rotate blocks cleanly.
Build in Pest management by positioning beds where you can scout daily and install simple barriers without obstruction.
Count Sunlight Hours Where the Patch Will Sit
You can’t design a productive patch until you count the true full-sun windows where it’ll sit. Track how shadows from trees, fences, and buildings shift through the day and across seasons, since spring sun won’t match late-summer light.
Use simple sun mapping—hourly notes, a phone app, or quick sketches—to lock in bed placement and crop choices with confidence.
Identify Full-Sun Windows
Before staking out beds or ordering seedlings, map the “full-sun” windows in the exact spot where the patch will sit by counting how many hours of direct sunlight actually hit the ground. Do your Sunlight mapping on a clear day: set a timer and check the site every hour from morning to late afternoon, noting when sun fully reaches soil, not just foliage.
For accurate Shade assessment, mark bright zones with small flags or chalk, and draw a quick plan view showing sunlit blocks and shaded blocks. Add up the uninterrupted hours for each block; vegetables that fruit need 6–8+ hours, while leafy crops tolerate 4–6.
Place beds where the longest continuous sun occurs, and align bed edges to those boundaries.
Track Seasonal Shade Shifts
Today’s full-sun map only captures a snapshot, so verify how that light pattern shifts as the season advances and the sun’s path changes. Walk the site monthly and note when fences, hedges, sheds, and nearby trees throw longer bands across your proposed beds. Pay attention to spring leaf-out and midsummer canopy density; both can cut hours fast, especially on the north and east edges.
Mark where morning sun disappears first and where late-afternoon light lingers, then place your highest-light crops in those reliable zones. Design for Shade adaptation by reserving marginal strips for greens, herbs, or succession slots that tolerate partial sun.
Anticipate seasonal shadows before you build paths and bed borders, so your layout keeps production centered in stable light.
Use Simple Sun Mapping
Where will the patch actually get six to eight solid hours of direct sun? Don’t guess—map it. Pick a clear day and check the proposed spot every hour from morning to late afternoon. Mark sun vs. shade on a simple sketch of your yard, or drop pins on your phone notes. You’re looking for consistent Sunlight patterns, not a brief noon blast.
Repeat once on a weekend in early spring and again in midsummer to confirm your range. Use the map to place tall crops on the north side, keep paths out of prime light, and decide what needs Shade management.
If you can’t hit six hours, pivot to greens, herbs, or containers in a brighter location.
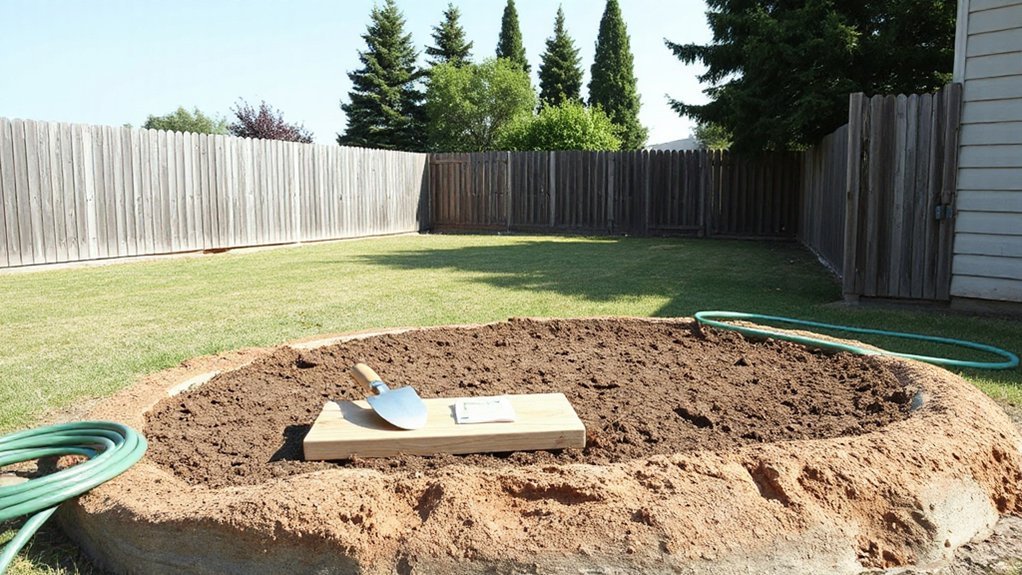
Check Drainage and Wind Before You Commit
How well will your chosen spot handle a downpour and an afternoon gust? After rain, watch where puddles sit for more than a few hours; that’s a yield killer. Choose ground that sheds water gently, not a low bowl. If you can’t change the grade, commit to raised beds and a defined path edge to keep soil from washing in.
Dig a quick test hole, fill it, and time the drain-down to guide placement before Soil testing begins.
Next, read the wind. Stand there at different times and notice leaf flutter and drying. Position the patch behind a fence, hedge, or shed, but keep it out of deep shade. Add wind barriers—lattice, woven willow, or dense shrubs—on the prevailing side.
Test Your Soil, Then Improve It Fast
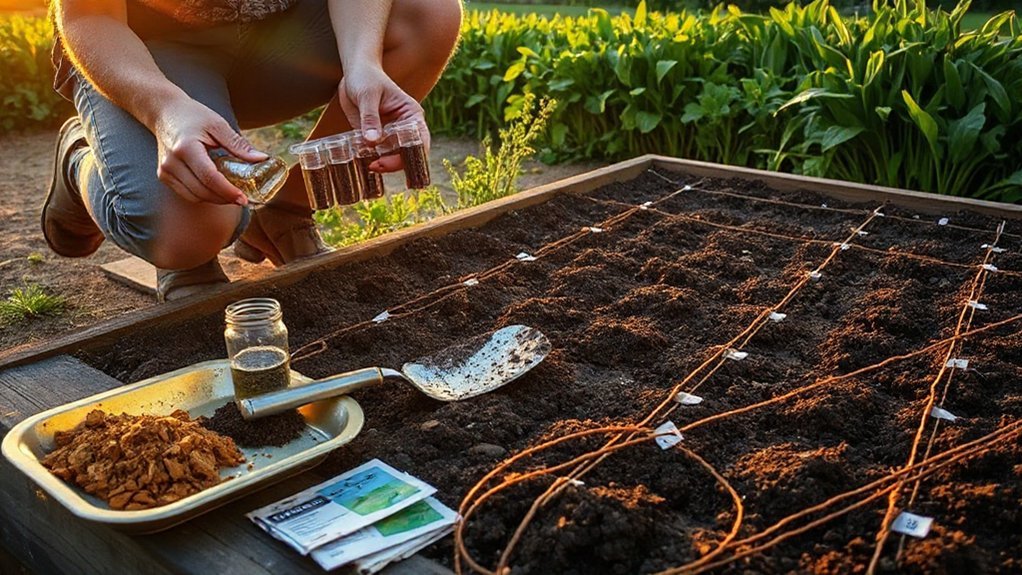
Once you’ve confirmed drainage and wind exposure, test your soil before you spend a dime on compost or lumber. Soil testing tells you pH, organic matter, and nutrient gaps, so your bed design matches what’s there. Use a lab test or a reliable mail-in kit; skip guesswork and “universal” fixes.
If pH is off, correct it first with lime or sulfur, because nutrients won’t perform in the wrong range. For fast improvement, top-dress 1–2 inches of finished compost and lightly incorporate the top 4–6 inches where roots live.
Add targeted amendments only as the report recommends: nitrogen sources for low N, rock phosphate for low P, and potassium sulfate for low K. Then mulch to lock in gains.
Pick Vegetables That Fit Your Sun and Climate
Although you can coax a lot from decent soil, your vegetable list still has to match the hours of direct sun you get and the length of your frost-free season. Map your bed: full sun (6–8+ hours) supports tomatoes, peppers, squash, and most fruiting crops; part sun favors greens, peas, beets, and herbs.
In hot climates, prioritize heat-tolerant vegetable varieties like okra, sweet potatoes, and cherry tomatoes. In cool summers, choose early-maturing cabbage, kale, and short-season beans.
Use microclimates intentionally—plant heat lovers against a south-facing wall and put shade-tolerant crops on the north edge.
Pair smart selection with targeted soil amendments: compost for water balance, and extra organic matter where afternoons bake.
Size Your Vegetable Patch to Your Weekly Time
Matching crops to your sun and season sets you up for success, but your schedule determines whether that success stays enjoyable or turns into a chore. Start by counting honest weekly minutes for watering, weeding, harvesting, and replanting—then size the patch to fit that number, not your ambition.
If you’ve got 30–45 minutes, keep it compact and prioritize high-return crops you’ll pick often.
With 60–90 minutes, you can add succession sowings and a few longer-season plants.
Two hours or more supports true crop diversity, including sprawling vines and storage crops, without neglect.
Design for quick passes: tight paths, clear edges, and grouped plantings that protect Garden aesthetics while reducing decision fatigue.
Expand only after two steady months.
Choose Beds, Rows, or Containers That Suit You
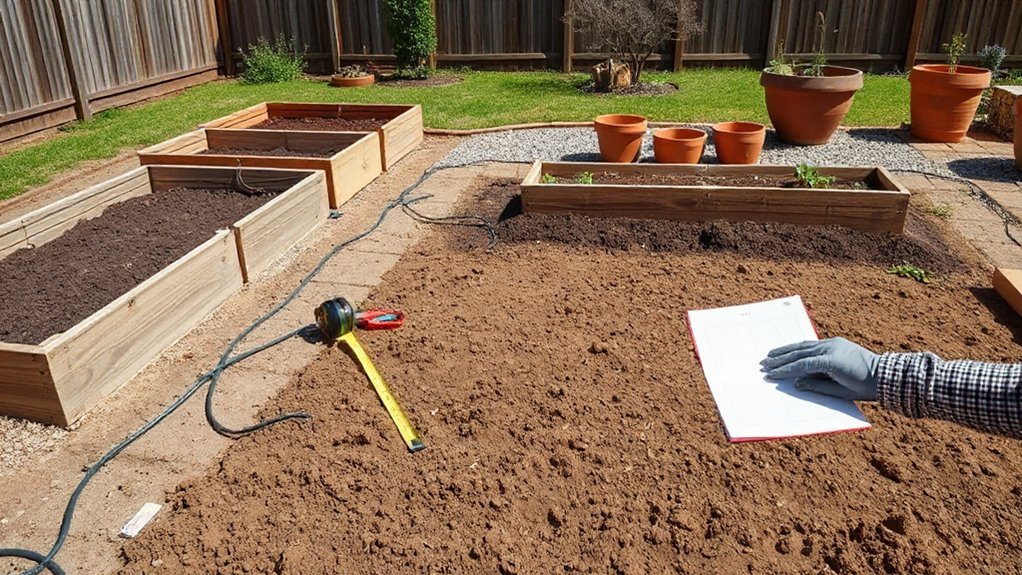
Choose raised beds when you want tight control over soil and clear boundaries.
Choose rows when you’ve got more ground to cover and can work efficiently with simple layouts.
If your space is a patio, balcony, or poor soil, containers let you garden where you’re and move plants to chase light.
Whatever format you pick, design for access first—keep paths wide enough, reach zones comfortable, and every plant easy to tend.
Beds Vs. Rows
Before you break ground, decide whether you’ll garden in raised beds, traditional rows, or containers, because that choice controls everything from spacing and irrigation to how easily you can weed and harvest.
If you want maximum yield per square foot, choose beds: you’ll plant in blocks, reduce paths, and keep roots in consistently amended soil. Beds also streamline soil improvement—top-dress compost once, and you’re done.
For pest management, beds make it easier to add hoops, netting, and quick-access scouting lanes without trampling crops.
Choose rows when you’ve got more ground, use in-row irrigation, or need equipment access; you’ll cultivate between lines and rotate large plantings efficiently.
Design your layout so every planting strip is reachable without stepping on growing soil.
Container Gardening Fit
If you’re short on space—or you want tighter control over soil and watering—containers can outperform rows and even raised beds for many crops. You’ll dial in drainage, fertility, and pH with a consistent potting mix, then refresh it fast between successions.
Choose wide, stable pots for tomatoes and peppers, and deeper containers for carrots or potatoes; match volume to mature root mass, not seedling size. Put wheels under heavy planters so you can reposition for sun, shelter, or sanitation.
Design each container as a mini-system: trellis vertical crops, underplant with basil or marigold for Companion planting, and use contrasting textures to spot stress early.
For Pest management, isolate problem plants, swap soil, and disinfect stakes. Containers reward disciplined monitoring and timely feeding.
Space And Access
Because your layout determines how you move, water, and harvest, start by mapping sun, slopes, and the paths you’ll actually use. Then fit beds, rows, or containers to that flow.
Keep beds no wider than you can reach from both sides (about 4 feet) and leave firm, weedable paths you can push a wheelbarrow through.
Choose rows only if you can cultivate efficiently; otherwise, raised beds give tighter spacing and cleaner edges.
Place containers where hoses and drip lines won’t cross walkways.
Design for Companion planting by grouping mutually supportive crops within arm’s reach, and build in Pest management: allow airflow, rotate families by bed, and keep inspection routes clear so you’ll catch problems early and act fast.
Sketch Your Vegetable Patch and Plant Spacing
Once you’ve chosen your site, put the plan on paper: sketch your vegetable patch to scale, mark paths and bed edges, and place each crop where it’ll actually fit at maturity. Use graph paper or a simple CAD app; 1 square can equal 6 inches or 1 foot.
Draw beds first, then allocate blocks for crops using recommended spacing, not seed-packet optimism. Leave room for sprawling vines, and keep tall plants on the north side to prevent shading.
After soil testing, note amendments on the sketch so you don’t misapply compost or lime. Add plant labeling directly on the plan and in the garden with weatherproof tags, so rotations stay accurate.
Include a small “buffer strip” for succession gaps and easy replanting.
Match Planting Dates to Local Frost Dates
Start by finding your area’s average last spring frost and first fall frost, because those dates set the hard edges of your growing calendar.
Then count backward from each frost date to lock in sowing and transplant windows for every crop you’ve placed on your plan.
If you want a longer season, design in row cover, cold frames, or low tunnels so you can plant earlier and harvest later with confidence.
Find Your Frost Dates
Before you sketch beds or order seeds, pin down your area’s average last spring frost and first fall frost—those two dates set the boundaries of your growing season and determine what you can realistically plant and when. Pull Frost dates from a trusted local extension office, nearby weather station normals, or a calibrated garden app, then verify them against what you’ve observed in your yard.
Your microclimate matters: south-facing walls, wind exposure, elevation, and low spots that trap cold can shift frost risk by days. Design with that in mind—place tender crops in the warmest, most sheltered beds and reserve cooler edges for hardy greens.
Note your site’s “last light frost” versus “hard freeze,” and plan protection storage: row cover, hoops, and cloches near the beds.
Count Back Planting Windows
How do you turn those frost dates into a workable planting schedule? You count backward from your average last spring frost and forward from your first fall frost, then map each crop’s “days to maturity” plus a buffer for cool, slow growth. This Back planting approach keeps your beds producing on purpose, not by luck.
Start with your must-grow crops and assign them slots: peas and greens get the earliest window; warm-season crops land after the last frost date; quick finishes like radishes fill gaps.
For fall harvests, count back from first frost to set final sowing dates for beans, carrots, and brassicas. Put these windows on a simple calendar grid so seasonal planning drives layout, succession, and spacing decisions across the patch.
Plan for Season Extenders
Even when you’ve nailed your planting windows, season extenders let you bend them to match your local frost pattern instead of treating those dates like hard walls. Use row cover for quick, flexible protection on beds you’ll replant soon; it’s ideal for early greens and late beans.
Add low tunnels where wind and radiational freezes hit hardest, and place them on the south edge so they don’t shade summer crops. Cold frames suit compact zones near paths for frequent harvest, while a simple hoop house earns its footprint by carrying tomatoes or greens past first frost.
Tie season extension to crop succession: protect the outgoing crop, then keep the soil warm enough for the next sowing to germinate fast.
Plan Succession Sowing for Ongoing Harvests
As your first plantings start to mature, map out succession sowings so you’re harvesting steadily instead of all at once. Stagger quick crops like radishes, lettuce, and spinach every 10–14 days, and re-sow beans and cilantro after each pick.
Use a simple bed calendar: mark expected harvest windows, then back-time new sowings to fill gaps.
Design your plantings in repeatable blocks so you can swap finished rows for the next crop without disrupting irrigation or access paths.
Pair succession with companion planting: follow brassicas with carrots, or tuck dill near cucumbers to support beneficial insects.
Tight timing also improves pest management because you remove aging, vulnerable plants and avoid long “host” periods that let infestations build.
Keep notes and adjust intervals to your microclimate.
Add Trellises to Grow More in Less Space
Where can you add vertical height to your beds without stealing walkway space? Put trellises on the north edge of each bed so vines won’t shade shorter crops. Use sturdy panels, cattle mesh, or tensioned wire, and anchor posts at least 18–24 inches deep for wind and heavy fruit.
Trellis installation goes faster when you standardize: same post spacing, same fasteners, and a clear top line for tying. Plant climbers at the base—peas, pole beans, cucumbers, and small-fruited squash—and train them early with soft ties.
Vertical gardening also improves harvest speed and airflow, reducing disease pressure. Treat the trellis as a layout element: align it with bed edges, keep it straight, and leave a clean picking aisle.
Set Up Simple Watering for Consistent Growth
Pick an efficient irrigation method—drip lines, soaker hoses, or a simple micro-sprayer layout—that matches your bed geometry and water pressure.
Set a consistent watering schedule, ideally early morning, so your plants get steady moisture without stressing roots.
Reduce evaporation and runoff by mulching, watering at low flow, and keeping emitters tight to the root zone.
Choose Efficient Irrigation Method
Even if you’ve designed your beds perfectly, your vegetable patch won’t deliver consistent growth without an efficient irrigation setup. Start by matching method to layout and crops: drip irrigation excels in row beds and tight plant spacing, sending water straight to roots while keeping paths dry and foliage cleaner.
Use inline emitters for evenly planted crops, or adjustable drippers for mixed plantings and containers.
Sprinkler systems fit larger, open blocks or newly seeded areas where you need broad coverage, but they waste more water in wind and can wet leaves.
If you choose sprinklers, design for head-to-head overlap and isolate zones for sunny vs. shaded beds.
Add a simple filter and pressure regulator so every line performs predictably.
Time Watering Consistently
Because plants respond to rhythm as much as moisture, you’ll get steadier growth when you water on a consistent schedule and adjust it with the weather instead of guessing day to day.
Pick two weekly “checkpoints” to inspect soil moisture at root depth, then water only when the top few inches turn dry. Keep timing consistent: irrigate early morning so plants enter the day fully hydrated and pressure stays stable through your lines.
Set a baseline duration for each bed, record it, and change only one variable at a time—minutes or days—so you can see what works.
For drought management, tighten intervals, prioritize fruiting crops, and keep new transplants on their own cycle until established.
Use a simple timer to lock it in.
Reduce Evaporation And Runoff
Where does most of your irrigation actually go—into the root zone, or off the bed and back into the air? Design your patch so water stays put. Shape beds slightly crowned with shallow basins around plants, and keep paths lower so runoff drains away from roots, not across them.
Add 2–3 inches of mulch to cut surface loss and stabilize soil moisture. Install dripline or soaker hoses under mulch; you’ll deliver slow, targeted water that sinks instead of splashing and evaporating.
Use a simple timer to run short cycles in the early morning, then pause so the soil can absorb.
On slopes, terrace with edging or logs and water at the top. This setup supports Water conservation and steadier growth.
Mulch Your Vegetable Patch to Cut Weeding
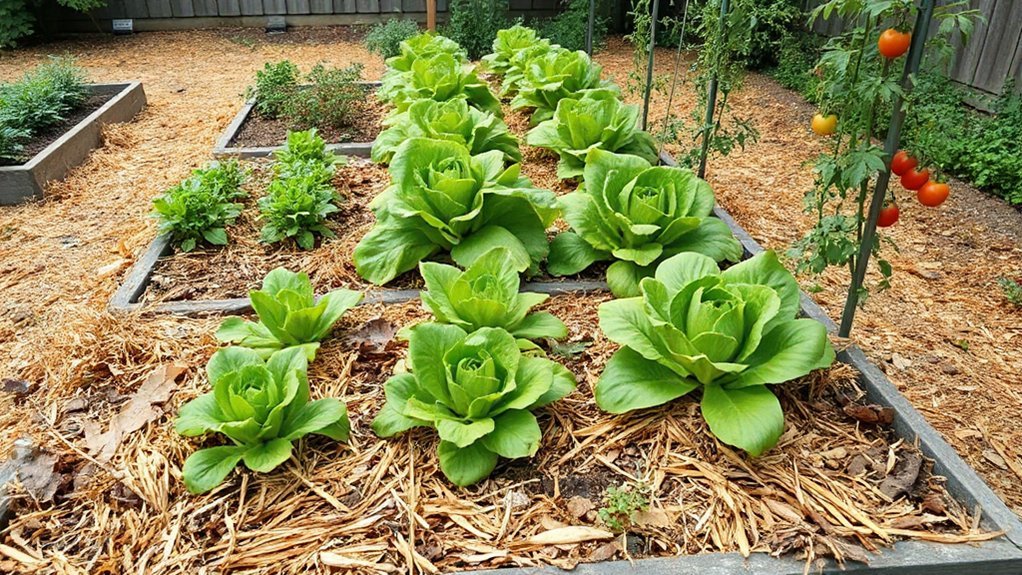
Once you’ve prepped and planted your beds, lay mulch right away to suppress weeds before they get established. Aim for a clean, continuous blanket that reads like a finished garden surface, not a patchwork. Use straw, shredded leaves, or fine bark around transplants; keep it 2–3 inches deep and pull it back an inch from stems to prevent rot.
Build fertility with Compost layering: spread a thin, even sheet of compost, then cap it with mulch so nutrients stay put and watering stays efficient.
For paths, go heavier—cardboard plus 3–4 inches of wood chips—to block light and define crisp edges.
Mulch also supports Pest deterrents by reducing soil splash and disrupting slug travel. Refresh lightly midseason; don’t bury seedlings.
Rotate Crops and Avoid the Biggest Mistakes
Mulch locks in moisture and tidies the surface, but it can’t fix a garden that repeats the same crops in the same soil year after year. Build Crop rotation into your layout like you’d plan pathways: move plant families one bed over each season, and you’ll cut disease carryover and boost Pest prevention without extra sprays.
Picture your patch as four clear “rooms” you cycle annually:
- Leafy greens in a cool, shaded corner with crisp edges
- Fruit crops on trellises, casting neat, controlled shadows
- Roots in a deep, stone-free strip that drains fast
- Legumes along borders, stitching nitrogen into the soil
Avoid the biggest mistakes: planting tomatoes after potatoes, crowding beds, skipping notes, and leaving volunteer plants to host pests.
Frequently Asked Questions
How Do I Keep Rabbits, Deer, and Insects From Destroying My Vegetables?
You’ll stop rabbits, deer, and insects by installing tall fencing, burying mesh, and using row covers. Add companion planting borders and smart pest deterrents like scent repellents and traps. Keep beds tidy, inspect weekly, rotate crops.
What Are the Easiest Vegetables for Complete Beginners to Grow Successfully?
You’ll score quick wins with radishes, lettuce, bush beans, zucchini, and cherry tomatoes—they’re forgiving. Start with soil testing, then design beds for sun and airflow. Use companion planting to streamline care, boost vigor, and deter pests.
How Can I Save Seeds From My Vegetables for Next Season?
Let fruits fully mature, then dry seeds thoroughly; label by variety and date. Prevent Plant cross pollination with isolation or bagging. For Seed storage, keep seeds cool, dark, airtight with desiccant. Test germination before sowing.
Should I Use Organic Fertilizers, and Which Ones Actually Work Best?
Yes—use organic fertilizers; shockingly, plants don’t thrive on neglect. Start with soil testing methods, then apply finished compost, worm castings, and balanced organic blends. Use composting techniques to maintain structure and slow-release nutrients season-long.
When and How Should I Harvest to Maximize Flavor and Yield?
Harvest at peak ripeness: pick leafy greens young, fruits fully colored, roots when shoulders show. Use timing considerations—harvest mornings, water beforehand—for flavor enhancement. Cut-and-come-again, and pick frequently so plants keep producing.
Conclusion
You don’t need a huge yard or perfect soil to get a productive vegetable patch—you need a smart layout. Put it where the sun actually lands, fix drainage before you plant, and upgrade soil with compost. Choose crops that match your light and climate, then go vertical with trellises to multiply yield. Set up simple, consistent watering and lock moisture in with mulch. Rotate crops each season, and your patch keeps producing.