Want to know How to Create a Stylish and Durable Driveway for your home? Start by planning for your heaviest vehicle and tightest turns, then build for water control. You’ll excavate to firm subgrade, proof-roll soft spots, and install an 8–12 inch compacted gravel base with a consistent 2% slope away from structures. Choose climate-fit materials (air-entrained concrete, quality asphalt, or pavers), lock edges with proper edging, and align control joints to patterns and slab changes. Seal and de-ice carefully, and you’ll pick up more pro tips next.
Key Takeaways
- Plan for vehicle loads, turning radii, gate clearances, and weak zones to prevent cracking and premature surface failure.
- Set finished grades with a consistent 2% slope, directing runoff to legal discharge points using swales, trench drains, or catch basins.
- Excavate to undisturbed subgrade, proof-roll soft spots, and install an 8–12 inch well-compacted gravel base with geotextile on weak soils.
- Choose climate-appropriate surfaces—air-entrained concrete, quality asphalt, permeable or dense pavers—and detail control joints aligned with edges and patterns.
- Add durable edging and a simple, consistent pattern; budget for sealing, crack repairs, and drainage upkeep to maximize long-term value.
Define Your Driveway Use and Vehicle Load
Before you choose a material or layout, define exactly how you’ll use the driveway and what it must support. List every vehicle: daily cars, motorcycles, trailers, moving vans, RVs, delivery trucks, and snowplows. Note turning patterns, backing needs, and whether you’ll park or wash vehicles on it. Measure door clearances, gate widths, and any tight radii that can crack edges under repeated tire scrubbing.
Estimate weight and frequency: occasional heavy loads require thicker bases and stronger surface choices than passenger-only use. Identify weak zones such as the apron at the street, steep gradients, and areas over utilities. Tie these decisions to driveway aesthetics and driveway landscaping so borders, drainage, and planting beds don’t undermine structure.
Decide DIY or Hire a Driveway Pro
Now that you’ve defined the loads, turning patterns, and weak zones your driveway must handle, decide whether you’ll build it yourself or hire a driveway pro.
DIY works if you’ve run equipment before, can grade consistently, and you’re comfortable managing base compaction and drainage pitch. You’ll also need time for layout, staking, and coordinating deliveries, plus a plan to protect driveway aesthetics.
Hire a pro if you need tight tolerances, complex slopes, or seamless landscaping integration around beds, edging, and walkways. Ask for proof of insurance, a written scope, thickness and reinforcement details, and a compaction/testing approach.
Get three bids, compare apples to apples, and confirm who handles permits, spoils removal, and final cleanup before you sign.
Choose the Best Driveway Material for Your Climate
Your local weather should dictate your driveway choice because materials perform differently in wet, salty, windy, or arid conditions.
If you face winter, prioritize freeze-thaw resistance—tight compaction, proper base depth, and low-absorption surfaces help prevent heaving, cracking, and spalling.
In hot, high-UV climates, pick options that resist softening, fading, and surface breakdown, and plan for sealers or finishes that can handle sustained sun exposure.
Climate-Specific Material Performance
Although driveway materials can look similar on day one, they don’t age the same once your local weather starts stressing them. Your best results come from climate adaptation: match the surface to heat, UV, rain intensity, coastal salt, and drought cycles, not just color or price.
In hot, high-sun regions, choose light-colored concrete or pavers to reduce heat absorption and surface softening; specify UV-stable sealers to protect appearance.
In wet climates, prioritize permeable pavers or properly crowned asphalt so water moves off fast, limiting staining and surface raveling.
Near the coast, pick dense concrete mixes, stone pavers, or resin-bound systems that tolerate salt spray and reduce corrosion around edges.
In arid zones, use stabilized base layers and flexible joints to support material longevity.
Freeze-Thaw Resistance Factors
Weather stress doesn’t stop at heat and rain—winter cycles can break a driveway from the inside out when water seeps into pores or joints, freezes, expands, and forces the surface to crack or flake. To choose materials that resist this, you need low absorption, tight joints, and a base that drains fast so meltwater can’t linger under snow accumulation.
Dense concrete with proper air entrainment, well-fired pavers, and high-quality asphalt over a compacted, free-draining subbase outperform porous stone in repeated freeze-thaw.
- Specify low-porosity surfaces and sealed joints
- Use a thick, well-compacted gravel base with slope
- Control water: drains, edging, and downspout routing
- Allow movement: joints that accommodate thermal expansion
Heat And UV Durability
When summer sun bakes a driveway day after day, heat and UV exposure can soften binders, fade finishes, and accelerate surface breakdown. You’ll get longer service life by choosing materials with proven UV resistance and stable colorants, especially in asphalt blends and pigmented sealers.
Account for thermal expansion, which drives joint movement, curling, and edge cracking. If you pour concrete, you should spec proper joint spacing, fiber reinforcement, and a light, reflective finish to reduce heat gain.
If you install pavers, you’ll want UV-stable polymers and a well-compacted base that won’t rut when hot. For asphalt, you should use polymer-modified mix, maintain correct thickness, and re-seal on schedule.
You’ll also reduce damage by improving drainage and avoiding dark, heat-absorbing coatings.
Compare Driveway Cost Per Year (Not Just Upfront)
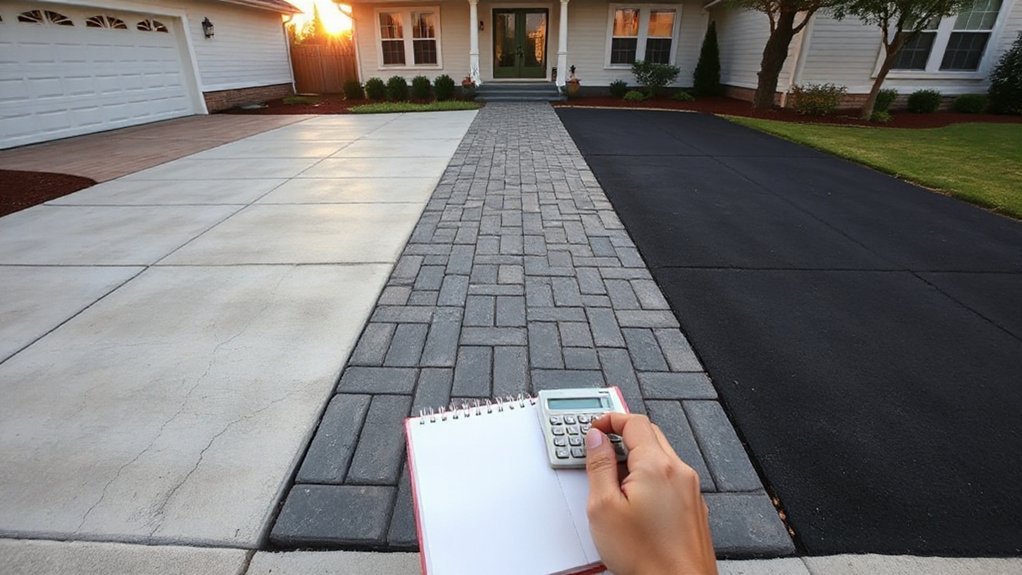
To compare driveway options realistically, you should convert each bid into an annualized cost by dividing total installed price by expected service life.
You’ll also want to factor in lifespan and replacement cycles, since a cheaper surface that fails sooner can cost more per year.
Finally, you should budget for ongoing maintenance and likely repairs—sealing, crack filling, resurfacing, and drainage fixes—to keep performance and curb appeal consistent.
Annualized Cost Breakdown
Although the upfront price tag grabs most of the attention, you’ll make a smarter driveway decision by breaking the total cost into a per‑year figure that accounts for service life, routine maintenance, and likely repairs.
Start your Cost analysis by dividing installed price by expected years, then add predictable annual maintenance and a repair reserve based on local conditions.
For a clean Material comparison, standardize assumptions (area, drainage needs, climate, usage) so you’re not mixing scopes.
Use this checklist to build a realistic annualized number:
- Installation cost amortized per year
- Scheduled upkeep (sealing, joint sand, crack fill)
- Repair allowance (patches, leveling, resurfacing)
- Operating impacts (snow removal difficulty, stain cleanup)
You’ll see which option stays cheaper after maintenance, not just at checkout.
Lifespan And Replacement Cycles
How long will this driveway really last before you’re paying for a major overhaul? Lifespan drives your true cost per year, so compare materials by replacement cycle, not just upfront price.
Basic asphalt typically lasts 15–20 years; poured concrete often reaches 25–35; pavers can run 40+ because you replace sections, not the whole field. Gravel may need frequent top-off, yet full replacement is rare if the base stays sound.
In freeze-thaw zones, expect shorter cycles unless you invest in thicker bases and proper drainage.
Also weigh driveway aesthetics: stamped concrete can fade, while pavers keep material aesthetics longer through consistent color and modular swaps.
Choose what matches your time horizon and resale plans.
Maintenance And Repair Budgets
Lifespan sets the replacement clock, but your yearly ownership cost comes from what you’ll spend keeping the surface looking good and performing well between overhauls.
For Budget planning, track maintenance as dollars per year, not just the install bid.
Your Material selection affects frequency: asphalt needs periodic sealing; concrete needs joint care; pavers need re-leveling and sand; gravel needs topping and grading.
Build a reserve line item so surprise cracks don’t become full failures.
- Annual cleaning, weed control, and drainage checks
- Sealing or joint re-sanding on a set schedule
- Small crack and edge repairs within 30 days
- Contingency fund (5–10% of install cost per year)
Compare bids by “cost per year,” including typical repairs, so you’re choosing long-term value.
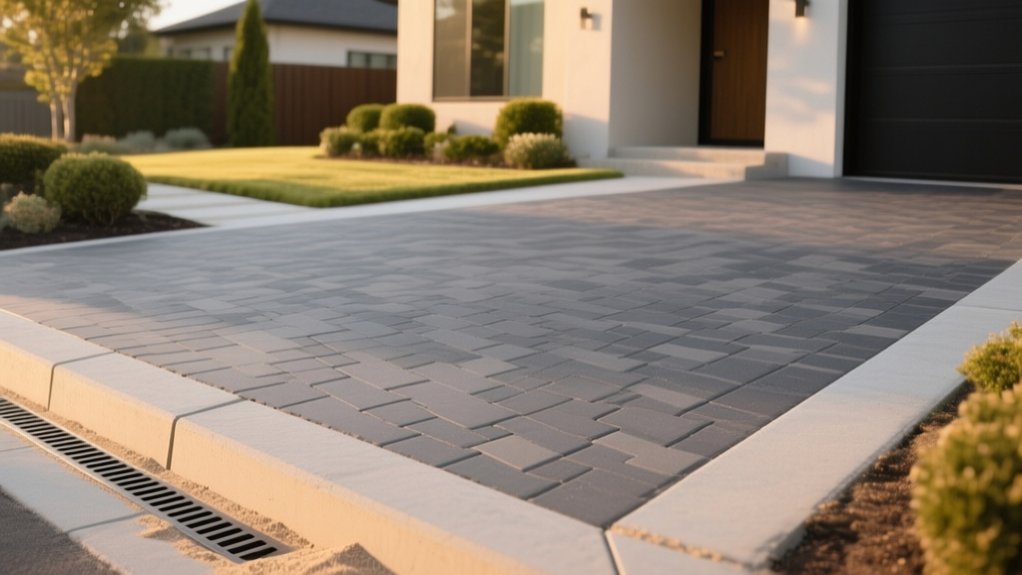
Plan Driveway Drainage and Slope First
Before you choose materials or start excavation, map out your driveway’s drainage and slope so water never gets the chance to pool, seep, and weaken the base. Start with drainage planning: identify where runoff should go, confirm legal discharge points, and locate low spots that will collect water.
Set your finished grade to shed water away from the house and garage, and keep flow directed to swales, trench drains, or catch basins.
For slope design, aim for a consistent fall—about 2% (roughly 1/4 inch per foot) across or along the surface—while avoiding abrupt breaks that trap water. Verify elevations with string lines or a laser level before you dig.
If soils drain poorly, specify geotextile and a deeper aggregate base to prevent pumping and frost heave.
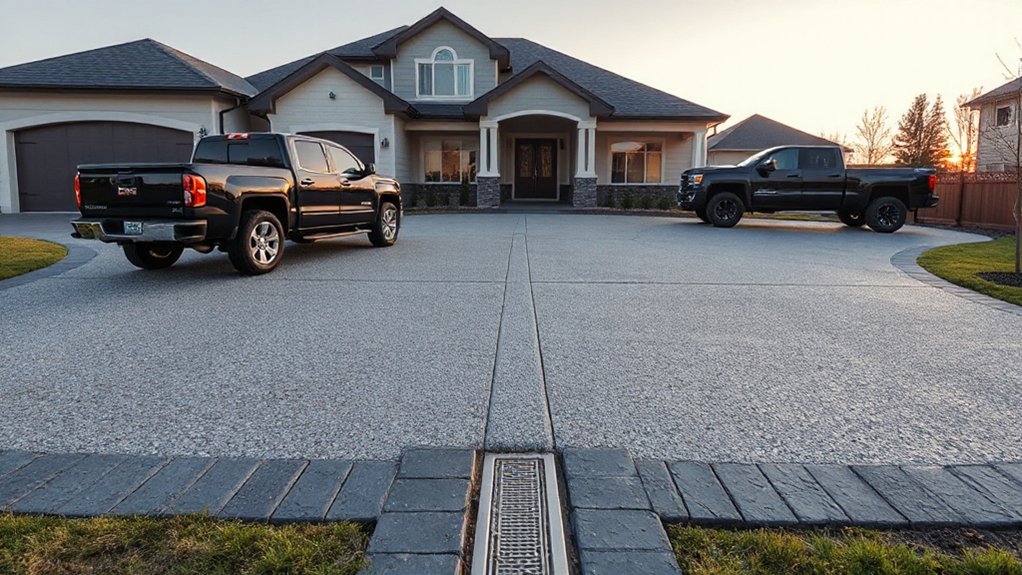
Size Your Driveway Layout and Turning Space
Once you’ve locked in drainage and slope, size the driveway to match the vehicles you actually park and the maneuvers you’ll make every day. Measure your widest vehicle, add door-swing clearance, then confirm the approach angle from the street so you won’t scrape bumpers.
Plan turning space for backing out safely, especially if you’ve got limited sightlines or frequent deliveries. Keep Driveway aesthetics in mind by aligning edges with your home’s geometry, and use landscaping integration to soften curves without tightening them.
- Standard width: 10–12 ft single, 18–20 ft double
- Add 2–3 ft of apron flare at the curb for easier entry
- Provide a 20–25 ft turning radius or a 3-point-turn pad
- Reserve 2–4 ft along edges for planting, lighting, and snow storage
Build a Base That Prevents Driveway Settling
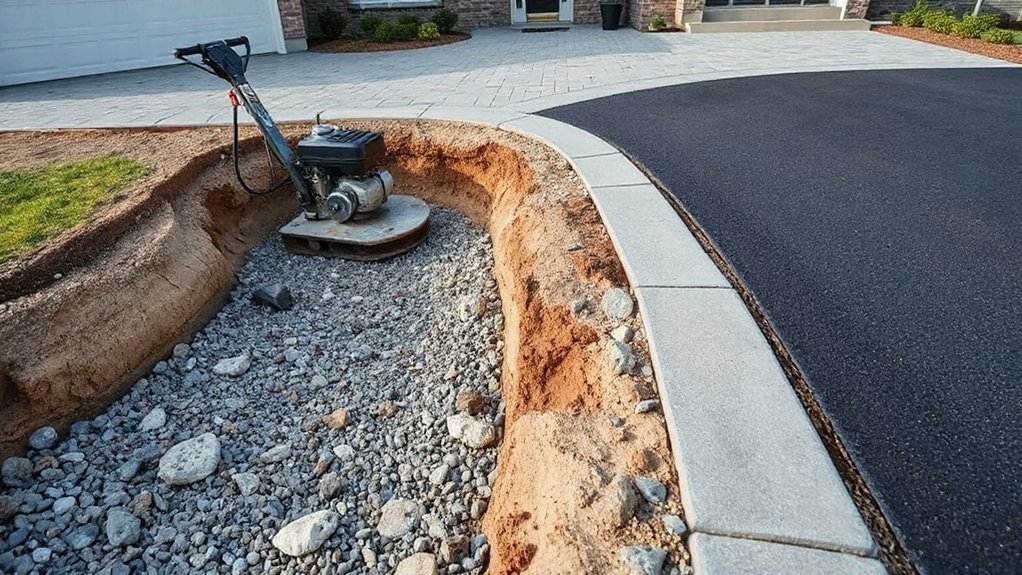
Although the surface material gets all the attention, your driveway’s long-term performance depends on a base that distributes loads, drains water, and resists frost movement so the slab or pavers don’t settle and crack.
Excavate to undisturbed subgrade, stripping all organic soil. Proof-roll and compact the subgrade, then correct soft spots with additional excavation and granular fill. Install a geotextile separator on weak or clay soils to stop fines from pumping up.
Place well-graded crushed stone in 3–4 inch lifts, compacting each lift to refusal; aim for 8–12 inches total, more for heavy vehicles. Set a consistent slope for runoff and avoid low spots.
Plan conduit sleeves now for landscape lighting and decorative accents without disturbing compaction later.
Add Driveway Edging That Locks Materials In
If you want your driveway to stay crisp at the edges and tight through freeze–thaw cycles, install edging that physically restrains the surface and the base. Use steel, aluminum, concrete curb, or heavy-duty polymer restraints matched to your material, and anchor them into compacted base, not loose soil.
Set top elevation to finish grade, then backfill and compact both sides so the edge can’t roll or spread under tires.
- Pin edging with long spikes on tight spacing at curves and boundary
- Add geotextile under adjacent soil to stop fines from migrating into the base
- Keep driveway landscaping mulch and beds separated so organic debris won’t contaminate aggregate
- Plan conduit sleeves now for lighting enhancements without cutting later
Use Patterns, Borders, and Color With Restraint
With the edges locked in, you can focus on how the driveway reads from the street—pattern, border, and color should reinforce the geometry rather than compete with it.
Start with Pattern restraint: choose one dominant layout (running bond, herringbone, or broom-finished bands) and keep it consistent across the field.
Use borders only to define shape or manage progression at aprons, walk ties, or curves. A single soldier course or contrasting band, kept to a uniform width, is usually enough; avoid multiple frames that chop up the plane.
For color harmony, pick two tones at most: a base that matches the home’s masonry or siding, plus a subtle accent in the border. Test samples in sun and shade, and commit only after they read calm at distance.
Detail Joints and Layers for Freeze-Thaw Zones
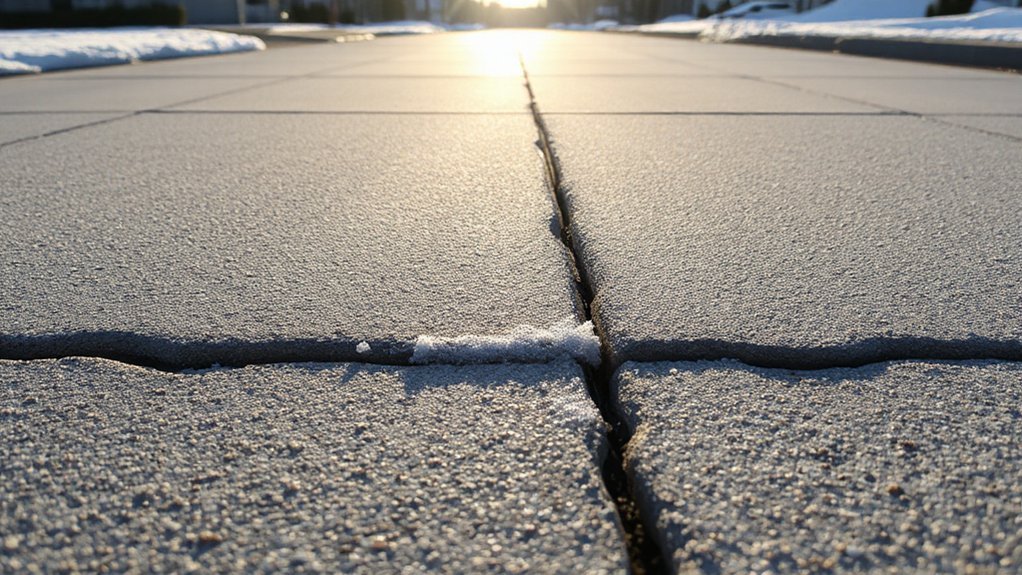
Because freeze–thaw cycles don’t just crack surfaces—they pry at weak seams—you need to detail joints and base layers like structural components, not finishing touches. You’ll control movement and moisture by planning joint detail early and executing layer layering with measured compaction and drainage.
- Set control joints at predictable intervals and align them with edges, patterns, and changes in slab width.
- Use a well-graded, compacted aggregate base, then add a leveling layer that won’t trap water.
- Install a capillary break or geotextile where soils pump fines, keeping the base stable.
- Pitch the driveway and harden conduits so meltwater can’t pond at joints or under slabs.
If you treat joints, subbase, and slope as one system, your surface stays tight through seasons.
Seal, De-Ice, and Clean Without Damage
To keep your driveway looking sharp and lasting longer, you’ll need to seal it with a product that’s compatible with your surface and climate, not a one-size-fits-all coating.
When ice hits, you should skip harsh salts and use a surface-safe de-icer at the right rate to prevent scaling and pitting.
For routine care, you’ll clean gently with mild cleaners and low-pressure rinsing so you don’t strip the sealer or etch the finish.
Choose Safe Sealants
- Use penetrating sealers for breathable protection
- Use film-forming only where recommended
- Verify ASTM-rated slip resistance
- Confirm compatibility, cure time, and recoat schedule
De-Ice And Clean Gently
When winter hits, your de-icing and cleaning routine can either preserve a sealed driveway or strip it prematurely. Choose Ice prevention first: improve drainage, fix low spots, and apply sand for traction before reaching for chemicals.
If you must de-ice, use calcium magnesium acetate or calcium chloride sparingly, and avoid rock salt on fresh sealer. Don’t apply products in piles; spread evenly and sweep residue after thaw.
During snow shoveling, use a plastic blade or a shovel with a rubber edge, and lift rather than scrape to protect the seal coat.
For cleaning, skip pressure washers set too high; rinse, then scrub with a pH-neutral detergent and a soft-bristle brush. Rinse thoroughly and keep runoff away from landscaping plants.
Avoid the Driveway Mistakes That Cause Cracks
Although a well-built driveway looks solid and permanent, most cracks start with avoidable mistakes made long before the first car parks on it. You’ll prevent failure by controlling water, base quality, thickness, and curing time—and you won’t sacrifice driveway aesthetics or decorative accents to do it.
- Skimping on base prep: compact in lifts, use proper aggregate, and verify grade.
- Poor drainage: slope away from structures, add channel drains, and keep edges supported.
- Wrong mix or thickness: match loads, reinforce where needed, and avoid overwatering concrete.
- Rushing cure and joints: cut control joints on schedule and keep traffic off until cured.
Also, don’t plant roots near edges or let heavy trucks park repeatedly in one spot.
Frequently Asked Questions
Do I Need a Permit or HOA Approval to Replace My Driveway?
You’ll likely need a permit and HOA approval if you change materials, drainage, or curb cuts; check local building codes and HOA rules first. Keep records for driveway maintenance, and schedule driveway cleaning post-installation.
How Long Should I Wait Before Parking on a New Driveway?
Like paint drying on steel, wait 24–48 hours for concrete, 3–7 days for asphalt, longer for pavers. Your driveway material options affect cure time; follow cost estimation tips by avoiding cracks and repairs.
Can I Widen My Driveway or Add a Parking Pad Later?
Yes, you can widen your driveway or add a parking pad later if you match base thickness and materials. Update landscape design, add drainage solutions, and check permits, setbacks, and utility clearances before excavating.
What Driveway Options Are Best for Homes With Tree Roots Nearby?
Choose permeable pavers, gravel, or reinforced turf—like a flexible handshake with roots—to reduce Tree root disruption and keep Driveway stability. You’ll add a geotextile base, avoid deep excavation, and use root-friendly edging.
Will a New Driveway Increase My Home’s Resale Value?
Yes, a new driveway can boost your home’s resale impact and property value if it improves curb appeal, drainage, and access. You’ll see the best returns when you choose durable materials and match neighborhood standards.
Conclusion
When you build your driveway with clear load needs, the right material for your climate, and drainage planned first, you’re setting it up to last. Choose DIY only if you can execute base layers, joints, and slope precisely; otherwise, hire a pro. Compare cost per year, not just the bid. Keep patterns subtle, seal correctly, and de-ice gently. Done right, your driveway performs like a well-fitted boot—tough, clean, dependable.