Design your garden office around how you work: plan quiet call time with a solid door, dense insulation, and a glare-free Teams backdrop, then set your desk 90° to north or north‑east glazing for steady light. Size the room for an 800mm clear route, storage, and a visitor chair. Build in proper drainage and a 900–1,000mm path with low-glare PIR lighting. Fit safe electrics, task lighting, and ideally Cat6 Ethernet. Next, you’ll see how to fine-tune comfort, acoustics, and security.
Key Takeaways
- Plan distinct zones for entry, deep work, storage, and seating, keeping at least 800mm clear walkways for comfortable movement.
- Optimize daylight with north or north-east glazing, set screens at 90° to windows, and add blinds or shading to control glare.
- Build for year-round comfort using continuous insulation, sealed vapour control layers, and controlled ventilation with appropriately sized heating.
- Reduce noise and echo with solid doors, dense insulation, acoustic panels, rugs, and bookcases to create a quiet, call-friendly workspace.
- Design power and connectivity around your workflow, with dedicated circuits, multiple desk-height sockets, tidy cable routes, and reliable wired internet.
Start With Your Workday Needs (Calls, Focus, Meetings)
Before you sketch layouts or pick cladding, map out what your average workday actually demands from the space: how many calls you take, how often you need uninterrupted focus, and whether you host meetings in person or on video.
If you’re on Teams all day, plan for a quiet zone: solid door seals, dense insulation, and a background that doesn’t glare under a ring light.
For deep work, set your desk to face away from the garden path and add task lighting that’s bright but warm.
If clients visit, allow a chair, coat hook, and a small table for documents.
Match sockets and cable routes to your productivity tools, and schedule storage around your Workday routines.
Set Budget, Permissions, and Build Type (DIY vs Prefab)
Next, you’ll set a total project budget that covers the base, insulation, electrics, heating, glazing, and fit-out, plus a contingency for groundworks and cable runs.
Then you’ll check what you can build under Permitted Development and whether you’ll need planning permission (and Building Regs sign-off) for size, height, or proximity to boundaries.
Finally, you’ll choose between DIY and a prefab kit by weighing your time, tools, warranties, lead times, and whether you want a turnkey install.
Define Total Project Budget
How much you can spend sets every other decision for your garden office, so pin down a total budget early and split it across the big cost areas: base and foundations, the structure (DIY build or prefab unit), insulation and glazing, electrics/data, heating, and finishes. Build in 10–15% contingency for ground surprises, cable runs, and price rises.
Do Budget allocation by working backwards from must-haves (year-round warmth, quiet, reliable broadband) and trimming nice-to-haves (cedar cladding, bifolds).
Compare DIY materials plus trades (groundworks, electrics) against a prefab quote that includes delivery, crane, and fit-out.
Do Expense tracking from day one: keep a simple spreadsheet with quotes, deposits, VAT, and lead times, and ring-fence cash for snagging and furniture.
Check Planning Permissions
Once you’ve fixed your budget, check what your local council will allow, because planning rules can quickly dictate the size, height, position, and even the roof form of your garden office.
Most UK projects fall under permitted development, but only if you meet limits on footprint, eaves height, ridge height, and how close you build to boundaries.
Confirm your property isn’t listed, in a conservation area, or subject to Article 4 directions, as these can tighten zoning regulations.
If you’re unsure, apply for a Lawful Development Certificate for written proof.
Ask whether Building permits are needed under Building Regulations: electrics, insulation, glazing, and foundations often trigger compliance.
Check access for fire safety, drainage, and neighbour amenity before you finalise drawings.
Choose DIY Or Prefab
Where do you want to land on the speed–cost–control triangle: a DIY build, or a prefab kit installed in a day or two? Start by setting a realistic budget for base, insulation, electrics, and VAT, then match it to your time and skills.
Prefab suits tight deadlines and predictable costs; DIY gives you more say over layout, material durability, and aesthetic style, but you’ll manage deliveries, snagging, and weather delays.
Use this checklist before you commit:
- Confirm permitted development limits and boundary distances.
- Price groundworks, drainage, and armoured cable to the consumer unit.
- Compare cladding, roof membrane, and window spec for material durability.
- Choose an aesthetic style that matches your house and neighbours, and lasts.
Choose the Best Spot for Light and Privacy
In a UK garden, the spot you choose can make or break your day-to-day comfort in a garden office, so start by mapping light and privacy before anything else. Track where Natural light falls at 9am, midday, and late afternoon across a typical week, because neighbouring trees and fences cast different shadows in winter versus summer. Aim for steady daylight on your desk wall, not harsh glare through the main window.
Next, define Privacy zones. Use existing boundaries first: place the office where sheds, hedges, or brick walls block sightlines from neighbours’ upstairs windows. Keep a buffer from patios and play areas so you won’t feel “on show” during calls.
If you’re overlooked, angle glazing away and favour higher-level side windows for light without exposure.
Plan Access: Paths, Drainage, and Exterior Lighting
Next, you’ll plan how you get to the garden office in all weathers, starting with a sensible path layout that suits wheelie bins, muddy boots, and barrow access.
You’ll also map surface drainage so rain runs away from the building and doesn’t pool on the route, using gentle falls and permeable finishes where possible.
Finally, you’ll place exterior lighting to cover steps, turns, and doorways without glare, and you’ll keep fittings IP-rated for UK conditions and safely routed back to the supply.
Practical Garden Path Layouts
Although it’s tempting to treat the route to your garden office as an afterthought, a well-planned path makes day-to-day access safer, cleaner, and easier to maintain in the UK’s wet weather. Keep the line of travel direct from the back door, but allow enough width for bins and a wheelbarrow—around 900–1,000mm works well.
Choose Garden path materials that match your maintenance tolerance: resin-bound or concrete flags for low upkeep, gravel for budget flexibility, and brick for character.
- Set a gentle, well-defined curve only where it improves sightlines.
- Use decorative edging to stop spread and keep borders neat.
- Add a small landing outside the office door for muddy boots.
- Fit low-glare, PIR-triggered bollards to guide you on dark evenings.
Effective Surface Drainage Planning
Because UK rainwater has a habit of pooling exactly where you walk, plan surface drainage at the same time as you set out paths and the office threshold.
Give paving a 1:60 fall away from the door, and keep the finished floor 150mm above surrounding ground.
Direct rainwater runoff into a soakaway or rain garden, not onto neighbouring plots.
Use permeable gravel, porous block paving, or resin-bound aggregate where possible to reduce standing water and meet SuDS principles.
If you’re laying slabs, set them on a free-draining sub-base and leave narrow joints for water to pass.
Add a linear channel drain at the threshold if levels are tight.
Choose drainage solutions that you can rod and clear easily each autumn.
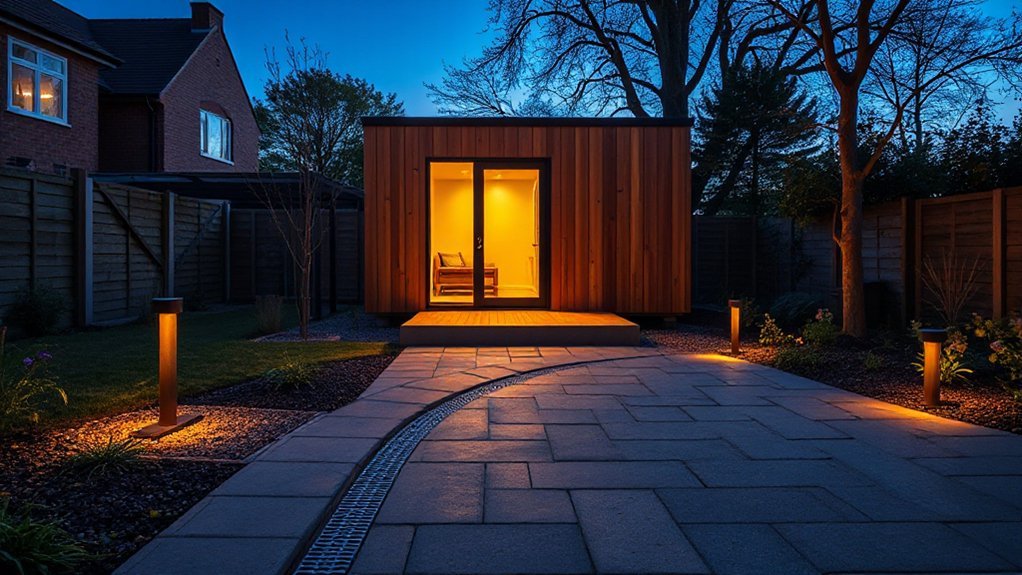
Safe Exterior Lighting Placement
Two well-placed exterior lights make your garden office approach safer without creating glare or nuisance: one to wash the path evenly and one at the door to pick out the threshold, steps, and any level changes. Keep fittings low-glare and aim them down to protect neighbours and preserve dark skies.
For reliable pathway safety, choose warm 2700–3000K LEDs and avoid harsh cool whites that flatten depth cues.
- Mount bollards or low wall lights 600–900mm high, spaced to overlap beams.
- Angle door lights to the lockset and landing, not eye level.
- Use PIR plus manual override, so you’re not plunged into darkness mid-walk.
- Run armoured cable in ducting and fit IP65 luminaires for UK weather.
Good landscape illumination should guide, not shout.
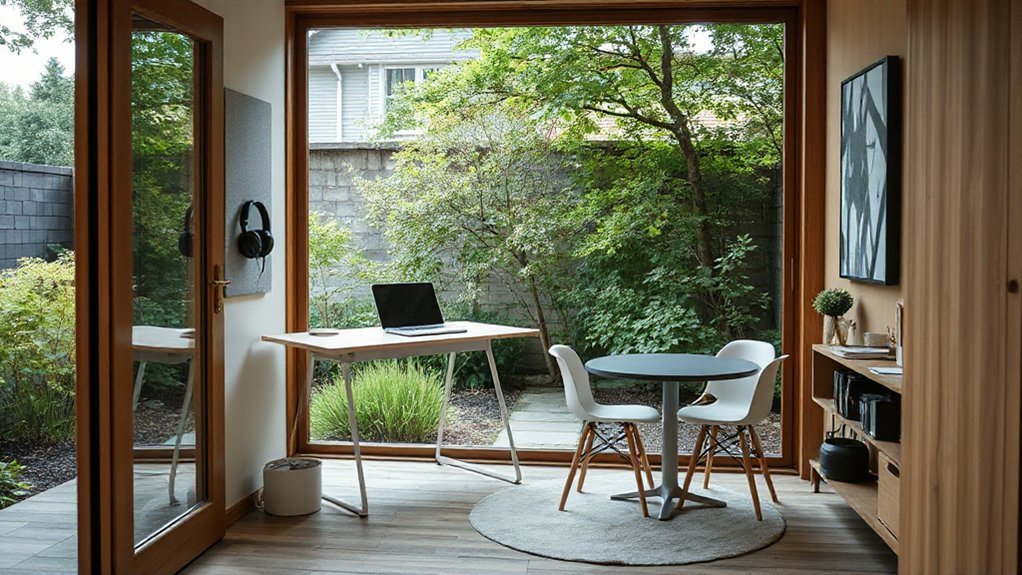
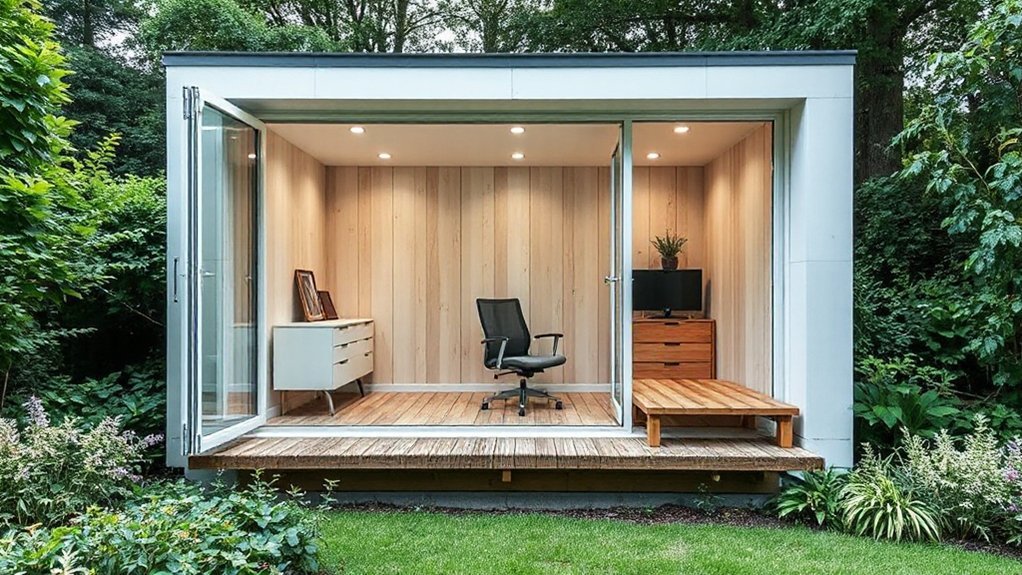
Size the Office Around Desk, Storage, and Seating
Before you commit to a footprint for your garden office, map the space around what you’ll actually use every day: your desk, storage, and seating.
Start with your Desk arrangement: measure the desktop, monitor depth, and cable routes, then allow at least 600mm clear behind the chair so you can sit and stand comfortably. If you take calls, add space for a small visitor chair or a compact armchair without crowding your working posture.
Build Storage solutions into the plan early: a 300–400mm deep cabinet run keeps files, printer, and stationery off the desk, while wall shelving above shoulder height stores rarely used items.
Check UK furniture sizes, and keep a 900mm clear working width where you’ll move most.
Lay Out Doors and Zones to Prevent Bottlenecks
Place your door where you’ll naturally approach from the house or path, and keep the swing clear of your chair and storage so you’re not sidestepping obstacles.
Zone the space into entry, work, and storage areas, and leave a straight, at least 800mm route between them for easy movement.
If you’re adding a second door or wide glazing, set it opposite or adjacent to the main door to spread traffic and stop pinch points.
Door Placement For Flow
Although a garden office might look simple on paper, door placement can make or break how smoothly you move between work, storage, and seating. In the UK, you’ll often work with tight footprints, so plan entry and internal access like a mini studio, not a shed. Good flow optimization means fewer sidesteps, less door swing conflict, and clearer sightlines when you step in.
- Place the main door on the long side, not the short end, to reduce pinch points.
- Use an outward-opening or sliding door where regs and security allow, keeping floor area usable.
- Keep at least 800mm clear walkway from door to desk so deliveries and chair movement don’t clash.
- Align the door with glazing to pull daylight through and make the room feel bigger.
Zoning To Reduce Congestion
When you split a garden office into clear zones—entry, work, storage, and a small break/guest seat—you stop the doorway area becoming a choke point every time you grab a file, answer the door, or swing your chair back.
Keep the entry strip at least 800mm wide and place hooks, shoe tray, and parcel shelf on the latch side, not behind the door swing.
Set your desk so you’ve got a straight run from door to chair, with cables routed along one wall.
Put storage on the far end or in a shallow run (300–400mm deep) to keep knees clear.
If you’re adding glazing, align it with Landscape integration views, but leave planting beds as wildlife habitat buffers outside, not in your path.
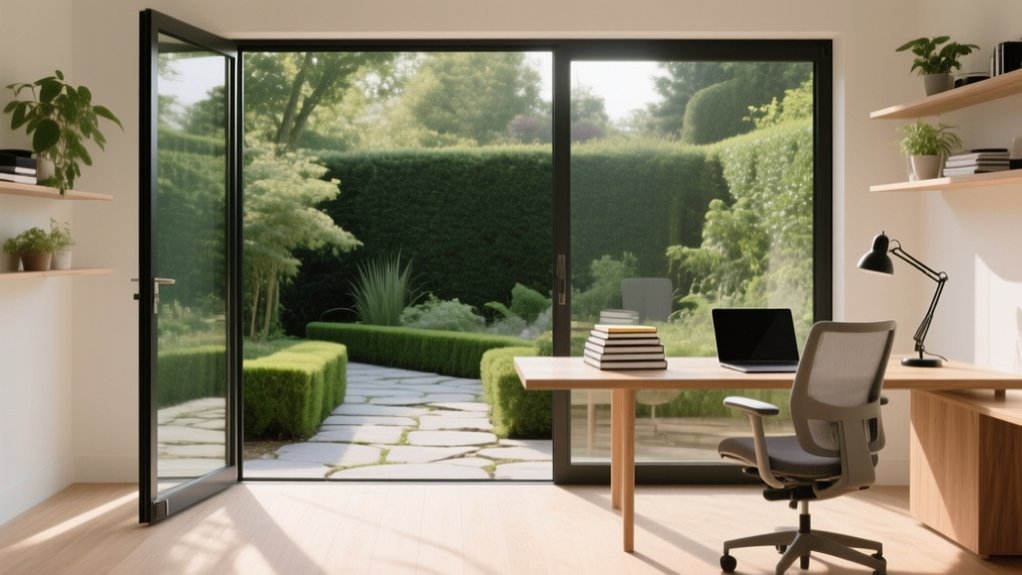
Place Windows for Daylight Without Screen Glare
Because your monitor will always be fussier than your eyes, you’ll get the best results by planning window positions around both daylight levels and the sun’s path. In the UK, a south-facing pane can flood the room, but it’ll also spike reflections at midday, so aim to keep daylight to the side of your desk.
- Put your main glazing on the north or north-east for steady, cool light.
- If you must face south or west, use smaller panes or higher clerestory windows.
- Keep your screen at 90° to the window, not directly in front or behind it.
- Add glare reduction with fitted blinds, solar film, or external shading to cut low-angle evening sun.
Good window placement makes video calls clearer and reduces eye strain.
Choose Foundations and Damp Protection First
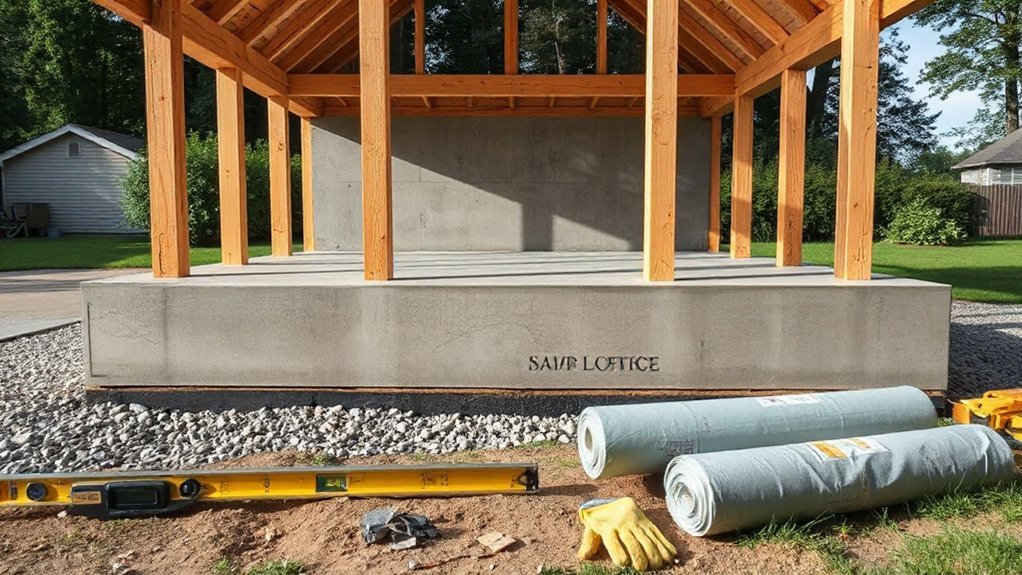
Before you fix the layout, you’ve got to choose the right base—concrete slab, paving on a compacted sub-base, or screw piles—based on your soil, drainage, and UK frost risk.
You’ll also need a proper damp-proof membrane and damp-proof course, lapped and sealed so ground moisture can’t wick into the floor and walls.
Get the foundations and damp protection right now, and you’ll avoid mould, warped finishes, and costly remedial work later.
Select The Right Base
If you get the base right, your garden office stays level, dry, and trouble-free through British winters. Start by checking access for barrows and mixers, then pick a base that suits your soil, slope, and budget. Keep finished floor height above surrounding ground, and plan drainage falls away from the build.
Tie your base choice into garden design so paths, edging, and plant selection don’t funnel water towards the walls or block airflow.
- Concrete slab: best for heavy builds; stable on clay if well-prepped.
- Paving slab grid: quicker, lighter; works for compact cabins on firm ground.
- Screw piles: ideal on slopes; minimal digging and mess.
- Timber frame on pads: good for small offices; needs precise levelling.
Install Damp-Proof Barriers
Where damp-proofing often goes wrong is treating it as an afterthought rather than part of the foundations package. Build it in from day one so your floor stays dry, your insulation performs, and your office doesn’t smell musty every winter.
If you’re using a concrete slab, lay Damp proof membranes (1200 gauge polythene) with taped laps, then turn it up at the edges to meet the wall DPC.
For timber bases, fit Moisture barriers beneath the joists and add a ventilated void; don’t block airbricks with gravel or decking.
Keep the barrier continuous around service penetrations, and seal pipes with grommets or butyl tape.
Maintain finished floor levels above external ground and slope paving away.
It’s cheaper than replacing swollen flooring later.
Insulate Walls, Roof, and Floor for All Seasons
Although a garden office might look finished once the shell’s up, it won’t feel usable year-round until you insulate the walls, roof, and floor properly. In the UK, aim for steady internal temperatures and fewer drafts, using materials that fit your stud and rafter depths without gaps.
- Fit Wall insulation tightly between studs, then add a continuous insulated board layer to reduce thermal bridging.
- Prioritise roof insulation between rafters, and leave a clear path for any required air gaps above it.
- Insulate the floor with rigid PIR between joists, and seal edges to stop cold spots.
- Tape all joints and service penetrations, then add a vapour control layer on the warm side where specified.
Check U-values and follow manufacturer details for timber frames.
Ventilation, Heating, and Cooling That Actually Works
Once you’ve insulated properly, you still need controlled airflow and correctly sized heating to keep a garden office comfortable without damp, stuffiness, or spiralling running costs.
Fit background ventilation (trickle vents or wall vents) and add a quiet extractor if you’ll dry clothes or run kit all day.
For reliable air circulation, crack a window isn’t enough in winter; consider a small MVHR unit for steady fresh air without dumping heat.
Size heating to the room: an electric panel heater or oil-filled radiator works, but a modern inverter air-to-air heat pump gives efficient climate control and summer cooling.
Use a programmable thermostat, set a modest 18–20°C, and stop short cycling.
Seal gaps, but don’t block vents.
Soundproofing for Calls, Music, and Concentration
How quiet does your garden office need to be for Teams calls, focused work, or a bit of music? Start by tackling both airborne noise (voices, traffic) and structure-borne vibration (lawnmowers, footfall).
In the UK, you’ll get the biggest gains by sealing gaps and adding mass before you buy fancy panels.
- Fit quality draught seals and a drop seal to the door; stop sound leaks first.
- Add mass with double plasterboard on resilient bars, and use acoustic mineral wool in studs.
- Upgrade glazing: laminated glass and tight frames beat “thicker” alone.
- Finish with Acoustic treatment: fabric wall panels, a thick rug, and bookcases to tame echo.
Test with a call, then adjust.
Safe Electrics: Sockets, Lighting, and Outdoor Runs
Where should you start with garden office electrics? Plan the load, then get a Part P registered electrician to design and certify it.
Run a dedicated armoured (SWA) cable from your consumer unit, buried at the right depth with warning tape, or clipped properly above ground, and protect it with an RCD/RCBO.
Use metal-clad or quality plastic Power outlets, ideally on two circuits: one for desk kit, one for heating.
Fit plenty of double sockets at desk height so you don’t rely on extensions.
Choose IP-rated external fittings and glands where cables enter the building, and seal penetrations.
Install bright, low-glare LED task lighting plus a separate ambient circuit.
Label isolators and test RCDs regularly for electrical safety.
Reliable Internet: Wi‑Fi Mesh vs Wired Ethernet
Because a garden office sits at the edge of your home network, you’ll get the most reliable connection by deciding early whether to run a wired Ethernet feed or extend Wi‑Fi with a mesh.
Wired ethernet gives consistent speed and low latency for Teams calls, uploads, and remote desktops, and it ignores thick walls and foil-backed insulation.
A Wi Fi mesh is quicker to install and suits light use, but performance can dip with distance, brickwork, and neighbouring interference.
- Check line-of-sight and wall materials between house router and office.
- If digging anyway, pull Cat6 in ducting with draw cord and spare.
- If using mesh, place a node near a window facing the garden.
- Test at peak times, then lock channels and update firmware regularly.
Ergonomics, Storage, Finishes, and Security Details
Once you’ve sorted a stable connection to the garden office, make the space comfortable and secure for daily use by planning ergonomics, storage, finishes, and the small security details before you start fitting out.
Choose ergonomic furniture: an adjustable chair with lumbar support, a desk at 72–75cm, and a monitor on an arm so your eyeline stays level. Add task lighting (4000K) and manage cables with trunking.
Build storage solutions in from the start: wall shelves for files, a lockable pedestal for kit, and a tall cupboard for coats and printer stock.
Pick hard-wearing finishes: wipeable matt paint, durable vinyl or engineered oak, and acoustic panels to cut echo.
Fit a BS-rated multi-point lock, laminated glazing, and a PIR light; secure Wi‑Fi kit inside.
Frequently Asked Questions
What Plants or Landscaping Help a Garden Office Feel More Professional?
Choose clipped box hedging, pleached hornbeam, and evergreen structure plants to signal order. Add gravel paths and tidy borders. Use Privacy screens like trellis with jasmine, plus subtle Outdoor lighting for after-hours focus.
How Do I Handle Deliveries and Parcels Securely at a Garden Office?
Stop parcels vanishing like magic: fit a lockable, weatherproof box for secure parcel storage, bolt it down, add CCTV/doorbell, and use delivery scheduling via Royal Mail/DPD. Prefer Click & Collect, neighbour safe-place notes.
Can a Garden Office Double as a Guest Room or Hobby Space?
Yes, you can make it work by adding a sofa bed, compact storage, and blackout blinds. Install soundproofing solutions for privacy and fit outdoor lighting for safe late arrivals, keeping electrics Part P compliant.
What Ongoing Maintenance Does a Garden Office Typically Require Yearly?
You’ll typically repaint or treat exterior timber, clear gutters, check roof felt, reseal windows/doors, service electrics, inspect insulation materials for damp, and clean solar energy panels. Each year, you’ll also test alarms and ventilation.
How Can I Style Décor to Separate “Work Mode” From “Home Mode”?
You’ll flip into work mode like you’ve stepped onto the Trading Floor: use strict color schemes (cool greys/blues) for desk zone, warm tones for lounge. Control lighting choices—bright task LEDs, dimmable lamps—plus a coat-hook “commute” ritual.
Conclusion
When you design your garden office around how you actually work, you turn a spare corner of the plot into a proper base camp. You’ve sorted permissions, budget, and build type, picked the brightest spot with privacy, and planned paths, drainage, and lighting for grim UK winters. With the right size, soundproofing, safe electrics, and solid internet, calls stay crisp. Finish with ergonomics, storage, and security, and you’ll clock off feeling lighter.