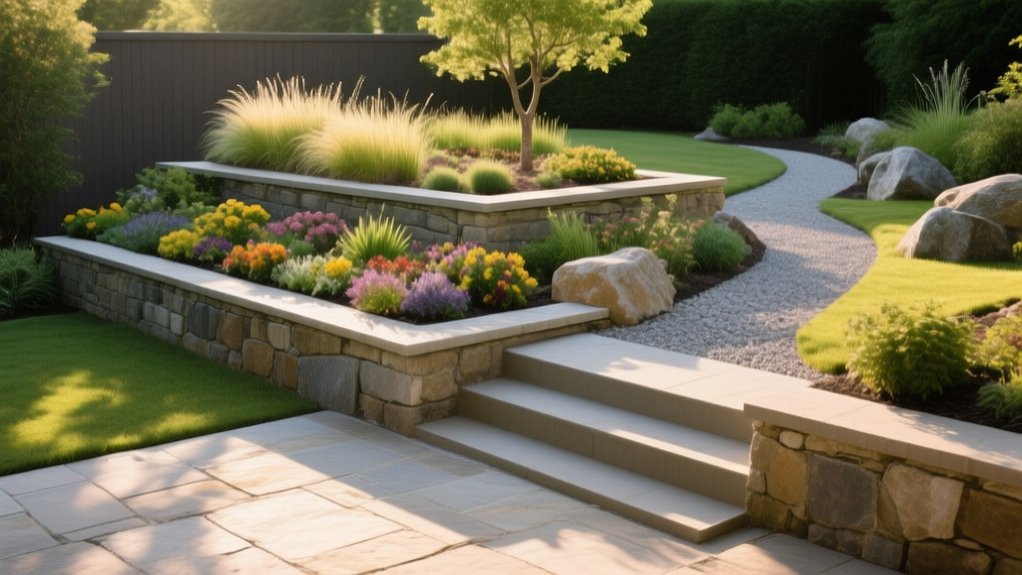
Use levels to add interest by matching the layout to your plot: on flat ground, create raised beds and shallow terraces; on slopes, step the garden in simple, even tiers to minimise retaining. Keep steps safe with consistent risers and generous treads, and plan drainage first so water falls away from buildings. Check sun and sightlines on each platform, then add screening or trellis where needed. Repeat paving and edging materials for cohesion—there’s more to refine next.
Key Takeaways
- Match terraces and level changes to the site’s natural slope, keeping rises modest and aligned with main walking routes.
- Create instant height using raised beds, planters, and stepped edging to define zones and make planting more prominent.
- Add safe, consistent steps and minimal retaining walls, with proper foundations and drainage to prevent movement and erosion.
- Use vertical elements at level changes—screens, trellises, pergolas, pleached trees—to frame views and improve privacy.
- Repeat a simple material palette across paving, steps, and edging so each level feels intentional, cohesive, and easy to maintain.
Choose a Garden Levels Layout (Flat vs Sloped)
Although both flat and sloped gardens can look striking, you’ll get the best results by choosing a levels layout that matches your site’s natural fall, soil conditions, and how you plan to use the space.
On Flat terrain, you can create crisp terraces with minimal retaining, keep paths accessible, and simplify drainage runs to existing gullies and soakaways. You should still set a subtle crossfall (about 1:80) so paving sheds water away from buildings.
With sloped gradients, you’ll need to decide whether to cut and fill or step with short risers. Keep each change in level modest, align steps with desire lines, and use retaining walls only where necessary.
Check ground stability, allow for free-draining backfill, and plan lawful boundary heights.
Check Sun, Views, and Privacy by Level
Where will the sun fall once you introduce terraces, raised beds, or a sunken seating area? Walk the garden at breakfast, midday, and early evening, then note how each level casts shade on the next.
In the UK, a south- or west-facing upper terrace can steal Sun exposure from a lower border, so keep tall planters and pergolas to the north side where possible.
Next, check sightlines from each platform: you’ll sit higher on a deck and see further, but neighbours may also see you. Stand at typical seated height on every level and look towards windows, patios, and the lane.
Use privacy screening selectively—slatted panels, pleached trees, or tall grasses—to block views without blacking out light.
Plan Drainage Before You Build Levels
Before you set a spade in the ground, map how rainwater will move once you add terraces, steps, and raised beds, because level changes can trap runoff against walls and fences. Use a hose test in a downpour-prone corner and mark flow lines with canes. Set finished levels to fall away from buildings at roughly 1:60, and allow a low point for capture, not your neighbour’s patio.
During soil preparation, break up compaction and blend in grit on heavy clay so water percolates rather than sheets. Install a French drain or gravel trench behind retaining edges, wrapped in geotextile, and lead it to a soakaway where ground allows.
Let plant placement help: use moisture-lovers in swales, drought-tolerant plants on banks.
Add Instant Garden Levels With Raised Beds
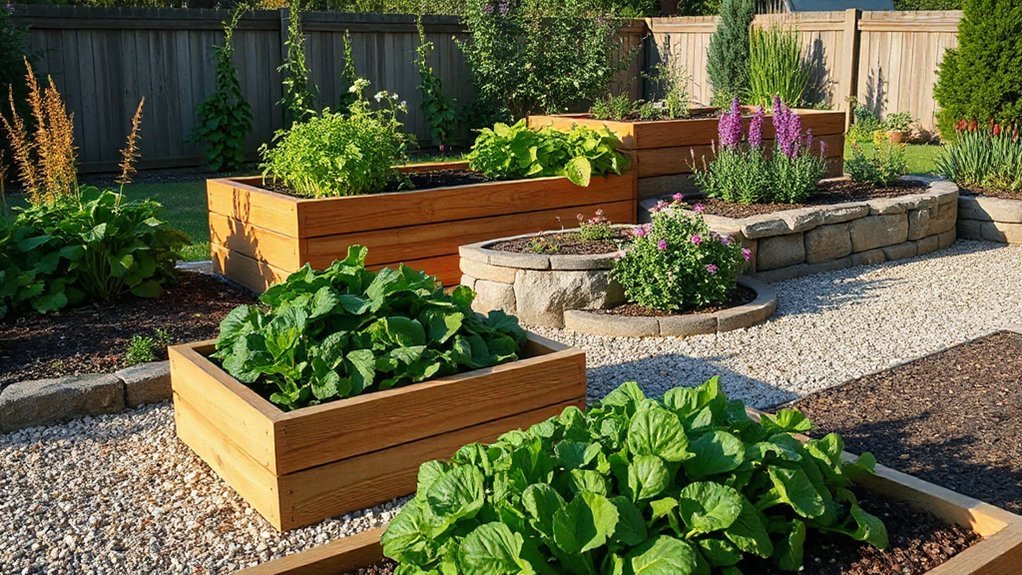
Once you’ve planned where water will run and installed any drainage behind hard edges, you can add level changes fast with raised beds. Set beds on firm, level ground and keep the top edge consistent, so they read as a deliberate step.
In the UK, choose FSC timber, reclaimed sleepers, or brick; line timber with a membrane to slow rot and keep soil backfilled tight to avoid bulging.
Use mixed soil: topsoil plus well-rotted compost, then cap with mulch to reduce splash and slumping. Raise planting height for easier access, and define paths with gravel or paving alongside.
You can also treat beds as structured container gardening: cluster smaller pots on the upper tier. Add vertical planting with obelisks, wall trellis, or arching herbs at corners.
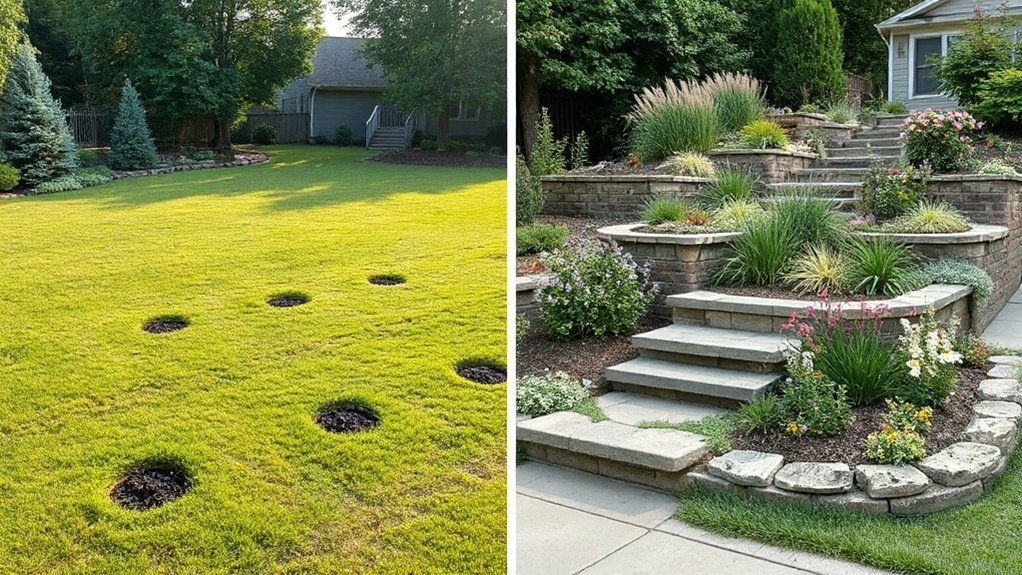
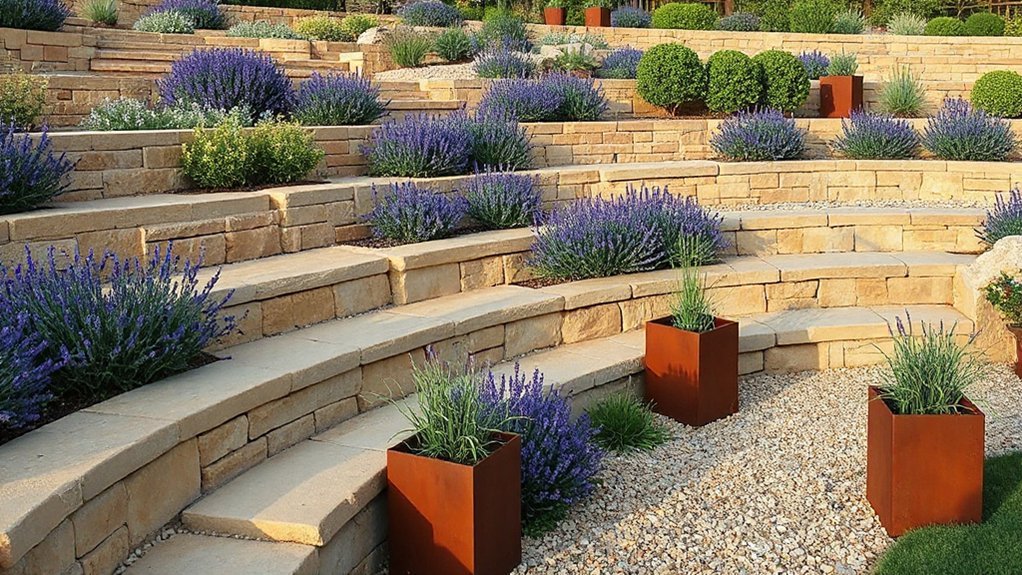
Terrace a Sloped Garden in Simple Tiers
How do you make a steep plot feel usable without losing half of it to runoff? You terrace it, breaking the garden slope into a run of shallow, workable levels.
Start by surveying the fall with stakes and string lines, then mark out equal rises so each tier has enough depth for planting and a narrow path. Keep the tier design simple: repeat the same tread depth and align edges so mowing and edging stay straightforward.
Excavate from the top down, shifting spoil to build the next level and tamping each platform firm. Add a slight fall back into the bank to slow water, and include a gravel strip or shallow swale to intercept flow.
Finish by improving soil structure with compost and mulch.
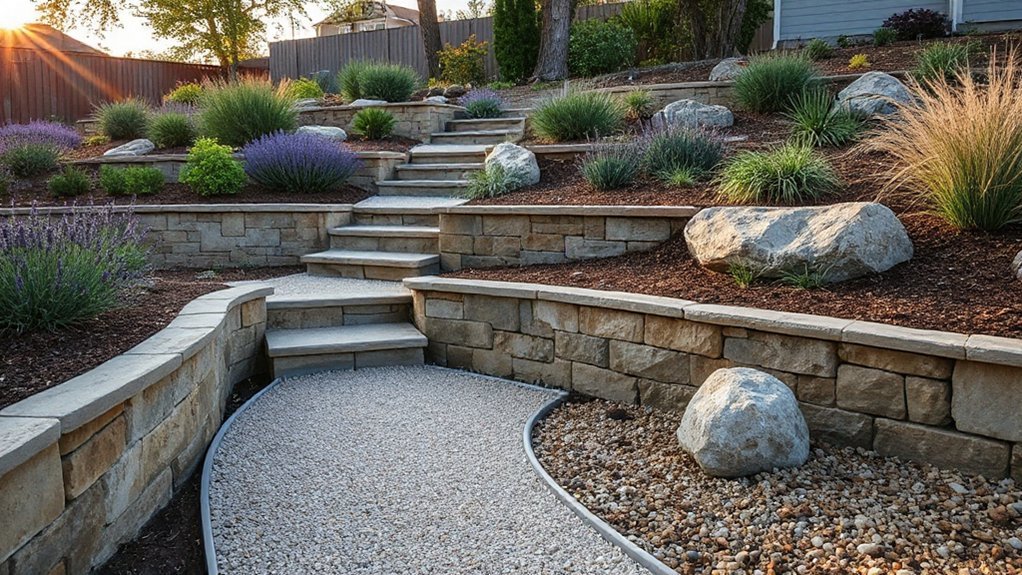
Pick the Right Retaining Wall Type and Height
You’ll need to match your retaining wall material to the job, whether that’s treated sleepers for a natural look, interlocking concrete blocks for speed, brick for a formal finish, or local stone for longevity.
You should also set the wall height with safety in mind, because higher walls increase soil pressure and demand proper drainage, foundations, and often engineering input.
If you’re going beyond about 1 metre, check what building control and planning rules apply in your council area before you build.
Retaining Wall Material Options
Where should you start when choosing a retaining wall for a sloped garden—materials or height? Begin with material, because it dictates build method, drainage detailing, and how crisply your levels read.
Treated softwood sleepers suit informal cottage planting and make pockets for plant propagation, but they need careful separation from wet soil and regular inspection.
Natural stone or reclaimed Yorkshire walling gives a timeless, UK-appropriate finish and copes well with freeze–thaw, yet it demands proper footings and skilled laying.
Concrete blocks are cost-effective and predictable; face them with brick slips or stone for a smarter terrace edge.
Gabions drain freely and fit modern schemes, especially with crushed stone backfill.
Match material to your soil amendments plan, so finishes, edging, and planting integrate neatly.
Choosing Wall Height Safely
Before you decide on terrace levels, pin down the retaining wall height, because it determines whether you can use a simple gravity wall or you’ll need engineered reinforcement.
In UK gardens, Wall height safety isn’t optional: once you approach 600mm, you should treat the build as a structural element, especially near boundaries, paths, or patios. Keep structural stability front and centre by matching wall type to soil, surcharge loads, and drainage.
- Up to 600mm: a well-battered gravity wall in stone or block often suffices, with free-draining backfill.
- 600mm–1m: add geogrid or a reinforced system; specify proper footing depth and weep holes.
- Over 1m: get a structural engineer, check planning rules, and design for frost heave and clay shrink-swell.
Add Safe Garden Steps for Level Changes
Although level changes can add drama to a garden, they also create trip hazards unless you handle them properly. Put garden safety first by keeping every riser consistent, ideally 150–170mm high, with treads at least 300mm deep so your footing feels natural.
Set steps square and level, and allow space to place your whole foot. Choose step materials that suit the site: riven paving, textured concrete, or properly bedded brick offer grip; avoid polished stone where algae forms.
Bed each step on a compacted sub-base with mortar or concrete to stop rocking and settlement. Add a slight fall (about 1:60) to shed rainwater.
If the drop is substantial, include a handrail and adequate lighting. Guarantee edges are clearly defined.
Connect Garden Levels With Paths and Edging
Once you’ve set your level changes, link them with paths and edging that guide people naturally and hold the structure in place. Good pathway integration stops wear on banks and makes each terrace feel intentional, not improvised.
Keep routes direct, with gentle curves only where sightlines need softening, and match materials to your home: York stone, gravel, or clay pavers. Set falls at 1:80 so rain sheds properly in UK weather.
Use robust edging techniques to lock surfaces and prevent creep between levels.
Prioritise:
- Consistent path widths (900mm minimum for comfortable passing).
- Edging set on concrete haunching, flush with the path.
- Threshold details at steps and landings to stop gravel migration.
Layer Plants to Soften and Hide Level Edges
Paths and edging give your terraces clean lines and solid footing, but planting makes the level changes feel settled rather than engineered.
Start with a backbone of evergreens to anchor each tier: small yew domes, hebe, or compact pittosporum suit most UK gardens and keep structure through winter.
Then layer for edge concealment: place mid-height perennials just back from the drop, and let low spillers run over the lip. Use hardy geraniums, lady’s mantle, campanula, and trailing rosemary to blur the hard line without smothering steps.
Add spring bulbs between clumps for seasonal lift.
For vertical planting without trellises, tuck in clump-formers like ferns, hostas, and ornamental grasses, tightening the spacing at corners where edges show most.
Use Trellises, Screens, and Focal Points Vertically
Where planting alone can’t give enough height or privacy, you can use trellises, slatted screens, and a well-placed focal point to pull the eye upward and make each level feel intentional. Position vertical elements at changes in level to define zones and frame views from the house or patio. Choose rot-resistant timber or powder-coated steel, suited to the UK’s wet winters, and fix posts securely into the terrace structure.
- Install Vine trellises on sunny, sheltered faces for clematis, honeysuckle, or climbing roses, keeping growth off retaining walls.
- Set Garden screens along boundaries to block overlooking without stealing light; leave a small gap for airflow.
- Add a vertical focal point—an obelisk, sculptural urn, or slim water feature—so your eye travels upward.
Repeat Materials So Garden Levels Feel Cohesive
Although each terrace may serve a different purpose, you’ll make the whole garden feel designed by repeating a tight palette of materials across every level. Choose one paving family—Yorkstone, clay pavers, or resin-bound gravel—and echo it on steps, landings, and edging so passages read as intentional rather than patched together.
Back the hardscape with consistent timber or metal: match sleeper risers to bench tops, or repeat powder-coated steel in balustrades, pergola posts, and planters. Keep joint colour and pointing consistent; in the UK’s wet climate, that visual line matters.
Use the same aggregate in path bases and gravel strips to stitch terraces together. This material repetition supports garden level symmetry, even when planting changes from herbs to ornamentals. Your eye reads continuity, not levels.
Avoid the Biggest Garden Levels Design Mistakes
If you get the levels wrong, even premium paving and planting won’t stop a stepped garden feeling awkward or unsafe. Avoid garden level myths like “a small rise needs only one step” or “retaining walls can be thin if rendered”.
In UK gardens, wet leaves, frost and clay soils punish sloppy detailing, so design for grip, drainage and structure, not just looks. Watch for these common mistakes:
- Setting risers and treads outside comfortable proportions (aim for 150–170mm risers, 280–320mm treads).
- Skipping falls and drainage at landings, so water sheets towards doors or pools on paving.
- Underbuilding retaining edges: use proper footings, weep holes, and reinforcement, then match coping to paving.
Check building regs where relevant and keep handrails in mind on higher drops.
Frequently Asked Questions
What Permits or Approvals Are Required for Building Garden Retaining Walls?
You’ll usually need planning permission if your retaining wall affects highways, exceeds 1m by a road or 2m elsewhere, or alters drainage. Check local permit requirements, follow your council’s approval process, and comply with Building Regulations.
How Much Do Terracing and Retaining Walls Typically Cost per Square Metre?
You’ll typically pay £80–£250/m² for terracing and £120–£450/m² for retaining walls in the UK. Your cost estimation depends on excavation, drainage, access, and material options like timber, block, or stone.
Can I Add Garden Levels Without Heavy Machinery or Professional Contractors?
Yes, you can add garden levels without heavy machinery or contractors if you choose small DIY projects: sleeper-edged raised beds, compacted gravel steps, and low dry-stone terraces. Plan aesthetic design, check drainage, and avoid undermining boundaries.
How Do Garden Levels Affect Property Value and Resale Appeal?
Garden levels can boost value and resale if they look engineered and safe, improving drainage, reducing Soil erosion, and enhancing Plant placement. In the UK, buyers pay for usability, low maintenance, and compliant retaining structures.
What Maintenance Schedule Keeps Retaining Walls and Terraces Structurally Sound?
You might think it’s a faff, but picture walls staying plumb. You’ll inspect monthly, clear drains quarterly, and check movement after storms. Annually, repoint, review Soil stabilization, and refresh Plant integration, keeping terraces secure.
Conclusion
Of course, you could keep your garden dead flat, like a municipal lawn that dares you to feel nothing. Or you can use levels properly: pick a layout that suits your slope, check sun and sightlines, sort drainage before the first sleeper goes in, then add raised beds or simple terraces. Soften edges with layered planting, add vertical screens and focal points, and repeat materials for unity. Skip the “random steps” school of design.