Start by measuring your wall, noting outlets and vents, and picking one focal upgrade, like a bold paint arch, one oversized mirror, or a long picture ledge. Use painter’s tape and a level for crisp painted bands or grids, and choose a finish (matte for softness, satin for wipeability). Add renter-safe peel-and-stick texture on a cleaned wall, then hang thrifted art with a simple color rule. Next, you’ll see easy layout, trim, and lighting upgrades.
Key Takeaways
- Pick one bold focal upgrade—oversized art, a large mirror, or a long shelf—to add instant character without clutter.
- Paint for depth using a single accent wall, two-tone bands, or a simple arch; crisp taped lines make it look custom.
- Apply peel-and-stick wallpaper or textured panels on one section; clean the wall first and trim seams for a seamless finish.
- Build a cohesive gallery wall with thrifted frames; unify with one color theme and keep 2–3 inch spacing between pieces.
- Add lighting and styling with plug-in sconces, picture lights, and a few plants; shadows and greenery make walls feel layered.
Choose a Quick Plan for Plain Walls
Before you buy paint or start hanging art, decide what “character” needs to do for your plain wall—add color, texture, or a focal point—and set a simple plan you can finish in a day. Measure the wall, note outlets and vents, and sketch a quick layout so you don’t improvise mid-project. Choose one upgrade: swap in a large mirror, mount two floating shelves, or install peel-and-stick wall texture panels. Keep scale tight: one oversized piece beats a cluster you can’t align. Pick a wall color direction now, even if you’re not painting, so frames, textiles, and wood tones coordinate. Set a budget, gather tools, and stage hardware before you start. Then work top-down, level everything, and stop when the plan’s done.
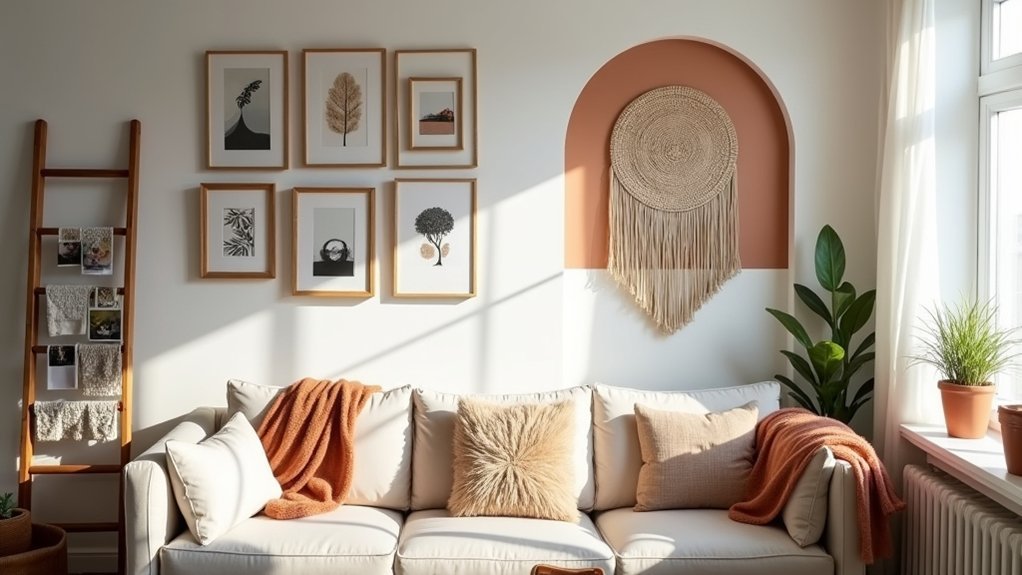
Add Character to Plain Walls With Paint Tricks
If you want a plain wall to feel finished without spending much, use paint tricks that create contrast and structure with minimal materials. Start with color psychology: deep blues or greens calm a bedroom, warm terracotta energizes a dining nook, and soft neutrals keep small rooms open. Add architecture by painting a 3/4-height band, a boxed “panel” grid, or a simple arch behind a chair.
Control crisp lines with painter’s tape, a level, and light pencil marks; seal tape edges with the base color to prevent bleed. Choose the right paint finish: matte hides flaws, eggshell cleans easily, and satin adds subtle sheen for trim-like edges. Finish by painting outlets to match (safely removed covers), so details disappear.
Use Renter-Safe Peel-and-Stick Texture on Plain Walls
How do you give a flat wall depth without losing your security deposit? Use renter-safe peel-and-stick products that add texture and peel off cleanly. Start with a smooth, dust-free surface; wipe with isopropyl alcohol and let it dry. Measure and mark a level line, then apply textured wallpaper from top to bottom, smoothing with a plastic squeegee to push out bubbles. Wrap seams by slightly overlapping, then trim with a sharp utility blade and metal ruler for crisp edges. If you want smaller accents, use wall decals to mimic paneling, linen, or plaster effects without committing to full coverage. Before you go all in, test a sample behind a door for 48 hours to confirm easy removal.
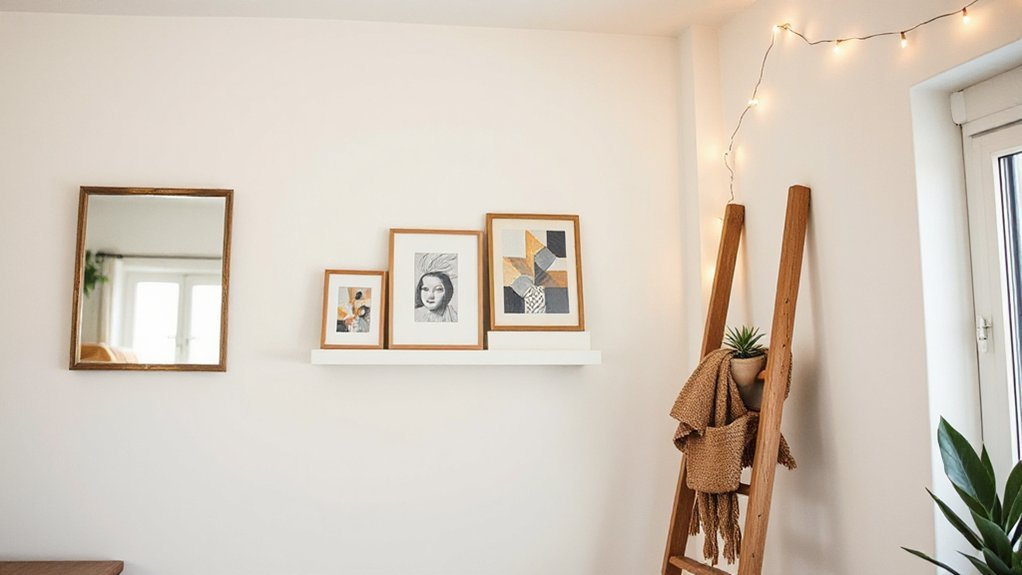
Thrift Art That Actually Works on Plain Walls
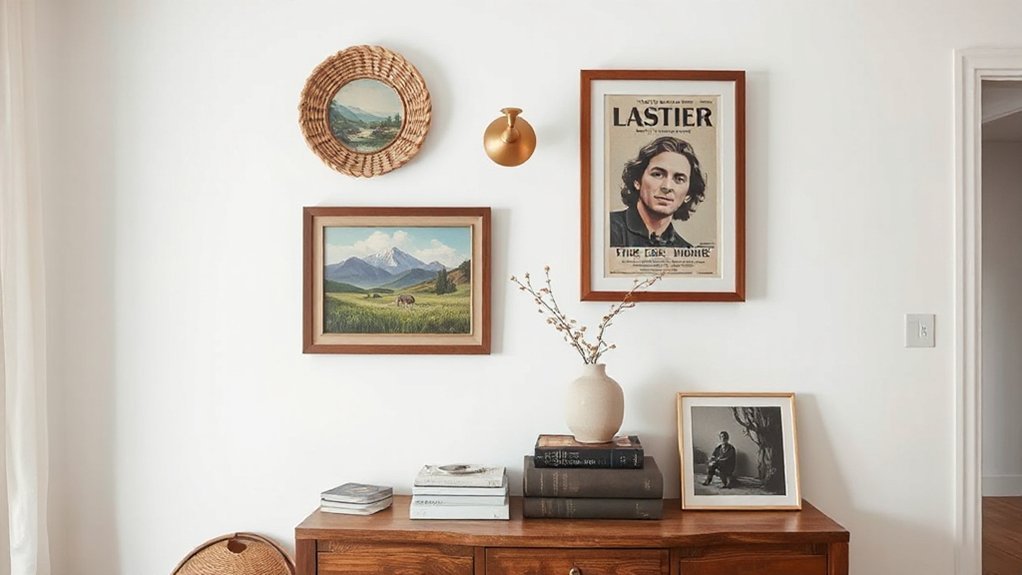
You can make thrifted art look intentional by curating a cohesive set—repeat a color, subject, or era so your plain wall reads as one story, not random finds. Upgrade the look fast with budget frames: swap mismatched plastic for painted thrift frames, add fresh mats, and standardize finishes so everything hangs together. Then balance scale and spacing by anchoring one larger piece, keeping 2–3 inches between frames, and centering the arrangement at eye level.
Curate Cohesive Thrift Sets
While single thrift-store finds can feel random on a plain wall, a cohesive set reads intentional and instantly adds character. Pick one unifying rule before you shop: a shared color (indigo, sepia, black-and-cream), a repeated subject (botanicals, portraits), or a consistent era. Scan shelves for groups—three to five pieces—then edit hard. Mix media for depth: pair small prints with Vintage textiles like scarf panels or embroidered napkins mounted flat, keeping the palette tight. If you’re short a matching piece, bridge gaps with Artistic wall decals in a simple motif that echoes the set’s theme. Lay everything on the floor, balance sizes, and keep spacing consistent so the collection feels curated, not cluttered. Your wall will look deliberate and lived-in.
Upgrade Frames On Budget
A cohesive thrift set looks intentional, but mismatched, flimsy frames can still make the whole wall feel cheap. You don’t need custom framing—use smart frame upgrades that elevate thrift finds fast. Start by ditching scratched plastic glazing; replace it with cut-to-size acrylic from a hardware store. Swap warped backs for foam board, then secure art with framer’s tape so it sits flat. Unify finishes: spray-paint frames matte black, warm white, or brass, and keep sheen consistent. If frames are odd sizes, buy inexpensive mats to standardize the look and create breathing room around budget artwork. Finally, upgrade hardware: add D-rings and braided wire so pieces hang straight and don’t tilt over time.
Balance Scale And Spacing
Because thrift art comes in wildly inconsistent sizes, scale and spacing decide whether your wall reads curated or chaotic. Start by picking one anchor piece, then build outward so every addition supports scale balance, not competition. Keep spacing uniformity tight enough to feel intentional, loose enough to breathe.
- Choose a largest “hero” print and center it at eye level (57–60 inches).
- Group by visual weight: dark frames and bold images need more breathing room.
- Hold gaps consistent: 2 inches for tight grids, 3–4 inches for salon-style clusters.
- Align at least one edge or midpoint across pieces to create a clean baseline.
- Mock it up with paper templates and painter’s tape before you commit.
Step back 6 feet, adjust, then hang.
Build a Simple Gallery Wall (Layout + Spacing)
Even if you’re working with mismatched frames and budget prints, you can make a gallery wall look intentional by nailing the layout and spacing first. Start on the floor: trace each frame on paper, cut templates, and tape them up so you can adjust without extra holes. Pick one anchor piece (largest Wall art) at eye level, then build out in a loose grid.
Keep gaps consistent—2 to 3 inches reads polished in most rooms. Align either the top edges or centerline across the group, not both. Limit your Color schemes to two to three tones so varied frames still feel cohesive. Step back 6 to 8 feet, photograph it, and tweak until the negative space looks even. Then hang from the center outward.
Add DIY Molding or Trim for Instant Wall Detail
You can add instant wall character with budget-friendly trim styles like MDF strips, lattice molding, or simple base cap—clean lines, low cost, big impact. You’ll get the best results by planning easy DIY placement (picture-frame boxes, a chair rail band, or vertical battens), snapping level lines, and using a nailer or adhesive for a tight fit. Finish strong with paint techniques for depth: match trim to the wall for subtle texture, or shift sheen and go a shade darker/lighter to make the profiles pop.
Budget-Friendly Trim Styles
A few well-chosen trim styles can turn a flat wall into a finished feature for surprisingly little money. Start by matching the profile to your home’s era, then choose materials that paint well and resist dents. These budget friendly trim styles also double as affordable wall accents when you keep lines clean and repetition consistent.
- Square-edge MDF for crisp, modern frames and easy sanding
- Thin lattice strips for simple grids that look custom
- Baseboard upgrades with a shoe or quarter-round cap
- Picture-rail molding to add a classic horizontal break
- Chair rail paired with a narrow backband for depth
Stick to common stock lengths, minimize seams, and buy during contractor-pack sales. Prime, caulk, and paint for a seamless, built-in look.
Easy DIY Molding Placement
Before you cut a single piece of trim, map the layout on the wall so the molding lands where it looks intentional and stays easy to install. Use painter’s tape to outline boxes or rails, then step back and adjust spacing until lines align with outlets, windows, and furniture height. Keep measurements consistent: mark a level baseline, then transfer dimensions with a combination square.
Choose molding materials that match your tools and room conditions—MDF for straight runs, pine for durability, PVC for humid areas. For clean corners, cope inside joints or use mitered returns on outside edges. Apply adhesive plus 18-gauge brads, and pre-drill near ends to prevent splitting. Fill nail holes, then caulk seams for crisp shadow lines.
Paint Techniques For Depth
Once the molding layout looks right and every joint sits tight, paint becomes the tool that turns that trim into real depth. Start with a bonding primer so edges don’t flash. Then choose sheen intentionally: flatter on fields, satin on trim, or swap them for subtle contrast. Use Color blending to soften gradations in box panels and to fake shadow lines where trim meets wall. For extra dimension, layer faux finishes sparingly—glaze, dry-brush, or a light wash—so the detail reads, not shouts. Work fast, keep a wet edge, and cut crisp lines.
- Prime, sand lightly, and tack-cloth dust
- Paint trim first, then wall for clean overlaps
- Blend two close tones for a shaded center panel
- Glaze corners to deepen reveals
- Seal with matching topcoat for durability
Finish Plain Walls With Shelves, Plants, and Lighting
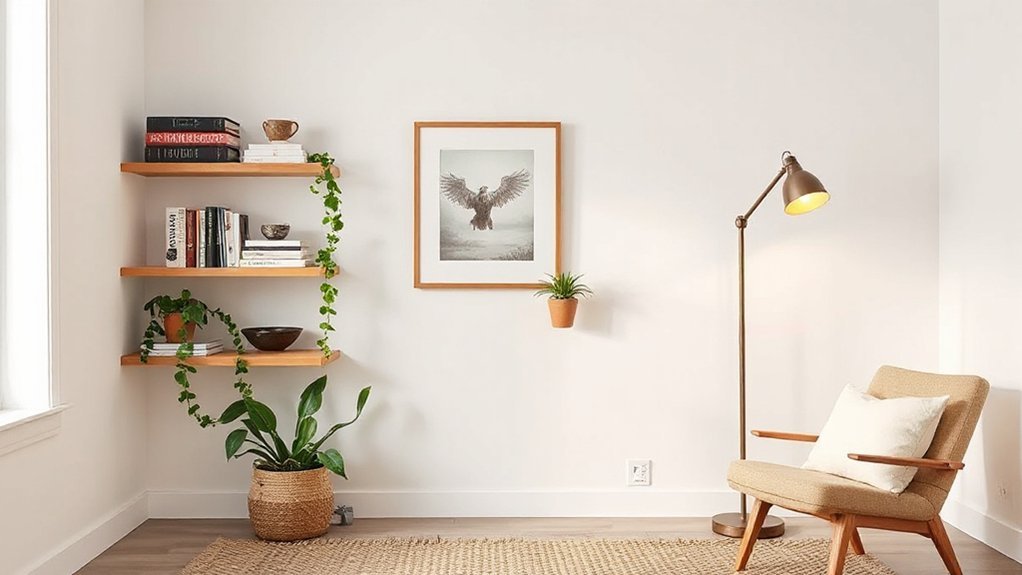
Even if you can’t paint or wallpaper right now, you can still give a blank wall real presence by layering shelves, plants, and lighting in a deliberate way. Start with one long picture ledge or two floating shelves, installed level and anchored into studs. Treat shelves like “Wall murals” in 3D: vary heights, overlap frames, and leave breathing room so the arrangement reads intentional, not cluttered. Add decorative accents sparingly—two or three objects per shelf—then repeat one material (black metal, oak, or brass) to unify everything.
Next, bring in plants for softness and vertical movement. Use a trailing pothos on the top shelf, a small upright snake plant below, and a saucer to protect surfaces. Finish with plug-in sconces or a slim picture light aimed downward to sharpen shadows and highlight texture.
Frequently Asked Questions
How Do I Remove Adhesive Damage From Peel-And-Stick Wall Treatments?
Warm the area with a hair dryer, then gently scrape and wipe with soapy water or isopropyl alcohol, removing adhesive residue. If paint lifts, sand smooth, apply spackle, prime, and repaint, repairing wall damage thoroughly.
What’s the Best Way to Soundproof a Room With Bare Walls?
You’ll get the best soundproofing by sealing gaps, adding dense layers, then treating reflections with Acoustic panels. Install weatherstripping, door sweeps, and caulk, then add drywall with Green Glue. Use Decorative paneling selectively.
How Can I Hide Wall Cracks and Uneven Drywall Without Full Repairs?
Hide cracks fast by skimming with lightweight spackle, sanding smooth, then using thick primer plus matte paint. You can also conceal flaws with fabric wall coverings or wall stencil designs that distract and unify texture.
Which Wall Upgrades Add the Most Resale Value on a Tight Budget?
You’ll get the most resale value from fresh neutral paint—NAR reports it can add about $1,500. Use Decorative wall decals for accents, and try DIY mural projects only in small, reversible areas.
How Do I Protect Painted Walls From Scuffs in High-Traffic Areas?
Protect painted walls by applying a durable, washable semi-gloss topcoat, adding chair rails, and installing Wall decals at impact zones. You can also mount fabric panels where bags rub, and clean marks quickly with mild soap.
Conclusion
You don’t need a big budget—or a blank weekend—to give plain walls real character. If you’re worried these ideas won’t “look cohesive,” pick one anchor (a paint stripe, peel-and-stick texture, or a thrifted statement piece) and repeat its color twice in your gallery frames, shelf decor, or lighting. That simple rule creates a finished, intentional look. Start with the quickest upgrade you’ll actually do, then layer trim, art, and plants.