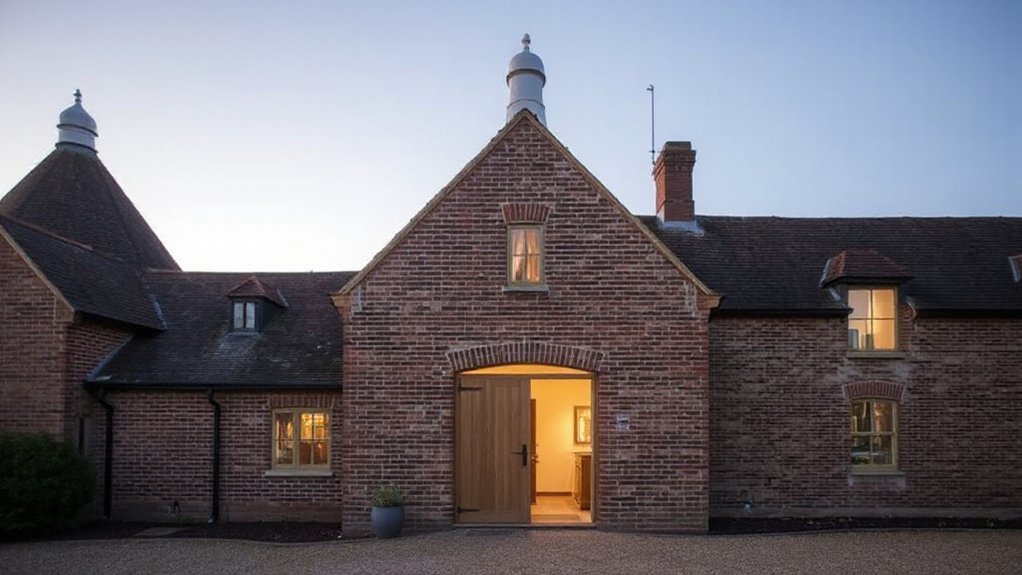
When you convert a Kent oast house with a cowled kiln roof, you quickly learn the silhouette drives every decision. You keep the conical cap, eaves line, and kiln–stow junction legible from a distance, and you avoid dormers or bulky roof build-ups that blur the profile. Inside, you work with the round plan using tight stair cores and discreet service routes, then add rooflights in shadow lines and insulate with breathable layers. The tricky part is deciding where change can hide without weakening what makes it unmistakable…
Key Takeaways
- Commission a full measured and structural survey to confirm kiln roof geometry, cone truss condition, and weathering at junctions before design changes.
- Establish listing, conservation area, or Article 4 constraints early, and prepare a heritage impact assessment focused on significance and reversibility.
- Treat the conical roof, cowl, eaves flare, and roof pitch as protected geometry; avoid dormers, bulky fascias, and visible roof build-ups.
- Place flush, low-profile rooflights on hidden slopes, and use slot glazing or concealed clerestories for daylight without altering the silhouette.
- Use breathable repairs—lime mortar, vapour-open membranes, and proper drainage—so insulation and services don’t trap moisture or distort external form.
Survey First: Feasibility, Defects, and Constraints
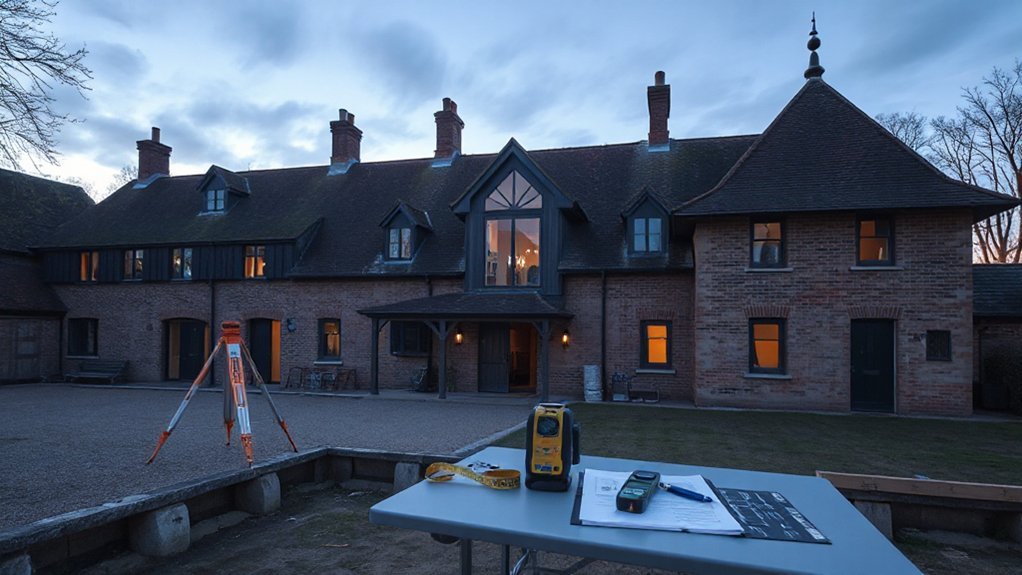
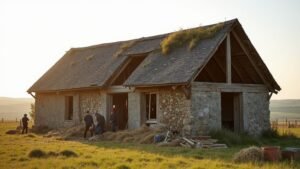
Before you commit to an oast house conversion, commission a full building survey that tests feasibility and pins down the defects and constraints unique to round, kiln-based structures.
You’ll need measured drawings, wall thickness checks, and a structural appraisal of the kiln shell, tie rings, and any timber floors inserted later.
Test for damp bridges, sulphate attack in brickwork, spalled clay tiles, and failed lime joints.
Then map cracks to distinguish settlement from thermal movement.
Confirm roof geometry, cone truss condition, and weathering at cowls and junctions.
Assess routes for services, insulation build-ups, and ventilation without trapping moisture.
Model interior lighting early because deep curved rooms limit openings.
Your material selection should match vapour permeability, salt tolerance, and existing mortar strength to avoid accelerated decay.
Understand Planning and Listed-Building Limits Early
Although you can solve many structural quirks in design, planning policy and listed-building controls will often dictate what you’re actually allowed to change in an oast house, so check the designation and constraints at the outset.
Confirm whether it’s listed, within a conservation area, or subject to Article 4 directions, then map each proposed intervention to consent routes: listed building consent, planning permission, and building regs.
You’ll need a heritage impact assessment that justifies alterations against significance, fabric hierarchy, and reversibility to support Heritage preservation.
Engage the conservation officer early, submit measured drawings, method statements, and material samples, and allow time for negotiation.
Don’t ignore access, ecology, or fire strategy, as these often trigger conditions.
Use community engagement to pre-empt objections and demonstrate local benefit.
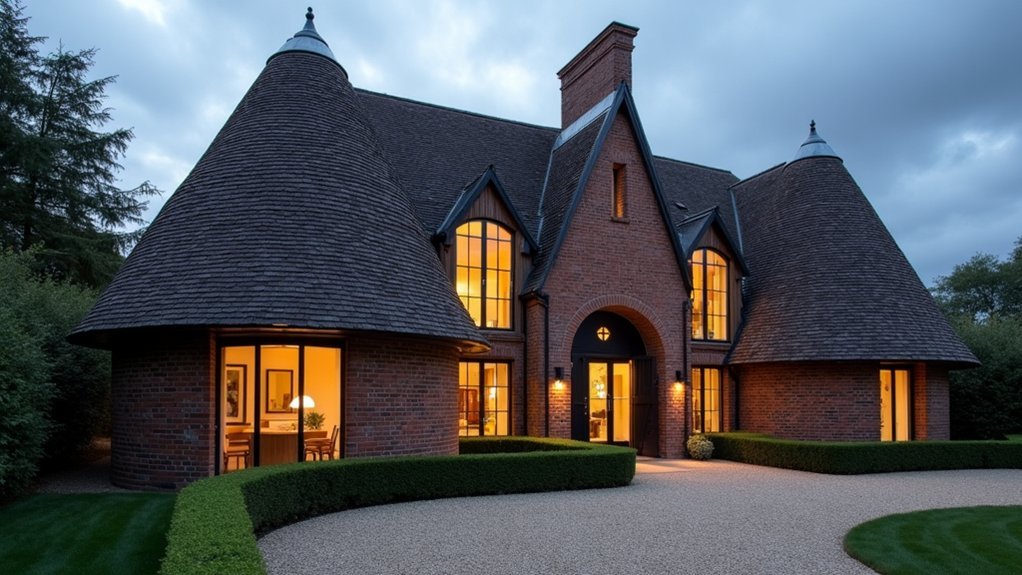
Keep the Oast Silhouette and Kiln Roofline
Because the silhouette is the oast’s primary identifier at distance, you should treat the kiln roofline—conical or cowled cap, eaves flare, and the tight junction between roundel and stowage—as protected geometry and design every intervention to sit behind it.
Preserve the cap’s profile and avoid raising ridges, thickening fascias, or adding dormers that read from the lane. Where insulation is required, build it internally and keep ventilation paths so the conical rafters don’t sweat.
Repair cowls, shingles, or tiles like-for-like, and keep the original roof pitch; kiln architecture depends on slender lines and a crisp eaves shadow.
Place rooflights only on hidden slopes, align flashings with seams, and route services through existing chases to respect Oast history.
Make Round Rooms Work: Zoning, Stairs, and Flow
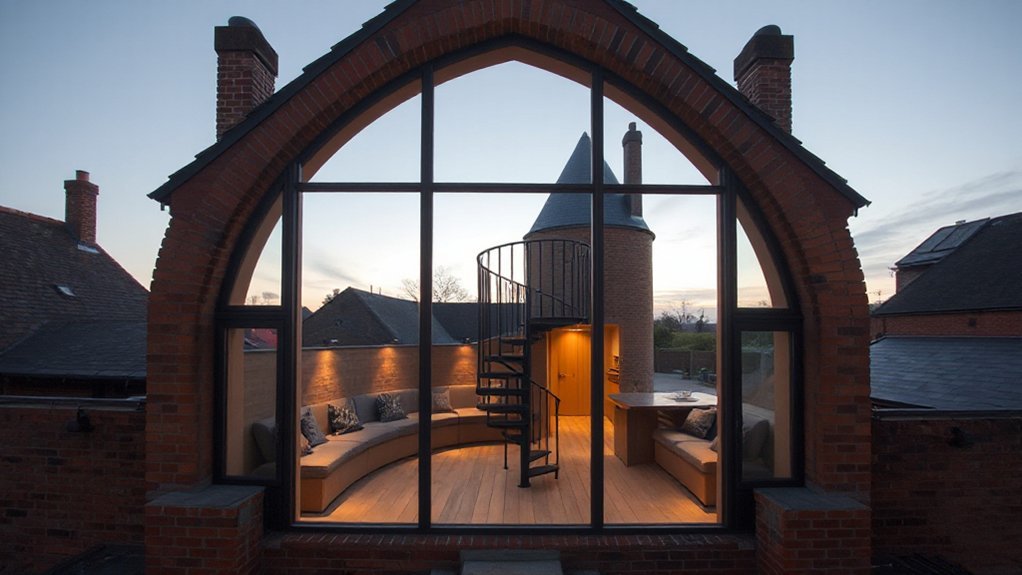
When you convert an oast’s round rooms, you’ve got to zone with curves by setting radial partitions, built-in joinery, and ceiling drops that define kitchen, living, and storage without fighting the wall line.
You’ll place the spiral stair where it ties into existing floor openings and lands on structural bearing points, keeping headroom clear and limiting torsion on the central core.
Then you’ll tune circulation and sightlines by aligning door arcs and furniture tangents so movement stays continuous and key views run clean from entry to kiln cone.
Zoning With Curves
To make an oast house feel deliberate rather than awkward, you’ll need to zone the circular plan with curved geometry instead of fighting it with straight partitions. Start by mapping primary sightlines from entry to windows, then set arcs that preserve a consistent circulation ring.
Use radius-based joinery for built-in banquettes, media walls, and storage so each “room” reads as a segment, not a leftover wedge. Align door openings tangentially to reduce pinch points and keep furniture clearances predictable.
Let wet and service zones hug the thickened core where ducts can stack, while living areas track the perimeter to borrow daylight off curved facades. Outside, mirror internal arcs with organic landscaping to reinforce orientation and soften thresholds.
Spiral Stair Placement
Where should a spiral stair land in an oast house so it supports the circular plan instead of disrupting it? You’ll get the best performance by anchoring the spiral staircase against the thickest wall zone, typically beside the kiln flue or an existing structural pier, so loads transfer cleanly into masonry.
Keep the stair’s centerline just inside the ring of primary structure, leaving a usable perimeter band for curved joinery and services. Your placement considerations should include headroom under roof geometry, minimum clear tread width, and a consistent inner handrail radius that won’t pinch turns.
Align the stair’s openings with existing floor joist directions or new radial beams, and detail fire separation at landings without overbuilding the historic shell.
Circulation And Sightlines
Although an oast house gives you a clean circular plan, circulation can quickly feel awkward if you let routes cut randomly across the diameter and turn the center into leftover space. You’ll get better flow by establishing a perimeter loop that links rooms as arcs, then using short radial links only where doors must align. Keep sightlines tangential so you read the curve and avoid “bowling alley” views to the stair.
Coordinate openings to support Natural ventilation: place high-level vents opposite low inlets along the loop so air moves with people, not against them. For interior lighting, treat the stair as a light well and keep partitions below the window head.
- Perimeter loop + selective radial spurs
- Tangential views, screened thresholds
- Vent and light paths coordinated
Add Daylight Discreetly: Rooflights, Slots, and Joins
When you need more daylight in an oast house but can’t afford to disrupt its silhouette, you’ll get the cleanest result by cutting light in at the roof plane and at junctions rather than by enlarging openings. Set flush conservation rooflights between rafters, align them to existing tile courses, and specify black framed, low-profile units to keep reflections down while improving Sunlight integration.
Use narrow slot glazing where the round kiln meets the straight barn, so the reveal reads as a shadow line from outside. At roof-to-wall joins, add clerestory strips behind parapets or within eaves returns, then baffle with deep linings to avoid glare.
Pair opening rooflights with high-level extracts to drive natural ventilation, and use trickle vents only where you can’t route ducts discreetly.
Insulate Without Trapping Moisture or Losing Space
Because most oast houses rely on breathable masonry and timber to manage rain-driven damp, you’ll get the safest insulation upgrade by keeping vapour-open layers to the cold side and reserving vapour control only for the warm face.
While choosing build-ups that don’t steal headroom from the kiln or pinch the barn’s usable width, focus on moisture control by targeting airtightness at junctions first. Then, add insulation in thin, continuous layers.
- Line the kiln cone internally with flexible woodfibre or mineral wool plus a smart vapour retarder, keeping service voids minimal.
- Use aerogel blanket or phenolic boards on curved reveals and tight eaves to preserve profiles and avoid cold bridges.
- Under floors, choose rigid cork or foam glass with taped joints; pair with perimeter upstands to cut edge losses.
Specify insulation materials by hygrothermal modelling, not generic U-values.
Repair Structure and Control Damp With Breathable Details
Before you add any new linings, stabilise the oast house’s fabric and reset its moisture pathways so damp can drain, dry, and ventilate instead of being forced inward. Start by repairing the roof cowl, flashing, and gutters, then reinstate lime mortar pointing so the masonry can breathe.
You’ll need to stitch cracks with stainless helical bars and replace rotten wall plates with like-for-like timber, keeping loads continuous without introducing hard cement collars.
Lower ground moisture by clearing perimeter drains, adding a limecrete slab with capillary break, and detailing a ventilated floor void where possible.
Use vapour-open membranes behind battens, and specify limewash or silicate paint, not acrylics. This Historic preservation approach lets Modern amenities coexist without mould, salts, or timber decay.
Frequently Asked Questions
How Much Does an Oast House Conversion Typically Cost per Square Metre?
You’ll typically pay £2,500–£4,500 per m², depending on Historical preservation requirements and Architectural modifications complexity. You’ll spend more if you upgrade insulation, services, structural repairs, and round-kiln detailing under listed-building constraints.
How Long Does an Oast House Conversion Usually Take From Design to Completion?
You’ll typically need 12–24 months from design to completion, depending on surveys, planning consent, and contractor lead times. Historic preservation and architectural restoration add time for approvals, specialist trades, and careful detailing.
Can I Get a Standard Mortgage or Specialist Finance for an Oast Conversion?
You can often get a standard mortgage, but you’ll sometimes need specialist finance when the property’s “nonstandard.” Mortgage options depend on valuation, planning, and build stage; Financing challenges include retention, drawdowns, and lender appetite.
What Ongoing Maintenance Costs Should I Budget for After Conversion?
Budget 1–3% of value annually for roof/tile checks, lime mortar repointing, timber/metalwork repairs, drainage, and servicing. Allow extra for Historic preservation surveys and Eco friendly upgrades like heat pumps, MVHR filters, glazing seals.
How Can I Improve Mobile Signal and Wi‑Fi in Thick-Walled Oast Buildings?
You can’t fight physics: thick masonry kills Wireless signal, so you’ll run wired backhaul (Ethernet/PoE) to ceiling-mounted mesh APs, then add Signal boosters with external antennas, correct bands, and proper earthing to cut loss.
Conclusion
You’ll succeed by surveying first, then syncing design with planning and listed-building limits. You keep the kiln’s crisp cone and cowl, protecting junctions so the silhouette stays sharp from every sightline. You make round rooms rational with careful zoning, compact stairs, and clear circulation. You add daylight discreetly with slim slots and low-profile rooflights, aligned to structure. You insulate intelligently with thin, breathable build-ups, and you’ll repair damp details with like-for-like materials.