First, check the fused spur (FCU) by the thermostat is on and its fuse isn’t blown, then confirm the UFH MCB/RCD at the consumer unit hasn’t tripped. If the thermostat screen is blank, you’ve likely lost power. If it’s on, raise the setpoint to 22–24°C and make sure you’re in Heat/Manual and not limited by a floor max. If it still won’t warm, test mat and sensor resistance or get an electrician—more checks follow.
Key Takeaways
- Check the fused spur and consumer unit; a blank thermostat screen often means no power or a tripped breaker/RCD.
- Reset any tripped MCB/RCD once; immediate retripping, warm fuse carriers, or burning smells indicate a wiring or cable fault needing an electrician.
- Confirm the thermostat is calling for heat: correct mode, active schedule/override, and set temperature at least 1–2°C above current temperature.
- Verify sensor settings and readings; wrong sensor mode, floor temperature limits, or a faulty floor probe can stop heating despite demand.
- Allow realistic warm-up time: 30–90 minutes typical, but thick screed can take 2–4 hours, especially without insulation or preheating.
Is Your Electric Underfloor Heating Switched On?
Before you assume the mat or cable has failed, confirm the system is actually powered up: check the fused spur (FCU) next to the thermostat is switched on and the correct fuse hasn’t blown, then verify the thermostat has power and is calling for heat (set it above the current floor temperature and look for a heating indicator), as many “not heating” faults come down to the supply being off, a tripped RCD/MCB at the consumer unit, or the controller being in standby/schedule mode. Next, confirm you’ve selected the right programme (manual vs timed) and floor sensor mode, and that any smart hub hasn’t overridden the setpoint. If the FCU isolates, don’t keep resetting; you’ll protect Energy efficiency and avoid escalating installation costs—book a NICEIC electrician to test insulation resistance and continuity.
How Long Does Electric Underfloor Heating Take to Warm Up?
You’ll typically feel electric underfloor heating within 30–90 minutes, but a cold screed floor can take 2–4 hours to reach setpoint. Warm-up time depends on floor build-up (screed vs tile), insulation, room heat loss, cable/mat wattage (W/m²), and your thermostat schedule. If it’s still sluggish, watch for long run times with little temperature rise, frequent thermostat cycling, or lukewarm patches that suggest poor contact or a sensor issue.
Typical Warm-Up Timeframes
How long should electric underfloor heating take to warm up? In most UK homes, electric mat or cable systems give you noticeable floor warmth in 30–60 minutes, while reaching a stable room temperature often takes 1–3 hours. If you’re using a thick screed or stone finish, expect 2–4 hours for the floor to feel evenly warm, with full comfort taking longer. For best Energy efficiency, you should pre-heat using a programmable thermostat rather than relying on last-minute boosts; insulation improvements also shorten the wait and cut running costs. Visualise what “normal” feels like:
- A tiled bathroom floor turning gently warm under bare feet
- A hallway losing its chill after lunch
- A living room settling into steady, even heat by evening
- A thermostat display drifting to setpoint without rapid cycling
Key Factors Affecting Heat-Up
Although most electric underfloor systems respond quickly, your actual heat-up time depends on a handful of installation and control variables: the floor build-up (tile/stone vs vinyl/wood), the thermal mass above the heating element (adhesive bed vs screed), the quality and thickness of insulation beneath, and how accurately the thermostat and floor probe are set up. Tiles and stone conduct heat well, but thicker screeds store it, so you’ll wait longer for the surface to feel warm. With timber or LVT, you must respect maximum floor temperatures and lower tog values, or output drops. Insulation boards to UK installation guidelines reduce downward losses and improve Energy efficiency, speeding response and cutting running costs. Finally, set realistic setpoints, use timed preheat, and confirm the probe sits centrally between heating runs.
Signs Of Slow Warm-Up
Because electric underfloor heating delivers heat through the floor build-up rather than directly to the air, a “slow” warm-up usually shows up as the room thermostat rising before the floor ever feels properly warm, or the floor taking far longer than expected to reach setpoint. In UK homes, expect 30–90 minutes for thin mats under tile, and 2–4+ hours in thicker screed; beyond that, you’ve likely got a lag issue. Look for these signs during a timed heat-up test:
- Your bare feet find a cold strip where the mat should be
- The thermostat cycles off, yet the slab stays cool
- You smell warm dust at the manifold point but not across the room
- The setpoint hits late, forcing longer runtimes and lower Energy efficiency
You’ll cut installation costs later by fixing insulation and sensor placement now.
Is the Thermostat Calling for Heat (Heat Icon On)?
Check your thermostat display and confirm the heat icon is on, as that’s your first sign it’s actually calling for heat. Compare the set temperature to the current room or floor reading—if the setpoint isn’t higher, it won’t energise the mat. Also verify you’re in the correct mode (Auto/Timed vs Manual) and that the heating schedule isn’t holding the system off.
Confirm Heat Icon Status
First, look at your thermostat display—does the heat icon show that it’s actually calling for heat? If the Heat icon isn’t lit (or it’s flashing an error state), the system may not be sending a demand to the floor heating controller. Confirm the indicator status on the thermostat and any receiver/relay box, as UK installs often split control between the wall stat and a separate switched output.
- You see the heat symbol solid, like a steady pilot light on the screen
- You hear a faint relay “click” from the wiring centre or contactor
- You spot a red/amber demand LED on the receiver next to the boiler/UFH controls
- You notice the floor probe icon/alert toggling, hinting at a sensor fault
Check Setpoint Versus Room
Even if the heat icon’s on, the thermostat won’t drive the UFH output unless your setpoint sits above the measured temperature. Check the room temperature reading and compare it to your target: if the room is at 20°C and the setpoint is 20°C or lower, the relay won’t energise and the floor won’t warm. Raise the setpoint by 1–2°C and wait a few minutes for the call-for-heat to latch. If you use a floor probe, confirm you’re viewing the correct sensor (air vs floor) and that any floor limit isn’t already met. Some stats show Color temperature for the display backlight; it doesn’t affect heating. Keeping a realistic setpoint improves Energy efficiency too.
Verify Heating Schedule Mode
If your thermostat is running to a schedule, it may look “on” while it’s actually in a timed setback period, so it won’t call for heat. Check the heat icon or “calling for heat” indicator; if it’s off, your Heating schedule is preventing output. Switch temporarily to Manual/Override and raise the setpoint by 2–3°C to force a demand, then confirm the relay symbol and output LED energise.
- Picture the display showing a moon icon (setback) while the room feels cool
- Imagine the heat icon missing even though the set temperature looks high
- Visualise an override button lighting up and the relay click at the stat
- Think of a clock mis-set after a power cut, shifting all timings
Correct the time/day, review setbacks, then re-run system calibration if available.
Thermostat Settings to Check (Mode, Schedule, Limits)

Because electric underfloor heating relies on your thermostat to call for heat, the quickest checks are in the settings: confirm it’s in Heat/Manual (not Off, Program-only, or Holiday), make sure the schedule is actually set to heat during the hours you’re testing, and verify the temperature limits haven’t been set too low. Next, check the setpoint: if it’s only 18°C and your floor’s cold, raise it to 22–24°C temporarily to prove demand. Look for a “Floor Limit” or “Max Floor Temp” cap; if it’s set to 20–25°C, the system may stop early, especially under tiles. Also review “Adaptive/Optimum Start” so it preheats before occupancy. For interior design choices like thick rugs, adjust expectations and prioritise energy efficiency with sensible setbacks.
Has the Breaker, Fuse or RCD Tripped?
Before you dig into the thermostat or floor sensor, check your consumer unit for a tripped MCB, blown fuse, or a tripped RCD/RCBO feeding the underfloor heating circuit, as any of these will cut power and leave the system cold. Identify the UFH way, then reset once; if it trips again, you’ve got a fault that needs an electrician. Don’t keep re-energising a circuit that won’t hold.
- You open the consumer unit door and spot one switch sitting halfway down
- The RCD test button label sits beside the UFH circuit, taunting you
- You flip the MCB up, hear a click, then it drops again immediately
- The fuse carrier feels warm, hinting at overload or a loose connection
Once power is stable, Energy efficiency improves, especially after insulation improvements.
Does the Thermostat Have Power (Screen On)?
If your thermostat screen’s blank, you’ve likely lost supply to the controller, so re-check the breaker, fuse and any RCD feeding the underfloor heating circuit. If those protections are set, isolate the circuit and verify the thermostat’s live, neutral and earth connections are correctly landed and secure. Once power’s restored to the stat, you can confirm it’s calling for heat and driving the load.
Check Breaker And Fuse
- You’re at the consumer unit, labels in torchlight, scanning for a dropped breaker.
- Your finger clicks the MCB fully OFF, then firmly back ON.
- You pull the fused spur, spotting a tiny cartridge fuse ready to swap.
- You smell warm plastic or see soot marks—stop and call an electrician.
If it trips again, don’t keep resetting it.
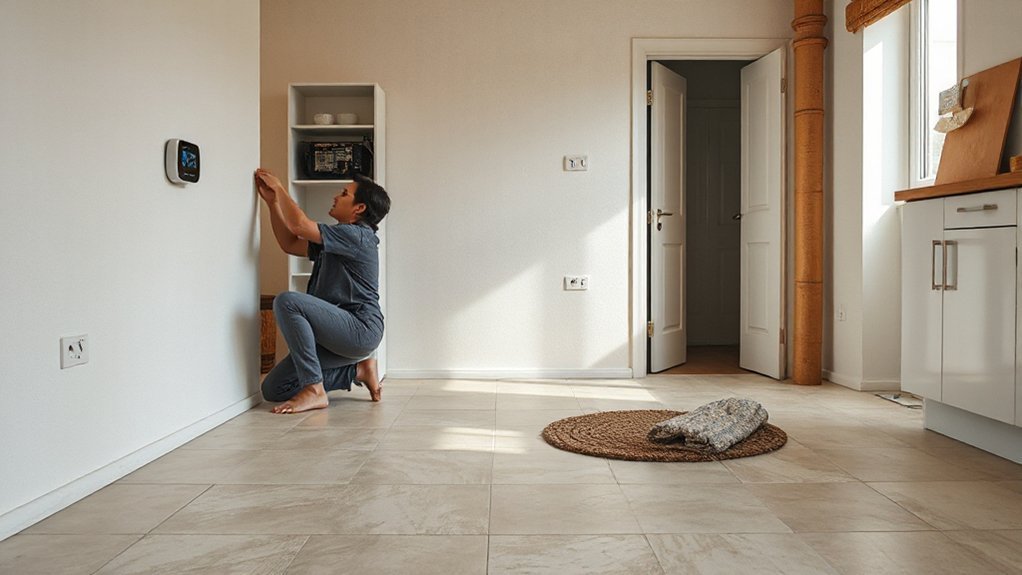
Verify Thermostat Wiring
First, check whether the thermostat actually has power—does the screen light up, show the room temperature, or respond when you tap a button? If it’s dead, isolate the circuit at the consumer unit, then confirm you’ve got 230V at the thermostat’s supply terminals (typically L and N). Next, remove the faceplate and inspect connections against the manufacturer diagram and UK Wiring color codes: brown to live (L), blue to neutral (N), and green/yellow to earth where required. Confirm the heater load and sensor wires aren’t swapped, and that terminals are tight with no scorch marks. Also verify Thermostat placement: don’t mount it on an external wall or above a radiator, as false readings can stop heating. If in doubt, call a NICEIC electrician.
Smart Thermostat/App Issues Stopping Electric UFH?
Although your heating mat and wiring can be perfectly sound, a smart thermostat or its app can still stop electric UFH from calling for heat due to configuration, connectivity, or scheduling errors. First, confirm the stat is in Heat mode, not “Off”, “Eco”, or “Holiday”, and that the setpoint sits above room temperature. Check geofencing and “open window” features that can lock out demand. If you’ve got solar panels, make sure any smart tariff or PV-divert logic isn’t delaying heat to chase energy efficiency.
- Your phone shows “Disconnected” while the hallway Wi‑Fi drops out
- A greyed-out schedule overrides manual boosts at 06:30
- A meter icon indicates a kWh cap or load limit
- A hub LED blinks amber, so the relay never closes
Re-pair the app, update firmware, and reboot the hub/router.
Is the Floor Temperature Sensor Faulty or Misplaced?
When your thermostat thinks the floor’s already warm, it won’t energise the heating mat, and a faulty or badly positioned floor probe is a common reason. If the Floor sensor sits too close to a heating cable, it’ll read hot early and shut the system down; if it’s too near an external wall or draughty area, it may under-read and drive odd cycling. Check your thermostat menu for sensor type and setpoint limits, then compare the displayed floor temperature to a reliable surface thermometer after the room stabilises. Big differences suggest Calibration issues or a failing probe. In many UK installs the sensor should be centred between runs inside conduit, so it can be replaced without lifting tiles. If it’s not, you’ll need an electrician.
Loose Wiring: Could a Connection Have Come Free?
If your electric underfloor heating isn’t warming up, you should check for loose terminations at the thermostat back box, the fused spur/FCU, and any junction box where the cold tail joins the heating mat. You can isolate the circuit at the consumer unit, prove dead with an approved voltage tester, then visually confirm earth, live and neutral conductors are fully seated and clamps are tightened to the manufacturer’s torque. If anything looks heat-damaged or you’re not confident working to UK electrical safety practice, you shouldn’t re-terminate it yourself—get a qualified electrician to secure and test the connections.
Common Loose Connection Points
- A slightly browned FCU faceplate from warm, stressed terminals
- A thermostat base with a conductor not fully clamped under the screw
- A junction box with a loose Wago/strip connector on the heating tails
- A sensor pair nicked or barely held, causing erratic readings
Safe Wiring Inspection Steps
Although a loose conductor can stop an underfloor mat dead, you can still carry out a basic inspection safely by isolating the circuit at the consumer unit, locking it off (or clearly labelling it), and proving dead with a two‑pole tester before you remove the thermostat/FCU front and visually check for heat damage, backed‑out screws, or displaced Wago/terminal blocks—don’t rely on the thermostat “off” setting, and don’t touch any bare copper until you’ve confirmed isolation. Check line, load, and earth terminations are fully seated and torque to the manufacturer’s spec. If you find scorching, brittle insulation, or melted terminals, stop and call a NICEIC electrician. Re-energise and confirm correct voltage under load. For Energy efficient upgrades, fix terminations before changing controls. In any Cost comparison, include electrician time versus repeated thermostat swaps.
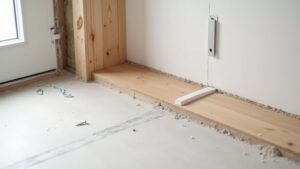
New Install Problems: Was It Tested Before Covering?
Before you assume the mat or cable’s faulty, confirm the installer completed the required pre-covering tests, because most “dead on arrival” electric underfloor heating issues trace back to missed or undocumented commissioning. Ask for the test sheet: you need continuity, insulation resistance (typically 500V DC megger), and resistance readings matching the nameplate within tolerance, signed and dated. If there’s no record, you’ll struggle with warranty and you can’t prove the system wasn’t nicked during fitting—bad news for energy efficiency and Interior design timelines.
- A multimeter reading steady ohms beside the kit label
- A megger lead clipped to earth on the heating braid
- A commissioning form stamped by a NICEIC electrician
- A floor plan marking cold tails, sensor route, and test values
Not Heating After Tiling: Adhesive and Cure-Time Checks
Once you’ve tiled, the most common reason an electric underfloor system won’t heat is that you’ve energised it too soon or locked the heat under the wrong adhesive bed. Check the adhesive and grout datasheets: most UK flexible cement-based adhesives need 7–14 days before commissioning, and some levellers longer. If you power up early, trapped moisture drives the thermostat into long warm-up times and can stress the cable.
Confirm you used a suitable S1/S2 flexible adhesive, applied with the correct notched trowel, fully encapsulating the mat for consistent tile adhesion. Voids act as insulation and create cool spots. Also verify floor insulation sits beneath the heating layer; missing or compressed boards dump heat into the slab. If cure time has passed, re-test resistance and insulation readings before re-energising.
Can Your Floor Covering Block Electric Underfloor Heating?
Even if your heating mat and thermostat work perfectly, the floor finish can throttle heat output by adding too much thermal resistance. Your floor covering acts like a lid, and some products sold in the UK are simply too insulating for low-profile electric systems. Check the manufacturer’s tog or R-value; aim for low tog (often ≤1.5) unless your UFH supplier states otherwise, and avoid stacked insulation materials like thick underlay plus dense carpet.
- A plush carpet with springy underlay trapping warmth like a duvet
- Vinyl laid over foam-backed layers that feel soft underfoot
- Engineered timber that’s thick, tight-grained, and slow to conduct
- Rubber-backed mats creating cool “dead zones” near doorways
Switch to UFH-rated finishes, use thin adhesives, and keep layers minimal.
Uneven Heating: Layout, Spacing, and Insulation Checks
Why does your electric underfloor heating feel warm in some spots but barely lukewarm in others? Uneven heat usually points to installation geometry, not the thermostat. Check your Room layout: large fixed furniture, kitchen units, or sanitaryware can create “dead” zones where no mat/cable was installed, so the floor never warms uniformly. Next, consider spacing. If heating cable runs are too far apart, you’ll feel stripes of warmth; if they’re bunched, you’ll get hot bands. Compare as-built photos or your installer’s plan to the actual floor area and any later alterations. Finally, confirm Floor insulation. Missing or crushed insulation boards, gaps at edges, or uninsulated concrete slabs dump heat downward, especially near external walls. Add perimeter insulation and repair voids.
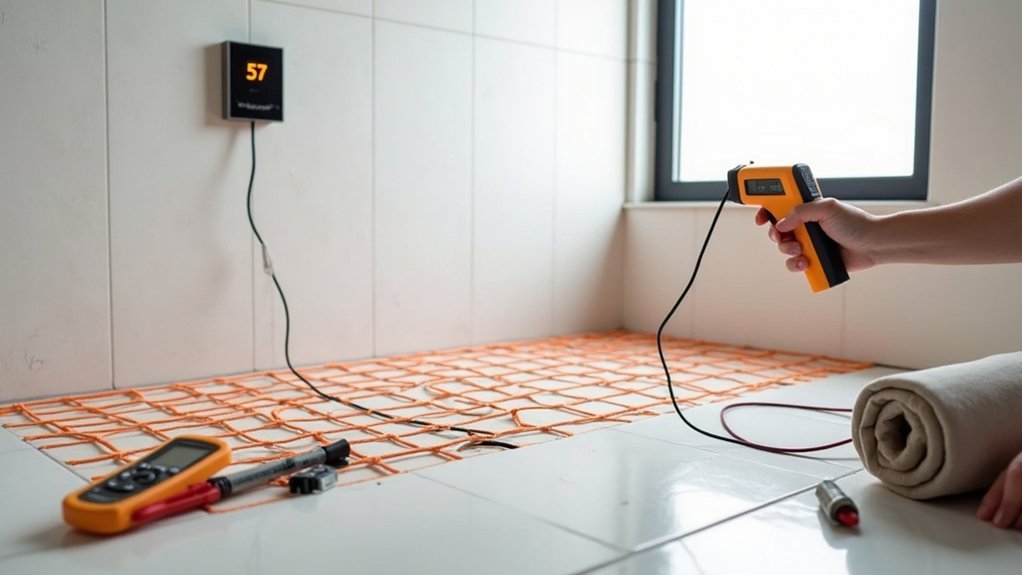
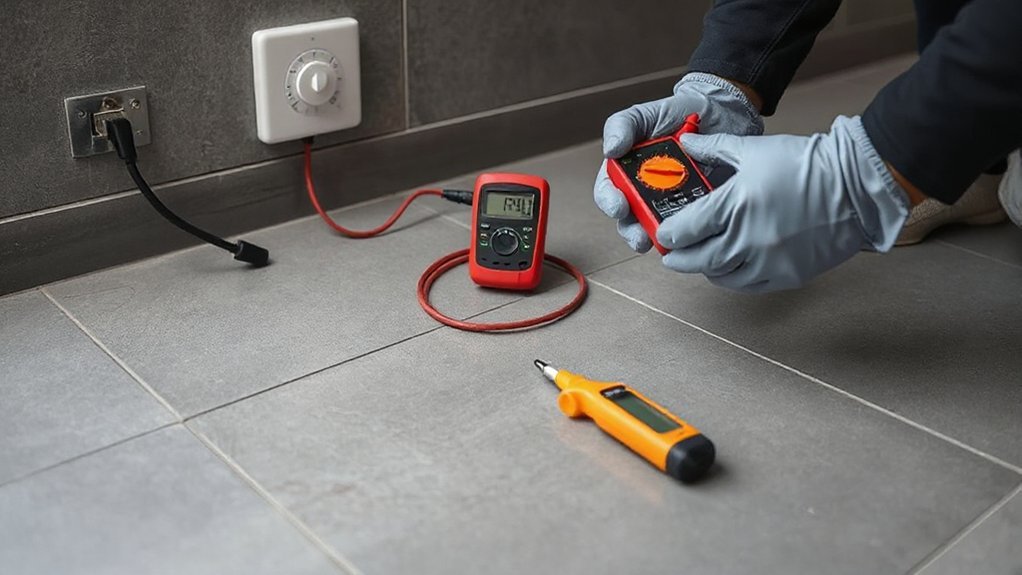
How to Test Electric UFH With a Multimeter (Ohms)
Uneven warmth can come from layout and insulation, but you’ll confirm whether the heating element itself is healthy by checking its resistance with a multimeter. Isolate power at the consumer unit, then remove the thermostat faceplate to access the UFH cold tails (don’t disturb the floor). Set the meter to Ω, place probes on live and neutral, and compare the reading to the mat or cable label (or install manual). A small tolerance is normal; a wildly higher or infinite reading suggests a break, while near-zero suggests a short. Record results for Energy efficiency troubleshooting and to verify installation guidelines compliance.
- Consumer unit locked off, tester in hand
- Thermostat back box with labelled conductors
- Multimeter probes steady on cold-tail terminals
- Resistance value matched against the product datasheet
When to Call an Electrician for Electric UFH Faults
If your resistance test doesn’t match the manufacturer’s tolerance, or the UFH still won’t warm after you’ve confirmed the thermostat settings and supply, call a qualified electrician to fault-find safely. In the UK, any work on fixed wiring, RCDs, and fused spurs should be done by someone competent and, where required, Part P compliant. You should also call if the RCD trips, you smell overheating, the thermostat display resets, or you suspect a damaged floor sensor or cable (common after floor screws or tile removal). An electrician can insulation-resistance test with a megger, check earth continuity, verify correct breaker sizing, and confirm the load matches the controller rating. Proper diagnosis restores Energy efficiency and User comfort without risking electric shock or further cable damage.
Frequently Asked Questions
Why Is My Electric Underfloor Heating Expensive to Run?
Your electric underfloor heating’s expensive because high Energy consumption occurs with poor insulation, long run-times, and high tariffs, reducing Cost efficiency. You’ll cut bills by improving insulation, using programmable thermostats, zoning rooms, and switching to off-peak UK tariffs.
Can Electric Underfloor Heating Be Repaired Without Lifting the Entire Floor?
Yes, you can often repair it without full floor lifting. You’ll use fault-finding, thermal imaging, and insulation-resistance tests to pinpoint breaks, then apply repair methods like splice kits or localised tile removal, UK-certified.
What Wattage per Square Metre Should My Electric Underfloor Heating Be?
You’ll typically need 100–150W/m² for electric underfloor heating in UK rooms; bathrooms often use 150–200W/m². Around 25% of heat can vanish through poor floors, so improve Insulation efficiency and check Thermostat calibration too.
Can Air Pockets or Voids Under Tiles Prevent Proper Underfloor Heating?
Yes, air pockets and voids can stop proper heat transfer, creating cold spots and overheating risk. You should check for tile adhesion issues, insulation gaps, and hollow tiles, then re-bed with suitable UK-rated adhesive.
Will Underfloor Heating Interfere With Wi‑Fi, Alarms, or Other Electronics?
Like a quiet radiator, your underfloor heating shouldn’t cause Wi Fi interference or alarm disruption. You’ll avoid issues by fitting screened cables, keeping thermostat wiring tidy, and checking UK EMC compliance and earthing.
Conclusion
If your electric underfloor heating’s still sulking, don’t blame “British weather” and call it a day. You’ve checked power, schedule, mode, and that the thermostat’s actually demanding heat. You’ve reset the MCB/RCD, confirmed floor coverings aren’t acting like a duvet, and verified spacing and insulation. Now get clinical: measure resistance (ohms) and compare to the mat’s spec. If readings are off or faults persist, call a qualified electrician.