You’ll see the biggest exterior improvements by tackling what’s visible from the pavement: pressure-wash walls, paving, gutters, and frames, then re-sand block paving once dry. Fix cracks, blown render, failed mastic, and any rot before you paint, and use breathable masonry paint and microporous timber coatings for UK weather. Update your front door hardware, house numbers, and warm-white LED lighting. Finish with crisp edging, mulch, and evergreen structure. Next, you can prioritise higher-ROI upgrades.
Key Takeaways
- Power-wash walls, paving, gutters, and windows, then re-sand block paving joints for an instant, cleaner-looking exterior.
- Repair cracks, rot, and failed sealant, then prime and repaint with breathable, weatherproof coatings for a fresh, durable finish.
- Upgrade the front door with a bold colour, aligned hinges, new weatherstrips, and matching hardware to boost kerb appeal and security.
- Replace exterior lighting with warm-white, weather-rated LEDs and PIR sensors, and add high-contrast house numbers for safer, clearer access.
- Tidy landscaping by edging paths, trimming shrubs, and refreshing beds or gravel to create a neat, intentional approach to the entrance.
Exterior Improvements With the Best Resale ROI
A well-chosen exterior upgrade can add tangible value at sale time because it’s the first thing buyers and valuers see. Prioritise roof maintenance, guttering, and crisp exterior paint; these signal a dry, cared-for home in the UK climate.
Upgrade the front door with secure, modern locks and draught sealing to hint at lower running costs and better security.
Use durable Exterior materials that photograph well: repaired brickwork, tidy pointing, clean render, and smart boundary fencing.
Improve lighting with PIR LEDs to lift evening kerb appeal and safety.
Follow Landscaping trends that stay low-maintenance: defined paths, edged borders, evergreen structure, and a neat lawn or gravel with planting pockets.
Keep bins screened and drives weed-free to protect first impressions.
Plan Your Curb Appeal (Budget, DIY, Priorities)
Before you price up paint or paving, set a clear curb-appeal budget and decide what you’ll DIY versus leave to a tradesperson. Then rank each job by the impact it has from the pavement.
Start with budget planning: price materials, tool hire, skips, and a 10–15% contingency for surprises common in UK homes.
Check if you’ll need planning permission, listed-building consent, or a dropped-kerb application, and cost the fees.
Prioritise fixes buyers spot first: tired front doors, broken gutters, cracked paths, sagging fences, and poor exterior lighting.
Use DIY tips for low-risk tasks like sanding, priming, and fitting house numbers, but pay for qualified work on electrics, roofing, and structural masonry.
Get three quotes, confirm lead times, and schedule jobs to avoid rework.
Start With Cleaning and Pressure Washing
Although paint and planting get the glory, you’ll see the fastest curb-appeal lift by cleaning everything first. Start at the top: clear gutters, sweep soffits, and wash fascias so grime doesn’t run onto freshly cleaned areas.
Then tackle walls, paving, and drives with a methodical approach.
For Power washing, choose the right nozzle and keep the lance moving to avoid etching brick, stone, or concrete. Pre-wet nearby planting, apply a suitable detergent for algae, and rinse thoroughly.
On block paving, focus on joints and edges, then brush in fresh kiln-dried sand once it’s fully dry.
For surface cleaning, use a rotary patio head on large slabs to reduce streaks and overspray.
Finish by washing windows, doors, and exterior lights.
Fix Cracks, Rot, and Peeling Paint First
Once you’ve finished cleaning, you need to inspect every elevation for hairline cracks, blown render, and failed sealant that could be masking structural movement or water ingress.
You should cut out rot and any soft timber around fascias, soffits, sills, and window frames, then splice in sound wood or use a suitable exterior repair system.
Don’t paint over failure—scrape back to a firm edge, sand smooth, prime bare patches, and repaint with a compatible exterior system so the finish actually lasts in the UK weather.
Identify Hidden Structural Damage
Even if your exterior looks sound at a glance, small defects often hide structural problems that will worsen fast in the UK’s wet, freeze–thaw conditions. Before you repaint or seal anything, run Hidden inspections from ground level to eaves: look for stepped cracking in brickwork, bulging render, open mortar joints, and hairline splits around lintels and sills.
Check whether doors or windows bind, which can signal movement. After heavy rain, trace damp staining and salt deposits that may indicate failed pointing or flashing. Use a torch to scan soffits, bargeboards, and fascia edges for gaps where water tracks behind finishes.
If you spot widening cracks or displaced masonry, book a structural assessment and stabilise the cause first.
Repair Rot And Soft Wood
Before you touch a brush, you need to cut out and repair any rot or soft timber, because paint and sealant won’t stop decay that’s already feeding on damp.
Probe sills, fascias, bargeboards, door frames, and window cills with a bradawl; if it sinks easily, you’ve got compromised fibres.
Trace the moisture source first—failed gutters, cracked pointing, or poor ground clearance—then dry the area.
Remove all friable wood back to sound material, keeping edges square for a tight splice.
Apply a boron-based rot treatment to kill remaining spores, then consolidate and rebuild with a quality epoxy wood repair system or new treated timber.
Prime cut ends and seal joints to prevent recurrence.
Scrape And Repaint Properly
Although fresh paint can transform tired joinery, it won’t stay put if you lay it over cracked caulk, lingering rot repairs, or flaking old coatings. Start by washing down with sugar soap, then scrape paint back to a firm edge using a sharp scraper and a tungsten blade for stubborn gloss. Feather the margins with 120–180 grit, then fill splits and nail holes with exterior filler and re-caulk open joints.
Spot-prime bare timber and repaired areas with an exterior wood primer, then undercoat. Finish with two topcoats suited to the substrate and UK weather, keeping to the manufacturer’s recoat times for proper repainting.
- Wash and dry thoroughly
- Scrape loose coatings to sound paint
- Sand edges smooth
- Prime exposed wood and repairs
- Apply undercoat and two topcoats
Refresh Curb Appeal With Exterior Paint
When your home’s exterior starts to look tired, a fresh coat of paint delivers one of the quickest, most cost-effective curb-appeal upgrades. Choose colour palettes that suit your brick, stone, or render and your local streetscape. Muted heritage tones work well on period homes, while crisp neutrals sharpen modern façades. Test patches in morning and late-afternoon light to avoid surprises.
Specify exterior-grade systems suited to the substrate and UK weather: breathable masonry paint for render, microporous coatings for timber, and rust-inhibiting primers for metalwork. Match paint finishes to function—matt hides uneven walls, satin resists grime on sills, and gloss sheds rain on timber trim.
Keep lines crisp with careful masking, and repaint gutters and bargeboards for a cohesive look.
Upgrade Your Front Door for Instant Impact
Swap in a statement front door to set the tone instantly, whether you choose painted timber, composite, or a modern glazed design that suits your home’s period and proportions.
Update the hardware with solid handles, a secure letter plate, and a British Standard night latch or multi-point lock, keeping finishes consistent across the set.
Finish it properly with weatherproof paint or stain, crisp seals, and a tidy threshold so it looks sharp and performs well in UK weather.
Choose A Statement Door
One bold front door can transform your home’s kerb appeal in an afternoon. Choose a design that suits your property’s era and proportions, then commit to a confident colour that reads well in UK daylight.
A quality composite or timber door improves security and insulation, while Decorative glass adds character without sacrificing privacy if you pick obscured patterns. Keep the surround simple so the door stays the focal point, and plan your finish to withstand rain and grit.
A well-chosen style also sets expectations for the rest of your exterior, from planting to lighting, without extra building work.
- Period-appropriate panels for terraces and semis
- Contemporary flush slab for new-builds
- Decorative glass in frosted or leaded designs
- Deep heritage shades: navy, racing green, oxblood
- Balanced proportions with statement hardware
Update Hardware And Finish
Even if you keep the door itself, upgraded hardware and a fresh finish can make the entrance look sharper, newer, and more secure in a single weekend.
Start with Hardware updates: swap tired handles, letterplates, knockers, and hinges for matching brushed stainless, satin brass, or matte black sets rated for UK weather. Fit a BS 8621 or TS007 3-star cylinder and a solid escutcheon for real security, not just shine.
Check alignment, lubricate hinges, and replace perished weatherstrips to stop draughts.
Then tackle finish enhancements: degrease, sand, and spot-prime bare timber or rust, then use an exterior-grade undercoat and topcoat, or a UV-stable front-door paint. Seal glazing beads and refresh the threshold for a clean close.
Replace Outdoor Lighting for Safety and Style
Because outdoor lighting does more than brighten a path, replacing tired fittings is one of the quickest ways to boost both safety and kerb appeal. Upgrade to efficient LEDs and you’ll cut running costs while improving visibility around steps, gates, and driveways.
Choose weather-rated fittings (IP65 where exposed) and position them to reduce glare for neighbours and road users, in line with common UK planning expectations. Use warm-white colour temperatures to keep the façade flattering, then layer in garden lighting to define borders and seating areas.
For pathway illumination, low-level bollards or recessed deck lights guide feet without harsh hotspots.
- PIR sensors for entrances and side returns
- Dusk-to-dawn photocells for consistency
- Shielded downlights to limit light spill
- Stainless or powder-coated finishes for durability
- Professional installation to meet Part P compliance
Upgrade House Numbers and the Mailbox
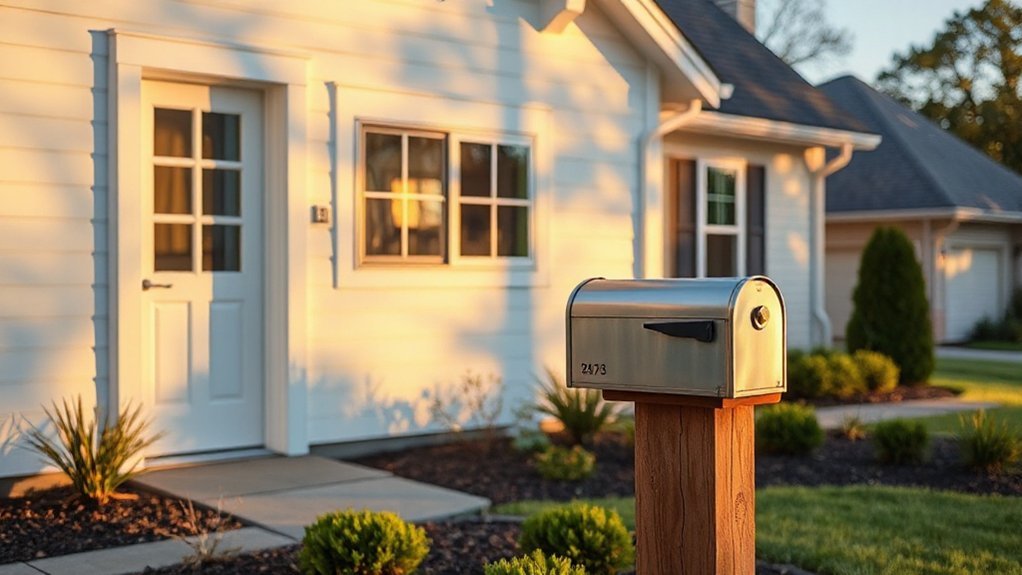
Make your property easy to find by fitting high-contrast house numbers that stand out against brick, render, or cladding in all weathers.
If your frontage is dim, you’ll get better visibility with an illuminated address plaque placed where it’s readable from the pavement and the road.
Finish the update by coordinating the mailbox style and finish with your door furniture and exterior lighting so the frontage looks intentional, not patched together.
Choose High-Contrast Numbers
When did you last check whether your house number stands out clearly from the pavement? In the UK, clear contrast signage improves number visibility for deliveries, visitors, and emergency services, especially on narrow lanes and shared drives.
You can upgrade quickly by choosing bolder colours and clean, legible type that reads at a glance.
- Pick dark numbers on pale render, or pale numbers on dark brick
- Use sans-serif fonts with wide strokes, not ornate scripts
- Size numbers to suit viewing distance; go larger for set-back homes
- Mount on a flat, uncluttered background panel for crisp edges
- Keep the mailbox face consistent, matching finish and placement
Check sightlines from the kerb and the driver’s seat, then adjust height and spacing for instant recognition.
Install Illuminated Address Plaques
Although high-contrast numbers do most of the heavy lifting in daylight, an illuminated address plaque keeps your house clearly identifiable after dark and in poor weather—exactly when couriers, taxis, and emergency services struggle most on UK streets.
Choose a weather-rated unit (IP65 or better) with a sealed diffuser so rain and road grime don’t dull the digits. Mount it at eye level near the main entrance, angled to face the pavement, not your driveway.
Go for warm-white LEDs for readability without glare, and check brightness won’t spill into neighbours’ windows. If you’d rather avoid wiring, pick a solar model with a replaceable battery and a dusk sensor.
Treat it as functional outdoor signage: simple font, ample spacing, and your full property number visible from the kerb.
Coordinate Mailbox Style
Because your postie and visitors spot the mailbox and the house numbers in the same glance, you’ll get a cleaner frontage and better wayfinding if you coordinate them as one set rather than two afterthoughts. Prioritise mailbox coordination by matching materials, colours, and typography, and you’ll signal quality from the pavement.
Choose finishes that suit UK weather: powder-coated steel, marine-grade stainless, or painted timber with proper sealing. Keep placement logical: eye level, lit if possible, and clear of planting. Guarantee Royal Mail practicality too—secure slot sizing, accessible opening, and a sensible approach to privacy.
- Match typeface between numbers and mailbox
- Align colours with door furniture
- Use one metal finish throughout
- Size numbers for 10–15m legibility
- Mount both on the same visual axis
Style consistency reduces visual clutter and prevents missed deliveries.
Make Windows and Trim Look Brand New
Even if your paintwork looks decent from the pavement, tired windows and trim can make the whole exterior feel neglected. Start with proper window maintenance: wash frames, clear trickle vents, and scrape off loose paint.
Rake out perished putty and cracked sealant, then re-bed with exterior-grade glazing compound and a paintable frame sealant to stop draughts and water ingress. If you’ve got uPVC, use a specialist restorer and replace yellowed gaskets.
For timber, treat bare patches with knotting solution, prime, and apply two topcoats for UK weather.
Trim restoration matters just as much: sand back flaking fascias and bargeboards, repair rot with epoxy filler, then repaint with a microporous system for longevity.
Landscaping Upgrades That Look Expensive (Cheaply)
When your front garden looks deliberate and well-kept, the whole property reads as higher value before anyone reaches the door. You don’t need a landscaper; you need consistency, tidy structure, and a few high-impact swaps that suit the UK climate and light levels.
Keep planting restrained, repeat materials, and maintain sharp presentation through every season.
- Swap tired lawn patches for Artificial turf in shaded or high-wear spots
- Top beds with decorative mulch to suppress weeds and unify colour
- Group pots in odd numbers; choose matching terracotta or matte black
- Add evergreen structure with clipped box alternatives like Ilex crenata
- Refresh gravel and remove moss; keep drains, kerbs, and soil lines clean
Water in, cut back, and weed little-and-often so it stays premium-looking.
Add a New Walkway or Crisp Edging

Tidy planting and fresh mulch set the scene, but a clean walkway or sharp edging gives your front garden the definition buyers notice first.
Replace tired slabs with level pavers or gravel over a compacted sub-base, and you’ll stop puddling and wobbles that scream neglect.
Keep garden pathways at least 900mm wide so two people can pass, and run them to the door in a direct, logical line.
Use a simple soldier course, setts, or steel edging to hold materials in place and prevent creep into lawns.
For beds, cut a crisp spade edge or install decorative borders in brick or kerb stones.
Finish by brushing kiln-dried sand into joints and sweeping surfaces clean.
Update Siding and Trim for a Modern Look
Although paint and planting help, nothing updates kerb appeal faster than refreshed siding and sharp trim that frames the whole elevation. If your boards are warped, stained, or patched, you’ll see it from the pavement. Choose materials that suit UK weather: fibre-cement for stable lines, treated timber for character, or quality uPVC for low upkeep.
Prioritise Siding durability with proper ventilation, insect-proof detailing, and manufacturer-backed finishes. Then refine Trim design: consistent reveals, crisp corners, and proportions that match your windows and soffits. Keep colours simple—heritage neutrals or modern contrasts—and you’ll make the façade look intentional, not piecemeal.
- Repair rot and replace failed fixings
- Wash down and treat algae
- Upgrade cladding for straighter profiles
- Add wider corner boards and window surrounds
- Seal joints with paintable mastic
Big-Ticket Exterior Improvements: Roof and Garage Door
Because buyers clock the roofline and garage door before they register your front door, these two upgrades often deliver the biggest jump in kerb appeal—and they protect the structure in the process.
If your roof shows slipped tiles, moss, or sagging, you’ll want a survey and clear quotes. In the UK, replacement typically means concrete or clay tiles, slate, or modern fibre-cement. Your material options affect lifespan, weight, and planning constraints in conservation areas. Specify breathable underlay, upgraded flashing, and proper ventilation to prevent damp.
For the garage door, choose insulated sectional or roller designs with quality seals. You’ll boost security, cut draughts, and improve energy efficiency, especially if the garage adjoins the house.
Finish with colour-matched gutters and soffits for a cohesive elevation.
Frequently Asked Questions
Do I Need Permits for Exterior Improvements Like Doors, Roofs, or Walkways?
Yes, you’ll often need permits for doors, roofs, or walkways, especially if you alter structure or drainage. Check your local council’s Permit requirements and Design restrictions, plus listed-building or conservation-area rules, before starting.
What Exterior Changes Are Allowed Under HOA Rules in My Neighborhood?
You’re allowed only what your HOA’s covenants approve—because nothing says “freedom” like forms. Typically, you can tweak Garden landscaping and add compliant Exterior lighting, but you’ll need written consent and follow uniformity rules.
Which Exterior Upgrades Qualify for Energy-Efficiency Tax Credits or Rebates?
You’ll typically qualify for UK grants or tax relief when you install solar panels and upgrade to energy efficient windows, plus heat pumps, insulation, and smart controls—provided products meet MCS/PAS standards and you keep invoices.
How Do Exterior Improvements Impact Homeowners Insurance Premiums and Coverage?
Exterior improvements can lower your premium if you reduce risk; you’ll often qualify for Insurance discounts after roof, window, or security upgrades. Insurers may require Coverage adjustments, increasing rebuild costs and limiting non-compliant materials.
When Is the Best Season to Schedule Exterior Work for Fastest Completion?
Book most exterior work in late spring to early autumn for fastest completion; you’ll face fewer delays. Prioritise season planning and weather considerations: avoid winter rain and high winds, and secure trades early.
Conclusion
You’ve scrubbed the grime, chased out rot, sealed the cracks, and laid down paint that makes the façade look newly minted. Your borders sit sharp, the path reads straight, and the trim finally matches the decade. But the real payoff waits at the kerb: step back and watch the whole frontage click into place—clean lines, calm colour, tidy planting. Then you notice it: the roofline and garage door. Get those right, and buyers won’t just look—they’ll stop.