Start with a 10-minute walkthrough and flag dated pulls, yellow bulbs, and cord clutter. You’ll get big impact in an hour by swapping to matte black, brushed nickel, or warm brass hardware, adding 2700K–3000K LEDs, and installing a dimmer. Paint walls a modern neutral and pop trim brighter for crisp contrast, then caulk for shadow-free lines. Style surfaces using the rule of three, keep only the top 30%, and hide cables with paintable raceways. Keep going for smarter storage upgrades.
Key Takeaways
- Do a 10-minute walkthrough, then prioritize one-hour upgrades like new pulls, LED strips, and smart dimmers for quick modernization.
- Paint with modern neutrals and brighter trim, and caulk sharp lines to create clean, shadow-free edges.
- Swap dated hardware and faucets for matte black, brushed nickel, or warm brass, keeping finishes consistent within each room.
- Replace yellow bulbs with 2700K–3000K LEDs, add dimmers, and choose flush or slim fixtures for a cleaner ceiling line.
- Edit surfaces to the top 30%, style in groups of three with trays, and hide cables using grommets, raceways, and labeled bins.
Pick Your Modern DIY Wins (Time, Cost, Tools)

Before you start swapping fixtures or painting anything, pick a few “modern wins” that match your time, budget, and tool comfort level. Do a 10‑minute walkthrough and list what dates the space: clunky hardware, tangled cords, mismatched bulbs, crowded counters, or tired window treatments.
If you’ve got one hour, focus on budget friendly upgrades like swapping cabinet pulls, adding a slimline LED under-cabinet strip, or installing a smart dimmer (no neutral? choose a compatible model). With a half day, mount floating shelves, add a minimalist rail for towels, or hide router and TV cables with paintable raceways. Keep quick transformation tips simple: measure twice, buy one extra, and test finishes in your lighting before committing.
Modernize Fast With Paint, Doors, and Trim
While new furniture can help, paint and trim work change a room’s vibe faster—and for less—than almost any other DIY. Start by tightening your Color schemes: warm whites, soft greiges, or muted greens read current, especially with crisp ceilings and consistent sheen.
- Paint walls in a modern neutral, then use a slightly brighter trim color for clean contrast.
- Upgrade hollow-core doors with a flat-panel look, or paint existing doors satin black for definition.
- Swap dated profiles for simple, squared casing and baseboards; caulk seams for shadow-free lines.
- Nail Material selection: MDF for budget-straight trim, primed pine for durability, and a washable enamel finish.
Mask carefully, sand lightly, and keep lines sharp for a built-in feel.
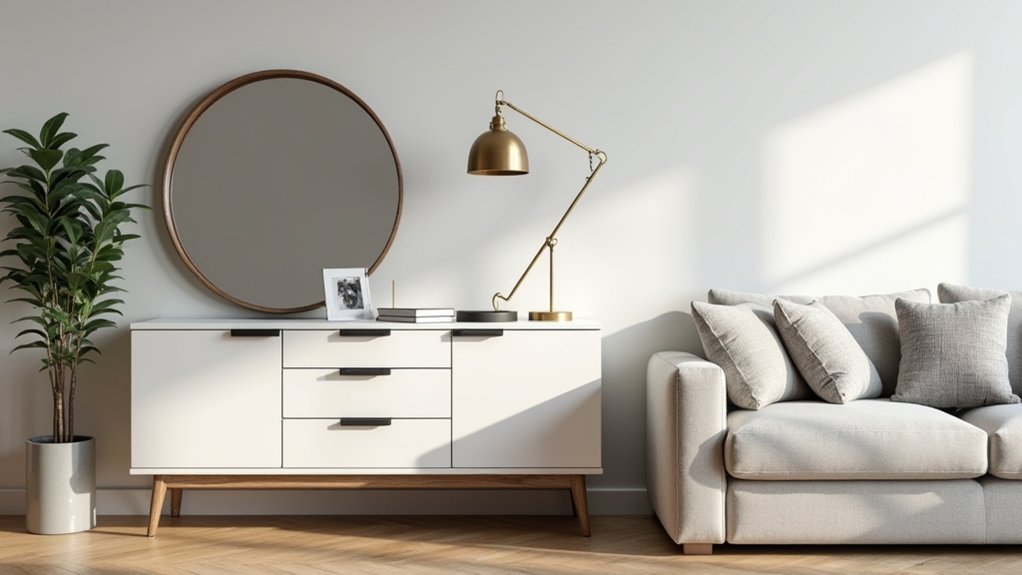
Swap Hardware and Faucets for Instant Polish
Two quick swaps—hardware and faucets—can make your kitchen or bath read instantly more modern without touching layouts or tile. Start by replacing ornate hardware with clean pulls or slim knobs in matte black, brushed nickel, or warm brass. Stick to one finish per room for a calmer, intentional look, and measure existing hole spacing so new pieces fit without patching. If you’ve got mixed eras, retire mismatched Vintage fixtures and choose a single faucet style: squared-off for contemporary, gently arched for updated-traditional. Upgrade to a pull-down kitchen faucet or a single-handle bath faucet for a streamlined profile and easier use. Don’t forget matching accessories like towel bars and toilet levers for a cohesive, polished finish.
Update Lighting and Bulbs for a Cleaner Look
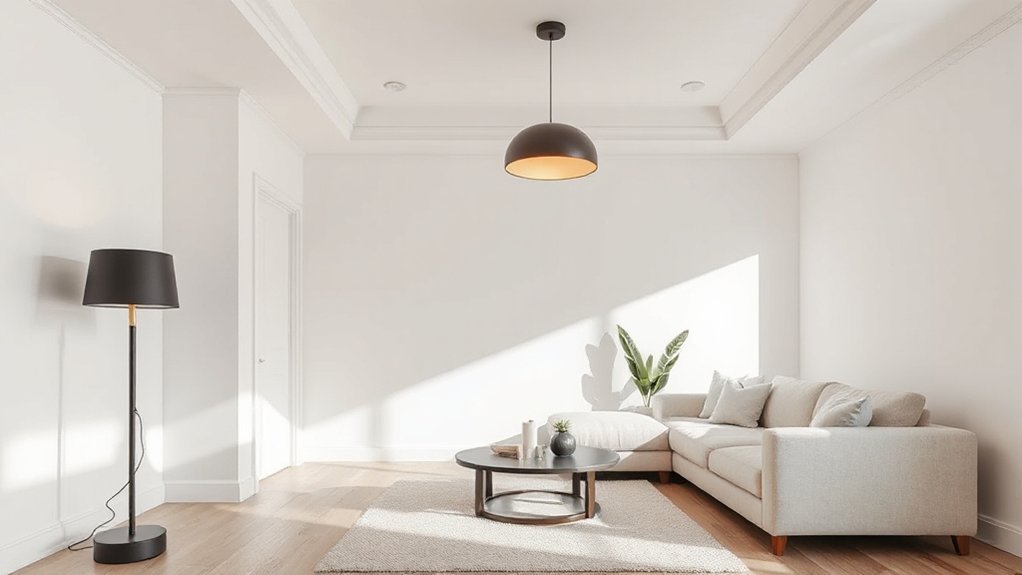
Once you’ve streamlined hardware and faucets, lighting becomes the next fast upgrade that makes a room feel sharper and more current. Swap dated yellow bulbs and mismatched fixtures for a consistent, clean glow that flatters walls and finishes.
- Choose LED bulbs in 2700K–3000K for warm modern, or 3500K for crisp task areas.
- Match bulb temps in the same sightline (open kitchen/living) so the space doesn’t feel patchy.
- Add dimmers or Smart lighting to shift brightness for mornings, work time, and evenings without changing fixtures.
- Replace cloudy domes with simple flush mounts or slim pendants, and use clear or frosted shades to cut glare.
You’ll notice fewer shadows, cleaner lines, and a more intentional, updated vibe.
Style Shelves and Surfaces to Look Curated
To make your shelves and surfaces feel intentionally modern, group items in threes so each vignette reads clean and styled. Mix heights and textures—stack a couple of books, add a sculptural object, and finish with something organic like a matte ceramic or a small plant. Then edit hard and leave negative space so every piece gets room to stand out instead of blending into clutter.
Use The Rule Of Three
If your shelves and side tables keep looking cluttered no matter how much you tidy, the rule of three fixes it fast. Group items in threes so every surface reads intentional, not accidental. You’ll edit faster, your Decorative accents will feel curated, and your Color schemes will look more modern because repeats feel planned.
- Pick one “anchor” piece you already own, like a vase or framed print.
- Add two supporting items that relate by theme (travel, ceramics, books) and keep them visually calm.
- Keep one small negative-space gap around the trio so it can breathe.
- Repeat the same trio logic across the room, not on every shelf, to avoid a staged look.
Mix Heights And Textures
While a matching set can feel flat, mixing heights and textures makes shelves and side tables look intentional and modern. Start with one tall anchor, like a matte ceramic vase or sculptural lamp, then step down with medium pieces—framed art, a lidded box, or a stacked book pair.
Bring in varied materials to keep it current: ribbed glass, brushed brass, raw wood, and stone. Add Layered textiles on nearby surfaces—linen coasters, a nubby runner, or a small woven tray—to soften hard edges without looking fussy. Vary silhouettes too: round bowl, angular bookends, and a curved candle. Repeat one finish twice for cohesion, but swap textures so the setup feels curated, not showroom-staged. Keep items touchable and useful.
Edit And Add Negative Space
Mixing heights and textures gives you visual rhythm, but the setup won’t read modern until you edit it down and let some space show. Treat shelves and surfaces like a gallery wall: fewer, stronger pieces, plus intentional negative space for visual breathing.
- Pull everything off, then put back only your “top 30%” (best scale, best finish, best story).
- Group in odd numbers, but cap each vignette at 3–5 items so it doesn’t look fussy.
- Leave at least one open span per shelf; a clean gap looks as designed as a sculpture.
- Add one quiet anchor (tray, bowl, or book stack) to corral small pieces and reduce clutter.
Step back, snap a photo, and remove one more item.
Hide Clutter With Simple DIY Storage
To keep your space feeling modern, you can hide everyday clutter with DIY storage that looks intentional. Build slim storage nooks into dead zones—under stairs, beside a fireplace, or between studs—then finish them flush with the wall for a clean, built-in vibe. Add hidden multifunction furniture like an ottoman with lift-top storage or a bench with pull-out bins, and you’ll keep surfaces clear without sacrificing style.
Built-In Storage Nooks
One built-in storage nook can instantly make your home feel cleaner and more modern by pulling everyday clutter off surfaces and into a spot that looks intentional. You don’t need a full remodel—just smart Built in storage that matches your routines and finishes. Start with nook customization: measure the dead zone (under stairs, hall ends, beside a fireplace), then frame a shallow cavity between studs or build a boxed surround.
- Add a slim bench top with a durable edge band for a crisp, modern line.
- Install vertical dividers for mail, tablets, and water bottles you grab daily.
- Use push-latch doors or flat-front drawers to keep the face seamless.
- Paint the interior one shade darker for depth and a designer look.
Finish with warm LED strip lighting and matte black hardware.
Hidden Multifunction Furniture
Built-ins clean up the “always-out” stuff, but hidden multifunction furniture tackles the clutter that moves around with you—throws, remotes, chargers, toys, and extra pillows. Start with a DIY lift-top coffee table: add a piano hinge, soft-close lid supports, and a shallow tray for cords. Upgrade an ottoman by stapling on a hinged plywood seat and lining the cavity with felt, so storage stays quiet and polished. In the bedroom, hack a platform bed with slide-out bins on casters; match drawer fronts to your baseboard for a seamless look. Choose multi purpose furniture with slim legs and matte hardware to keep the room feeling airy. Label bins, route charging cables through grommets, and you’ll hide mess instantly with hidden storage.
Frequently Asked Questions
Do I Need Permits for DIY Lighting or Plumbing Updates?
You often do need permits for DIY lighting or plumbing updates—especially new circuits, panel work, or moving supply/drain lines. Check local plumbing regulations and prioritize Electrical safety. Call your inspector; small swaps may not.
How Can I Modernize a Rental Without Risking My Security Deposit?
Like swapping sneakers before a meeting, you’ll modernize safely by choosing rent friendly decor and temporary wall treatments: peel-and-stick wallpaper, removable hooks, plug-in sconces. You’ll document move-in photos, and patch tiny holes before you leave.
What Modern Upgrades Add the Most Resale Value?
You’ll add the most resale value with kitchen/bath refreshes, fresh neutral paint, updated lighting, and curb appeal. Prioritize energy efficiency—new windows, insulation, efficient HVAC—and smart home upgrades like thermostats, locks, and lighting.
How Do I Choose a Modern Style That Fits My Home’s Architecture?
Start with your home’s era and key features, then layer modern elements that keep architectural harmony and style consistency. Match window proportions, rooflines, and materials; update lighting, hardware, and colors; avoid clashing trims.
Which DIY Changes Are Safest for Beginners Living With Kids or Pets?
Choose low-risk swaps: peel-and-stick backsplash, cordless shades, and furniture anchors. Follow Childproofing tips: corner guards, cabinet latches. Use pet safe materials: low-VOC paint, washable rugs. Keep tools locked, cures ventilated.
Conclusion
You don’t need a full renovation to get a modern feel—you just need a few high-impact DIY wins. Start with crisp paint and cleaner trim lines, then swap dated knobs, faucets, and switch plates for cohesive finishes. Refresh lighting with warm LEDs and simple fixtures for instant clarity. Style shelves with breathing room, not clutter. And remember: the National Association of REALTORS reports minor cosmetic updates can recoup around 70% of costs—so your weekend upgrades can look sharp and pay off.