Start by identifying your floor finish and damage: test a hidden spot with white spirit (wax) and methylated spirit (shellac), then check under raking light and use your fingernail to judge depth. Choose a matching treatment—wax, hardwax oil, or lacquer—based on what’s already there and how hard the area’s used. Clear the room, vacuum, mop with a pH-neutral cleaner, spot-sand, and dry fully. Apply thin coats, wipe excess, and buff or recoat. Keep going to pick up fixes for stains, squeaks, and patches.
Key Takeaways
- Identify the wood type and existing finish using solvent tests, and inspect damage under raking light to choose the right treatment.
- Decide between cleaning and refreshing, spot repairs, or a full recoat based on whether scratches penetrate beyond the finish.
- Prepare properly: clear the room, punch down nails, vacuum thoroughly, then clean with a pH-neutral solution without flooding gaps.
- Apply the correct product thinly and evenly: oil or wax buffed after hazing, or varnish in 2–3 coats with light sanding between.
- Fix causes and prevent repeat damage by addressing squeaks and stains, adding felt pads, and maintaining indoor humidity around 45–60%.
Identify Your Floor Finish and Main Damage
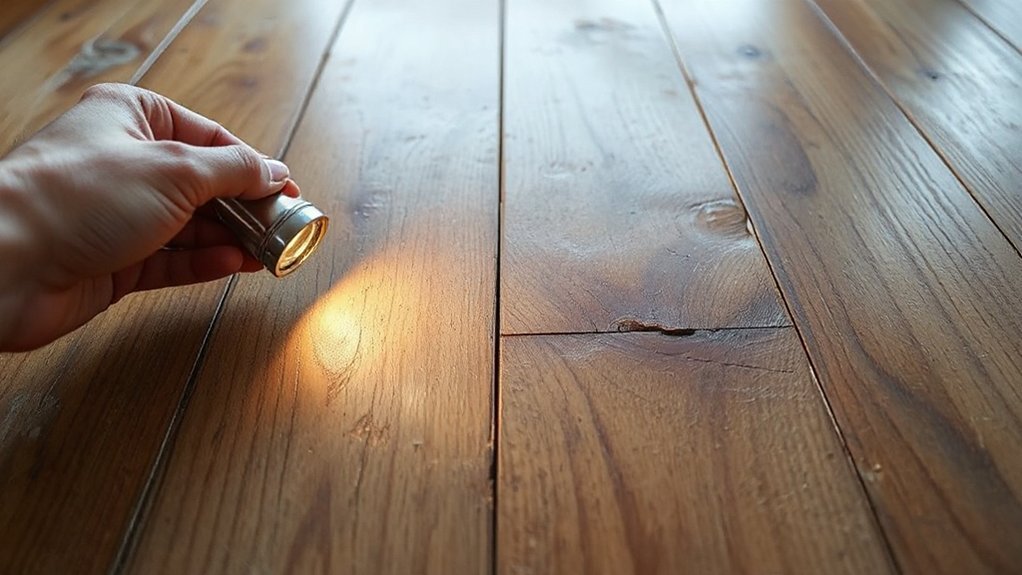
Before you reach for sandpaper or polish, check what finish you’re dealing with and pinpoint the main type of damage. First, note your floorboard materials: solid timber, engineered boards, or reclaimed pine all react differently to abrasion and moisture. Next, do finish identification: wipe a hidden spot with white spirit; if it softens, you’ve likely got wax. Try methylated spirit; tackiness suggests shellac. If neither affects it, you’re probably seeing lacquer or oil. Then assess damage type under raking light: surface scuffs, dull patches, water marks, cupping, gaps, or deep scratches. Run a fingernail across marks; if it catches, damage goes beyond the finish. Finally, check for staining around nails and edges, and confirm any loose boards by listening for squeaks.
Choose a Wooden Floor Treatment That Fits
Where do you start once you’ve worked out the finish and the fault? First, match treatment to the existing coating: use compatible wax for waxed boards, hardwax oil for oiled boards, and a maintenance coat of lacquer only where the lacquer system allows it. Second, choose the level of repair: for light wear, use a refresher or re-oil; for deeper abrasion, plan a full recoat; for staining or patchiness, consider spot repairs only if you can blend edges cleanly. Third, factor in traffic and moisture: pick tougher finishes for halls and kitchens, and breathable finishes for older properties. Fourth, protect features: around Decorative inlays, use low-build products and fine brushes. For Historical restoration, prioritise reversible, traditional finishes and minimal colour change.
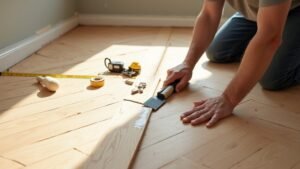
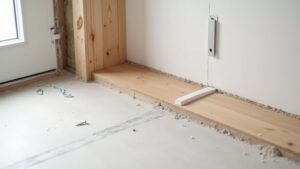
Clean and Prep Floorboards for Treatment
Once you’ve chosen the right treatment, strip the floor back to a clean, stable surface so the product can bond properly. Clear the room, lift thresholds, and punch down any proud nails. Sweep up grit first, then inspect boards for splits, cupping, and loose edges so you can stabilise them before finishing.
- Vacuum thoroughly with a soft brush head, working with the boards; use crevice tools along skirting and between gaps.
- Wash with a well-wrung microfibre mop and a pH-neutral cleaner; don’t flood joints or leave standing water.
- Spot-sand rough patches and old residue in the direction of the wood grain for Wood grain enhancement.
- Apply Dust removal techniques: vacuum again, wipe with a tack cloth, and let the floor dry fully before moving on.
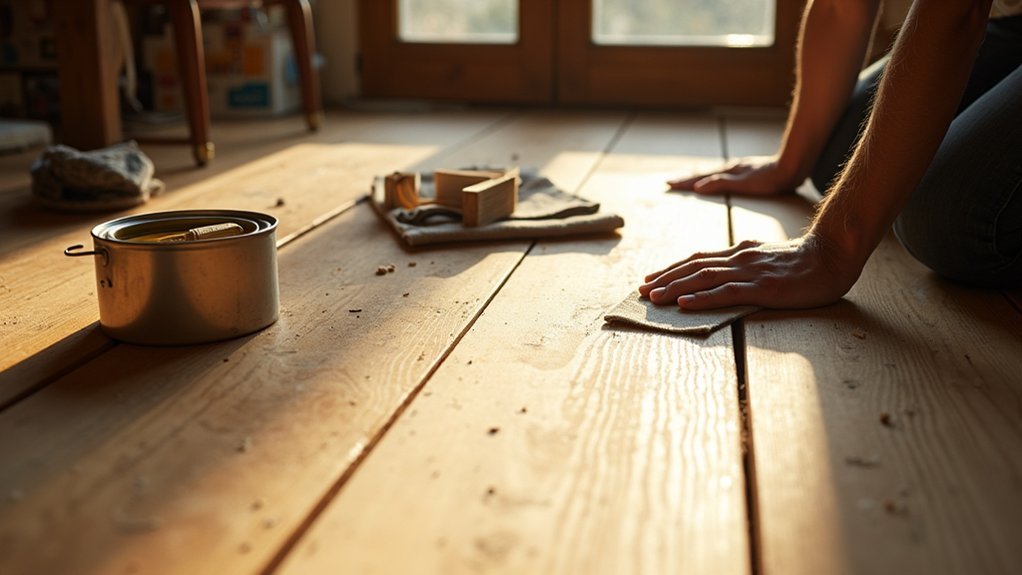
Treat Wooden Floorboards With Oil, Wax, or Varnish
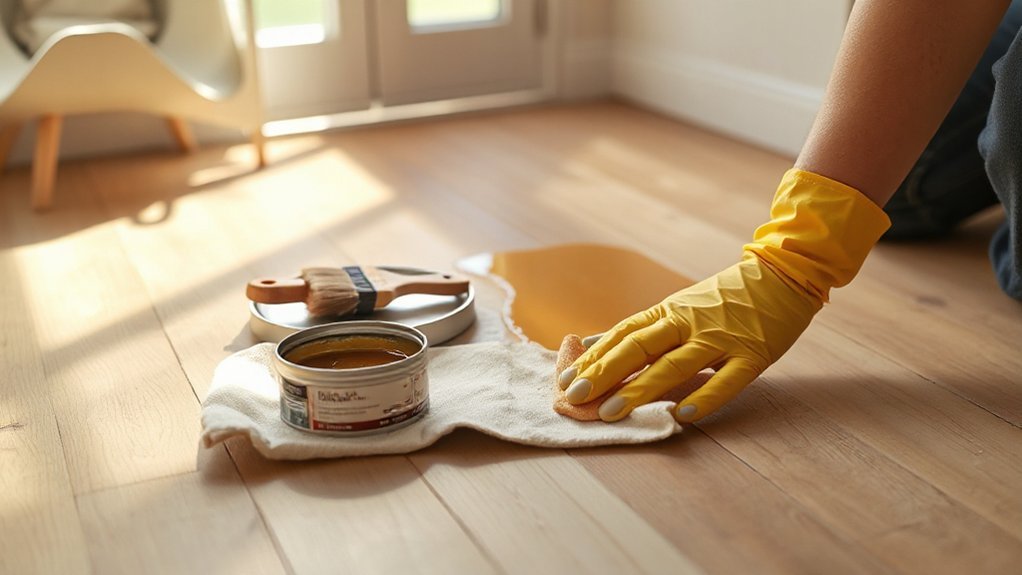
With the floor clean, stable, and fully dry, you can start applying your chosen finish—oil for a natural, breathable look, wax for a soft sheen, or varnish for maximum durability. First, choose Eco friendly finishes where possible and stir well; don’t shake. Next, test in an inconspicuous corner to confirm colour and Wood grain enhancement.
For oil, apply a thin coat with a pad or lint-free cloth, work with the grain, then wipe off excess; let it cure and add a second coat if needed. For wax, rub on sparingly, allow it to haze, then buff to an even sheen. For varnish, cut in edges with a brush, roll along the boards, keep a wet edge, and apply two to three coats, sanding lightly between coats.
Fix Stains, Squeaks, and Bare Patches (and Prevent Them)
Although a good finish protects timber, you’ll still need to tackle the odd stain, squeak, or bare patch quickly so the damage doesn’t spread. Work methodically and you’ll restore a clean, quiet surface and stop repeat problems.
- Lift stains: Blot spills, then wipe with a damp microfibre cloth and mild soap. For black water marks, rub oxalic acid solution sparingly, rinse, and dry fully.
- Silence squeaks: Locate the joist, then drive lost-head nails or screws through the board into the joist, countersink, and fill. Dust talc between boards for minor rub.
- Patch bare timber: Lightly sand, vacuum, then spot-apply matching oil/varnish in thin coats, feathering edges.
- Prevent recurrence: Use felt pads, practise Furniture rearrangement, and maintain Humidity control (45–60%) year-round.
Frequently Asked Questions
How Long Should I Wait Before Walking on Treated Floorboards?
Wait 24 hours before walking on treated floorboards; wait 72 hours for heavy use. 1) Check the wood finish label. 2) Make certain of good ventilation. 3) Confirm drying time by touch-test edges.
Can I Treat Floorboards During Humid or Cold Weather?
Yes, you can, but you shouldn’t. 1) Check Humidity concerns: keep RH 40–60%. 2) For Seasonal timing, choose mild, dry days. 3) Warm the room to 15–20°C. 4) Ventilate.
Are Wooden Floor Treatments Safe for Pets and Children?
Yes—like a seatbelt, you protect them by choosing wisely. 1) Pick Non toxic finishes and Child safe sealants. 2) Check UK VOC ratings. 3) Ventilate well. 4) Keep pets/kids off until fully cured.
What’s the Best Way to Dispose of Oily Rags Safely?
Lay oily rags flat outdoors to dry, away from heat, after any oil spill. Once stiff, bag them for council collection; or seal in a metal tin of water. Never bin damp rags—rag disposal risks fires.
How Often Should I Re-Treat Floorboards in High-Traffic Areas?
Re-treat high-traffic floorboards every 12–24 months; inspect quarterly to confirm treatment frequency. For wood floor maintenance: 1) clean thoroughly; 2) abrade lightly; 3) apply finish; 4) cure fully; 5) add mats.
Conclusion
Start by checking your floor’s finish and the damage, then pick the right oil, wax, or varnish. Next, clear the room, hoover, degrease, and lightly sand so the treatment bonds properly. Apply thin coats with the grain, let each coat cure, then buff or recoat as directed. Fix stains, tighten loose boards, and fill bare patches fast. Remember: up to 80% of floor wear comes from grit, so fit doormats and felt pads.