Check your laminate is stair-rated (AC4/AC5) and suitable for treads/risers, and use an anti-slip nosing that won’t create a trip lip (Part K). Strip old coverings, screw down any loose treads to stop squeaks, and level/fill defects. Measure every step, make a card template, then cut risers, treads, and nosings precisely. Install risers first from the bottom, then glue and fix each tread and nosing. Next you’ll see how to finish edges and landings neatly.
Key Takeaways
- Confirm the laminate is rated for stair treads and risers, with suitable AC rating, anti-slip nosing, and required fire documentation.
- Measure each tread and riser individually; make labeled card/hardboard templates to handle out-of-square stringers and uneven walls.
- Remove old coverings, fix loose treads/risers with screws, eliminate squeaks, and level high/low spots so the stair is rigid and flat.
- Install risers then treads using solvent-free high-grab adhesive, maintaining full contact and wiping squeeze-out within the open time.
- Fit and secure stair nosings for a defined leading edge, then finish trims and allow full adhesive cure before heavy use.
Confirm Laminate Is Stair-Rated and Code-Safe
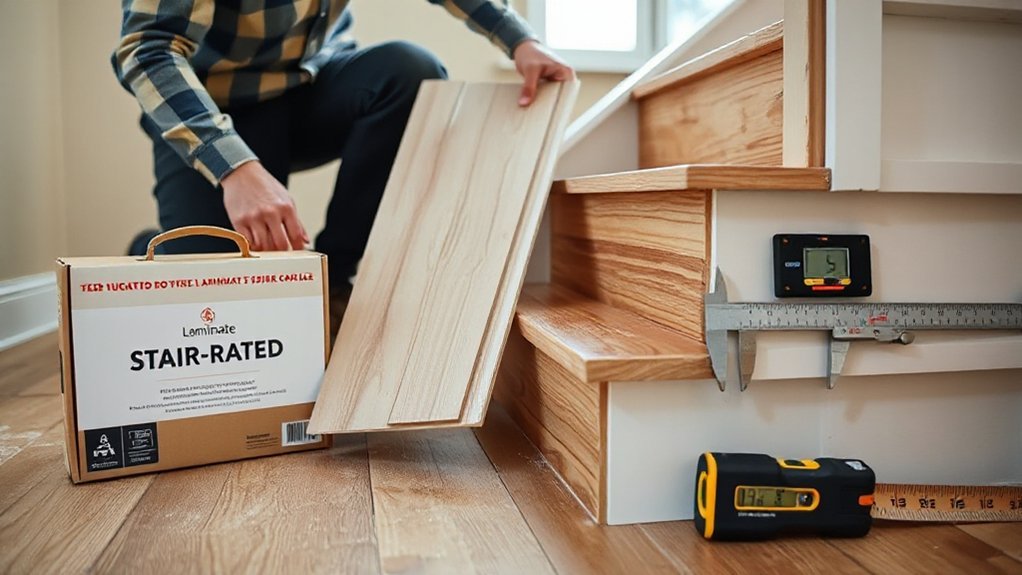
Before you buy anything, check that the laminate and stair nosings are explicitly rated by the manufacturer for stair use and comply with UK requirements. Confirm the product data sheet states suitability for stair treads and risers, not just “domestic flooring”. Check the AC rating (AC4/AC5 preferred) and abrasion class to support laminate durability under concentrated foot traffic. Verify the nosing profile provides a defined leading edge and includes an anti-slip surface, improving stair safety. If you’re in a building subject to Building Regulations, check the stair geometry still meets Part K (consistent rise/going, no trip lip created by the nosing). For flats or escape routes, confirm fire performance information (e.g., reaction to fire classification) is supplied and acceptable. Keep documentation for sign-off.
Pick Tread Kits or Plank + Stair Nosing
Once you’ve confirmed the laminate is stair-rated and won’t compromise Part K geometry, decide whether you’ll use purpose-made stair tread kits or standard planks with matching stair nosings. Tread kits give you a one-piece surface and pre-formed bullnose, so you’ll reduce joints and speed templating on awkward winders. Plank + nosing suits tight budgets and lets you align Decorative patterns across treads and risers, but you must plan seam positions to avoid weak edges.
Next, measure each tread and riser individually; UK stairs often vary by a few millimetres. Choose a nosing profile that preserves a consistent going and doesn’t overhang excessively. Finally, review Underlayment options: on stairs you’ll typically skip foam and use a thin acoustic layer only if it won’t introduce bounce.
Tools, Adhesive, and Fasteners You’ll Need
Although laminate on stairs looks like a simple cut-and-stick job, you’ll get a safer, Part K–friendly result if you kit up for accurate templating and a rigid bond. First, gather a tape measure, combination square, stair gauge or profile scribe, sharp pencil, and a fine-tooth mitre saw or jigsaw with laminate blade; add a straightedge and clamps. Next, use a caulking gun with a high-grab MS polymer or PU adhesive rated for flooring; it boosts laminate durability and reduces movement. Then, keep 30–40mm lost-head nails or trim screws and wall plugs for nosing and riser returns, plus a nail punch/bit set. Finally, wear goggles, ear protection, dust mask, and knee pads for stair safety throughout.
Prep and Level Stairs to Prevent Squeaks
Because laminate amplifies any movement in the carcass, you need to prep each tread and riser so it’s solid, flat, and squeak-free before you fix anything down. First, strip off old coverings, staples, and adhesive ridges, then vacuum and degrease so fillers bond properly. Check for flex by loading each tread; if it moves, re-fix it into the stringers with screws (not nails) and resecure loose risers. Silence squeaks by dusting joints with talc, then driving trim screws through the tread into the riser below. Next, level high spots with a sander and pack low spots with a rapid-setting floor leveller or wood filler, feathered flush. Add stair insulation only behind voids, not under treads. Keep safety railings tight and stable throughout.
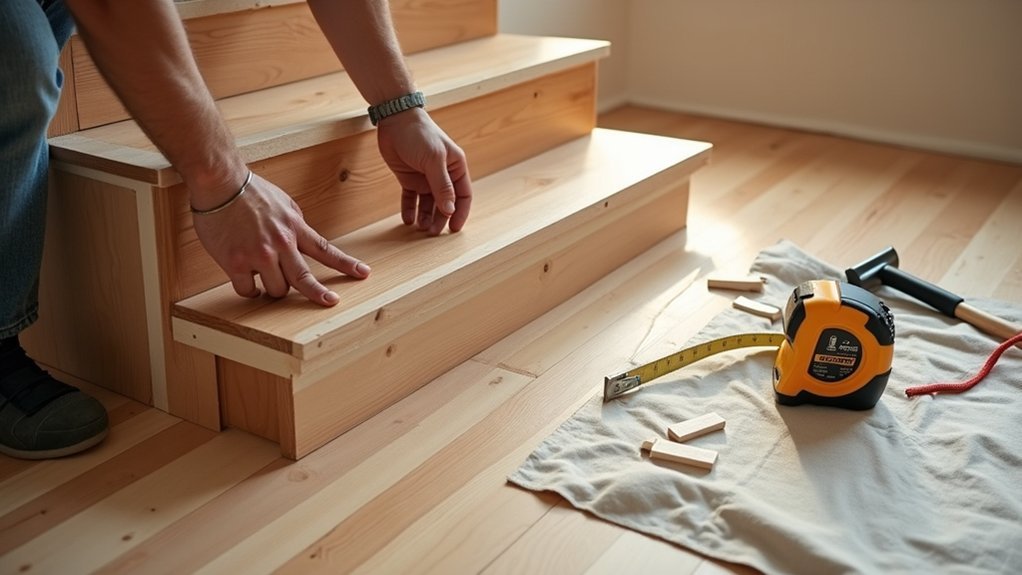
Measure Each Stair and Make a Template
With the stairs now solid, flat, and quiet underfoot, you can measure each tread and riser accurately so the laminate lands tight to the strings and nosings without gaps. Switch on staircase lighting, clear the run, and keep one hand on the safety handrails while you work. Number every step with masking tape.
Measure each tread width at the back and at the nosing, then measure depth from riser face to nosing edge. Take riser height at both strings. Record the smallest dimension each time and note any out-of-square. Use a sliding bevel or combination square to capture string angles.
Make a template per step using stiff card or 3 mm hardboard. Scribe to both strings, mark nosing line, and label top/bottom, left/right, and step number. Check the template seats tight before moving on.
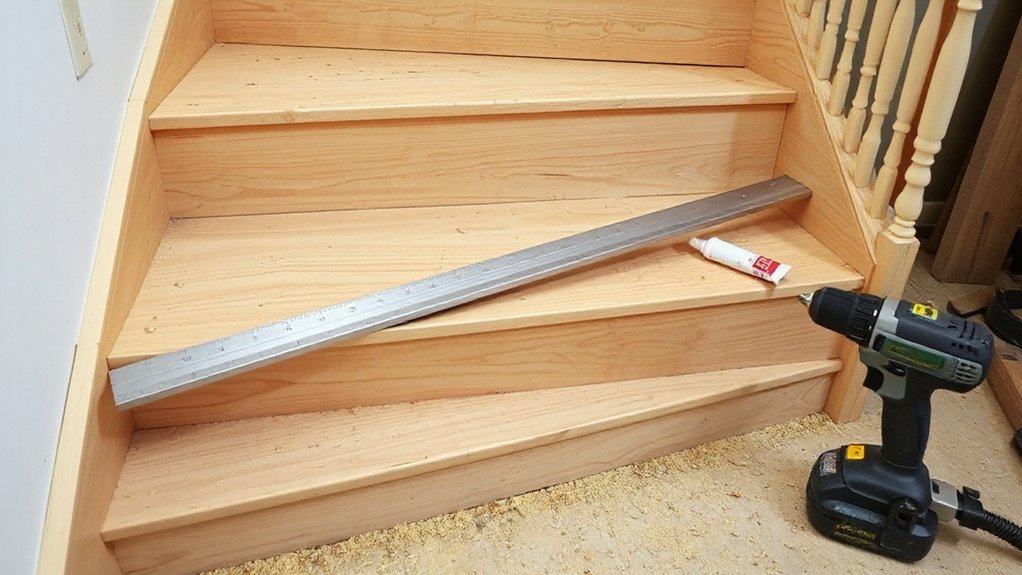
Cut Laminate Treads and Risers Accurately
Measure each stair’s width to the millimetre and transfer the line to your laminate tread and riser blanks. Mark the nosing position and any required overhang, then square your cut lines so they’ll sit tight against the strings. Use your templates to set each piece out, then cut with a fine-tooth saw and dry-fit before you commit.
Measure Stair Width Precisely
Before you cut anything, confirm the exact width of each stair at the front edge and again at the back, as walls and stringers rarely run perfectly parallel. Measure each tread and riser individually; don’t assume consistency, even in modern staircase design. Use a steel tape and record values in millimetres, then cut laminate slightly undersize (about 2–3 mm) to allow for expansion and improve flooring durability. Work methodically from bottom to top and label every piece to match its step.
- Measure front width, then back width, and note the difference.
- Check both sides for plaster bellies or skirting irregularities.
- Transfer measurements to a cutting list with step numbers.
- Dry-offer each cut piece before final adhesive fit.
Mark Nosing And Overhang
Once you’ve confirmed each tread’s width, mark the nosing line and any required overhang so every laminate cut lands cleanly on the stair edge. Set a combination square to your chosen projection (typically 10–20 mm, matching your stair nosing profile), then scribe a consistent line across the tread front. Transfer that line to the underside of the laminate tread piece, keeping the factory edge aligned to the front for a crisp finish. Mark riser top and bottom lines too, allowing for any trim or bead you’ll add as decorative accents. Dry-offer the nosing to check the overhang doesn’t foul doors or skirting. Maintain safety considerations by keeping the projection uniform, avoiding sharp lips, and ensuring the nosing will cover the tread edge fully.
Cut Pieces With Templates
Although your stair dimensions may look consistent, you’ll get the cleanest fit by templating each tread and riser, then transferring that shape to the laminate for cutting. Use 3mm hardboard or thick card, and scribe tight to skirts and strings with a compass. Mark the tread’s nosing line and overhang reference from your previous step, then label orientation (top, front, left). If you’re matching Decorative patterns, draw a centreline so the grain repeats consistently up the flight. Apply safety precautions: isolate power, wear eye protection, and clamp workpieces.
- Make a template for every tread and riser
- Transfer lines with a sharp pencil and square
- Cut with a fine-tooth blade, then dry-fit
- Ease edges lightly; keep expansion gaps uniform
Install Laminate Risers (Bottom to Top)
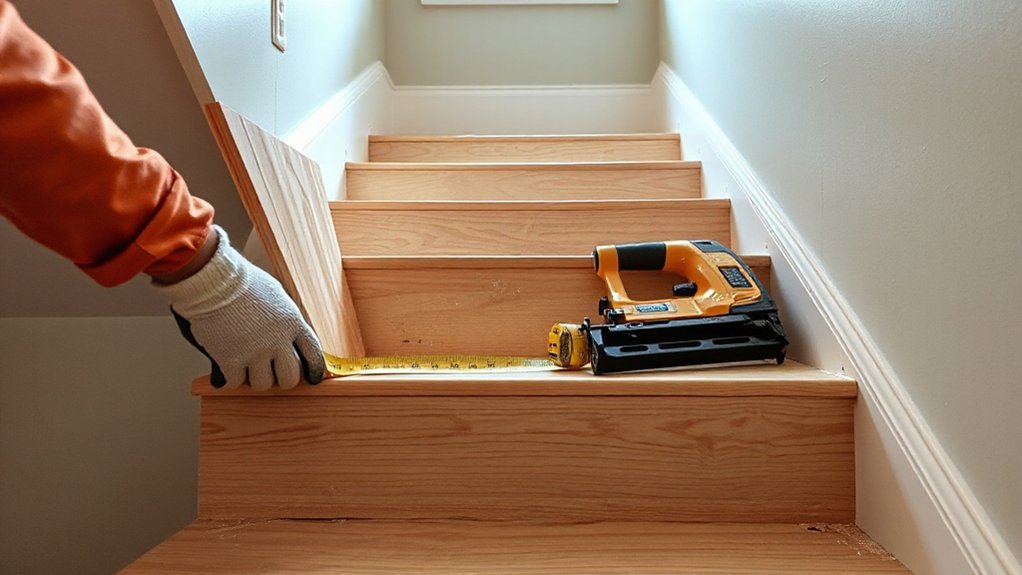
Measure each riser face, then cut the laminate riser to suit, allowing for any nosing overlap and keeping edges square. Apply a continuous, even bead of grab adhesive across the riser substrate and lightly butter the back of the laminate for full contact. Set the first riser at the bottom step, press it home, and work upwards riser by riser so you don’t trap access or disturb freshly fixed pieces.
Measure And Cut Risers
Before you apply any adhesive, take accurate riser measurements and cut each laminate piece to suit, starting at the bottom step and working upwards. Measure each riser’s height and width separately; staircases in UK homes often vary by a few millimetres. Account for any nosing overhang and keep your Creative design consistent by matching grain direction on every riser. Mark the back of the laminate, then cut with a fine-tooth saw or laminate guillotine for a clean edge. Dry-fit each piece to confirm it sits flush with the stringers and doesn’t foul the tread.
- Use a steel rule and try-square for true lines
- Scribe uneven plaster or skirting, then trim
- Leave a small expansion gap at side walls
- Wear eye protection and gloves: safety considerations
Apply Adhesive Evenly
Once you’ve dry-fitted the cut pieces, apply a continuous, even bead of solvent-free grab adhesive to the back of the first riser (start at the bottom step), then spread it with a notched trowel into full coverage without leaving dry patches or thick ridges. Keep the trowel angle consistent so the bed thickness stays uniform across the laminate. Don’t over-apply; excess adhesive can squeeze out at the edges and affect the finish. Wipe any squeeze-out immediately with a damp cloth, checking the manufacturer’s guidance. Factor in Adhesive drying time: work within the stated open time and don’t re-trowel once skinning starts. Follow Safety precautions—wear nitrile gloves, ventilate the stairwell, and keep adhesive off treads to prevent slips. Keep tools on a stable platform too.
Set Risers Bottom-Up
With the adhesive bed combed out and still within its open time, set the first laminate riser at the bottom step and work upwards. Offer it up square to the stringers, then press firmly from centre out to purge air. Check the reveal against the tread nosing line, and keep a consistent shadow gap for later Riser painting touch-ups. Use a straightedge to confirm it’s plumb before you move to the next riser.
- Dry-fit each riser, then mark cut lines from the back edge.
- Apply even pressure with a roller; don’t slide the board on wet adhesive.
- Pin temporarily with 18G brads if needed, keeping fixings low.
- Plan Stair lighting cable routes now, before you close voids above.
Install and Secure Laminate Treads + Nosing
After you’ve dry-fitted each piece and confirmed the overhang, apply a continuous bead of high-grab adhesive to the stair tread (and the back of the laminate tread if the manufacturer specifies), then press the tread firmly into position and slide it tight to the riser. Roll it with a J-roller or apply even body weight to bed it down, boosting laminate durability and stair safety.
Next, dry-fit the nosing so it fully covers the leading edge without rocking. Run adhesive along the tread’s front edge and the nosing channel, then seat the nosing and clamp it with masking tape or edge clamps. If your system requires fixings, pre-drill and countersink into the sub-tread, then drive screws flush. Wipe squeeze-out immediately and observe cure times.
Finish Edges: Transitions, Trim, and Caulk
Let the adhesive on your treads and nosings cure fully, then move on to sealing and covering the exposed edges so the staircase looks finished and won’t trap dirt or snag. Dry-fit every piece, then cut mitres square and tight.
- Fit stair-end trim or quadrant to open sides for Decorative edge detailing.
- Install metal or laminate profiles at landings for safety edge transitions.
- Leave a 2–3 mm expansion gap at walls, then cover it with scotia or beading.
- Run a fine bead of colour-matched flexible caulk along trim-to-wall joints only, not across movement gaps.
Fix trims with grab adhesive and pins where permitted, then wipe squeeze-out immediately. Finally, check nosing lips are flush, and confirm transitions don’t create a trip edge.
Frequently Asked Questions
How Long Does Laminate Stair Installation Typically Take for a Full Staircase?
You’ll typically take 1–2 days for a full staircase. First, prep treads/risers; gather installation tools. Next, dry-fit, cut, glue, fix nosings. Finally, seal edges, test stability, and follow safety precautions throughout.
Can Laminate Be Installed on Curved or Spiral Staircases?
Yes, you can—it’s unbelievably doable. Tackle Curved staircase challenges by templating each tread, trimming laminate, and using flexible nosings. Make Spiral staircase modifications: scribe wedges, reinforce bullnoses, and bond with MS polymer adhesive.
How Do You Clean and Maintain Laminate Flooring on Stairs?
Vacuum maintenance weekly using a soft brush, then wipe with a barely damp microfibre cloth. Guarantee moisture prevention: don’t soak joints, dry immediately. Use pH-neutral cleaner, fit stair mats, and check nosings monthly.
Will Laminate on Stairs Be Noisy Compared to Carpet or Hardwood?
Yes, it’ll sound noisier than carpet and often louder than hardwood. 1) Fit acoustic underlay and riser foam. 2) Seal gaps, add nosing. 3) Use Soundproofing options and Noise reduction techniques: rugs, runners.
Can You Match Laminate Stair Treads to Existing Upstairs Flooring?
Yes, you can match laminate stair treads to your upstairs boards by sourcing the same brand, range, and batch. Measure profiles, buy Matching stair treads, confirm sheen/embossing, and plan Staircase design around trims.
Conclusion
You’ve now got stair-rated laminate fitted safely and neatly: check compliance, template each step, cut precisely, then fix risers bottom-to-top before treads and nosing. Keep levels true and bond/fasten properly to stop squeaks. Think of it like the London Underground: when one platform edge sits 2 mm proud, everyone notices—same with a nosing line. Finish with trims, junctions, and a tight bead of caulk, then recheck every tread.