
Upgrade your outdoor space on any budget by setting a 5-minute spending cap (save 10–15% for extras), then designing around your #1 use: lounging, dining, or play. Start with a 30-minute cleanup—clear clutter into one lidded bin, sweep paths, and wipe surfaces—so everything looks intentional. Map simple zones for traffic and seating, then add cheap, high-impact lighting like solar path lights or warm string lights. Next, you’ll see where to invest and where to save.
Key Takeaways
- Set a spending cap fast, reserve 10–15% for extras, and stop shopping once you hit the budget limit.
- Define one primary use (lounging, dining, play), measure the active zone, and buy furniture that fits it.
- Refresh cheaply by clearing clutter, sweeping pathways, wiping surfaces, and grouping essentials into one lidded storage bin.
- Upgrade comfort with a cohesive “hero” finish, durable cushions, an outdoor rug, and one standout plant plus two smaller fillers.
- Add instant polish using layered lighting and privacy: solar path lights, string lights, lanterns, and screens or shade sails.
Pick a Budget in 5 Minutes

Before you buy a single plant or patio chair, decide what you can comfortably spend. Set a timer for five minutes and pick one number you won’t exceed. Use quick Budget planning: start with your max, then reserve 10–15% for delivery, fasteners, and weatherproofing.
Split the rest into three buckets—surfaces, seating, and lighting—so the space looks intentional, not piecemeal.
Next, make material selection work harder. Choose one “hero” finish you’ll repeat (black metal, warm teak tone, or concrete gray), then buy affordable pieces that match it.
Price-check alternatives: pressure-treated wood vs. cedar, resin wicker vs. rope, solar LEDs vs. hardwired. Write your shortlist, confirm totals, and stop shopping when you hit the cap.
Choose Your #1 Use: Lounge, Dine, or Play
Even if you want your patio to do everything, you’ll get a cleaner look (and spend less) when you pick one primary job: lounging, dining, or play. Start by measuring your “active zone,” then buy outdoor furniture that serves that use first; everything else becomes optional.
Match your plant selection to the vibe: soft and layered for lounging, upright and tidy for dining, tough and low for play.
- Lounge: a compact loveseat, two chairs, one outdoor rug
- Dine: a bistro set, stackable seats, slim serving cart
- Play: open center space, storage bench, washable mat
Finish: two large planters to frame the zone and add color.
This focus keeps your layout intentional, scales to any budget, and avoids impulse buys.
Do the 30-Minute Cleanup That Changes Everything
Give yourself 30 minutes and clear every surface and pathway—stash stray toys, sweep debris, and move anything that doesn’t support your #1 use.
Once the layout reads clean, add quick, low-cost touch-ups like a wipe-down of furniture, a shake-out of outdoor rugs, and a fast trim along edges.
You’ll instantly make the space feel larger, calmer, and more intentional without buying a thing.
Clear Surfaces And Paths
If your patio or porch feels cramped, the fastest “upgrade” costs nothing: clear the surfaces and paths. Give yourself 30 minutes and treat it like Surface maintenance plus Pathway design—because open sightlines read as “bigger” and move better.
Start by removing anything that doesn’t earn its keep today, then reset only the essentials.
- Sweep and wipe tabletops, railings, and ledges so the space looks intentional.
- Pull stray pots, toys, and tools off walkways and into one temporary bin.
- Define a clear walking lane from door to seating; straighten mats and pavers.
- Park bulky items (coolers, bikes) along one edge to keep circulation clean.
You’ll feel the difference immediately, and you won’t spend a dollar.
Refresh With Quick Touches
Clear surfaces and clean pathways set the stage; now you can make the whole space look “finished” with a few quick touches that take 30 minutes and cost little to nothing.
Start with a fast “edit”: put away stray toys, hoses, and tools, then corral essentials in one bin near the door. Shake out the outdoor rug and wipe tables with soapy water.
Next, add Landscaping shortcuts—pull obvious weeds, edge one clean line along the path, and top off bare spots with mulch or pea gravel.
Finally, place decor accents with intent: one lantern or candle cluster, two matching pillows, and a single tray for drinks. Water pots, deadhead blooms, and you’re done.
Your patio will read tidy, styled, and welcoming.
Map Your Zones First (Traffic + Focal Point)
- A clear walkway you won’t dodge with drinks in hand
- A seating zone sized to your smallest “real” gathering
- A dining or prep spot close to the kitchen door
- A quiet nook facing your focal point for calm, not clutter
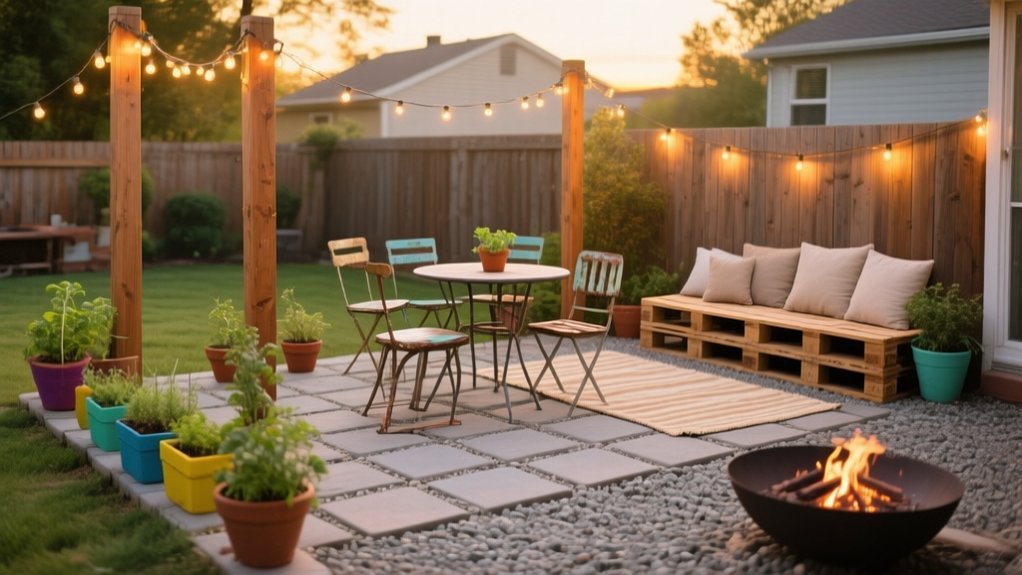
Add Lighting That’s Cheap but High Impact
Once you’ve mapped your zones, use lighting to make them feel intentional after dark without spending much. Line walkways with solar path lights, then layer string lights and lanterns to add warm glow where you sit and gather.
For extra character on the cheap, DIY upcycled luminaries from jars, cans, or bottles and cluster them at your focal point.
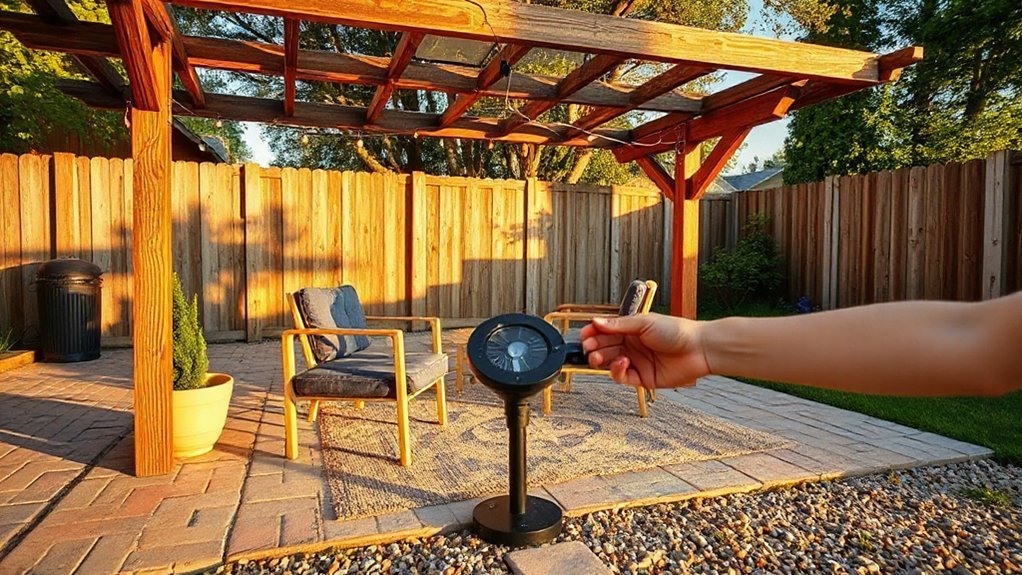
Solar Path Lights
A simple row of solar path lights can transform your yard for under $30. You’ll get safer footing and instant outdoor ambiance without wiring or an electrician. Place them where they guide movement, not where they compete with plants or views.
- Line both sides of a walkway, spacing lights 6–8 feet apart for an even glow
- Tuck a few along a garden edge to outline beds and highlight texture
- Mark steps, turns, and gates so guests move confidently after dark
- Mix heights or choose matte-black stakes for a clean, design-forward look
Buy a 6–10 pack, then upgrade the feel by aiming for symmetry and consistent color temperature. Set panels in full sun, and wipe them monthly so they stay bright.
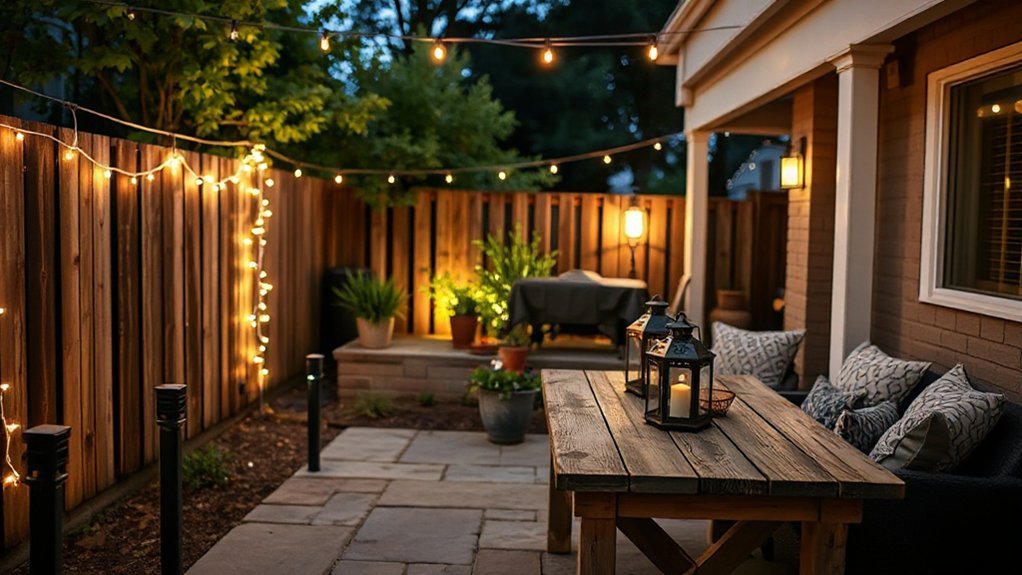
String Lights And Lanterns
If you want the biggest mood upgrade for the least money, hang string lights and scatter a few lanterns to “ceiling” your patio and define gathering zones. Run strands from the house to a fence, pergola, or sturdy poles, keeping a gentle swoop for a polished look. Choose warm-white LEDs for flattering ambient illumination and lower energy use.
If you’re renting, use removable hooks or zip ties on rails to avoid damage. Add lanterns on the table, steps, and corners to anchor the glow at eye level; mix two sizes for a styled, intentional feel. Treat them like decorative fixtures: repeat finishes (black, brass, or rattan) and keep bulb color consistent so your outdoor space reads cohesive at night.
DIY Upcycled Luminaries
Because lighting reads as “decor” and “function” at the same time, DIY upcycled luminaries deliver a big style payoff for pocket change. Shop your cabinets, thrift aisles, and curb finds first, then unify everything with one finish (matte black spray paint, rubbed bronze, or all clear). Use warm LEDs or solar tea lights so you won’t mess with cords, and cluster lights at different heights to make your patio feel intentional.
- Fill Recycled glass jars with sand, then nest solar tea lights for a beachy glow.
- Turn tin cans into punch-light holders; hang them with wire for pattern shadows.
- Refresh Vintage lanterns with paint and a new handle, then line your steps.
- Wrap bottles in jute, add a mini LED string, and tuck them into planters.
Place Lights Correctly (Where, How Many, How Bright)
Even when you’re working with a tight budget, you can make outdoor lighting look intentional by planning placement, quantity, and brightness before you buy. Start with task zones: grill, steps, and doors get the brightest fixtures, aimed down to cut glare.
Next, add ambient light along seating edges and pathways; consistent lighting placement reads polished even with inexpensive solar stakes or string lights. Count what you need by spacing path lights 6–8 feet apart and placing one accent light per focal element (a tree, planter, or wall texture).
Control brightness levels by choosing warm LEDs (2700–3000K) and keeping most lights low-lumen; save higher output for safety. Put everything on timers or smart plugs to avoid waste.
Add Privacy Fast With Screens and Fabric
If you need privacy now, you can reshape your outdoor space in an afternoon with freestanding screens, outdoor curtain panels, or a simple shade sail. You’ll block sightlines, soften harsh sun, and add a finished, design-forward look without building anything permanent.
Choose weather-ready fabric and place panels where you actually sit—around the dining set, lounge chairs, or hot tub—to get the most impact for the least spend.
Freestanding Privacy Screens
Want privacy in a hurry without committing to a permanent fence? Freestanding privacy screens let you block sightlines today and rearrange the layout tomorrow. They’re cheaper than Privacy fences, don’t require permits in many areas, and can double as a design moment.
Choose lightweight decorative panels in resin or metal for a crisp, modern look, or wood slats for warmth. Anchor them with planters, weighted bases, or ground spikes so they won’t tip in wind.
- Place two screens in an L-shape to carve out a cozy seating nook
- Line three panels behind a grill to hide clutter
- Use one screen to shield a hot tub entry
- Mix heights and finishes to mimic built-in architecture
Outdoor Curtain Panels
Two curtain panels can transform a patio corner into a private “room” in an afternoon, especially when you pair them with a simple frame or freestanding screen. For fast Privacy enhancement, hang Outdoor curtain panels on a tension rod, wire, or ceiling track, then tie them back when you want airflow.
Choose solution-dyed acrylic or outdoor-rated polyester so they resist fading, mildew, and splashes; you’ll spend less replacing them. Keep the look intentional by matching panel color to your cushions, or go high-contrast to define zones.
If your budget’s tight, buy one set and double up only on the street-facing side. Add inexpensive grommets or clip rings for smooth movement, and weigh hems with chain or drapery weights so they don’t flap.
Shade Sails And Fabric
Because they cover a lot of visual ground for relatively little money, shade sails and outdoor fabric screens let you carve out shade and privacy in a weekend without building a full structure. You’ll get a tailored look by choosing Fabric patterns that echo your cushions or rug, then anchoring panels to posts, a fence, or your home’s fascia.
- A triangular sail over the dining set creates a crisp, modern “ceiling.”
- A striped screen along the railing blocks neighbors while keeping airflow.
- A warm-toned mesh panel softens harsh sun without darkening the patio.
- A pair of layered fabrics adds depth and hides utilitarian hardware.
For Shade installation, measure the sun path, pitch the sail for runoff, and use turnbuckles to tension it tight. Buy grommet kits and budget fabric for DIY screens.
Use Plants That Thrive in Your Sun/Shade
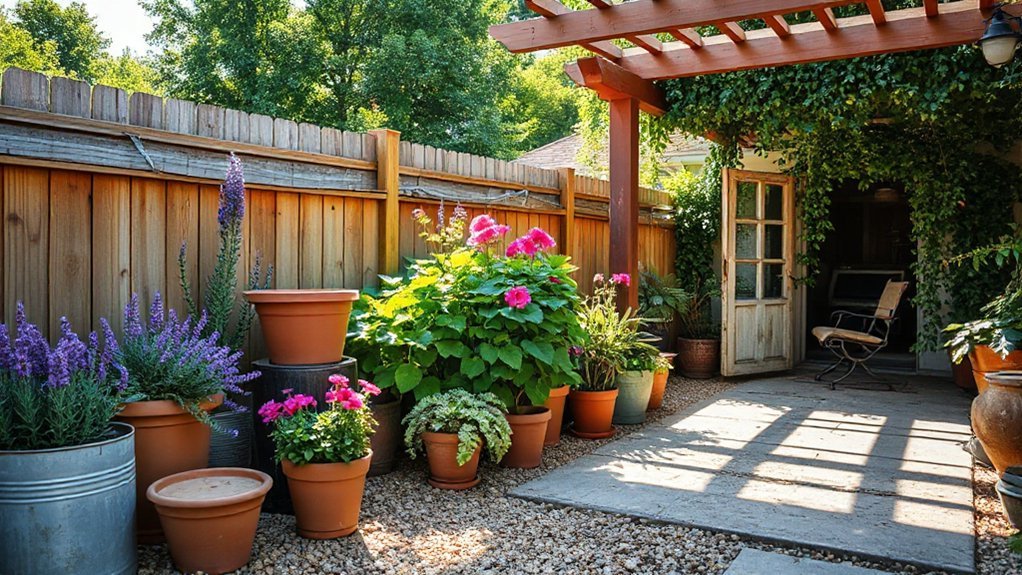
Even if you’re working with a tight budget, you’ll get a more polished outdoor space by choosing plants that match your light conditions instead of fighting them. Start by tracking sun: note where you get 6+ hours, dappled light, or deep shade.
Then buy fewer plants, but the right ones, so you don’t waste money replacing failures. In bright spots, group Sun loving plants in repeating clusters for a designed look and easier watering.
In low-light corners, lean into shade tolerant foliage to create lush texture without constant blooms. Use one or two pot colors to unify the scene, and vary leaf size for contrast.
Finish with mulch to reduce evaporation and make beds look intentional.
Refresh Seating Without Buying New Furniture
You don’t need new patio furniture to make your seating feel upgraded—you just need smarter styling. Add fresh cushions and weather-ready throws to boost comfort and pull your color scheme together fast.
Then repaint or refinish the frames to cover wear, protect the material, and make the whole set look intentional again.
Add Cushions And Throws
When your patio seating looks tired but the frame still feels solid, new cushions and throws deliver an instant refresh for far less than replacing furniture. Focus on outdoor comfort and aesthetic appeal by choosing weather-resistant fabrics, washable covers, and colors that echo your plants or exterior trim.
Mix patterns in a tight palette so it looks curated, not chaotic, and keep a spare set for quick swaps after rain or heavy use.
- A thick seat pad in a neutral base to ground the look
- Two bold, UV-rated pillows to add contrast and personality
- A lightweight throw for cool evenings and layered texture
- A storage basket or bench to keep textiles dry and tidy
Shop end-of-season sales, measure before you buy, and prioritize fill that rebounds fast.
Repaint Or Refinish Frames
If your chairs and benches still feel sturdy, repainting or refinishing the frames gives them a clean, modern look for the cost of sandpaper and a can of paint. Start with a quick scrub, then lightly sand to knock back rust or peeling finish. Wipe clean, tape off slats, and prime metal or bare wood so your topcoat lasts.
For Frame restoration, tighten loose bolts and fill small chips before you paint.
Choose a Color revamp that supports your palette: matte black for a crisp, architectural vibe, warm white for coastal calm, or deep green to blend into planting.
Use exterior enamel or rust-inhibiting spray in thin coats, letting each layer dry fully.
Seal wood with outdoor varnish for durability.
Add Textiles That Survive Outdoors (Rugs, Pillows)
Although hard surfaces set the stage, outdoor-ready textiles make the space feel finished without a big spend. You’ll get instant comfort and color by layering a rug and a few pillows, and you won’t regret it later if you shop smart.
Choose Outdoor fabric rated for UV and moisture, then prioritize Textile durability over trendy prints—classic stripes and solids mix easily with what you already own.
- A flatweave polypropylene rug to define the seating zone
- Quick-dry pillow inserts with zip covers for easy washing
- A washable throw for cool nights and extra texture
- Clip-on cushion ties so nothing slides or blows away
Stick to two colors plus one accent, and repeat them across pieces for a pulled-together look. Store soft goods when storms hit.
Create Shade With Umbrellas, Sails, or Curtains
Because harsh sun can make even the nicest patio feel unusable, adding shade is one of the fastest upgrades you can make on any budget. Start with a market umbrella: it’s movable, renter-friendly, and you can angle it as the light shifts.
If wind’s an issue, choose a cantilever style and add a weighted base.
For a sleeker look, install a shade sail; mount it high and taut, then tilt one corner to shed rain.
Want softness and privacy? Hang outdoor curtains on a wire or rod under an overhang.
Your fabric choices matter: pick solution-dyed acrylic or UV-rated polyester, and skip thin cotton.
Mix shade options to layer light, not block it completely.
Build a Budget Dining Spot (Table Hacks + Layouts)
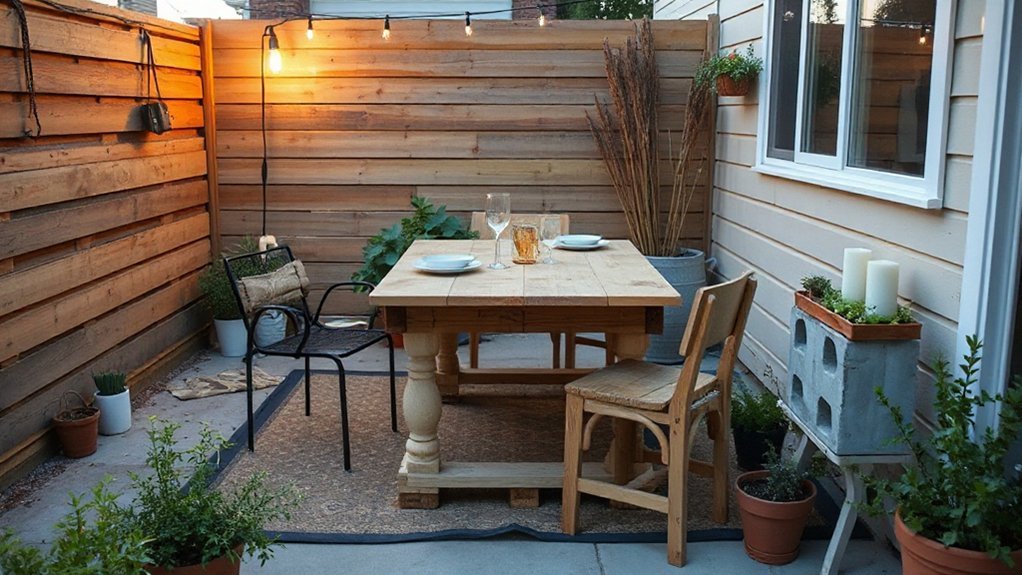
Once you carve out a clear footprint for eating, the rest of your outdoor setup starts to feel intentional—even on a tight budget. Start with a “table” that fits your space: a thrifted bistro top, a sealed plywood slab on sawhorses, or a folding picnic table you paint matte black.
Keep circulation easy by leaving a chair-width behind each seat and centering the table under your shade.
- Clamp-on lanterns or battery candles as Outdoor decor accents
- Mix mismatched chairs, unified with one cushion color
- Creative plant arrangements in grouped pots to frame the dining zone
- An outdoor rug or pavers to visually anchor the layout
Finish with a simple runner and one low centerpiece so plates and elbows still have room.
Add Hidden Storage to Keep It Clutter-Free
When your patio has a place for everything, it instantly looks more “designed” and takes less effort to keep clean. Add concealed storage wherever you already sit, lean, or serve: a bench with a lift-up lid, an ottoman that opens, or a slim deck box tucked behind planters.
Use hidden compartments to corral small stuff—lighters, bug spray, string-light clips—so tabletops stay clear. Mount a narrow cabinet or shelf with a drop-front door near the grill for tools, towels, and matches.
If you’re short on floor space, hang a storage rail under a console and clip baskets beneath it.
Label bins, group by task, and you’ll reset the patio in minutes.
Spend Smarter on High-Wear Outdoor Materials
Hidden storage keeps your patio looking pulled together, but the surfaces you touch every day do the heavy lifting. Put your money where wear shows: decking, dining tops, seat fabrics, and pathways.
Prioritize Material durability so you’re not replacing pieces each season, then use Cost effective sourcing to keep the look elevated without overpaying.
- Composite or sealed hardwood decking for fewer splinters and steadier color
- Powder-coated aluminum frames that won’t rust after rain or sprinklers
- Solution-dyed acrylic cushions that resist fading, stains, and mildew
- Porcelain pavers or gravel zones that hide dirt and handle foot traffic
Shop end-of-season, ask for contractor leftovers, and mix “hero” materials with simpler accents to stay on budget.
5 One-Hour DIY Outdoor Upgrades
Even if you’ve only got a spare hour, you can make your patio feel more finished with a few quick, high-impact tweaks that don’t require power tools or a big spend. Start by editing what’s already outside: corral clutter into a single lidded bin, then define zones with an outdoor rug or a folded throw to soften hard surfaces.
Next, refresh garden aesthetics with light and height. Swap in warm LED string lights or solar stakes, and group candles on a thrifted tray for a focal point.
For plant selection, choose one “hero” pot (tall grass, rosemary, or a dwarf citrus) and two smaller fillers for balance. Finish by cleaning tabletops, fluffing cushions, and adding one bold pillow for color contrast.
Save-Now, Build-Later Upgrades for Next Season
If your outdoor wish list feels bigger than your budget, you can still set yourself up for a smarter upgrade next season by tackling “save-now, build-later” moves that cost little today and prevent do-overs later. Start by planning layout and utilities now, so you won’t rip up fresh finishes later. Measure, sketch sightlines, and choose a simple palette that guides future outdoor decor and seasonal planting.
- Mark patio edges with mulch or pavers on sand to test size and flow
- Run conduit, hose guides, or drip lines before you add hardscape
- Prep soil: compost, edging, and weed barrier where beds will go
- Shop end-of-season: stackable chairs, cushions, and planters for next year
You’ll spend less later, and your upgrades will look intentional, not piecemeal.
Frequently Asked Questions
Do I Need a Permit for a Patio, Deck, or Pergola Upgrade?
You’ll often need a permit for new decks or structural pergolas; small patios may not. Check local codes first. Plan landscape lighting and outdoor furniture layouts early, so you avoid costly redesigns and meet setbacks.
How Can I Keep Mosquitoes and Pests Away Without Harsh Chemicals?
You can keep mosquitoes and pests away without harsh chemicals by using Natural repellents like citronella and eucalyptus, adding Pest barriers such as tight screens, sealing gaps, draining standing water, and installing budget-friendly fans.
What Are the Best Ways to Protect Outdoor Items From Theft?
To protect outdoor items from theft, layer deterrents: install Security cameras, add sturdy Locking mechanisms, and anchor furniture. Like a moat for your patio, use motion lights and discreet storage so security blends with design.
How Do I Winterize My Outdoor Space for Freezing Temperatures?
Winterize your outdoor space by draining hoses, storing cushions, and covering furniture. Add Plant insulation with mulch and wraps for Frost protection. Seal gaps, elevate pots, and use budget tarps for sleek, tidy lines.
What’s the Easiest Way to Add Outdoor Power Outlets Safely?
Like striking a match in twilight, you’ll add safe outdoor power easiest by hiring an electrician to install a GFCI weatherproof outlet on an existing circuit. It’ll feed garden lighting and outdoor furniture chargers cleanly, affordably.
Conclusion
You don’t need a big budget to get a backyard you’ll actually use. If you’re thinking, “I don’t have time,” start with the 30-minute cleanup and one lighting upgrade—instant payoff. Keep your plan design-led: pick one primary use, map zones, then add storage to protect that progress. Spend where wear is real (seat fabric, decking, shade), and DIY the rest. Save bigger pieces for next season and build momentum now.


