Structural repairs change how your house transfers loads through foundations, beams, columns, bearing walls, and connectors, unlike cosmetic work like paint, caulk, or trim. You can spot potential movement by tracking crack patterns (stair-step masonry, diagonal corner cracks, horizontal bowing), sticking doors/windows, and sloped or bouncy floors. Document crack widths and floor levels, then correct drainage and moisture first. For confirmed settlement, you’ll likely need engineered piering/underpinning and joist or beam reinforcement. Next, you’ll see how to prioritize fixes and pick the right team.
Key Takeaways
- Structural repairs change or restore load-bearing elements like foundations, beams, columns, bearing walls, or their connections, unlike routine maintenance.
- Use crack patterns to identify movement: stair-step masonry, diagonal corner cracks, and horizontal wall cracks can signal settlement or bowing.
- Confirm active movement by photographing, dating, and measuring cracks, plus tracking sticking doors/windows and floor slope over time.
- Diagnose sagging floors by checking joist span and damage, moisture/rot, bearing conditions, and connection failures at hangers, ledgers, and beam pockets.
- Address root causes like drainage and soil moisture first, then apply engineered fixes such as sistering joists, adding posts/footings, or underpinning foundations.
What Is a Structural Repair (and What Isn’t)?
Where do you draw the line between routine maintenance and a true structural repair? You look at load paths and the building’s ability to transfer forces safely to the ground.
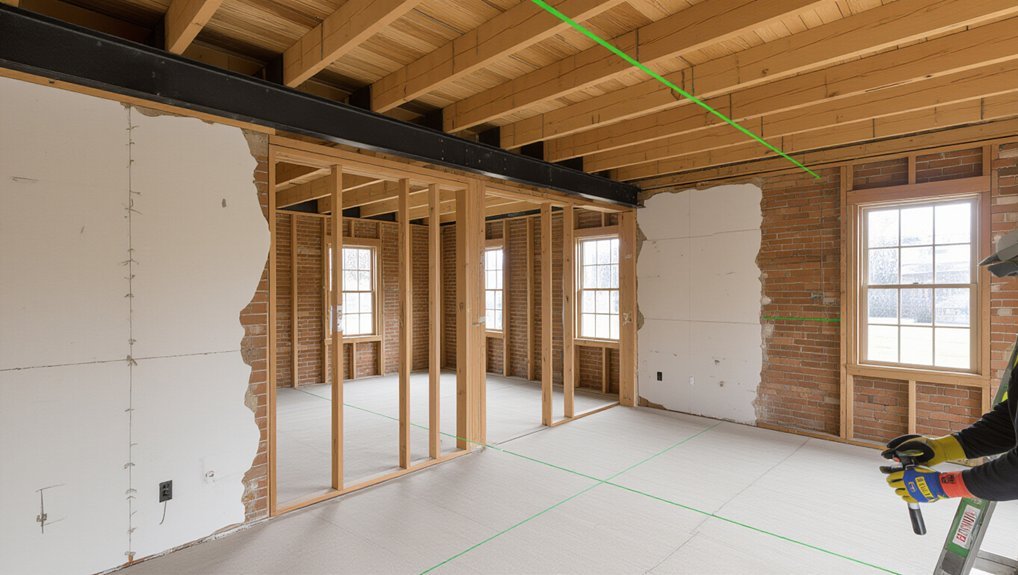
A structural repair changes or restores primary elements: foundations, footings, beams, joists, columns, bearing walls, lintels, roof trusses, or their connections. You’re repairing rot in a sill plate, sistering a compromised joist, epoxy-injecting a cracked foundation wall with engineering intent, or installing new anchors, straps, or piers.
Routine work doesn’t affect capacity: repainting, caulking, replacing trim, regrading garden landscaping for drainage, or updating interior decor like cabinets and tile. If the task can be done without recalculating loads or modifying framing, it’s typically maintenance, not structural repair.
Structural Red Flags: What’s Urgent vs Normal
Once you’ve separated routine maintenance from work that affects load paths, the next step is deciding which symptoms signal a real structural risk and which ones fall within normal building movement.
Treat as urgent: sudden, widening cracks; stair-step cracking through masonry; doors that rack after a storm; bouncy floors with audible snapping; roof sagging at ridges; and any member showing crushing, rot, or insect loss at bearings. Also escalate if you see displaced beams, popped connectors, or new separation at chimneys and parapets, especially in Historical architecture with brittle mortar.
More normal: hairline plaster cracks, minor nail pops, or seasonal joint gaps that open and close predictably. Still, check landscaping influence—large roots, irrigation overspray, and grading changes can trigger moisture swings that amplify movement.
Document, date, and remeasure.
Foundation Settlement Signs Homeowners Notice First
You’ll often spot foundation settlement first as new or widening wall cracks, especially radiating from door and window corners or stepping through drywall seams.
You may also notice doors and windows start sticking, rubbing, or failing to latch because frames rack out of square as the structure shifts.
Track crack width and location, and note which openings bind and when, since these patterns help distinguish settlement-related movement from normal seasonal changes.
Cracks In Walls
Why do wall cracks often show up before anything else when a home starts settling? Your wall assemblies act like stress gauges: gypsum board, plaster, and joint compound can’t tolerate differential movement, so they split long before you notice floor slope.
Watch for new hairline cracks radiating from corners, horizontal cracks along seams, or stair-step patterns through masonry. You’ll often see wall paint “telegraphing” the shift as faint ridges, flaking, or separated caulk lines, especially near decorative molding where stiffness changes concentrate strain.
- Measure crack width and length; photograph and date it.
- Mark endpoints, then recheck weekly for growth or offset.
- Note location: corners, ceilings, and beam-bearing lines.
Sticking Doors And Windows
As the foundation settles unevenly, the framing rack shifts door and window openings out of square, so the slab or sash starts rubbing long before you see obvious structural distortion. You’ll notice latch misalignment, tight reveals, or daylight gaps that change with humidity.
Check for hinge-side binding, strike plate scuffing, and uneven contact along the jamb; these pinpoint racking versus simple swelling. Don’t plane doors or force windows shut until you measure: confirm plumb at jambs, level at headers, and diagonal equality across the opening.
Record seasonal movement and correlate it with new floor slope. Temporary fixes (shim hinges, adjust strikes) help, but they can mask active movement. Address settlement before Decorative finishes or aesthetic upgrades, or you’ll crack trims and repaint repeatedly.
Foundation Settlement: What to Do Next
Confirm settlement by documenting warning signs such as stair-step cracking, sticking doors, sloped floors, and gaps at trim or siding. Then track changes with dated photos and simple level measurements.
Schedule a licensed foundation inspection so you can get elevation readings, soil/moisture conditions, and a written scope that distinguishes cosmetic damage from structural movement.
Use those findings to select the right repair method—piering/underpinning, slabjacking, drainage and grading corrections, or a combination—based on foundation type, movement pattern, and load paths.
Identify Settlement Warning Signs
Sometimes the earliest clue of foundation settlement shows up in places you don’t expect, so you’ll want to scan the whole structure for consistent, repeatable patterns rather than a single defect. Start at the exterior grade, then move room to room, comparing alignment lines and measuring gaps with a feeler gauge or ruler.
Don’t dismiss changes after landscaping enhancements or interior redesign; new loads and altered drainage can reveal latent movement.
- Doors or windows that bind, swing open, or show uneven reveal gaps at the jambs.
- Stair-step cracking in brick or diagonal drywall cracks that reappear after patching.
- Sloping floors, separated baseboards, or widening gaps at crown molding; verify with a 4–6 ft level.
Track locations, crack width, and dates to confirm progression.
Schedule Professional Foundation Inspection
If your notes show repeating crack patterns, sticking doors, or measurable floor slope, schedule a professional foundation inspection before you patch or remodel further. Hire a licensed structural engineer or qualified foundation inspector who’ll document elevations with a laser level, map crack widths, and check pier-and-beam components or slab edges for displacement.
You’ll get a written report with photos, measurements, and likely contributors such as drainage, expansive soils, plumbing leaks, or tree roots tied to garden landscaping. Ask for moisture readings, exterior grade verification, and crawlspace ventilation assessment where applicable.
Provide your timeline of symptoms and any prior repairs, including changes to interior decor that add load. Use the findings to prioritize safety, prevent cosmetic rework, and support insurance or contractor bids.
Choose Appropriate Repair Method
With the inspection report in hand, choose a repair method that matches the documented movement type (uniform settlement vs differential), the foundation system (slab-on-grade vs pier-and-beam), and the contributing cause (poor drainage, soil shrink-swell, leaks, or root activity).
Don’t default to the cheapest bid; match the mechanism to the fix and require engineered load paths.
- Stabilize: Use helical piers or push piers for differential settlement; shim and relevel pier-and-beam with durable pads and corrected beam bearing.
- Correct causes: Install drainage swales, gutters, or subdrains; repair plumbing leaks; manage roots; control moisture with graded soil.
- Protect finishes: Delay decorative finishes and landscaping improvements until elevation readings hold steady through a wet/dry cycle; then patch cracks with compatible materials.
Wall Cracks: Cosmetic, Concerning, or Structural?
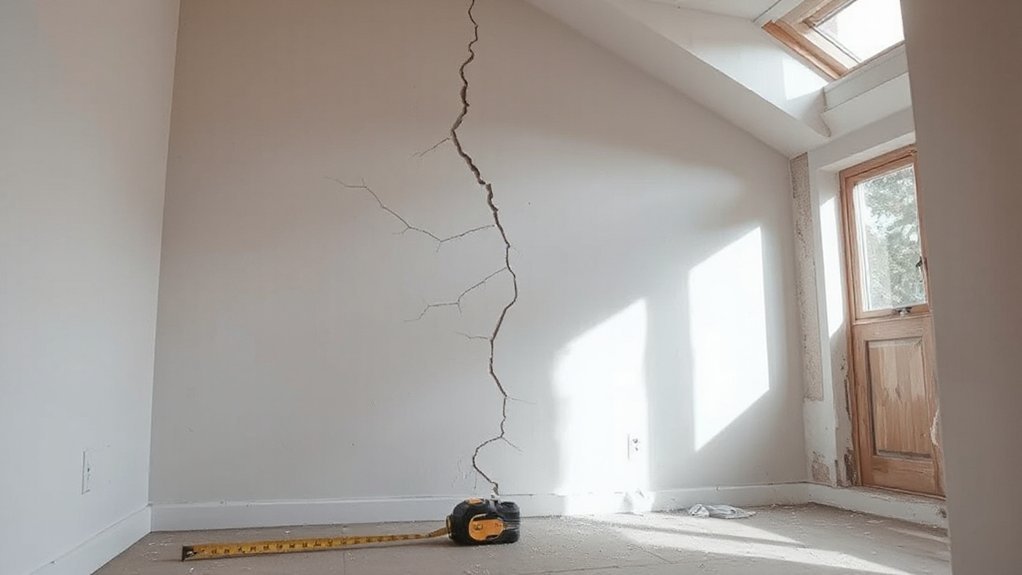
Although a hairline crack in drywall can look identical to a serious defect at first glance, wall cracks fall into three practical categories—cosmetic (finish-related), concerning (movement-related), and structural (load-path or foundation-related)—and you’ll classify them fastest by documenting their width, length, orientation, location, and any progression over time.
Measure width with a feeler gauge or calipers, photograph with a scale, and mark endpoints with date stamps.
Cosmetic cracks stay tight, don’t offset surfaces, and track seams or plaster shrinkage; you can patch and repaint without changing interior decor plans.
Concerning cracks warrant monitoring with crack gauges and a moisture check at plumbing and window heads.
Structural cracks coincide with door binding, floor slope, or beam bearing points; you’ll call a licensed engineer before repairs.
Don’t let landscaping ideas hide drainage issues.
Crack Patterns That Suggest Structural Movement
When a wall crack forms a repeatable pattern—rather than a random hairline—you can often link it to how the structure is moving and where the load path is getting disturbed. Track direction, location, and whether the crack reopens after patching or coincides with paint peeling.
- Stair-step cracking in brick or block: You’re often seeing differential foundation movement; measure offsets at mortar joints and check for widening toward corners.
- Diagonal cracks from window/door corners: You’re likely seeing racking or localized settlement; note if lintels are deflecting or fasteners are pulling.
- Horizontal cracks at mid-wall or near ceiling lines: You may be seeing wall bowing or tie failure; look for bulging, shifted trim, and stressed decorative features.
Photograph, date, and gauge width to confirm active movement over weeks.
Sagging or Bouncy Floors: Joists, Beams, and Spans
When your floor feels sagging or bouncy, you can diagnose joist deflection by measuring mid-span drop with a straightedge or laser level and comparing it to the joist span and loading conditions.
You should also verify joist size, spacing, species/grade, bearing length, and any notches, holes, or moisture damage that reduce stiffness.
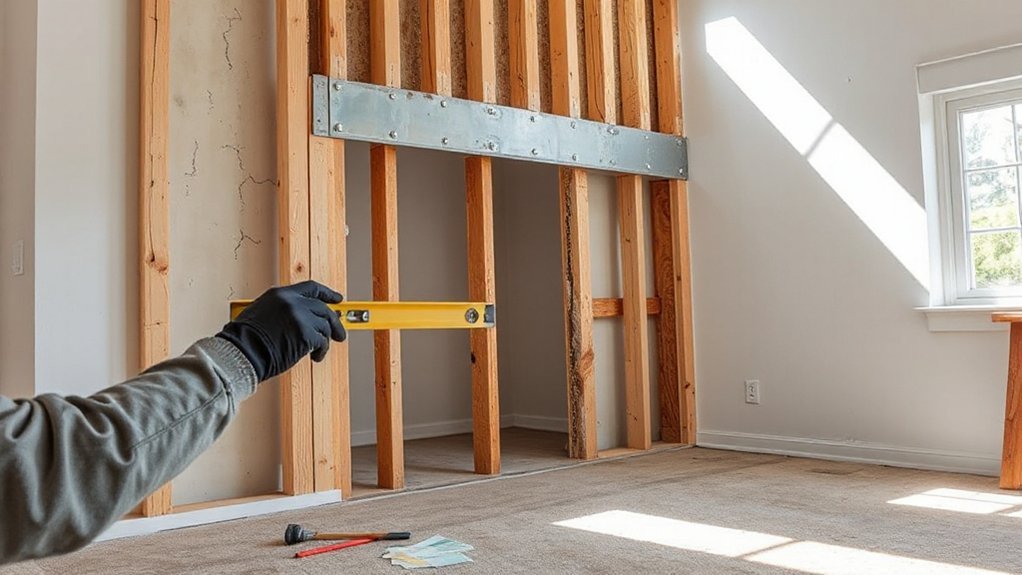
If the framing checks out but the span is overstressed, you can reinforce the beam system by sistering joists, adding solid blocking, installing a mid-span beam with posts and proper footings, or upsizing/adding a built-up or steel beam.
Diagnosing Joist Deflection
Why does a floor feel bouncy underfoot or show a noticeable sag between supports? You’re usually seeing joist deflection from undersized members, excessive span, moisture damage, or altered load distribution. Start by mapping the problem: note where the bounce peaks, then trace that zone to the supporting beams, bearing walls, and foundation lines.
- Measure midspan drop with a laser or taut string; compare to the joist depth and span to judge severity.
- Inspect joists for splits, notches, bored holes, rot, or insect galleries, especially near bearings and plumbing penetrations.
- Verify connections: check hangers, nails, ledger attachment, and any beam pocket crushing or shim gaps.
Also identify added dead loads (tile, tubs, aquariums) and confirm joist spacing and species grade where visible.
Beam Reinforcement Options
How do you stiffen a sagging or bouncy floor once you’ve confirmed the joists aren’t the only weak link? Start by evaluating the main beam’s span, section size, and bearing points, then choose beam reinforcement that boosts load capacity without overloading supports.
You can sister the beam with LVL or steel plate, through-bolt at specified spacing, and add construction adhesive to reduce slip. If headroom allows, install a flitch beam or replace with a deeper LVL.
You can also shorten the effective span by adding a mid-span post on a new footing sized for soil bearing. Use adjustable steel columns only for temporary leveling unless rated and properly based.
Verify fastening, lateral bracing, and end bearing.
Sticking Doors and Windows: What They Really Mean
Although a sticky door or window can look like a minor nuisance, it often signals movement in the building’s frame that you shouldn’t ignore. When openings rack out of square, the latch side drags, reveals widen, and weatherstrips compress unevenly. Don’t mask it with decorative molding or paint touch ups; you’ll hide the symptom and miss the cause.
- Check hinge screws, jamb fasteners, and header shims; loose hardware can mimic settlement.
- Measure the frame: compare diagonals, verify plumb at both jambs, and note any bow at the head.
- Track patterns: multiple sticking points on one level, or a change after seasonal temperature swings, suggests structural shift.
Document clearances, then consult a structural pro if adjustments don’t hold.
Moisture Problems That Lead to Structural Repair
You can’t ignore moisture when poor drainage and runoff keep saturating soil at the foundation, because hydrostatic pressure and erosion will shift footings and open cracks.
If you’ve got persistent basement water intrusion, you’re also trapping moisture against concrete and framing, accelerating spalling, corrosion, and wood decay.
You’ll need to trace the water path from roof discharge and grading to subsurface seepage so you can prioritize drainage corrections before structural repairs.
Poor Drainage And Runoff
Where does all that rainwater go once it hits your roof, driveway, and yard—away from the foundation, or straight toward it? When runoff concentrates at the perimeter, it raises soil moisture, softens supporting soils, and increases lateral pressure against walls. That movement can translate into settlement, slab edge cracking, and bowed masonry over time. You can reduce risk by controlling flow paths and discharge points.
- Verify landscape grading: maintain a 5% slope (about 6 inches over 10 feet) away from the house, and avoid mulch “volcanoes” at siding.
- Tighten gutter maintenance: keep gutters clean, set proper pitch, and extend downspouts 6–10 feet to daylight.
- Address hardscape runoff: add swales, trench drains, or splash blocks where pavements dump water.
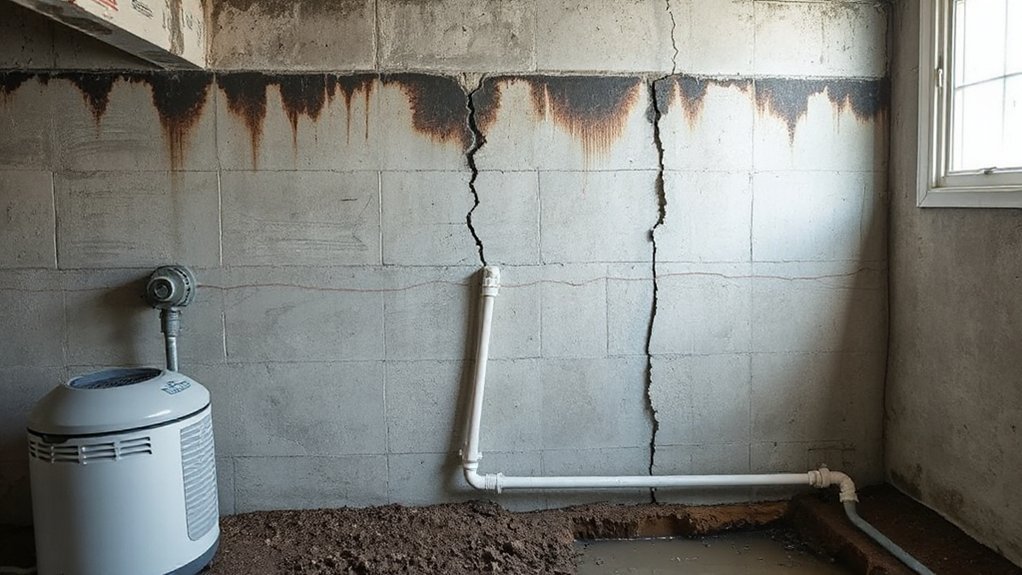
Persistent Basement Water Intrusion
How long can a basement stay damp before it starts costing you structurally? Not long if you’re seeing recurring seepage, puddling at wall joints, or efflorescence. Persistent water intrusion increases hydrostatic pressure, drives moisture through cracks, and weakens mortar and concrete paste over time.
You’ll often notice spalling, bowing walls, or floor slab heave as moisture cycles freeze, thaw, and expand soils. Don’t rely on Water resistant paint as your primary fix; it can conceal active leaks and trap vapor, accelerating decay behind finishes.
Instead, you should verify grading and footing drains, seal cracks with epoxy or polyurethane injection, and add a sump with backup. Replace wet Basement insulation, then control humidity with a dehumidifier and sealed rim joists.
Rot and Termites: When Framing Loses Strength
Although framing lumber can look sound from the outside, rot and termite activity can strip away its load-bearing capacity long before obvious sagging or cracking shows up. You’ll often find damage at rim joists, sill plates, band boards, and around plumbing or HVAC penetrations where moisture lingers.
When you update roofing materials, confirm flashing and drip edges don’t wet wall cavities; when you change landscaping design, keep mulch and planter beds from burying siding and exposing plates to dampness.
- Probe suspect members with an awl; spongy fibers or hollow galleries mean section loss.
- Use a moisture meter; readings above ~20% sustain fungal decay and invite termites.
- Repair structurally: sister joists, replace plates, add connectors, and treat remaining wood professionally.
Soil, Grading, and Drainage Behind Structural Damage
When surface water and groundwater linger against your foundation, they don’t just “cause dampness”—they change soil behavior and push loads into places your structure wasn’t designed to handle. Expansive clays swell when wet and shrink when dry, so your footings see seasonal lift and settlement.
Loose fill can consolidate under repeated saturation, reducing soil stability and creating differential movement that cracks slabs and racks frames.
You can reduce risk by managing runoff first. Use grading techniques that slope soil away from the house (about 5% for the first 10 feet), keep mulch and planters from trapping water, and extend downspouts well clear of backfill.
Maintain gutters, add splash blocks, and avoid overwatering near the perimeter. Keep swales and drains clear so water exits quickly.
How Pros Diagnose Structural Problems in a Home
- Measure floor/beam elevations and document differential readings.
- Track crack widths, directions, and displacement at openings.
- Correlate findings with drainage, humidity, and crawlspace ventilation.
When to Hire a Structural Engineer (vs a Contractor)
If you’re seeing movement in load-bearing elements—sagging beams, out-of-level floors, widening cracks, or doors and windows that suddenly rack—bring in a structural engineer before you let a contractor “fix” it. You need stamped calculations, load-path verification, and a scope that separates cosmetic defects from structural distress, so you don’t waste money patching drywall or re-leveling trim.
Hire a contractor when the work is clearly defined and non-interpretive: replacing damaged framing to an engineer’s detail, installing specified connectors, or correcting moisture and drainage items tied to Landscaping design.
If your Interior decor plans involve removing walls, adding heavy finishes, or changing openings, you’ll want an engineer to confirm beam sizing and bearing. Contractors build; engineers diagnose, design, and document compliance.
Foundation Structural Repair Options: Piers and Underpinning
Because most foundation movement traces back to weak soils, poor drainage, or inadequate bearing, piering and underpinning repairs focus on transferring loads to competent support and stabilizing (or re-leveling) the structure.
You’ll typically choose helical piers for lighter loads and easier access, or push/driven steel piers where you need deeper refusal.
Underpinning with concrete mass pads or grade-beam extensions increases bearing area when soils are marginal, but it needs excavation control and curing time.
Plan access paths so crews don’t wreck Landscaping aesthetics, and confirm lift tolerances to protect Interior decoration from drywall cracking and tile shear.
- Verify pier layout from measured elevations and load paths.
- Specify corrosion protection, brackets, and torque/refusal criteria.
- Document pre/post elevations and monitor for rebound, settlement, and drainage fixes.
Structural Repairs for Beams, Posts, and Load-Bearing Walls
Once you’ve stabilized the foundation, you still need to confirm that beams, posts, and load-bearing walls can carry design loads without excessive deflection, rotation, or crushing at connections. Map sagging spans, check bearing length, and probe for rot, insect damage, splits, or corrosion.
Sister undersized joists or beams with LVL or steel flitch plates, fastening per engineering schedules and adding blocking at point loads. Replace compromised posts with treated lumber or steel columns, and install proper base/beam caps to prevent end-grain crushing.
For load-bearing walls, correct out-of-plumb studs, add header upgrades, and use plywood or steel strap bracing where racking shows. Protect work with fire blocking and restored finishes so interior decor stays clean and landscaping aesthetics remain undisturbed outside.
Crawl Space Structural Repair: Supports and Jacks
How do you stop a bouncy floor when the framing checks out above? You go to the Crawl space and verify that the girder and joists actually bear on firm, continuous supports. Probe for rot at beam ends, crushed shims, and settlement at pier pads. Then you add adjustable steel jacks or permanent posts to restore load paths without over-lifting.
- Set a stable base: Pour a properly sized concrete footing or pad on undisturbed soil; don’t jack on dirt.
- Align the load: Place the jack under the girder/joist line, use a steel cap plate, and keep it plumb.
- Lift in stages: Turn slowly, measure deflection, and stop when doors and floors normalize, then lock and brace.
Costs, Permits, and Choosing the Right Repair Team
Before you sign off on any structural repair, price the work as a scope with clear assumptions, confirm whether your municipality requires a permit or stamped engineering, and choose a crew that can document load paths—not just “make it feel solid.”
Get itemized bids that separate investigation (crawlspace access, probing, level survey), materials (footings, posts/jacks, hardware), and labor, then ask what triggers change orders (hidden rot, undersized pads, plumbing/electrical conflicts).
Verify the contractor’s license, insurance, and engineer relationship, and require pre/post elevation readings plus photo logs.
Confirm inspections: footing depth, connector nailing, and treated lumber specs.
Schedule repairs before interior design finishes, flooring, or cabinetry, and protect landscaping improvements by planning access routes, spoil staging, and restoration allowances.
Hold retainage until punch-list and permit sign-off complete.
Frequently Asked Questions
Will Structural Repairs Increase My Home’s Resale Value or Appraisal Outcome?
Yes, structural repairs can raise appraisal and resale, especially when you document Foundation stability and Roof reinforcement. You’ll reduce lender risk flags, improve inspection results, and justify higher comps, though over-improvements may not fully recoup costs.
Can Structural Repairs Affect Homeowners Insurance Coverage or Future Claims?
Yes, structural repairs can change your coverage and future claim outcomes. You’ll need to document Foundation reinforcement and verify Material durability. Insurers may lower risk ratings, but deny claims if you don’t disclose work.
How Long Must I Leave My Home During Major Structural Repairs?
You’ll leave until the structure’s stable and utilities are safe—typically 3–14 days, but sometimes weeks. Your engineer/GC sets safety precautions. Plan temporary relocation whenever load-bearing walls, foundations, or extensive shoring gets installed.
Do Structural Repairs Impact Utility Lines, Plumbing, or Electrical Systems?
Yes, they can, especially where framing, slabs, or load paths intersect services. You’ll face utility disruption from reroutes or shutoffs. You must verify structural integration clearances, protect conduits, pressure-test plumbing, and re-inspect electrical.
What Warranties Should I Expect on Structural Repair Work and Materials?
After the dust settles, you should expect written coverage: Warranty duration typically 1–10 years on workmanship; Material guarantees follow manufacturer terms. You’ll get exclusions, transferability, claim steps, and proof of inspections documented.
Conclusion
You can’t treat structural repairs like cosmetic touch-ups—you’re managing load paths and safety. If you spot new stair-step cracks, sticking doors, or sloping floors, you should document changes, get a qualified structural inspection, and act before movement accelerates. One useful visual: a 1-inch foundation differential across a 20-foot span equals a 0.4% slope—enough to make floors feel “off” and to stress framing. Choose engineered fixes, permits, and experienced crews.