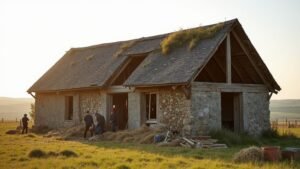
You’re turning a shepherd’s hut into a sustainable micro‑dwelling, so you’ll start by fixing the size, towing limits, and intended use under UK planning and Building Regs constraints. You’ll choose a braked chassis or static base, then build a timber shell with breathable cladding, a ventilated cavity, and natural insulation to control vapour and cold bridging. Off‑grid solar, water storage, and waste handling must match real loads, but the key decision comes next…
Key Takeaways
- Confirm site constraints, access, and UK planning/licensing rules, and map services, drainage, and waste routes early to avoid costly retrofits.
- Choose towable chassis or reversible static foundations based on ground bearing capacity, road-legal limits, and long-term maintenance practicality.
- Build a timber shell with natural insulation, vapour control, and a ventilated rainscreen to manage moisture, airtightness, and repairability.
- Design compact interiors with built-in storage, lightweight durable finishes, safe LPG cooking, efficient 12V lighting, and properly tanked wet-room detailing.
- Specify low-impact heating, CO safety, continuous ventilation, and off-grid solar, while managing greywater via soakaway and toilets via sealed composting or cassette.
Plan Hut Size, Use-Case, and Constraints
Before you sketch anything, define the hut’s footprint, intended use-case, and site constraints, because these will drive axle choice, insulation thickness, internal layout, and whether you can move it legally.
Measure access width, turning radius, overhead lines, and ground bearing capacity; check UK planning rules, permitted development limits, and any site licence or caravan definitions.
Set a target length and width that suits your programme: sleeping berths, desk, kitchenette, shower, and storage volumes, plus headroom under the curved roof.
Map services early—mains, off-grid solar, LPG, water, and foul drainage—to avoid retrofits.
Specify sustainable material sourcing (FSC timber, low-VOC finishes, recycled insulation) and apply eco-friendly design principles: airtightness, vapour control, thermal-bridge minimisation, and daylighting.
Choose a Chassis: Towable vs Static Base
Next, you’ll choose whether your shepherd’s hut sits on a towable chassis or a static base, and that decision drives your build spec and compliance route in the UK.
If you go towable, you’ll need to account for plated gross weight, axle rating, hitch height, braking, lighting, and road-legal dimensions before you fix the floor build-up and services.
If you go static, you’ll design for ground bearing capacity, pads or strip footings, level tolerances, damp control, and how you’ll route drainage and electrics to meet local site requirements.
Towable Chassis Considerations
Although the hut’s cladding and joinery get most of the attention, your chassis choice dictates the build’s legal status, service strategy, and long‑term costs.
For UK road use, you’ll design around towing regulations: plated GVW, hitch type, breakaway cable, lights, and reflectors to ECE standards, plus tyre load ratings and mudguards.
- Specify a galvanised steel ladder frame with sealed box sections for chassis durability in wet verges.
- Choose twin axles for stability, matching hubs to readily sourced bearings and 5‑stud wheels.
- Fit a braked coupling with overrun brakes, then route protected brake lines and loom conduits.
- Keep the floor height low: dropped crossmembers, underslung springs, and a level drawbar for tracking.
Plan access points for jacking and inspection too.
Static Base Requirements
A road‑legal towing chassis gives you mobility and a clear compliance target, but many shepherd’s huts spend their lives parked, so you can instead design around a static base and the ground it sits on.
You’ll need a stable bearing layer: compacted Type 1 sub‑base over geotextile, drained to a soakaway, or screw piles where access is tight.
Set level datum points and allow for frost heave and shrink–swell clays common in the UK.
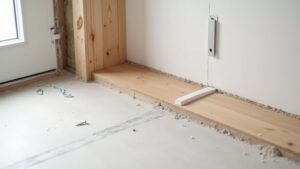
Isolate the timber sole plates from splashback with galvanised steel shoes or a damp‑proof course, and ventilate the underfloor void to limit decay.
Check planning and Part A loads if you’re creating a permanent pad.
Historical examples and cultural influences favour light footprints, so keep foundations reversible.
Build the Shell With Low-Impact Materials
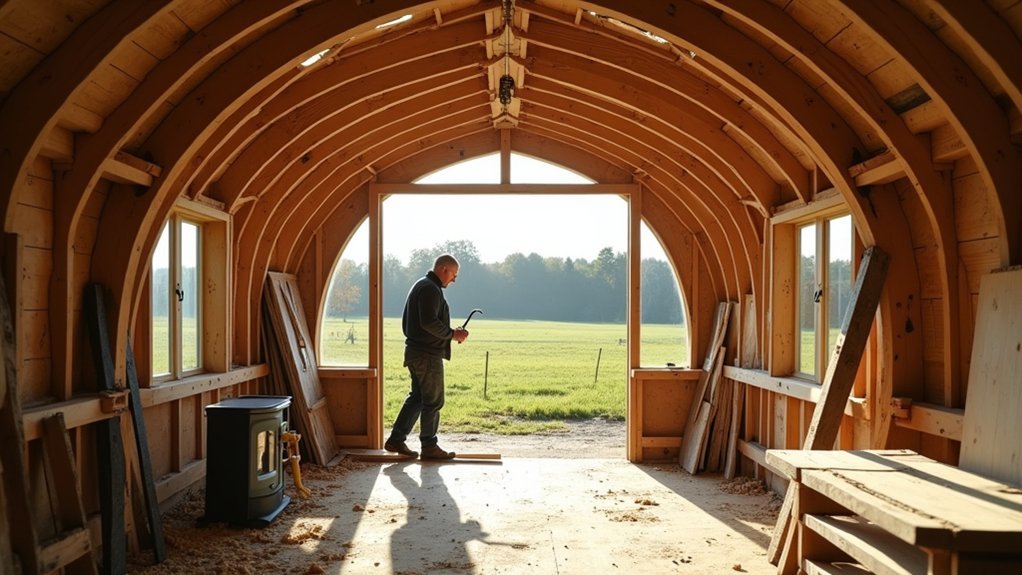
Once you’ve sorted the chassis, you’ll build a shell that keeps embodied carbon low by specifying reclaimed timber for studs, rails, and curved roof ribs where grading allows.
You’ll then pack the frame with natural insulation—wood fibre, sheep’s wool, or hemp—paired with a vapour-open membrane and taped airtight layer to suit the UK’s damp climate.
Finally, you’ll finish with durable, repairable cladding such as reclaimed larch or sweet chestnut, detailed with a ventilated rainscreen cavity to manage moisture and extend service life.
Reclaimed Timber Framing
Three priorities drive a good reclaimed timber frame for a shepherd’s hut: structural grade, moisture management, and repeatable fixings. You’ll source C16+ beams from UK salvage yards, then de-nail, scan for shake, and re-saw to consistent sections.
Keep timber off the deck with DPC strips and ventilated sole plates so wet wheelspray can’t wick up. Pre-drill and standardise on coach screws or structural wood screws so you can replace members without splitting.
Leave selected faces rough-sawn for aesthetic appeal, but seal end grain to slow checking. Protect adjacent Wildlife habitat by staging cuts on tarps and collecting sawdust.
- Chalk lines snap across honeyed joists.
- Stainless fixings bite cleanly.
- Braced corners square under clamps.
- Pegged studs march in rhythm.
Natural Insulation And Cladding
How do you keep a shepherd’s hut warm, dry, and breathable without defaulting to petrochemical foams? Specify natural fiber insulation: sheep’s wool, hemp, or wood fibre batts sized to your stud bays. Fit it tight, then add a smart vapour control layer on the warm side and tape all laps to meet UK airtightness expectations.
Create a ventilated cavity behind the outer skin using 25mm battens and insect mesh, so wind-driven rain drains and the timber dries.
For eco friendly cladding, choose FSC larch, cedar, or thermally modified pine, fixed with stainless ring-shank nails. Detail drips, corner trims, and a 150mm splash zone above ground. Finish with breathable paint or oil, not film-forming gloss.
Insulate Naturally and Prevent Condensation
Although a shepherd’s hut looks simple from the outside, you’ll only keep it comfortable year‑round if you specify natural insulation alongside a proper vapour and ventilation strategy to stop interstitial condensation.
Use hygroscopic fibres (sheep’s wool, hemp, woodfibre) so moisture buffers safely, then add an internal smart vapour control layer, taped at joints and around services.
Keep a ventilated cavity behind cladding, with insect mesh and clear eaves-to-skirting air paths, so wind-washing doesn’t chill the build-up.
Detail junctions to avoid thermal bridges at hoops, window reveals, and the chassis line, and guarantee your breathable membranes remain continuous.
Protect your wildlife habitat and aesthetic design by keeping external battens slim and aligning fixings neatly.
Visualise:
- Warm wool between ribs
- Taped VCL seams
- 25mm ventilated rainscreen gap
- Drained, flashed sills
Heat the Shepherd’s Hut and Keep Air Fresh
Once you’ve sealed and insulated the shell, you need a heating system that matches the hut’s tiny heat load and a ventilation route that keeps CO₂ and humidity down without dumping all that warmth outside.
Choose a small, controllable heat source: a 2–3 kW wood burner with outside air kit, or low‑watt electric panel for short boosts.
Fit a CO alarm and keep clearances to combustibles per HETAS guidance.
For ventilation strategies, use continuous extract from the shower and hob zone with trickle inlets, or a compact MVHR if you’ve pushed airtightness.
Duct runs must be short and insulated to prevent condensation.
Use a humidistat and CO₂ monitor to tune flow rates for air quality enhancement year‑round.
Size Off-Grid Solar, Water, and Waste Systems
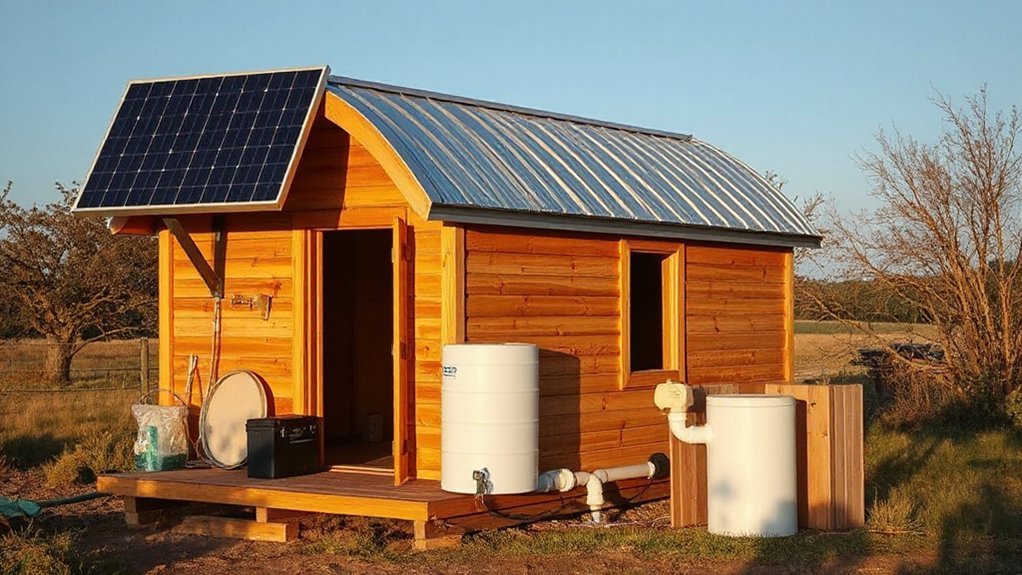
Before you buy panels or tanks, calculate your daily loads and peak demands so every off‑grid system in the hut scales to reality rather than wishful thinking.
In the UK, assume winter insolation is the constraint: size PV for December, then check solar panel efficiency losses from roof pitch, shading, and temperature. Pair panels with LiFePO4 storage and an inverter that can handle kettle-level surges, even if you rarely run them.
- Mount PV high and clear, with an isolator and DC cabling in UV‑rated conduit.
- Specify a 12/24V pump, header tank, and water filtration methods: sediment, carbon, then UV.
- Fit greywater to a soakaway sized to soil percolation and Building Regs guidance.
- Choose a sealed composting WC or cassette, plan emptying intervals, and vent above roofline.
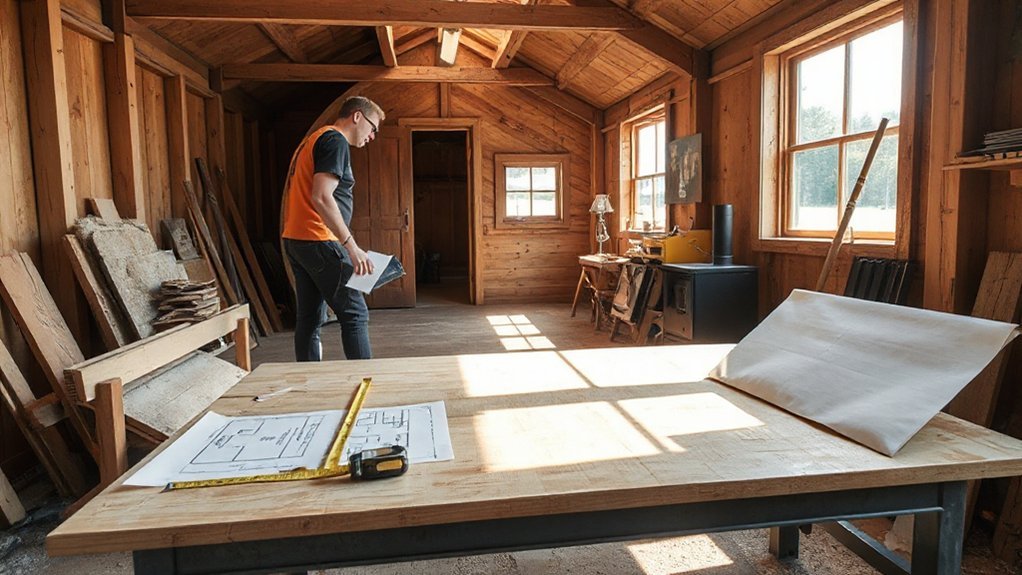
Fit Out the Interior: Storage, Kitchen, and Washroom
Where do you put everything when your shepherd’s hut barely gives you a few square metres to work with? You’ll win space by building storage into structure: bench seats with lift-up lids, toe-kick drawers, and overhead lockers fixed to studs with ply backers. Specify lightweight poplar ply and positive latches for towing. Keep interior decor hard-wearing: Osmo-oiled timber, washable paint, and trim that hides service runs.
For the kitchen, you’ll fit a 600 mm worktop, a two-burner LPG hob with flame-failure, and a small 12 V compressor fridge; vent the locker to BS EN 1949.
In the washroom, use a compact cassette WC or separating toilet, plus a corner basin and wet-room tanking.
Plan lighting design with 12 V LEDs, task strips, and IP65 fittings.
Frequently Asked Questions
Do I Need Building Permits to Place a Shepherd’s Hut on My Land?
Yes—you’ll often need planning permission, unless it’s genuinely movable, ancillary, and not used as a dwelling. Check local authority guidance, Historical shepherd’s hut regulations, and Shepherd’s hut aesthetics impacts, plus Building Regulations for services.
How Can I Insure a Shepherd’s Hut for Full-Time or Rental Use?
You’ll guarantee it by arranging specialist park-home insurance or adding it to your home policy, declaring full-time or holiday-let use. Want guests cosy by the stove? Compare Insurance options, ensure Liability coverage, contents, and loss-of-rent protection.
What Are Typical Total Costs and Timelines for a DIY Build?
You’ll typically spend £8k–£25k on a DIY build, depending on spec; do rigorous cost estimation for chassis, timber, insulation, windows, electrics, plumbing. Expect 6–16 weekends; tight timeline planning cuts rework, delays.
How Do I Transport a Finished Hut Legally on Public Roads?
You’ll tow it on a plated trailer or as a caravan, keep within UK size/weight limits, fit lights/reflectors, and follow Road safety regulations. Check Foundation considerations: axle rating, hitch height, brakes, and insurance.
What Maintenance Schedule Best Prevents Rot, Rust, and Roof Leaks?
Inspect quarterly: clear gutters, check flashings, and test Roof waterproofing. Annually: wash, spot‑prime, and repaint steel; re‑seal fixings. Every 2–3 years: apply Timber preservation and renew exterior stains. After storms, probe joints for damp.
Conclusion
You’ve planned the footprint around your use-case, selected a compliant chassis or static base, and built a breathable shell from low-impact timber with ventilated cavities. You’ve insulated with wool or fibre, controlled dew point risk, and paired efficient heating with managed ventilation. Like a well-tuned MVHR system, every component works in balance. You’ve sized solar, water storage, and waste treatment for true off-grid resilience, then fitted durable storage, kitchen, and washroom.