We’ll revive your Victorian town house properly by starting with a room-by-room survey, checking damp, movement, roof defects and services safety, then confirming listing or conservation constraints with the council. We’ll set a line-item budget with 10–20% contingency and phase works: stop water ingress, stabilise structure, and preserve original joinery and lime plaster before finishes. We’ll repair rooflines, chimneys, gutters and drains, draught-proof sash windows, then upgrade heating, electrics, insulation and ventilation. Keep going for the full sequence.
Key Takeaways
- Start with a room-by-room survey, documenting damp, movement, roof defects, and services risks to define scope, phasing, and priorities.
- Confirm listed or conservation constraints early, engaging planners and conservation officers to ensure compliant repairs to windows, roofs, and interiors.
- Budget with itemised evidence and 10–20% contingency, prioritising structure, weatherproofing, and statutory compliance before decorative finishes.
- Stop water ingress first by repairing roofs, chimneys, gutters, and drains, then address damp with ventilation, breathable lime plaster, and rot treatment.
- Preserve original fabric by repairing joinery and plaster like-for-like, adding discreet draught-proofing, and upgrading heating, electrics, insulation, and ventilation reversibly.
Survey Your Victorian Town House (and Permissions)
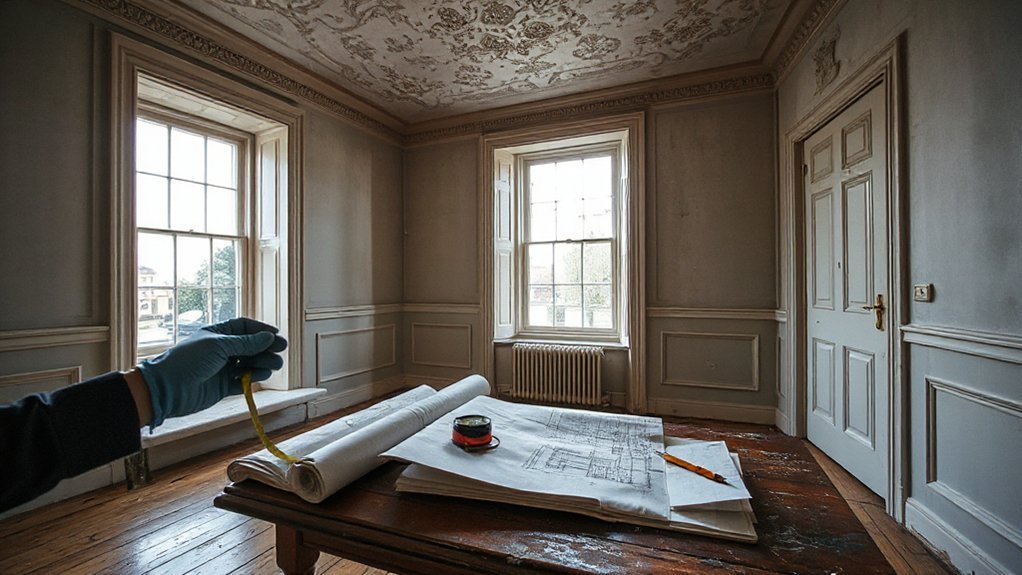
Before we pick up a tool, we’ll carry out a thorough survey of the house and confirm what permissions apply, because Victorian fabric can hide serious defects and legal constraints can shape every decision.
We’ll record the building’s condition room by room: damp staining, failed flashings, roof spread, sagging joists, cracked plaster, and worn stonework. We’ll check services safety, ventilation routes, and any signs of historic movement, then photograph and mark up plans so everyone’s working from the same evidence.
Next, we’ll establish whether the property is listed or in a conservation area, and what that means for windows, doors, roof coverings, and internal features.
Early dialogue with the local planning authority and conservation officer keeps Victorian architecture and Historic preservation aligned, and keeps our project on track.
Set a Restoration Budget and Work Order
Next we’ll set a restoration budget that defines scope line by line and builds in a realistic contingency for hidden defects behind lath and plaster, rotten joists, and outdated services.
We’ll agree cost priorities upfront—structure, weatherproofing, and compliance first—so you’re not spending on finishes before the fabric is sound.
Then we’ll map a phased work order plan that sequences surveys, enabling works, major trades, and reinstatement to control cashflow, reduce rework, and keep the programme on track.
Budget Scope And Contingency
Although the romance of a Victorian townhouse can tempt us to dive straight into stripping back plaster and polishing floorboards, we’ll keep the project on track only if we define a realistic budget scope and a clear work order from the outset.
We’ll agree what’s included (structure, services, finishes, fees) and what isn’t (garden redesign, bespoke joinery upgrades), then price each line with evidence from surveys and comparable quotes.
Strong budget allocation means ring‑fencing essentials: roof, damp management, electrics, heating, and fire safety, before decorative spend.
We’ll build contingency planning into the total—typically 10–15% for known unknowns, rising to 20% where access is limited or fabric is fragile.
We’ll also set decision thresholds, so variations need our sign‑off and feel fair to everyone involved.
Phased Work Order Plan
With a budget scope and contingency agreed, we can turn it into a phased work order plan that protects the building fabric and keeps cashflow predictable. We’ll sequence tasks so each trade hands over a stable, weather-tight shell before finishes begin, and we’ll keep you in the loop with sign-offs at every gateway—this is how our community of owners avoids costly rework in Victorian architecture.
- Phase 1: Make safe and dry — structural checks, temporary propping, roof repairs, guttering, drainage, damp diagnosis.
- Phase 2: Core services and fabric repair — rewiring, plumbing, lime mortar, sash overhaul, breathable insulation, joinery.
- Phase 3: Final finishes and compliance — plastering, decoration, flooring, fire safety, Building Control, snagging.
We’ll log decisions, variations, and heritage rationale for Historic preservation and future resale.
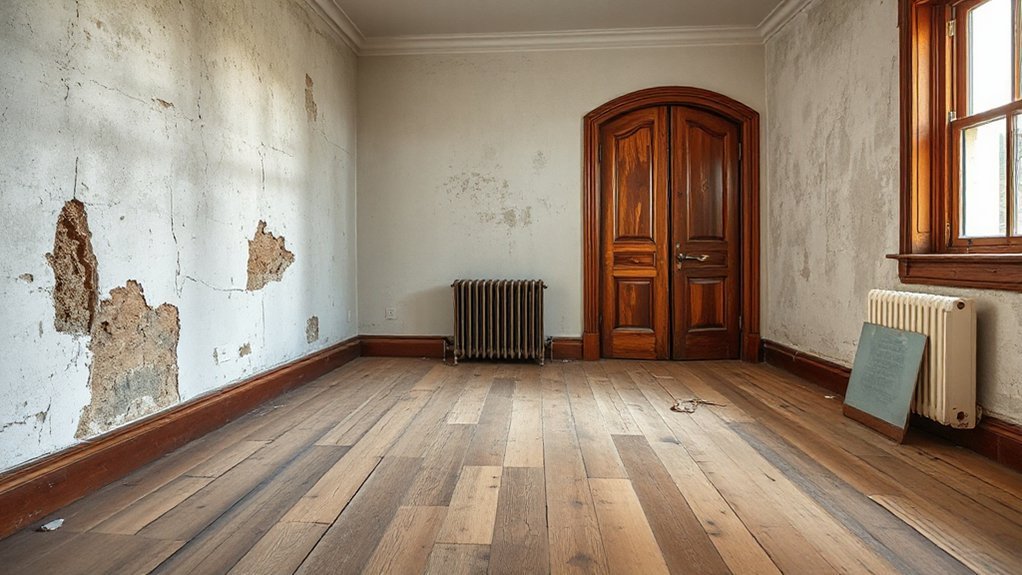
Tackle Damp, Rot, and Structural Movement
Before we strip back finishes or commit to major repairs, we need to identify and stop the causes of damp, rot, and structural movement, because any cosmetic work will fail if the fabric stays wet or unstable.
We’ll map moisture with a meter, check for salt deposits, and trace staining to sources such as bridging of the damp-proof course, high external ground levels, leaking internal plumbing, and poor ventilation.
Damp prevention means lowering ground, clearing sub-floor vents, and reinstating breathable lime plaster where cement has trapped moisture.
For Rot treatment, we’ll cut out decayed timber back to sound wood, improve airflow, and use boron paste where appropriate.
We’ll monitor cracks with tell-tales, assess joist bearings, and call a structural engineer if movement widens or doors rack.
Repair Rooflines, Chimneys, Gutters, and Drains
Next we’ll put the building back on a watertight footing by correcting rooflines and making chimneys and flues safe, sound, and properly ventilated.
We’ll check pots, flashings, pointing, and flaunching, then repair or reline flues where defects risk leaks, poor draw, or carbon monoxide.
We’ll also restore gutters, hoppers, downpipes, and below-ground drains so rainfall discharges cleanly away from the house rather than soaking the walls and foundations.
Chimney And Flue Repairs
Although a Victorian town house chimney can look sound from street level, we shouldn’t trust appearances—failed flashings, perished flaunching, sulphate attack on brickwork, and blocked flues often hide until damp staining or poor draw forces the issue.
We’ll tackle chimney restoration methodically, so your stack performs safely and we all keep the house’s character intact.
- Inspect at roof level: check lead soakers, step flashings, pots, and mortar joints; rake out and repoint in lime where needed.
- Open up and sweep: clear debris, nests, and fallen parging; test draw and smoke-tightness before relighting any appliance.
- Specify flue lining: fit the correct stainless or pumice system, then cap and ventilate unused flues to prevent condensation and salts.
Gutter And Drain Restoration
Why do so many Victorian town houses suffer recurring damp at the eaves and in the lower ground floor? Because failed gutters, cracked hoppers, and blocked gullies send water where it shouldn’t go.
We start at the roofline: check falls, jointing, and bracket spacing, then clear debris and flush through to confirm free flow.
Repair cast-iron with proper clamps and epoxy where suitable, or splice like-for-like sections to respect historic materials.
Re-bed slipped slates at the eaves and renew flashings around chimneys so runoff reaches the gutter, not the wall.
At ground level, we rod rainwater pipes, reset trapped gullies, and repair broken clay drains.
We finish with discreet weatherproofing techniques: lime-compatible sealants and breathable paint, keeping the whole terrace looking cared-for together.
Draught-Proof Victorian Windows and Doors
Before we reach for replacement units, we’ll draught-proof Victorian windows and doors because it cuts heat loss dramatically without sacrificing original joinery or listed-building character. We’ll work room by room, keeping you part of the town-house caretakers’ club: careful, reversible, and compliant.
- Find leakage paths: hold a smoke pencil by sash stiles, meeting rails, thresholds, and letter plates; mark gaps, then prioritise the worst.
- Fit discreet seals: use brush pile in staff beads and parting beads, compression seals to casements, and a drop seal or new threshold strip to doors.
- Tighten operation: add sash stops, renew cords, and tune locks so frames pull snug.
These Victorian window restoration steps apply proven Draught proofing techniques without altering sightlines or glazing bars.
Repair Plasterwork, Floors, and Original Joinery
Once we’ve stopped the worst draughts, we’ll turn to plasterwork, floors, and original joinery, because these fabric repairs stabilise the house and protect its historic finishes.
We’ll start by sounding walls and ceilings for hollow patches, then cut back to firm keys and re-fix with stainless screws and plaster washers before plaster restoration in lime putty, finished with a tight skim.
We’ll keep cornices by taking moulds from sound runs and casting lime repairs in situ.
Underfoot, we’ll lift loose boards, label them, and tighten joists with packing rather than forcing them level.
Finally, we’ll clean, splice, and wax skirtings, architraves, and shutters, choosing like-for-like timber for joinery preservation.
Together, we’ll keep the patina, not erase it.
Upgrade Heating, Electrics, Insulation, and Ventilation
After we’ve stabilised the fabric, we can upgrade heating, electrics, insulation, and ventilation in a way that improves comfort without trapping moisture or scarring original features. We’ll start by mapping existing routes and keeping services in reversible voids, not chased into lime plaster.
For historic heating, we can keep restored radiators, add thermostatic valves, and use weather-compensated controls, or discreet underfloor zones where floors lift.
Electrical upgrades should prioritise a new consumer unit, RCD protection, and metal back boxes, with period-appropriate fittings where visible.
Insulate lofts and between joists with vapour-open materials, then pair with controlled ventilation so damp can’t linger.
Let’s agree a joined-up strategy:
- Heat loss survey and emitter plan
- Cable and earthing schedule
- Ventilation rate and moisture checks
Frequently Asked Questions
How Can I Source Period-Accurate Tiles, Bricks, and Ironmongery?
We’ll source period-accurate tiles, bricks, and ironmongery by prioritising reclamation yards, salvage auctions, and specialist makers. Use historic tile sourcing guides, match brick dimensions locally, and insist on authentic ironmongery procurement from UK foundries, heritage suppliers.
What Insurance Covers Renovation Risks in an Occupied Victorian Townhouse?
Nearly 1 in 5 UK home insurance claims involve escape of water—we’ll protect you with specialist renovation and occupied-home policy coverage: contractor’s all-risks, public liability, employer’s liability, and existing-structure cover. We’ll check exclusions and guarantee Insurance claims run smoothly.
How Do I Choose Reputable Heritage Contractors and Verify Their Credentials?
We’ll choose reputable heritage contractors by checking portfolios in Historical preservation, taking UK references, and confirming memberships (IHBC/FMB). We’ll verify Contractor licensing via Companies House, CHAS, and public liability cover, then insist on written method statements.
Which Paint Colours and Finishes Best Match Victorian Interiors Room-By-Room?
We’ll match Victorian interiors by room: hall deep ochre, parlour rich green, dining burgundy, bedrooms softer tints, kitchen stone. Use Victorian color palettes with Historic paint finishes: distemper/matt, oil eggshell on woodwork, and waxed varnish.
What Ongoing Maintenance Schedule Prevents Future Deterioration After Restoration?
We’ll prevent deterioration with a yearly plan: quarterly gutter clearing, damp checks, and timber inspection; biannual paintwork touch-ups; annual roof survey, servicing boilers, and repointing reviews. Together, we’ll safeguard Historical preservation and structural integrity.
Conclusion
We’ve covered how to survey properly, secure permissions, and set a realistic budget, then tackle damp, rot, movement, and the roofline before moving inside to windows, plaster, floors, and services. If you’re thinking “it’s too much for one project”, we don’t need to do it all at once—we prioritise watertightness and safety first, then phase upgrades room by room. Done methodically, a Victorian townhouse rewards us with comfort, character, and lasting value.