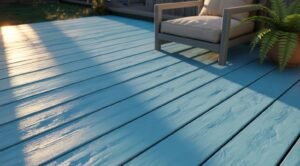
Colors transform your deck; follow easy steps to clean, sand, stain, and seal so you protect wood and prevent rot. You achieve decking with stunning colors that last and avoid common mistakes for a durable, safe finish.
Assessing and Preparing the Deck Surface
Inspect the deck for rotten or loose boards, protruding nails, peeling finish, and surface contamination; you must repair or replace compromised areas to create a solid foundation for fresh color.
Deep Cleaning and Power Washing Techniques
Begin by sweeping debris, apply a deck cleaner, then power wash at moderate distance and pressure-avoid staying too close to prevent wood damage; allow the deck to dry fully before proceeding.
Sanding for Smooth Finish and Optimal Adhesion
Smooth the surface by sanding with the grain, moving from coarse to fine grit to ensure optimal adhesion and an even appearance ready for stain or paint.
Use an orbital sander for open boards and a sanding block for edges, starting with 80-100 grit and finishing with 120-150 grit. Sand along the grain, avoid excessive pressure that can gouge, then vacuum and wipe with a tack cloth so dust won’t interfere with adhesion. Wear a respirator and eye protection because silica dust is hazardous, and confirm the deck is dry before coating.
Selecting the Ideal Coating: Paint vs. Stain
Choosing paint over stain affects color saturation and upkeep; you should weigh coverage against grain visibility, factoring in expected traffic, weather exposure, and how often you want to recoat.
Understanding Opacity and Wood Grain Visibility
Opacity controls how much grain shows; you can pick solid finishes to hide flaws or semi-transparent stains to preserve the wood grain while adding UV protection and color depth.
Comparing Oil-Based and Water-Based Formulations
Oil-based products deliver deeper penetration and longer wear, while water-based versions offer lower VOCs, quicker drying, and easier cleanup; you should match formula to project timeline and environmental concerns.
Consider that oil-based finishes often have higher VOCs and longer cure times; you can favor water-based for low VOCs, faster return-to-use, and simpler cleanup when safety or timelines matter.
Oil-Based vs Water-Based
| Oil-Based | Water-Based |
|---|---|
| Deeper penetration, longer wear | Lower VOCs, quicker drying |
| Longer cure time, flammable solvents | Fast return-to-use, less odor |
| Harder cleanup (solvents) | Easy cleanup with soap |
| Best for heavy-wear decks | Best for quick projects and low-emission areas |
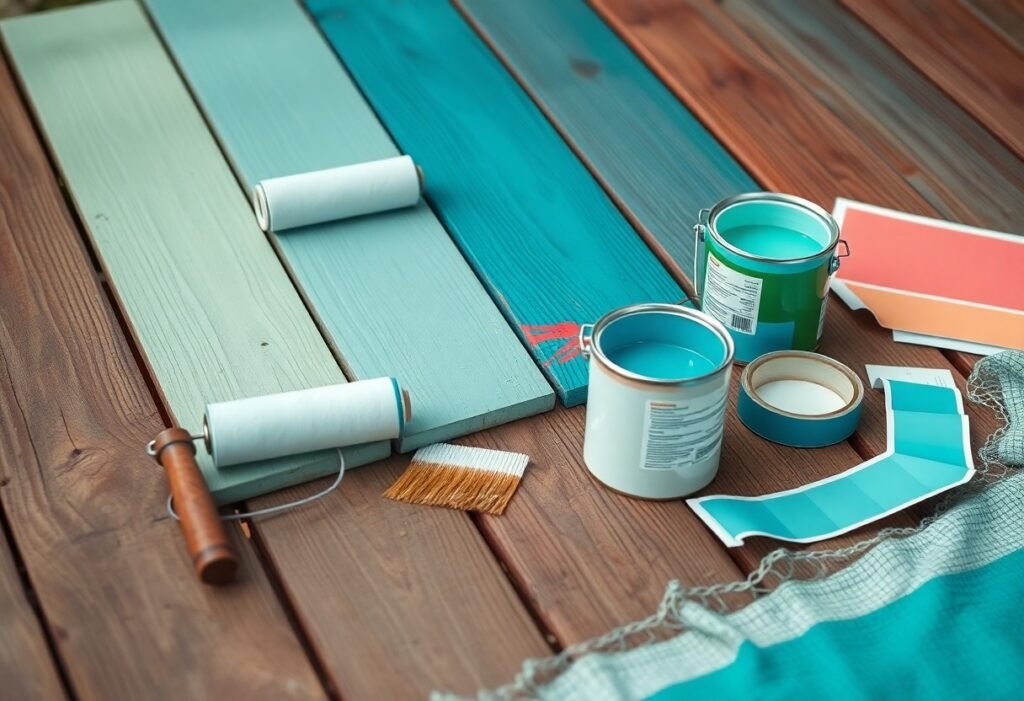
Essential Tools for a Professional Finish
Tools like a quality brush, roller and orbital sander help you achieve a professional finish; pair them with pads and a paint guard so you maintain safety around sharp edges and fumes while working.
Selecting High-Quality Brushes and Rollers
Choose brushes with high-quality synthetic bristles for water-based colors and a dense, low-lint roller to deliver even coats, reduce streaks, and cut your recoat time.
Protective Gear and Surface Masking Materials
Wear a NIOSH-rated respirator, chemical-resistant gloves and sealed goggles to block toxic fumes and splashes, and use painter’s tape plus drop cloths to shield nearby surfaces.
Ensure you fit the respirator snugly and use organic-vapor cartridges for solvent-based products, choose nitrile gloves to prevent skin absorption, seal edges with painter’s tape, cover plants and furniture with plastic sheeting, and provide adequate ventilation to minimize exposure to harmful fumes.
Execution: The Step-by-Step Application Process
| Step | Action |
|---|---|
| Prep | Clean, sand, and check for loose boards; keep surfaces dry and wear protective gear |
| Prime | Apply quality primer for better adhesion and even topcoat coverage |
| Paint | Work in small sections, roll then back-brush to force color into grain |
| Cure | Allow recommended drying time; avoid foot traffic until fully cured |
You will follow clear stages-prep, priming, painting and curing-to achieve stunning, lasting color; keep boards clean and dry, and use proper PPE to avoid hazards.
Proper Priming for Long-Lasting Results
Begin by sanding and removing debris, then apply a quality primer so adhesion is maximized; ensure boards are completely dry and you maintain even coverage for long-lasting results.
Mastering the Back-Brushing Technique
Apply paint in manageable sections and use back-brushing to push color into the grain; keep your strokes steady and avoid overworking to prevent streaks and pooling.
Practice by working in small sections: roll, then immediately back-brush with an angled synthetic brush so you force product into the grain and smooth ridges. Use short, firm strokes and keep a wet edge to avoid lap marks. Choose the correct brush-synthetic for water-based, natural-bristle for oil-and never paint damp boards to prevent adhesion failure.
Post-Transformation Maintenance and Care
After your deck makeover, you should inspect boards and finishes regularly, tighten fasteners, spot-clean stains, and address any mold quickly; keep furniture pads in place and avoid harsh pressure washing to protect color and grain. Use mildew-safe cleaners and test cleaners on hidden spots.
Seasonal Cleaning and Debris Removal
Regularly, you should sweep and remove leaves, pollen, and debris to prevent standing water and rot; rinse with mild detergent and a soft brush each season, and clear nearby gutters so runoff won’t accelerate finish wear.
Implementing Periodic Protective Re-Sealing
Protect your color by re-sealing every 1-3 years depending on sun exposure and traffic; select a quality sealer with UV protection and follow drying times to avoid peeling.
When preparing to re-seal, you should clean thoroughly and allow the deck to dry for 48-72 hours; sand rough spots and remove old, flaking finish so the new coat bonds. Use a brush or roller for even application, apply thin coats, and add a slip-resistant additive on high-traffic steps. Choose between penetrating oils for a natural look or film-forming sealers for longer wear, and keep containers away from heat-many finishes are flammable. Expect the manufacturer’s cure time before heavy use and replace failing areas promptly to prevent further rot.
Conclusion
Now you can transform your decking with smart color choices, proper prep, and quality finishes that resist weathering. Follow simple application steps, test samples, and maintain finishes annually to ensure vibrant, long-lasting results you can trust.
FAQ
Q: How do I choose the right color for my decking?
A: Consider the style of your home, yard, and nearby hardscapes when selecting a color. Test color swatches on several boards and view them at different times of day to see how light affects the shade. Match or contrast with exterior trim and furniture depending on the look you want; darker colors hide stains but absorb more heat, while lighter shades reflect heat and show wear less quickly.
Factor in the wood species and its natural undertones, and select products formulated for that substrate. Check manufacturer samples for UV resistance and maintenance recommendations to set realistic expectations.
Q: What are the step-by-step preparation and application tips for vibrant, long-lasting color?
A: Clean the deck thoroughly with a wood cleaner or oxygen bleach to remove dirt, mildew, and old finish residues. Repair loose boards and replace rotten sections, then sand glossy areas and remove dust with a leaf blower or vacuum. Measure moisture content with a meter; apply stain or paint only when wood reads below the product-recommended level and weather will stay dry for the full drying period.
Apply primer when using latex paint, and use a stain or paint designed for exterior decking for best adhesion. Work in small sections, follow the grain, back-brush or roll as needed to push product into the wood, and wear protective gear when using a sprayer. Allow each coat to dry fully, check manufacturer recoat intervals, and perform a test strip before committing to full coverage.
Q: How often should I maintain my deck’s color and what are easy maintenance routines?
A: Inspect the deck annually for worn areas, flaking finish, or mildew, and address spots promptly to prevent larger repairs. Clean the surface each spring with a mild cleaner and low-pressure rinse; avoid high-pressure washing that can damage wood fibers. Reapply a single maintenance coat of stain or clear sealer every 1-3 years depending on sun exposure, traffic, and product durability.
Use furniture pads and rugs to limit abrasion, move planters periodically to prevent moisture traps, and trim back nearby plants that touch the deck. When full refinishing is required, strip worn finish, sand to bare wood if necessary, and follow original application steps for best color renewal.