
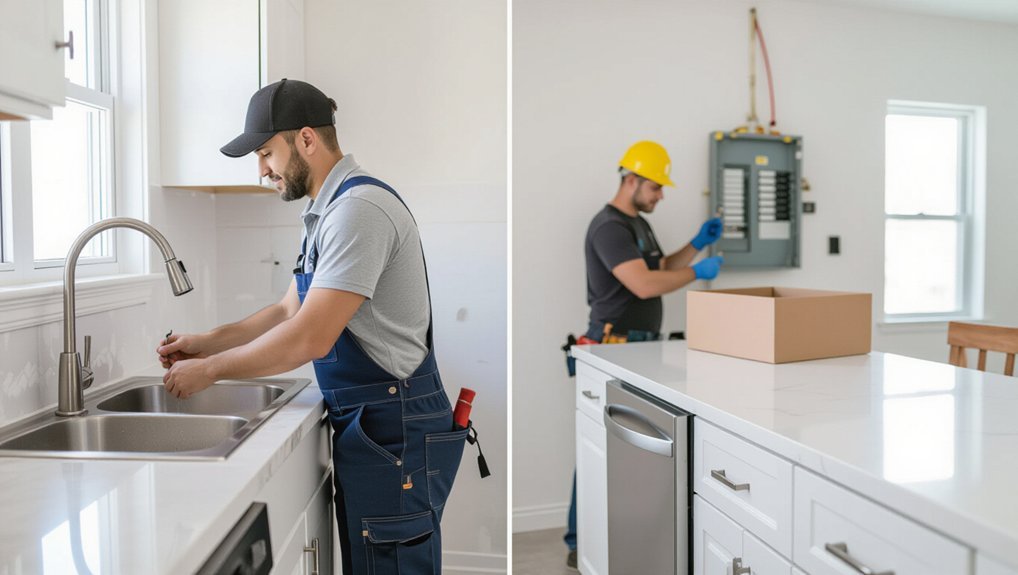
You should repair a home component when damage is localized, parts and qualified help are available, and the fix costs under 25% of replacement. You should replace it when there’s a safety risk (fire, leaks, mold, structural rot), parts are discontinued, performance is inadequate, or repair exceeds 50% of replacement without delivering half the remaining life. Use age cues too: older roofs, HVAC over 12–15 years, and corroded plumbing usually justify replacement. Keep going to see element-by-element triggers.
Key Takeaways
- Replace when safety risks exist: fire, leaks, mold, structural damage, or code violations outweigh repair benefits.
- Use the 50% rule: if repair costs exceed half of replacement and won’t last half as long, replace.
- Repair when issues are localized and systems still perform well, like small roof leaks, drafts, or single damaged siding boards.
- Replace when parts are discontinued, repeated failures occur, or equipment is near end-of-life, like HVAC over 12–15 years.
- Prioritize replacement for widespread deterioration, such as roof granule loss, rotten window frames, corroded plumbing, or unsafe electrical panels.
Repair Vs Replace: 5 Rules to Decide Fast
When something in your home breaks, you don’t have time to overthink it—you need a quick, repeatable way to decide whether a repair is worth it or if replacement will save you money and headaches.
Rule 1: Check safety—if it risks fire, leaks, mold, or structural damage, replace.
Rule 2: Verify parts and support—if components are discontinued or you can’t get a qualified tech, replace.
Rule 3: Confirm root cause—if you can’t diagnose why it failed, don’t patch blindly; replace or rebuild correctly.
Rule 4: Assess performance—if it can’t meet today’s needs (capacity, efficiency, code), replace.
Rule 5: Consider aesthetics—if it undermines Home decor cohesion or clashes with Landscaping design plans, replace to avoid rework later.
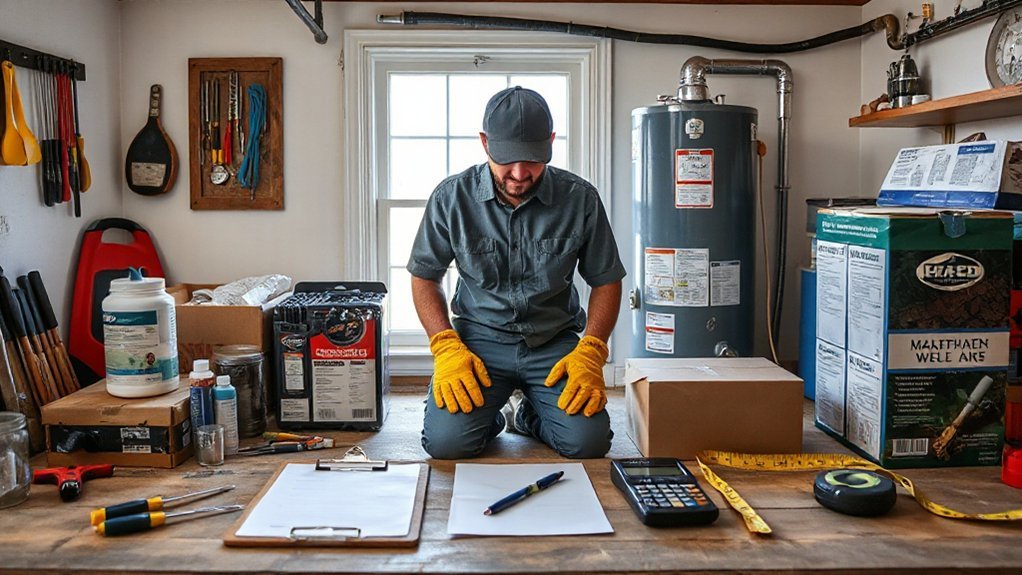
Repair vs Replace Costs: Ranges + Break-Even Point
Because the “right” choice often comes down to dollars, you should compare repair vs replacement using real cost ranges and a simple break-even test.
Minor fixes often run $100–$600 (patches, parts, labor).
Mid-level repairs can hit $600–$2,500 when multiple components fail.
Full replacement typically starts around $1,500 and can climb past $10,000 depending on size, access, and finishes.
Use a break-even rule: if repair costs exceed 50% of replacement, and the repaired item won’t reliably last at least half the new item’s expected life, replace it.
Also price the “hidden” costs: repeated service calls, downtime, and collateral damage to Home decor.
When replacement improves efficiency or supports landscaping design plans, you’ll often recover value sooner.
Repair vs Replace Your Roof: Leaks, Age, Layers
Although a roof leak can look like a simple patch job, you should decide repair vs replacement by checking three things first: where the water actually enters, how old the roof is, and how many shingle layers already sit on the deck.
Start with Roof inspections in the attic and on the surface; stains may travel, so trace wet decking to the uphill penetration, flashing seam, or valley.
If the roof’s under 10–12 years and shingles still flex, targeted flashing repair and a few shingle swaps usually win.
Past 20 years, widespread granule loss, curled tabs, or soft spots signal replacement.
Also count layers: two layers often mask rot and trap heat; many codes limit you to one re-roof.
After storm damage, replace when impact bruising or lifted fields affect whole slopes, not isolated tabs.
Repair vs Replace Windows and Doors: Drafts vs Rot

If you feel drafts around windows or doors, you can often fix the problem with weatherstripping, caulk, and adjustments to the sash, strike plate, or hinges.
You should replace units when you find rot in frames, sills, or jambs, because decayed wood won’t hold fasteners, sealants, or hardware for long.
Start by pinpointing air leaks versus soft, crumbling material so you spend money on repairs where they’ll last and replacement where they won’t.
Draft Sealing And Repairs
When your windows or doors feel drafty, you don’t always need a full replacement—often you can restore comfort with targeted sealing and small repairs. Start by finding leaks with a smoke pencil or a damp hand on windy days.
Then focus on insulation efficiency and draft prevention at the gaps, not the glass. Replace worn weatherstripping on operable sashes and door bottoms, and add a door sweep if light shows at the threshold.
Re-caulk exterior trim joints with paintable, elastomeric sealant, and repair cracked glazing putty around panes. Tighten loose hinges, adjust strike plates, and square the door so seals compress evenly.
If a window won’t lock tightly, replace the latch to pull the sash snug. These fixes cut drafts quickly and cost far less.
Rot Damage And Replacement
Draft fixes solve comfort issues at the gaps, but rot signals a moisture problem that can compromise the frame itself. Probe sill corners and door bottoms with an awl; if the wood feels spongy, flakes, or crumbles, you’re dealing with Wood rot. Check for bubbling paint, dark staining, and persistent condensation that points to moisture damage behind the trim.
You can repair small, localized rot by drying the area, fixing the leak, treating with a consolidant, and rebuilding with epoxy, then priming all sides.
Replace when rot reaches the jambs, spreads along the sill, affects fastener hold, or lets the unit rack out of square. If glass seals fail or the threshold is soft, replacement usually saves time and restores structure.
Repair vs Replace HVAC: Comfort, Efficiency, Safety
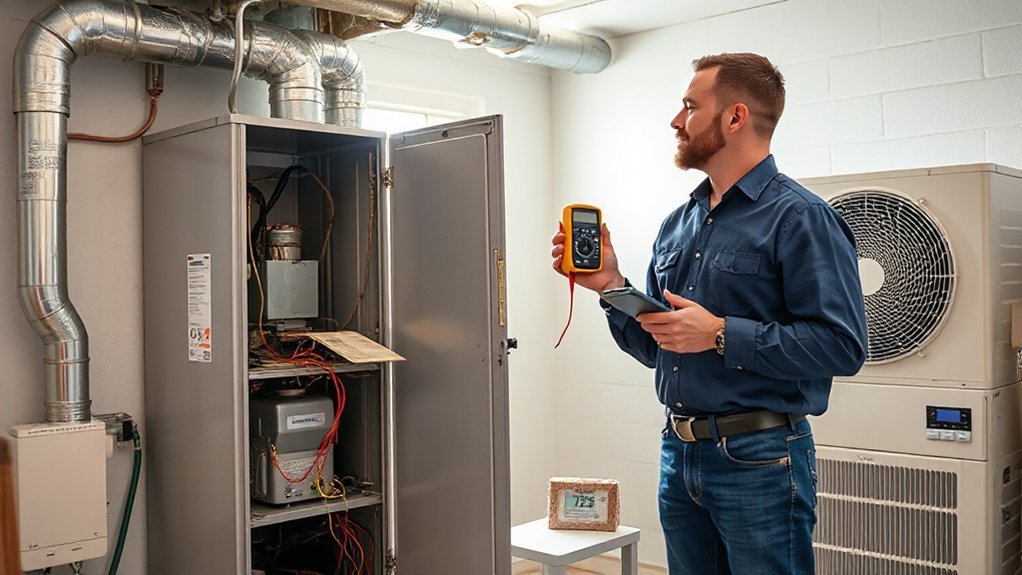
Although your HVAC system often limps along with minor fixes, the repair-versus-replace decision should hinge on three things: comfort, efficiency, and safety. If rooms stay uneven, humidity won’t stabilize, or the system short-cycles, repairs may not restore comfort.
Track energy bills and run-time: rising costs, frequent service calls, and outdated SEER ratings point toward replacement, especially if your unit is 12–15 years old.
Prioritize safety when you notice gas odors, persistent burning smells, tripped breakers, or cracked heat-exchanger warnings—replace immediately.
Protect air quality by fixing duct leaks, changing filters, and scheduling HVAC maintenance. If you still see excess dust, moldy odors, or allergy flare-ups, a new, properly sized system with better filtration may be the smarter move.
Repair vs Replace a Water Heater: Leaks, Rust, Recovery
If your water heater shows even minor trouble, you need to judge it by three fast signals: leaks, rust, and recovery time. A drip at fittings might be a repair, but tank seepage usually means replacement.
Rusty water or flakes point to water heater corrosion, often from a spent anode rod; you can replace the rod if the tank isn’t compromised.
Slow recovery and temperature fluctuations suggest failing heating elements, sediment buildup, or a struggling gas burner—repairs can restore output, but not if the unit’s near end-of-life.
- Replace the anode rod when corrosion appears early and the tank is sound
- Flush sediment if recovery is slow and popping noises start
- Replace elements/thermostat when temperature swings persist
- Replace the tank if rust, swelling, or base leaks show
Repair vs Replace Kitchen Appliances: Fixability Checklist
Start with the appliance’s age and expected service life—if it’s near the end of its typical lifespan, replacement usually makes more sense.
Next, compare the repair quote to the unit’s value and follow a clear threshold (often 50% or more of replacement cost points toward replacing).
Finally, confirm parts availability and lead times; if critical components are discontinued or backordered for weeks, you’re better off replacing.
Age And Service Life
Before you spend money on a repair call, check the appliance’s age against its typical service life, because that number usually predicts whether you’re buying a lasting fix or just delaying replacement.
Compare the model’s build era to Historical trends: older units often used heavier components, while newer designs may prioritize efficiency over longevity. Then judge Material durability—metal gears, thick-gauge racks, and robust hinges usually outlast thin plastics.
- Find the manufacture date on the serial tag; don’t guess by install year.
- Match age to averages (dishwasher 8–12, fridge 10–15, range 13–18, microwave 7–10).
- Note lifetime-limiting parts: compressors, control boards, door seals, drum bearings.
- If it’s near end-of-life, expect cascading failures and longer downtime.
Repair Cost Thresholds
Age tells you how close the appliance is to the end of its run; the next step is to put a hard ceiling on what you’ll spend to keep it going. Use a simple rule: if the repair estimate exceeds 50% of the price of a comparable new unit, replace it; if it’s under 25%, repair it; between 25–50%, decide based on efficiency gains and how soon you’ll remodel.
Include labor, diagnostic fees, delivery, haul-away, and any required electrical or plumbing updates. If you’re adding Home automation, treat the upgrade value like a discount on replacement—newer appliances integrate better and may cut utility costs.
Also weigh opportunity cost: money sunk here can delay outdoor landscaping projects you’ve budgeted.
Parts Availability Check
How fast can you get the exact part your appliance needs? Before you approve a repair, confirm Parts availability for your model and revision. If the manufacturer lists the component as discontinued, or lead times exceed your tolerance, replacement often wins.
You’ll also want to verify Material compatibility so the new part won’t accelerate wear, leak, or short out due to mismatched metals, plastics, or connectors. Use this quick check to avoid paying labor twice.
- Search the model/serial number on the OEM parts site, not just marketplaces
- Ask for lead time in writing and whether substitutes fit your exact revision
- Confirm return policy and warranty on the part and the installed repair
- Compare total downtime cost (food loss, laundromat, takeout) against replacing now
Repair vs Replace Plumbing: Leaks, Clogs, Old Pipes
Although a dripping faucet or slow drain can look like a quick fix, plumbing problems call for a clear repair-or-replace decision based on what’s failing and what’s at risk behind the walls. If leaks come from a single fitting, you can usually repair it with new washers, a cartridge, or a compression nut—then recheck water pressure to confirm you didn’t create a restriction.
Clear recurring clogs by snaking and inspecting the trap; if backups return, replace crushed, bellied, or corroded drain sections. Replace supply lines that show bulging, green corrosion, or brittle valves.
If your home has galvanized steel, polybutylene, or multiple patched pinholes, replacement prevents cascading failures and hidden rot. Upgrade pipe insulation where freezing is possible to avoid burst pipes.
Repair vs Replace Electrical: Panel Limits and Hazards
When your breakers trip repeatedly or lights flicker under normal loads, you need to decide fast whether you’re dealing with a fixable circuit issue or a panel that’s reached its safe limits.
If one circuit’s overloaded, you can often repair it by redistributing loads, replacing a faulty breaker, or tightening loose terminations.
But a crowded, outdated, or damaged service panel raises Electrical hazards and usually calls for Panel upgrades.
- You smell burning, see scorching, or feel heat at the panel door
- Breakers won’t reset, or they trip with small, routine loads
- You’ve added big appliances, EV charging, or a workshop circuit
- The panel shows corrosion, water intrusion, or obsolete brands
Don’t ignore arcing sounds or buzzing—shut power off and call a licensed electrician.
Repair vs Replace Exterior Finishes: Siding, Paint, Trim
If your siding shows cracks, your paint peels early, or your trim stays soft after drying out, you’re looking at more than cosmetic wear—you’re evaluating the home’s first line of water control.
Repair makes sense when damage is localized: re-caulk failed joints, replace a few boards, and scrape to sound substrate before priming. Match exterior texture and sheen so patches don’t telegraph moisture pathways.
Replace when you find widespread rot, recurring blistering, or panels that won’t hold fasteners; those usually signal trapped water behind the cladding. Also replace if your siding material is past its service life, heavily warped, or missing a drainage plane.
During replacement, add flashing at penetrations, maintain clearances, and back-prime trim to slow future absorption.
Repair vs Replace If You’re Selling Soon (ROI Rules)
If you’re selling soon, put your money into high-ROI repairs that buyers notice immediately—think fresh paint, minor curb-appeal fixes, and small functional upgrades.
Replace only what’s clearly failing or scaring buyers off, like a leaking roof section, dead HVAC, or rotten trim that won’t pass inspection.
Keep finishes and features in line with your neighborhood’s price point so you don’t over-improve and cut into your return.
Prioritize High-ROI Repairs
Heading into a sale, focus your budget on repairs and updates that buyers notice immediately and appraisers can justify on paper. You’ll get the best ROI by fixing condition issues that read as “well-maintained,” then layering simple presentation upgrades.
Start with a quick pre-listing inspection, price each item, and fund the work that reduces buyer objections and supports a higher valuation. Keep choices neutral and consistent across rooms so interior decor feels intentional, not piecemeal.
Outside, tidy garden landscaping to boost first impressions and shorten days on market.
- Patch drywall, re-caulk baths, and touch up trim paint
- Deep-clean flooring and correct pet or smoke odors
- Refresh lighting (matching temps) and update basic hardware
- Improve curb appeal: edging, mulch, pruning, and a clean entry
Replace Only Visible Failures
When should you replace instead of repair when you’re selling soon? Replace items that look broken, stained, or dated at first glance, because buyers price in visible risk. Swap cracked switch plates, warped baseboards, torn screens, and chipped tile; quick repairs won’t hide defects under showing lights.
Replace a failing faucet, loose toilet, or noisy exhaust fan if the fix still leaves wobble, leaks, or loud operation. In the kitchen, replace a dented appliance front or peeling laminate; patching reads “temporary.” Keep upgrades surface-level: fresh caulk, new outlet covers, and consistent hardware finishes that support your interior decor.
Outside, replace dead shrubs, split edging, and missing pavers; tidy garden landscaping must look intentional, not “revived.”
Match Neighborhood Expectations
Because buyers compare your home to nearby listings, you’ll get the best ROI by repairing or replacing to the neighborhood’s baseline—not to your personal “dream upgrade” standard. If most comps have solid mid-grade finishes, you’ll waste money chasing Luxury upgrades that won’t price in.
Instead, fix condition issues, match common features, and reserve replacements for elements that drag your showing down.
- Pull three recent comparable sales and note finish level, age, and curb appeal.
- Replace only when repair still reads “worn” (stained carpet, dated fixtures, peeling trim).
- Prioritize high-visibility, low-risk swaps: neutral paint, updated lighting, fresh hardware.
- Target landscape improvements that mirror the street: edged beds, healthy turf, clean walkways.
You’ll protect value, avoid overbuilding, and shorten days on market.
Frequently Asked Questions
Do Home Warranties Cover Repairs or Replacements for Major Systems?
Yes—Home warranty coverage typically pays for major system repair or replacement when covered components fail from normal wear. You’ll still pay a service fee, and exclusions, caps, preexisting issues, and improper maintenance can limit payouts.
Should I Get Permits Before Replacing Electrical, Plumbing, or HVAC Components?
Yes—you should usually get permits before replacing electrical, plumbing, or HVAC components. Permit requirements protect electrical safety, confirm code compliance, and trigger inspections. Call your local building department first; unpermitted work can void insurance and warranties.
How Do I Choose a Reliable Contractor for Repair Versus Replacement Work?
Choose a reliable contractor by verifying licensing, insurance, and local references. Compare itemized bids, timelines, and warranties. For Home repair versus replacement, ask about options and code compliance. Trust clear communication and documented change orders.
Will Insurance Pay for Replacement After Storm, Water, or Fire Damage?
Insurance may pay for replacement if your policy covers Storm damage, water, or fire and you meet deductibles. You’ll file Insurance claims, document losses, mitigate further damage, and expect exclusions for neglect, wear, or flooding.
How Can I Prioritize Repairs When Multiple Systems Fail Simultaneously?
Like triage in a storm, you tackle safety, then water, power, and HVAC first. Set Scheduling priorities by risk and downtime. Lock Budget management by pricing critical fixes, deferring cosmetic work, and staging contractors.
Conclusion
You don’t have to guess when to repair or replace—use clear rules, real costs, and safety limits to decide fast. If the fix is minor, recent, and stops the root cause, repair it. If failures repeat, parts are obsolete, or you’re facing code or safety issues, replace it. Think of your home like a car: patching a tire works once; a bald set needs swapping. When selling, prioritize upgrades buyers notice and inspectors flag.


