
Before you make an offer, you can spot costly defects if you follow a tight, methodical inspection sequence. You’ll check grading and downspouts for negative slope, scan interiors for moisture staining and musty VOC odors, and confirm with a meter where possible. You’ll note foundation crack patterns, door bind, roof granule loss, and panel heat or DIY wiring. You’ll also test pressure, drainage, HVAC output, and wood damage—but one sign should change your decision immediately…
Key Takeaways
- Do a 10-minute interior scan for musty odors, humidity, uneven floors, stains, and fresh paint that can conceal active leaks.
- Use a moisture meter to confirm intrusion pathways, especially at window corners, plumbing walls, and exterior penetrations with elevated readings.
- Verify exterior drainage: grade slopes 6 inches over 10 feet, and downspouts discharge 6–10 feet away or into tightline drains.
- Check structure and roof: map foundation cracks, test door binding, inspect shingles/flashing, and look for attic staining, dampness, or poor ventilation.
- Spot safety hazards quickly: test GFCIs/outlets, watch for panel red flags, and check under sinks for corrosion, active drips, and slow drains.
Pre-Offer Home Inspection Checklist (10 Minutes)

Before you submit an offer, you can complete a disciplined 10‑minute walkthrough that flags high-risk defects and helps you decide whether to proceed, renegotiate, or escalate to a specialist.
Start at the entry: note odors, humidity, and uneven floors that indicate concealed leaks or settlement. Scan ceilings and window heads for staining, tape lines, or fresh paint. Open and close several doors and windows; binding suggests frame movement.
Test a representative set of outlets with a plug tester and verify GFCIs trip and reset. Run faucets briefly; watch for delayed hot water, sputter, or cabinet base swelling. Check under sinks for corrosion and active drips.
At the panel, confirm labeling and look for double-taps. Don’t let Home staging distract you; pair findings with Neighborhood analysis.
Exterior Drainage and Grading Before You Buy
Once your quick interior walkthrough flags moisture or movement risks, verify how the site handles water, since exterior drainage and grading drive many basement leaks, slab heave, and crawlspace rot.
Walk the perimeter and confirm finished grade slopes away from the foundation at least 6 inches within 10 feet; note any reverse pitch, settlement pockets, or eroded swales.
Evaluate roof runoff discharge: gutters, downspouts, and extensions should route water 6–10 feet away or into tightline drains.
Inspect hardscapes and driveways for negative slope toward the structure and for cracked joints that concentrate flow.
Identify onsite stormwater management features—dry wells, French drains, catch basins, or rain gardens—and confirm they’re placed downslope and clear of overflow paths.
Check fence lines for neighbor runoff convergence points.
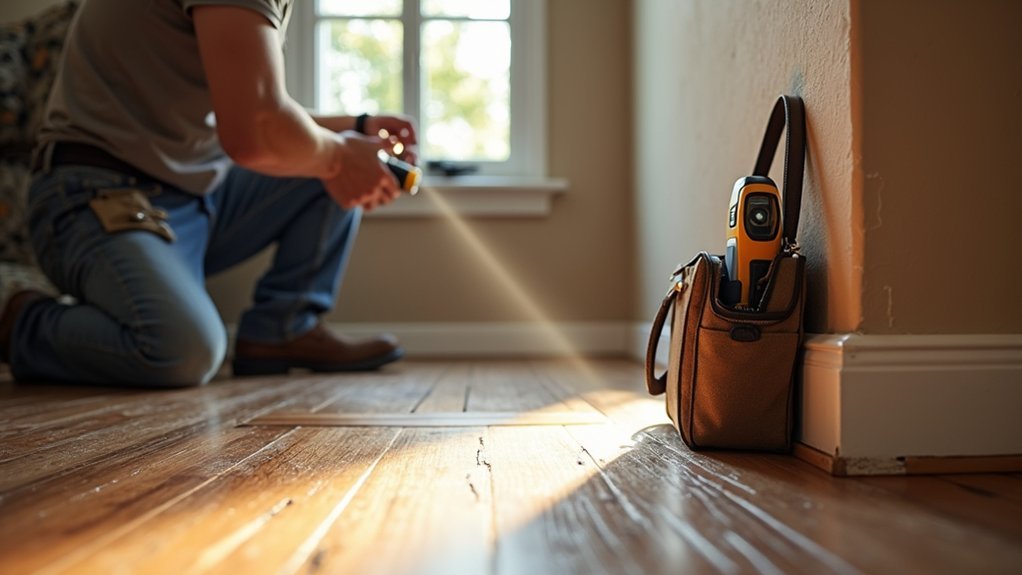
Water Intrusion Clues: Stains, Smells, and Meters
You can identify water intrusion by reading stains and discoloration patterns on drywall, trim, and foundation surfaces. Noting tide lines, efflorescence, and blistered paint that indicate repeated wetting.
You should also treat persistent musty odors as an active moisture signal and trace them to adjacent cavities, floor junctions, and exterior wall intersections.
You can confirm and map the extent with a moisture meter, taking baseline readings on dry materials, comparing suspect areas, and documenting elevated values to guide further inspection.
Reading Stains And Discoloration
Although a stain can look like a simple cosmetic defect, its color, edge definition, and location often map directly to a moisture pathway. When you’re reading stains, note yellow-brown halos on drywall; they often indicate slow seepage and repeated wetting cycles.
Crisp, dark edges suggest an active leak, while diffuse margins imply older events or wicking through porous finishes. Track gravity patterns: vertical runs under window sills, fan-shaped marks below roof penetrations, and perimeter staining at slab edges.
Evaluate discoloration across materials. Efflorescence on masonry signals migrating salts from moisture movement. Black spotting on painted surfaces may reflect persistent condensation, especially at thermal bridges behind furniture.
Warped baseboards, blistered paint, and softened trim confirm prolonged exposure. Mark locations, compare symmetry, and correlate with exterior drainage features.
Detecting Moisture With Meters
When visual clues and odors suggest water intrusion but don’t define its extent, a moisture meter lets you quantify dampness and trace it to a likely pathway.
Use pin-type Moisture meters on drywall, trim, and subflooring to measure internal moisture; use pinless meters to scan larger areas without punctures.
Establish a baseline on a known-dry surface, then map readings outward from stains, window corners, plumbing walls, and exterior penetrations.
Treat elevated readings that taper with distance as a directional gradient toward the source.
Verify anomalies by checking adjacent materials, fastener lines, and sill plates where capillary wicking concentrates moisture.
Document percentages, locations, and ambient humidity, and recheck after HVAC operation.
Consistent spikes often indicate Hidden leaks or active intrusion requiring invasive confirmation.
Foundation Shifts: Cracks, Slopes, Sticking Doors
As a foundation shifts under load, moisture variation, or soil movement, the structure transfers stress into rigid finishes and framed openings, producing telltale defects that an inspection can confirm quickly.
You should map Foundation cracks by location, width, and orientation; stair-step cracks in masonry and diagonal drywall cracks at corners often indicate differential movement. You should note any displacement, spalling, or fresh patching that may conceal active separation.
Perform a Slope assessment by running a 6–8 ft level across floors and recording out-of-plane readings; localized dips near bearing walls can signal settlement.
You should test doors for latch alignment and rubbing at jambs, then compare multiple openings on the same plane.
You shouldn’t ignore recurring caulk splits at trim; they track cyclic movement.
Roof Wear Signs and What They Usually Cost

Because roof systems fail progressively, you can usually spot wear early by checking for lifted or missing shingles, granular loss that exposes asphalt, cracked or curled tabs, soft decking underfoot, and flashing defects at valleys, chimneys, and penetrations.
To quantify Roof wear, document slopes, materials, and repair access, then run cost estimation using unit pricing and measured areas.
- Replace a few shingles and reseal flashing: $200–$700
- Replace step/pipe flashing assemblies: $300–$1,200
- Correct widespread granule loss (re-roof likely): $6,000–$18,000
- Replace rotten sheathing during re-roof: $2–$7 per sq ft
- Upgrade underlayment/ice barrier at eaves: $1–$3 per sq ft
You’ll reduce scope creep by requiring photos, a written scope, and a warranty duration before you negotiate.
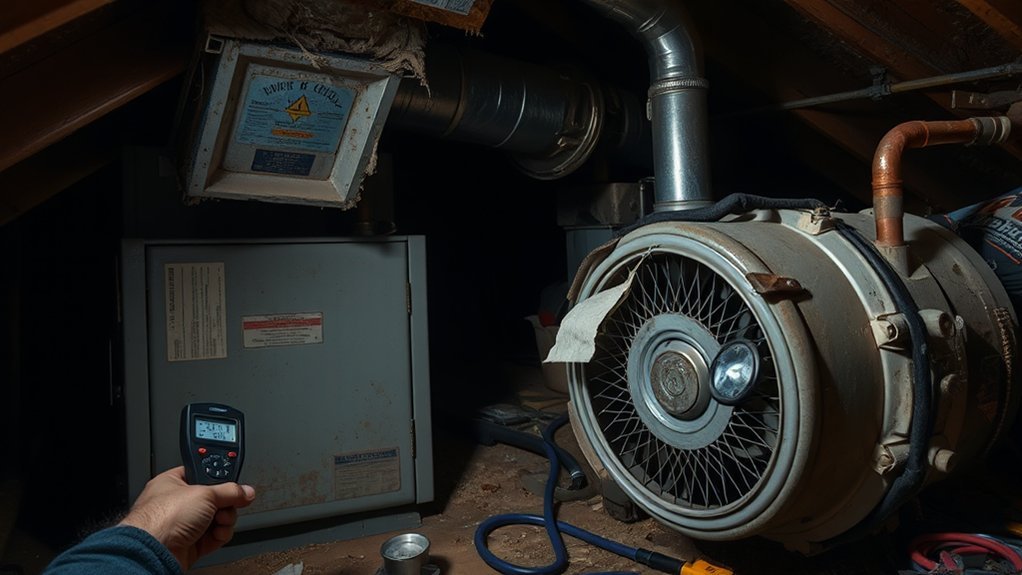
Attic and Crawlspace: Leaks, Mold, Ventilation
Even if the roof looks sound from the exterior, you can confirm moisture performance only by inspecting the attic and crawlspace for active leaks, chronic condensation, microbial growth, and ventilation defects that trap humid air.
In the attic, scan sheathing and rafters for dark staining, rusted fasteners, and wet nail tips. Probe around penetrations and valleys for dampness, and verify attic insulation isn’t matted, compressed, or masking water tracks. Check for frost lines in cold climates and for blocked soffit paths that short-circuit airflow.
In the crawlspace, assess vapor barrier continuity, standing water, and wood moisture at sills and joists. Verify crawlspace vents are unobstructed, screened, and appropriately distributed.
Note musty odor, efflorescence, and fungal films indicating chronic humidity and spore amplification.
Electrical Inspection Red Flags (DIY and Hazards)
When you inspect a property’s electrical system, you should assume prior DIY work may conceal code violations and latent fire risk.
You can often spot common mistakes by checking for double-tapped breakers, exposed conductor splices outside junction boxes, reversed polarity at receptacles, and missing GFCI/AFCI protection where required.
You should treat flickering lights, warm or scorched outlets, buzzing at the panel, persistent breaker trips, and aluminum branch wiring with improper terminations as immediate hazard indicators.
Common DIY Wiring Mistakes
How often do DIY electrical “fixes” hide behind neat faceplates while creating serious safety hazards? When you inspect a home, treat DIY wiring as a high-risk variable because amateur terminations, splices, and device selection often ignore code and load calculations, increasing electrical hazards.
- You’ll find backstabbed receptacles instead of screw-terminal connections, reducing contact area and increasing resistance.
- You may see mixed wire gauges on a breaker, creating uneven heating under load.
- You can spot open splices outside approved junction boxes, defeating strain relief and containment.
- You should check for reversed polarity or bootleg grounds that mask missing equipment grounding.
- You’ll notice overfilled boxes where conductor bend radius and fill limits get violated, stressing insulation.
Dangerous Electrical Warning Signs
DIY terminations and improvised splices often look tidy at the device face, so you need to rely on red-flag conditions that indicate overheating, arcing, or miswired grounding. You should treat warm cover plates, buzzing, intermittent flicker, or a sharp “hot plastic” odor as urgent indicators.
At the panel, you shouldn’t accept double-tapped breakers, mixed-brand breakers, missing knockouts, or scorched insulation. You should flag aluminum branch wiring tied directly to copper without listed connectors.
Open a few receptacles: you shouldn’t see backstab terminations, loose neutrals, bootleg grounds, or reversed polarity.
Outside, you shouldn’t see exposed electrical wiring, cracked conduit, or undersized bonding jumpers at meters and service equipment. If GFCI/AFCI protection is absent where required, circuit safety is compromised and upgrades are likely.
Plumbing Checks: Leaks, Pressure, Slow Drains
Although plumbing problems often stay out of sight, you can surface them quickly by checking for active leaks, stable water pressure, and proper drainage.
Start at Plumbing fixtures: inspect supply stops, escutcheons, and trap joints for moisture, corrosion, or mineral tracks. Confirm water pressure by opening two fixtures simultaneously; flow shouldn’t collapse or pulse.
Check cabinets and flooring for staining, swollen particleboard, or musty odors that indicate chronic seepage.
Test drainage by filling sinks and tubs, then releasing water; it should evacuate rapidly without gurgling, backsplashing, or sewer odor.
- Scan under sinks with a flashlight for active drips
- Wrap tissue on shutoffs to reveal weeping valves
- Note pressure drop during simultaneous use
- Time bowl refills; slow refills suggest restriction
- Run all drains; listen for gurgle indicating vent issues
HVAC Inspection: Age, Airflow, and Noises
Before you trust a home’s comfort claims, evaluate the HVAC system’s age, airflow consistency, and operating noises because these factors reveal efficiency losses and impending component failure.
Check the data plate for manufacture date, model, and refrigerant type; older units often show reduced HVAC efficiency and higher repair risk.
Run heating and cooling modes and measure supply-to-return temperature split; weak deltas suggest low charge, dirty coils, or blower issues.
Verify airflow room-to-room: feel each register, confirm balanced returns, and note hot/cold spots.
Perform a duct inspection at accessible plenums and joints for disconnected runs, crushed flex, gaps, and heavy dust lines indicating leakage.
Listen for rattling, grinding, short-cycling, and whistling; they signal loose panels, bearing wear, or static-pressure problems.
Pests and Wood Damage: and When to Walk
Next, you’ll inspect for termite activity and wood deterioration by checking mud tubes on foundation walls, frass near sill plates, and hollow-sounding or blistered wood at joists and trim.
You’ll verify rot by probing suspect members for softness, moisture staining, and fiber failure, especially around bathrooms, kitchens, decks, and roof penetrations.
If you confirm active infestation, widespread structural section loss, or conditions indicating long-term moisture intrusion without a practical remediation plan, you shouldn’t proceed and should walk.
Spotting Termites And Rot
When you inspect a property, treat termite activity and wood rot as structural risk indicators rather than cosmetic defects. You’ll verify conditions that support cellulose decay and insect ingress, then document extent, moisture source, and accessibility for repair.
- Check mud tubes on foundation walls, piers, and sill plates; probe for hollow sound.
- Look for frass, discarded wings, and blistered paint near baseboards and window trim.
- Test Wood rot with an awl at window sills, door thresholds, decks, and rim joists.
- Measure moisture at suspect lumber; readings above ~20% justify targeted invasive evaluation.
- Review grading, downspouts, crawlspace ventilation, and soil-to-wood clearance for Termite prevention.
You should photograph evidence, map locations, and request a licensed WDI report plus moisture-correction plan.
Deciding When To Walk
Evidence of termites or rot becomes a deal-level decision once you’ve verified active conditions, mapped affected members, and tied the damage to a persistent moisture source.
You should walk if structural members show section loss, crushing, or deflection, or if probing reveals soft fiber beyond localized trim.
Require you to walk when the seller won’t authorize invasive inspection, can’t document prior treatment, or when moisture readings stay elevated after basic drying.
Walk if concealed damage likely extends behind interior decor, built-ins, or tiled wet walls, implying costly selective demolition.
Exterior risk rises when Garden landscaping buries siding, bridges slab edges, or traps soil against piers, enabling reinfestation.
If remediation needs full sill replacement, widespread joist sistering, or repeated chemical barriers, the risk profile exceeds typical contingencies.
Frequently Asked Questions
Should I Hire a Specialist Inspector in Addition to a General Home Inspection?
Yes, you should hire a specialist inspector when risks exceed the general report’s Inspection scope. You’ll gain Specialist expertise for HVAC, roofing, structural, sewer, or electrical concerns, reducing uncertainty, quantifying defects, and supporting negotiations.
What Inspection Contingencies Should I Include in My Purchase Contract?
Picture floorboards whispering beneath your steps: you’ll include contingencies for general, structural, roof, HVAC, plumbing, electrical, pest, and sewer inspections; require Property disclosure review; set a tight Inspection timeline; and retain repair/credit termination rights.
How Do I Verify if Renovations Were Permitted and Approved by the City?
Request Permit verification through the city’s online portal or building department. Match permit numbers to finaled inspections and certificates of occupancy. Confirm renovation approval by reviewing plans, signed inspection cards, and “final” status; document everything.
Can I Negotiate the Price Instead of Requesting the Seller to Make Repairs?
Yes, you can negotiate the price instead of repairs; you’ll quantify Renovation costs using contractor bids, then apply Property negotiations by requesting a credit, reduction, or escrow holdback tied to documented defects and timelines.
What Hidden Issues Are Typically Excluded From a Standard Inspection Report?
Standard inspections often exclude concealed defects behind finished surfaces, underground Foundation issues, latent Pest infestations, mold sampling, sewer scope, asbestos/lead testing, and code compliance. You’ll need specialized evaluations to detect hidden structural, environmental, and subgrade problems.
Conclusion
You’ve now got a disciplined, time-efficient method to surface hidden defects before you commit. Verify drainage and grading, trace moisture with stains, odors, and meters, and evaluate foundations for displacement via cracks, slopes, and binding doors. Confirm roof wear and likely replacement ranges, then flag unsafe electrical conditions and plumbing faults. Check HVAC age, airflow, and abnormal sounds. Finally, treat pest and wood damage as deal-breakers when warranted—you can’t afford to buy a pig in a poke.


