You’ll design a driveway that complements your home by starting with how you actually park and turn—vehicle count, door swing, guest overflow, and delivery loads—then matching width (10–12 ft single, 18–20 ft double) and adding pull-off bays or a small turnaround if needed. Choose materials and colors that echo your facade and climate (freeze-thaw concrete, quality asphalt, or well-based pavers), and get slope, apron grading, and drains right. Keep going to see smart layout and lighting upgrades.
Key Takeaways
- Match driveway materials, colors, and edging to your home’s architecture, aligning with roof, brick, trim, and overall massing.
- Plan the layout for your lot shape and traffic flow—straight runs, gentle curves, angled entries, and turnarounds where space is tight.
- Size for real use: 10–12 ft single-lane, 18–20 ft two-way, plus parking bays, door-swing clearance, and turning radius checks.
- Choose durable, climate-appropriate surfaces like air-entrained concrete, quality asphalt, or well-based pavers to resist heat, stains, and freeze-thaw damage.
- Manage water with correct grading, apron alignment, and drains or permeable sections to prevent runoff pooling and protect the driveway’s finish.
Define Your Driveway Goals and Daily Use
Before you pick a material or sketch a layout, get clear on what you need your driveway to do every day: how many vehicles you’ll park, whether you’ll use it for turnarounds or guest overflow, and what kinds of loads it must handle (commuter cars, SUVs, delivery trucks, or an RV).
Measure parking depth, turning radius, and door-swing clearance, then map walk paths to your entry so you don’t force people into traffic.
Decide where bins, bikes, and packages land, and plan a dedicated pad to prevent clutter.
For driveway security, choose sightlines that reveal the approach, add lighting zones, and reserve space for a gate or camera.
Finally, plan landscaping integration early—tree roots, drainage swales, and edging should support runoff control and seasonal curb appeal.
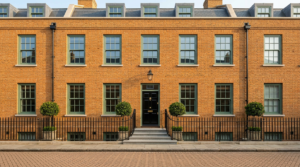
Match Driveway Design to Your Home’s Architecture
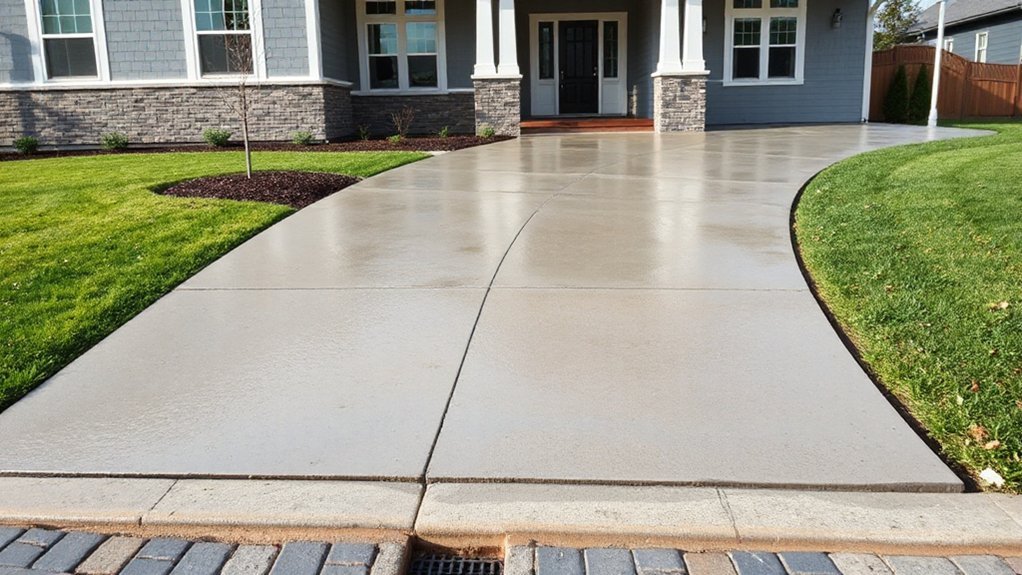
To make your driveway feel intentional, you’ll want it to echo your home’s architectural style—clean pavers for modern lines, tumbled stone for traditional charm, or exposed aggregate for a fresh, contemporary look.
Coordinate colors and materials with what’s already on your facade (roof, brick, trim), so the driveway reads as part of the palette instead of an add-on.
Keep scale and proportion in check by matching driveway width, edging, and pattern size to the home’s massing and the garage frontage, avoiding looks that feel either cramped or oversized.
Reflect Architectural Style
How do you make a driveway look like it belongs with your house instead of feeling like an add-on? Start by echoing your home’s architectural lines. If you’ve got a modern facade, keep edges crisp, joints tight, and geometry simple.
For a craftsman or cottage, introduce gentle curves and a slightly narrower approach that feels welcoming, like connected garden pathways. With a colonial or traditional home, center the drive on the front elevation and use balanced symmetry to reinforce formality.
Match scale to the house: wide garages need broader aprons and turning radii; compact homes look better with restrained widths. Trend-wise, integrate subtle driveway security—low-profile bollards, discreet lighting placement, and clear sightlines—without overpowering the entry experience.
Coordinate Colors And Materials
When you coordinate your driveway’s colors and materials with your home’s exterior palette, the whole approach reads as intentional instead of patched on. Start by pulling two to three tones from your siding, brick, stone, or trim, then choose a driveway hue that echoes them.
For warm brick, lean into tan, charcoal, or clay pavers; for cool gray façades, consider slate, salt-and-pepper concrete, or bluestone-inspired finishes.
Use Color coordination to link hardscape to details like garage doors, window frames, and roof shingles. Then focus on material selection: brushed concrete suits modern lines, tumbled pavers fit traditional homes, and exposed aggregate bridges both while hiding tire marks.
Keep sheen consistent—matte reads current and hides dust.
Balance Scale And Proportion
Even if you’ve nailed the right color and material, the driveway can still look “off” if its scale doesn’t match your home’s architecture. Start by sizing the drive to the façade: wider homes can handle a broader apron and gentle curves, while narrow cottages look better with a tighter, straight run. Match details too—echo rooflines with angled edges, or soften modern boxes with crisp, rectangular bands.
Use proportion to guide borders and joints. A thin soldier-course border suits small entries; larger homes need bolder banding to anchor driveway aesthetics. Keep pattern scale consistent: large pavers overwhelm compact porches, while tiny units can look busy on expansive lots.
Finally, pick thickness and base depth for material durability so big spans don’t crack or rut under traffic.
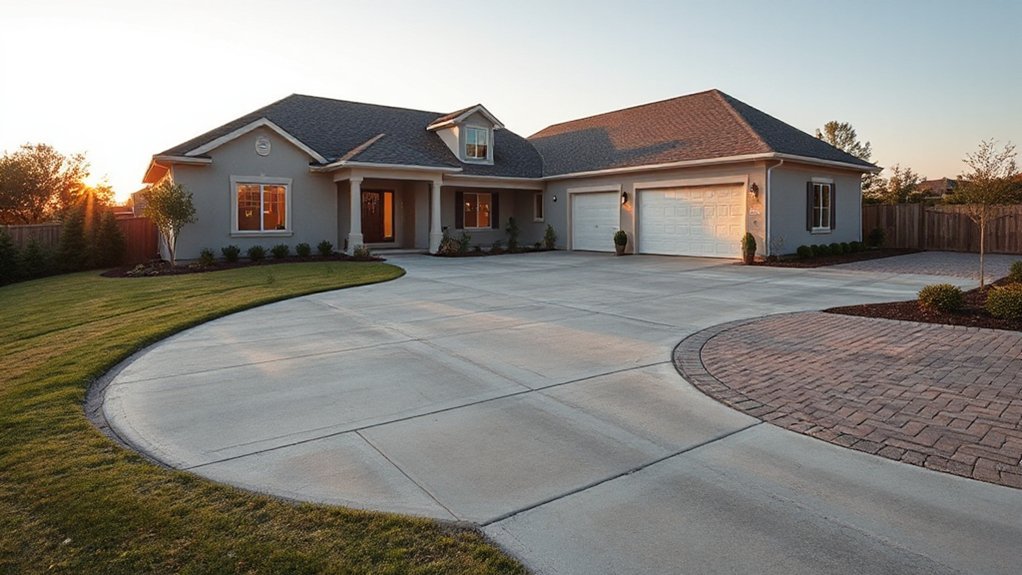
Choose a Driveway Layout for Your Lot Shape
Because every lot handles space, slope, and sightlines differently, you’ll get the cleanest function (and curb appeal) by matching your driveway layout to your property’s shape. On a wide, shallow lot, a gentle arc or split entry can reduce the “runway” look and frame the façade.
On a narrow or deep lot, a straight run often reads crisp, but you can soften it with a slight offset near the house to protect mature trees and keep grades manageable.
Corner lots benefit from an angled approach that respects traffic flow and improves visibility.
If your site slopes, follow contours and use subtle terraces to minimize cut-and-fill and manage runoff.
Finish the plan with Landscaping accents that guide edges, plus discreet driveway signage for guests and deliveries.
Size Driveway Width, Turning, and Parking Bays
Next, you’ll size your driveway for real-world use: a comfortable width for your vehicles, a turning radius that keeps you off the lawn, and parking bays that don’t choke the travel lane.
You’ll base these dimensions on what you actually drive (including pickups, SUVs, or delivery trucks) and how often you need two-way access or guest parking.
Done right, you’ll get smooth entries, fewer multi-point turns, and a cleaner, more modern curb presence.
Optimal Driveway Width
Three numbers will guide almost every driveway-width decision: the clear travel lane, the turning envelope, and any parking bay you want to add.
For most homes, you’ll feel comfortable with a 10–12 ft single-lane width; go 12–14 ft if you expect frequent deliveries, teen drivers, or tight side setbacks.
If you want two cars to pass, plan 18–20 ft, but keep your façade scale in mind so it doesn’t read like a roadway.
Use edging, contrasting bands, and driveway landscaping to visually slim wider pavements while preserving function.
Leave room for gates, bollards, or keypad posts without pinching clearance—small details that improve driveway security and curb appeal.
Turning Radius And Bays
A comfortable driveway width won’t matter much if you can’t turn in and out without a three-point shuffle, so size your layout around the vehicle’s turning envelope and any bays you plan to add. Check your largest vehicle first—SUV, pickup, or van—then map the Turning radius from the street to your garage door with a simple chalk arc or site plan.
If your drive meets the road at an angle or has walls, widen the inside corner or add a flare so you don’t clip curbs. For tight sites, a small hammerhead or teardrop turnaround can beat a full circle.
Add parking bays where cars can pull off without blocking the main path—great for guests, EV charging, or deliveries. Keep bays straight, well-drained, and clear of gates.
Get Driveway Slope and Drainage Right From Day One
Because water always wins, you’ve got to set your driveway’s slope and drainage strategy before you pick materials or finalize edges.
Aim for a consistent 1–2% cross-slope away from your garage and foundation, and keep the fall predictable so you don’t create low spots that pond and ice over.
Use a laser level or stringline early, then lock grades in with compacted base and clear staking.
Add a trench drain at garage thresholds, and route runoff to a swale, rain garden, or dry well—never onto sidewalks or your neighbor’s lot.
Tie drainage into your driveway landscaping with subtle grading and stone channels.
For driveway security, prevent slippery sheets of water near entries and steps, and keep drains accessible for quick cleanouts.
Year-round maintenance matters, too.
Pick Driveway Materials for Your Climate
Match your driveway material to your weather, or you’ll pay for it in cracks, heaves, and premature wear. If you get freeze-thaw cycles, choose surfaces and base details rated for that stress—like air-entrained concrete or properly installed pavers with polymeric sand and robust drainage.
In hot, sunny regions, you’ll want heat-reflective, lighter-color finishes or reflective coatings that keep surface temps down and reduce softening and tire marks.
Freeze-Thaw Resistant Surfaces
Where you live dictates what your driveway can handle, especially when winter swings above and below freezing. Freeze-thaw cycles force water into pores, then expand it into cracks, so you need pavement durability and surface flexibility. Choose air-entrained concrete or high-quality asphalt with polymer modifiers; both tolerate movement better than brittle mixes.
If you like pavers, set them on a properly compacted, open-graded base with edge restraints so units can shift without heaving. Seal concrete and asphalt on schedule, and keep joints and edges tight to block moisture entry.
Prioritize smart drainage: slope the drive, add a trench drain if needed, and avoid low spots that pond. Use de-icing products labeled safe for your material.
Heat-Reflective Material Choices
How hot does your driveway get by midafternoon in July? If it’s radiating heat into your garage and front entry, choose lighter, higher-albedo materials that stay cooler. Concrete in a light gray or buff tone beats dark asphalt; permeable pavers also reduce surface temps by letting water and air move through.
Specify reflective aggregates in exposed-aggregate concrete to boost brightness without looking stark, and ask your installer about polish level so glare stays controlled. For existing slabs, apply Heat reflective coatings rated for UV stability and tire pickup, and recoat on the maker’s schedule.
Pair these choices with a few shade trees or a trellis near the drive for a modern, climate-smart upgrade.
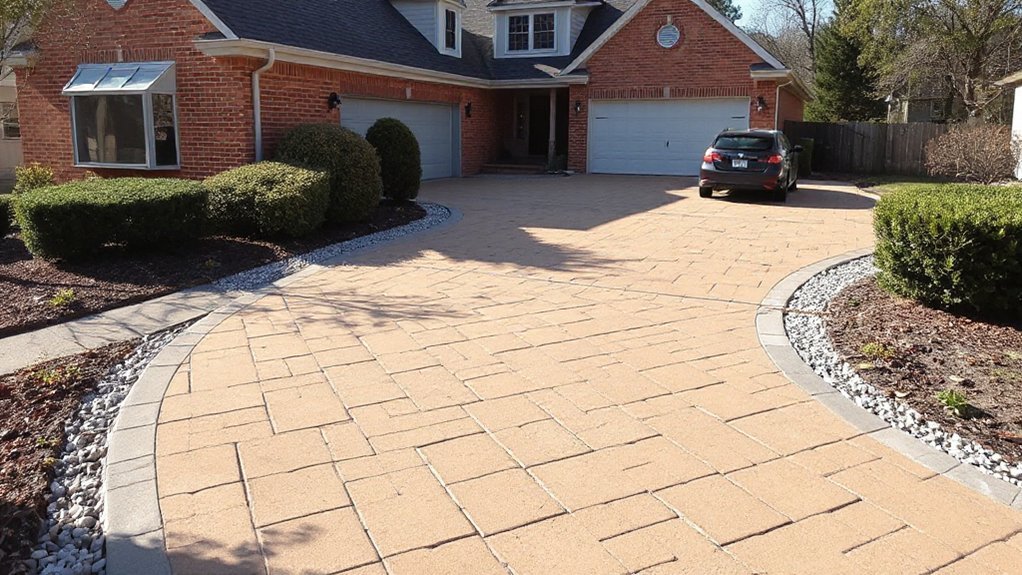
Choose Driveway Color, Texture, and Finish
Ever wonder why two driveways with the same material can look completely different? Your Color selection and Texture variety do the heavy lifting. Start by matching your home’s undertones: warm brick and stucco pair well with sandy beiges or charcoal with brown notes, while cool-toned siding looks sharp with bluish grays.
Stay mindful of dirt: mid-tones hide dust and tire marks better than pure white or jet black.
Next, choose a finish that fits your climate and style. A light broom finish boosts traction for rainy or icy areas. Exposed aggregate reads modern and adds grip, but it can feel busier, so keep the stone mix consistent.
For a sleek look, go with a troweled or lightly burnished surface, then seal it for stain resistance.
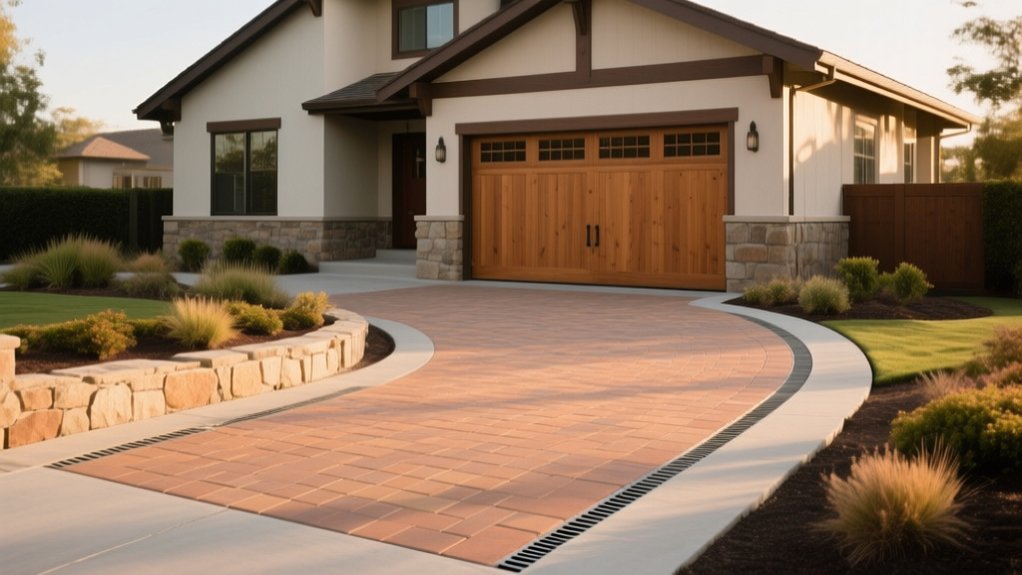
Add Borders and Patterns for Crisp Curb Appeal
Once you’ve nailed the right color and finish, borders and patterns give your driveway a clean, intentional look that reads high-end from the curb. Use Border patterns to frame the slab, break up large pours, and visually “square up” uneven edges.
Keep the scale proportional: narrow bands suit tight lots, while wider soldier courses feel modern on long runs. Choose materials that echo your home—brick for traditional, charcoal pavers for contemporary, or exposed aggregate strips for a subtle tonal shift. Seal transitions carefully so joints don’t telegraph.
- Frame the perimeter with a contrasting band for crisp curb accents.
- Repeat a simple inlay every few feet to guide the eye.
- Match joint lines to façade rhythms for cohesion.
- Limit to two tones so it stays timeless.
Design a Clean Driveway Apron at the Street
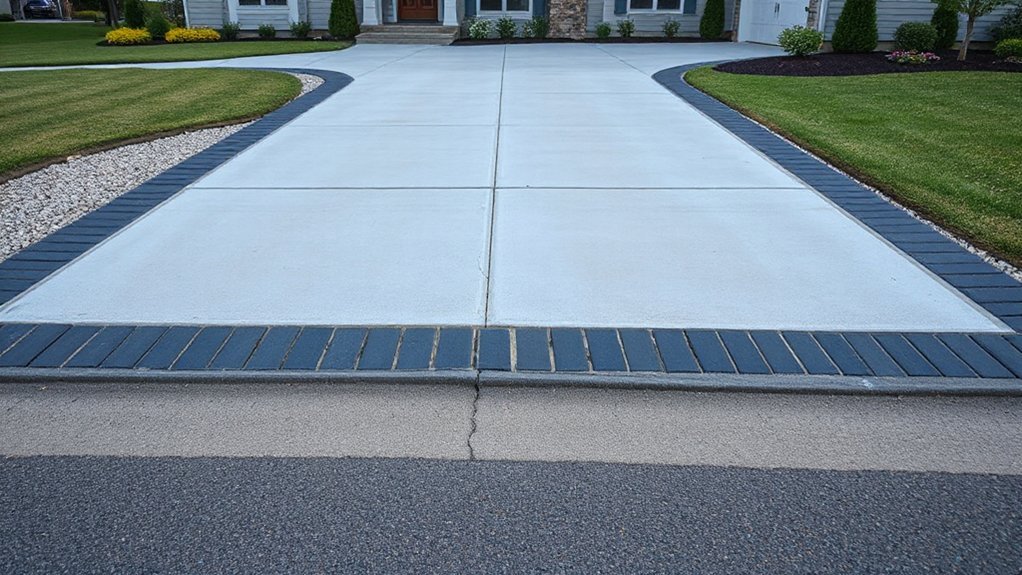
At the street, you’ll get the cleanest look when you match your driveway apron’s width, slope, and edge to the existing curb line.
Set the apron grade to guide water toward the gutter or an approved drain path so you don’t send runoff into the road or back onto your slab.
If your area allows it, consider a subtle channel drain or permeable band at the apron for a modern finish and better stormwater control.
Match Apron To Curb
If you want your driveway to look finished from the street, start by matching the apron to the existing curb line and gutter flow. Good apron matching makes the entry read intentional, not patched on, and it helps your paving tie into the streetscape. Aim for crisp geometry, consistent elevations, and materials that echo your driveway and sidewalk for seamless curb integration.
- Trace the curb radius and mirror it in your apron edges for a factory-clean curve.
- Set a straight reference line from sidewalk joints so your apron doesn’t skew.
- Match concrete finish and color to nearby public flatwork, keeping it modern and cohesive.
- Use clean sawcut control joints that align with driveway scoring for a tailored, current look.
Control Street Runoff
Where does all that street water go when it hits your driveway opening—straight into your garage, across your sidewalk, or back to the gutter where it belongs? A clean apron at the street should steer flow away from your slab and toward the curb line, even during heavy downpours.
Set the apron pitch to match the crown of the road, then add a subtle “lip” or micro-berm at the garage edge if you’re prone to flooding. For modern stormwater management, consider a trench drain or slot drain across the driveway mouth, tied to an approved outlet.
Use tight joints, smooth finishes, and sealed edges so water can’t undermine the base. You’ll get better runoff control and a cleaner frontage year-round.
Blend Driveway Edges Into Landscaping Smoothly
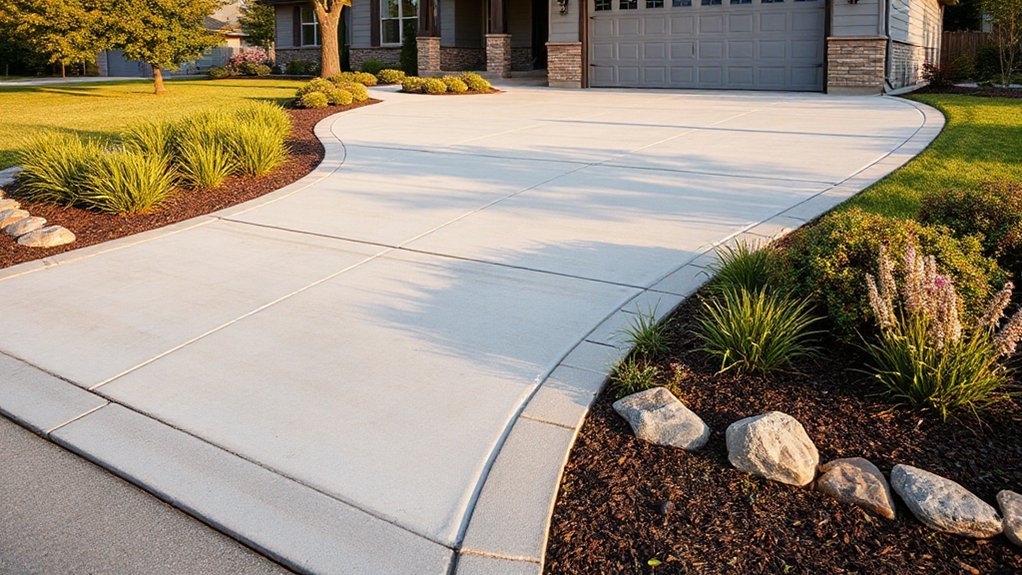
Because a hard driveway line can make your front yard look chopped up, you’ll get a cleaner, more modern curb appeal when you soften the edges with a deliberate shift zone. Plan edge blending as a thin buffer that manages splatter, hides cuts, and makes the pavement feel “set” into the site, not dropped on top.
For strong landscaping integration, keep materials and planting heights consistent with your home’s style and your maintenance tolerance.
- Use a 6–12 inch gravel strip or steel edging to create a crisp, durable boundary.
- Grade the shoulder slightly away from the slab so mulch stays put and water doesn’t undercut.
- Choose tough, low-profile plants (sedges, thyme, dwarf mondo) that tolerate heat and salt.
- Repeat one accent rock or paver tone so the blending reads intentional.
Connect the Driveway to the Front Walk Naturally
Although the driveway and front walk serve different jobs, you’ll get a cleaner, more intentional entry when you connect them with a clear “handoff” zone instead of a random shortcut path. Set that transition near the most-used car door, then aim for pathway alignment that sends you straight to the porch without awkward angles.
Keep grades gentle and consistent, and widen the connector enough for two people or a stroller to pass comfortably. Match materials thoughtfully: repeat the walk’s paver pattern as an inlay in the drive, or echo the drive’s edging along the walk for continuity.
For garden integration, flank the handoff with low, durable planting or a simple seat wall so the connection feels designed, not tacked on.
Plan Driveway Lighting for Safety and Style
Even if your driveway layout looks perfect on paper, poor lighting can turn everyday parking into a safety hazard and make the entry feel flat after dark. Plan driveway lighting like you’d plan landscaping: layered, purposeful, and scaled to your home’s architecture.
Aim for warm LEDs (2700–3000K) to keep finishes looking rich, not washed out, and choose shielded fixtures to cut glare and light spill. Use safety illumination to highlight edges, grade changes, and turning zones so guests and tires stay where they should.
- Place low path lights along borders to define width without runway brightness.
- Add motion-activated sconces at the garage for task light when you arrive.
- Uplight a feature tree or stone wall for modern curb appeal.
- Use step or recessed markers on slopes for confidence.
Check Permits, Codes, and HOA Rules Early
Before you finalize your driveway layout or call a contractor, check local permits, municipal codes, and HOA guidelines so you don’t get forced into a costly redo.
Start with your city or county building office to confirm Permit requirements for new pavement, widening, curb cuts, drainage changes, or work near sidewalks and utilities. Ask about setbacks, maximum width, slope limits, and any requirements for permeable pavers or on-site runoff control—popular upgrades that often trigger extra review.
Then pull your HOA regulations and look for rules on color, edging, patterns, lighting placement, and visible aprons. Submit sketches and product cut sheets early, since boards may meet monthly.
Get approvals in writing, keep them with your contract, and schedule inspections your contractor needs.
Verify Base Prep and Thickness Before Install
Once your permits and HOA sign-offs are squared away, focus on what’s under the surface—because base prep and slab/asphalt thickness dictate whether your driveway stays smooth or starts rutting and cracking in a season. Don’t let a pretty finish hide weak subgrade stability or rushed material compaction.
Walk the site with your installer and confirm measurements before trucks arrive; it’s the most cost-effective quality control you’ll ever do. Use these checks:
- Verify excavation depth matches spec plus slope for drainage and curb progression.
- Confirm base aggregate type and lift thickness, then require compaction testing or proof-rolling.
- Check edge restraint and forms; thicker edges reduce cracking near borders.
- Measure planned pavement thickness at multiple points, especially at garage aprons and turn zones.
Seal and Maintain Your Driveway the Right Way
Because sun, water, de-icing salts, and turning tires break down surfaces faster than most homeowners expect, you’ll get the longest life from your driveway by sealing on the right schedule and following a simple maintenance routine.
For asphalt, wait 6–12 months after install, then plan driveway sealing every 2–3 years, or sooner if the finish looks gray and porous.
For concrete, use a breathable penetrating sealer every 3–5 years, especially if you’re in a freeze-thaw zone.
Keep Seal maintenance simple: sweep grit weekly, rinse oil spots fast, and use a pH-neutral cleaner instead of harsh degreasers.
In winter, choose calcium magnesium acetate over rock salt.
Reseal after crack repair, and keep water draining off edges.
Avoid Driveway Design Mistakes Homeowners Regret
Although a driveway looks like a simple strip of paving, most homeowner regrets come from design choices made on day one—too-steep slopes that ice over, turns that force tire scrubbing, edges that crumble from weak base prep, and drainage that funnels water straight under the slab.
You can avoid expensive fixes by planning like it’s part of your site, not an add-on, and by syncing layout with garden integration and landscaping coordination.
- Set slope and crossfall to shed water, then route it to swales or drains.
- Specify base depth, compaction, and geotextile where soils are weak.
- Keep turning radii generous; match widths to today’s larger vehicles.
- Choose borders, lighting, and permeable pavers to reduce runoff and elevate curb appeal.
Frequently Asked Questions
How Much Does a New Driveway Typically Cost per Square Foot?
You’ll typically pay $4–$15 per square foot for a new driveway, depending on paving materials. Add 10–25% for base prep, drainage, and trendy borders, and budget ongoing maintenance costs, too.
How Long Does Driveway Installation Take From Demolition to Final Cure?
You’ll typically finish in 3–7 days, but full cure takes 7–28 days. About 60% of delays come from weather and inspections. Your driveway materials and installation timeline vary with demolition, base, pour, and sealing.
Can I Widen My Driveway Without Removing the Existing One?
Yes, you can widen it without removal if the base is sound. For driveway expansion, you’ll tie in new concrete or pavers; material options include asphalt, permeable pavers, or reinforced concrete, matching grade.
Will a New Driveway Increase My Home’s Resale Value?
A rising tide lifts all boats: yes, a new driveway can boost your resale value if you choose durable materials, add driveway lighting, and coordinate landscaping options for crisp curb appeal and safer, on-trend nighttime access.
What Warranties Do Driveway Contractors Usually Provide?
You’ll usually get a 1–5 year workmanship warranty plus manufacturer coverage on driveway material options (asphalt, pavers, concrete). You should confirm contractor licensing, exclusions for freeze-thaw, drainage, or soil movement, and get it in writing.
Conclusion
When you design your driveway with clear goals, the right layout, and proper slope, you’re not just “pouring pavement” — you’re building daily convenience. A neighbor skipped drainage and, after one storm, watched a mini river carve ruts across his new gravel; he redid it within 6 months. Don’t repeat that. Confirm permits, base thickness, and edging, then seal on schedule. Done right, your driveway frames your home’s style and boosts curb appeal.