
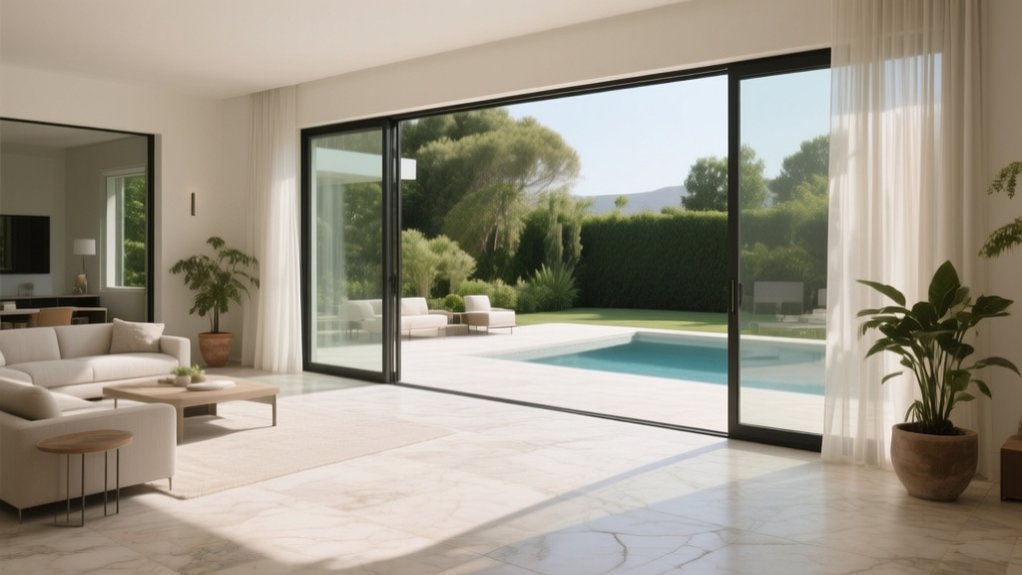
You create a seamless indoor-outdoor connection by choosing one priority (flow or privacy), then mapping how you actually move between spaces. Pick the best doorway, widen the opening if possible, and align finished floor heights for a near-flush threshold with proper drainage. Repeat key finishes—wood tones, metal, and textiles—and match lighting color temperatures so the patio doesn’t feel harsh at night. Use layered outdoor lighting and planting to soften edges, and you’ll see even more easy upgrades ahead.
Key Takeaways
- Pick one indoor–outdoor priority (ambiance or privacy) and align colors, finishes, and lighting temperature to maintain continuity.
- Track daily movement patterns between house and yard to identify bottlenecks and design around real traffic flow.
- Optimize the transition zone with clear sightlines, entry storage, and flooring changes at natural pause points.
- Select the best door location and style, and widen openings when possible to improve flow and daylight.
- Coordinate thresholds and floor heights for near-flush crossings, with proper drainage, flashing, and slip-resistant exterior materials.
Start With One Indoor-Outdoor Priority
Where should you begin if you want your home to feel like it flows naturally from indoors to outdoors? Choose one priority that will drive every early decision.
If you want stronger Indoor ambiance, match your interior palette to an exterior anchor: one wood tone, one metal finish, and one textile color that repeats outside. Specify lighting temperatures so the patio doesn’t look harsh against warm indoor lamps.
If you need outdoor privacy, start with sightlines: identify what you must block, then select one solution—slatted screens, layered planting, or a pergola with side panels—and commit to its material and spacing.
Keep the priority measurable: “consistent finishes” or “no direct views in.” You’ll prevent competing upgrades and get cohesion faster.
Map Daily Traffic Between Indoors and Outdoors
You can’t improve flow until you map how you actually move, so track peak movement times across a normal week.
Next, identify the exact indoor-outdoor pathways you use most—doors, gates, steps, and hall segments—so you see where traffic concentrates and conflicts.
Then optimize the changeover zone layout around that pattern, placing storage, lighting, mats, and clearances where they reduce bottlenecks and keep movement smooth.
Track Peak Movement Times
When do people actually flow from the kitchen to the patio, or from the garage into the mudroom? You won’t know until you measure.
Start Peak tracking for seven days: note every shift in 30-minute blocks, and log the purpose (meals, pets, school runs, grilling, trash). Pair it with simple Traffic mapping: tally direction, group size, and whether hands are full.
Then isolate the true peaks—weekday mornings, dinner prep, weekend hosting—and quantify them: crossings per hour and average dwell time at the threshold. Use that data to set performance targets for doors, lighting, and floor durability during peak loads.
Recheck after changes, since schedules shift seasonally and holidays can distort patterns.
Identify Indoor-Outdoor Pathways
Before changing a door, step, or landing, map the exact indoor–outdoor routes people actually take throughout a normal week. Walk each path at real times, note what they carry, and log where they pause, detour, or double back.
Include service routes too—trash, deliveries, pets—because they often drive wear patterns and drafts that affect Indoor air and bring outdoor noise inside. Use a simple floor plan and tally marks so you can quantify usage, not guess.
Then you’ll know which connections truly matter and which are occasional. Capture both directions, because exiting and entering create different bottlenecks and door-hold habits.
- Front entry to street parking
- Kitchen to grill/patio
- Mudroom to garden/tools
- Bedroom to balcony for morning air
Optimize Transition Zone Layout
Those mapped routes now need a layout that supports how people actually move, not how the plan looks on paper. Start by sizing the transition zone for peak loads: strollers, groceries, pets, and two-way passing. Keep sightlines clear and set door swings so they don’t collide with furniture or foot traffic.
Align flooring changes with natural pause points, not mid-stride, and specify slip-resistant surfaces where moisture tracks in.
Place storage where it’s reached in one step: hooks, bench, and mat well. Add weatherproofing solutions—recessed drains, robust thresholds, and sealed trim—to control water and grit.
Support landscape integration by matching grades, adding a landing, and positioning lighting to guide movement at dusk and prevent missed steps.
Choose the Best Room-to-Yard Connection Point
Start by evaluating your existing doorways for width, swing direction, weather exposure, and how directly they connect to the rooms you use most.
Next, align that opening with yard traffic flow so you’re not funneling people through gardens, tight corners, or high-use seating zones.
Finally, match indoor and outdoor levels as closely as possible, since fewer steps and a flush threshold make the shift safer, cleaner, and easier to use year-round.
Evaluate Existing Doorways
Whether you’re planning a full renovation or a simple patio upgrade, you’ll get the smoothest indoor-outdoor flow by evaluating the doorways you already have and choosing the one that makes the most sense as your primary connection point. Start by measuring the opening, checking swing clearance, and confirming the threshold height won’t trip you up.
Then assess Doorway durability: look for rot, corrosion, worn rollers, and cracked glazing, because weak hardware will fail fast outdoors. Finally, plan Ventilation strategies by noting where breezes naturally cross the room and how easily you can screen the opening.
- Verify framing is plumb and the header isn’t sagging
- Inspect weatherstripping, sill pan, and drainage paths
- Test operation: latching, sliding, and soft-close behavior
- Note sightlines and daylight gain from each doorway
Consider Yard Traffic Flow
Before you commit to a new patio door location, map how people actually move between the house and the yard so you can place the main connection where traffic already wants to go. Watch daily patterns: where you carry groceries, let pets out, or supervise kids.
Choose a doorway that aligns with existing garden pathways instead of forcing new routes across planting beds or wet lawn. Stand in key rooms and sightline to your most-used outdoor zone—grill, dining set, or play area—and pick the point that minimizes turns and pinch points.
Leave clear circulation space around outdoor furniture so guests don’t squeeze between chairs and railings. If you entertain, prioritize a straight shot from kitchen or dining area.
Match Indoor Outdoor Levels
Once you’ve identified the door location that matches real yard traffic, check the floor heights on both sides so the connection feels natural and stays code-safe. Aim for a near-flush threshold to reduce trips while still shedding water away from the interior.
Balance Indoor aesthetics with outdoor durability by selecting finishes that look intentional inside yet tolerate sun, grit, and moisture outside. Confirm drainage slopes, step counts, and door swing clearances before you pour concrete or set pavers.
- Measure interior finished floor to exterior grade at the sill
- Plan a slight exterior drop and positive drainage away from the home
- Use compatible materials: slip-resistant tile, composite decking, or stone
- Verify accessibility rules, including maximum threshold height and landings
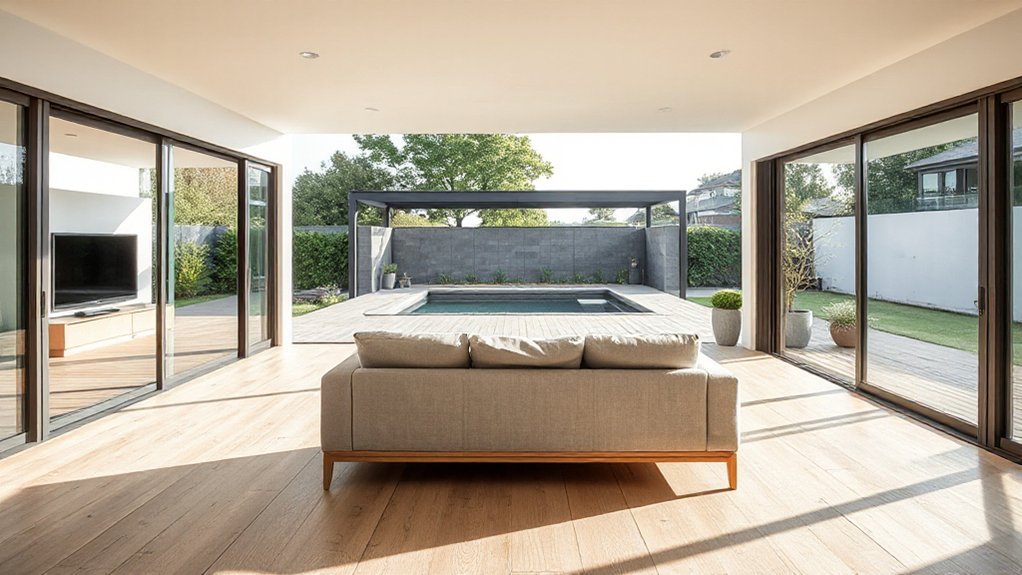
Widen the Opening for Better Flow
If your patio doors feel like a bottleneck, widening the opening instantly improves how you move, see, and ventilate between indoors and out. Start by measuring the clear width you actually use, then target a span that fits furniture, grills, and daily traffic without turning sideways.
Confirm whether the wall is load-bearing, and plan for a properly sized header so you don’t compromise structure.
Keep the new opening aligned with garden pathways so foot traffic naturally continues outside instead of bunching at the threshold. Set aside space near the exit for outdoor storage—hooks, a slim bench, or a weatherproof cabinet—so shoes and tools don’t migrate indoors.
Finally, coordinate lighting and flooring lines to emphasize the wider passage and guide movement.
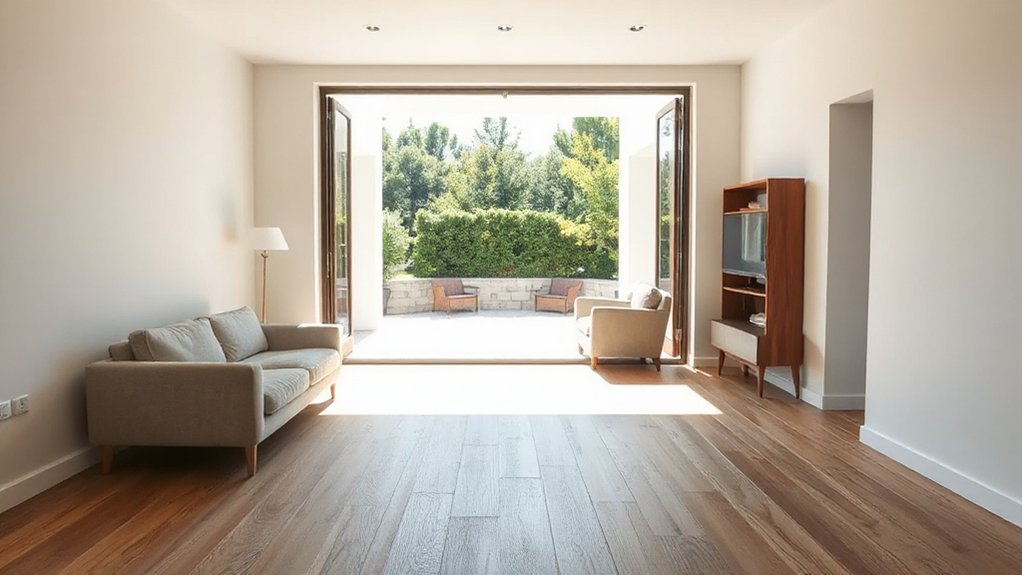
Pick the Right Patio Door Style
Once you’ve widened the opening, you need a patio door style that matches how you’ll move through the space every day. You can choose sliding doors for a clean footprint, French doors for a classic swing-and-vent option, or go bigger with bifold and multi-slide systems that stack or pocket away for a wide, uninterrupted opening.
Your best pick comes down to clearance, sightlines, and how much of the wall you want the doors to disappear into.
Sliding Vs. French Doors
How do you choose between sliding and French patio doors when both promise light, access, and curb appeal? Start with your room’s layout and how you’ll use the opening daily.
Sliding doors save floor space, glide past furniture, and typically deliver strong Energy efficiency with tight seals.
French doors swing wide for a classic look, but they demand clearance and careful weatherstripping to prevent drafts.
For Door security, prioritize multi-point locks, reinforced frames, and impact-rated glass regardless of style.
Then match the door to your traffic patterns, view, and maintenance tolerance.
- Choose sliding if you need space-saving access near dining or seating areas
- Choose French if you want a traditional façade and full-width ventilation
- Compare U-factor, SHGC, and air-infiltration ratings before buying
- Budget for hardware quality, screens, and durable thresholds
Bifold And Multi-Slide Options
While sliding and French doors cover the basics, bifold and multi-slide systems turn a standard patio opening into a true indoor–outdoor wall by stacking or pocketing large glass panels out of the way.
Choose bifolds when you want the widest clear opening; panels fold to one or both sides, but you’ll need space for the stacked bundle.
Choose multi-slide when you prefer a cleaner look; panels glide on parallel tracks and can disappear into a wall pocket if framing allows.
Prioritize Aluminum frames for strength and slimmer sightlines, especially on wide spans.
Specify insulated Glass panes, low-E coatings, and robust weather seals to control heat gain, drafts, and noise.
Confirm track drainage, floor transitions, and hardware load ratings before you order.
Match Floor Heights at the Threshold
Ideally, your indoor and outdoor floors should meet at the threshold with little to no step, because even a small height mismatch creates a trip hazard and breaks the visual flow. Start by confirming finished floor heights early, then coordinate framing, slab, and door sill specs so your threshold elevation lands exactly where you need it.
A solid transition design also has to manage water: keep the exterior surface slightly sloped away while maintaining a near-flush crossing.
- Verify subfloor, underlayment, and exterior build-up before ordering doors
- Choose a low-profile sill rated for your climate and exposure
- Detail drainage: pan flashing, weeps, and a positive exterior slope
- Mock up the junction on site and measure twice before pouring or tiling
Use Continuous Flooring (or Close Matches)
If you run the same flooring from inside to outside—or choose materials that read as one continuous surface—you’ll make the shift feel intentional instead of patched together. Prioritize Seamless flooring options rated for exterior exposure: porcelain pavers, honed stone, or composite decking with matching interior planks.
When one material can’t do both jobs, select close matches in scale, joint pattern, and surface sheen so your eye doesn’t “trip” at the door. Control connection zones by aligning grout lines or board direction through the opening and keeping joint widths consistent.
Use a flush drain or subtle slope outside so water moves away without breaking the visual plane. Finally, detail the threshold with a minimal edge profile that protects the cut while staying nearly invisible.
Keep a Consistent Indoor-Outdoor Color Palette
Because your eye reads color faster than texture, a consistent indoor-outdoor palette does more to “erase” the threshold than almost any single detail. Start by choosing one neutral that works in both light conditions—indoor shade and outdoor sun—then anchor accents to it.
Aim for Color harmony by repeating the same hue families at different saturations, so nothing feels pasted on. Maintain Palette consistency by limiting yourself to three core colors plus one small pop, and carry them through paint, furnishings, and planters.
- Match your interior wall neutral to an exterior trim or soffit color
- Echo your main accent in outdoor cushions or pots
- Keep metals in one temperature (warm brass or cool black)
- Test samples at morning, noon, and evening
Repeat Key Textures to Link Both Spaces
To make inside and outside feel like one continuous space, you should echo key materials across zones—carry the same stone, wood tone, or woven fiber from interior finishes to exterior surfaces.
You’ll reinforce continuity when you match finishes, such as keeping metal sheens, grout colors, and stain levels consistent at thresholds.
Pick two or three textures to repeat, then apply them with intention so the shift reads planned, not patched together.
Echo Materials Across Zones
While your indoor and outdoor areas may serve different purposes, repeating a few key materials across both zones makes them feel like one continuous space. Start by choosing two or three anchor textures you’ll use on both sides of the threshold, then scale them to suit each setting.
Prioritize materials compatibility: confirm slip resistance, UV stability, and moisture tolerance outdoors while keeping the same material family indoors. You can still maintain zone differentiation by changing where and how much you use each material, not by introducing new ones.
- Run the same wood species on an entry bench and a patio seat.
- Mirror a stone slab on a kitchen sill and an outdoor bar top.
- Repeat blackened steel in door hardware and pergola brackets.
- Echo woven fiber in dining chairs and weather-rated lounge pieces.
Match Finishes For Continuity
Even if your indoor and outdoor materials differ, matching their finishes creates the visual “through-line” that makes the shift feel intentional. Start by choosing one dominant sheen—matte, satin, or lightly honed—and repeat it on adjacent surfaces like flooring, thresholds, and planters.
If your interior has matte oak, echo that low-gloss look outdoors with composite decking or a honed paver, not a high-polish stone.
Lock in color consistency by repeating the same undertone: warm grays with warm grays, creamy whites with creamy whites. Then build furniture cohesion through finish pairings—black powder-coated frames inside and out, or consistent brushed metal on pulls, sconces, and table legs.
Keep textures simple: one wood grain, one metal, one fabric weave.
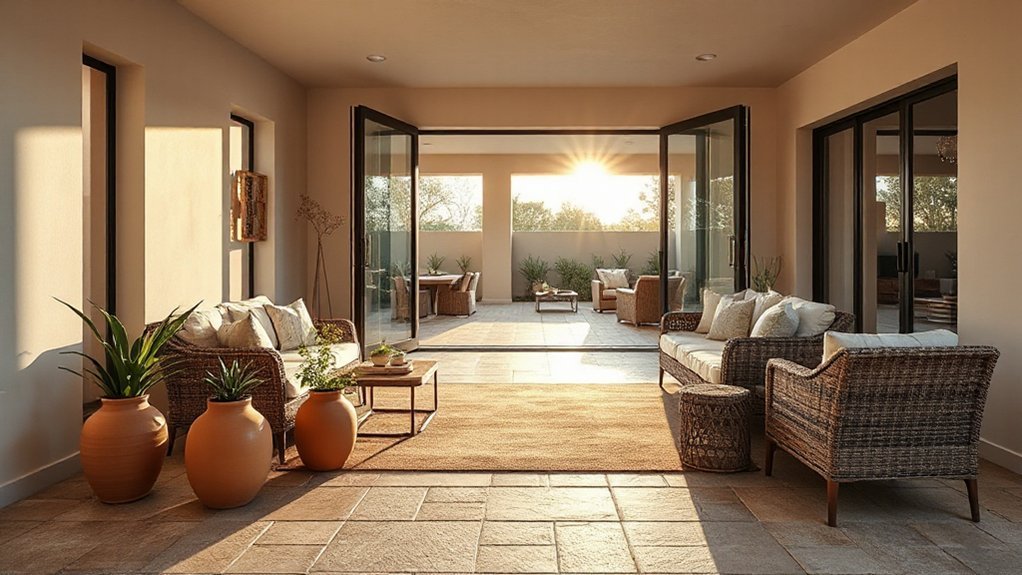
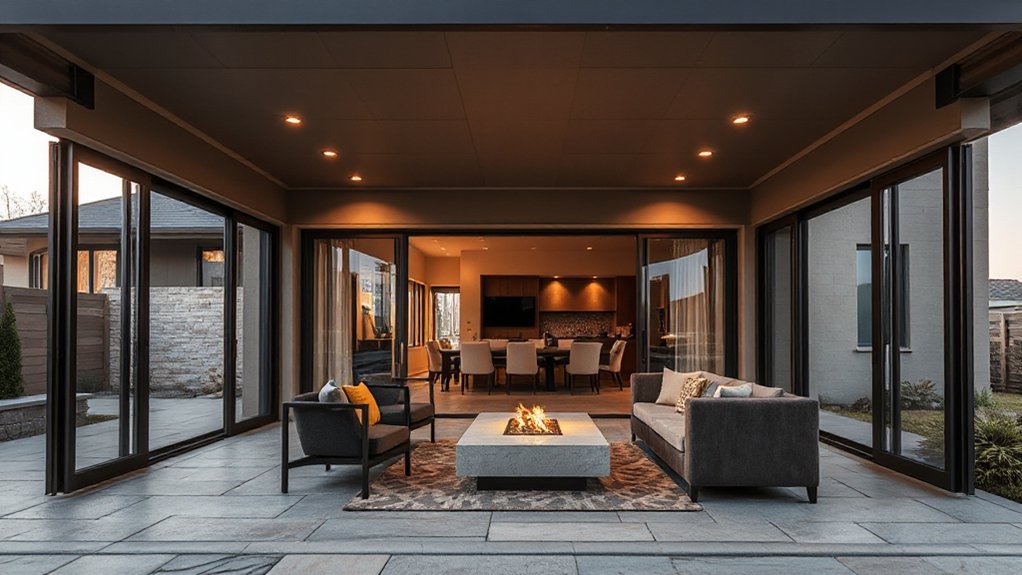
Create an Outdoor “Room” With Indoor Cues
Because your brain reads familiar cues as “home,” you can make the outdoors feel like a true extension of your interior by building it like a room: define clear boundaries with an outdoor rug or pavers, anchor the space with a central “fixture” such as a dining table or fire pit, and arrange seating in a conversational layout that mirrors your living room.
Next, reinforce “walls” and “ceiling” cues so the area feels intentional, not leftover patio space. Use landscape integration to tie the perimeter into surrounding beds, and add privacy screening to block sightlines and wind without closing things in.
- Set “doorways” with planters or a low gate at entries
- Add layered lighting for task and ambient zones
- Use vertical elements to frame views, not clutter them
- Keep pathways aligned with interior traffic patterns
Choose Cohesive Indoor-Outdoor Furniture
If you want your patio to read as a true extension of your home, choose indoor-outdoor furniture that shares the same design DNA as what’s inside. Match silhouettes first: if your sofa is low and modern, pick outdoor seating with the same profile and clean lines. Then confirm scale; keep seat heights and table proportions consistent so circulation feels familiar.
Use smart Furniture pairing: coordinate a dining set with nearby lounge pieces through shared finishes, not identical sets. Repeat materials you already use indoors—oak tones, black metal, woven textures—via weather-ready equivalents like powder-coated aluminum and all-weather wicker.
Lock in Color coordination by pulling two to three interior hues into cushions, rugs, and side tables. Finish with one accent color to unify both zones.
Add Cover for Year-Round Indoor-Outdoor Use
Once your indoor-outdoor furniture speaks the same design language, give it protection so you can actually use the space beyond perfect-weather days. Prioritize a fixed roof or retractable awning that sheds water, blocks debris, and reduces UV exposure without trapping moisture.
Then lock in durability with proven Weatherproofing techniques and a simple plan for Seasonal maintenance, so materials don’t swell, rust, or fade.
- Install gutters and downspouts to move runoff away from slab edges and furniture legs.
- Seal concrete, stone, and grout to prevent staining and freeze-thaw spalling.
- Choose exterior-rated ceiling fans and lights with proper wet/damp ratings and GFCI circuits.
- Store cushions in vented deck boxes, and cover frames with fitted, breathable covers.
You’ll extend comfort, cut upkeep, and keep finishes consistent year-round.
Add Shade/Privacy Without Blocking Airflow
Where do you want the boundary to land—at the street view, the neighbor’s window, or the harshest afternoon sun? Start by mapping sightlines from seating height, then decide which edges need the most control without trapping heat.
For Shade options, use a slatted pergola, adjustable louvers, or a retractable shade sail; each blocks glare while letting breezes pass. Pair them with outdoor curtains on a ceiling track so you can pull coverage only when needed.
For Privacy solutions, choose open-weave screens, vertical battens spaced 1–2 inches apart, or trellis panels with climbing vines for dappled cover. Keep panels a few inches off the floor and stop them short of the ceiling to maintain airflow.
Bring Indoor Lighting Style Outside
Because lighting sets the mood faster than any furniture swap, you should carry your indoor lighting “layers” outdoors: ambient for overall glow, task for cooking and dining, and accent to highlight texture and planting. Match finishes and silhouettes to what you’ve already used inside so the view through the glass reads continuous, not cobbled together.
Choose damp- or wet-rated versions of familiar forms—drum pendants, lantern sconces, slim ceiling mounts—then place them where you naturally pause, sit, and serve. For Outdoor acoustics, avoid noisy buzzing drivers and pick quality dimmers and transformers.
Make landscape integration feel intentional by aligning fixture spacing with planters, paths, and door centers.
- Repeat metal tones from interior hardware
- Use warm CCT bulbs for consistency
- Hide wiring in posts or soffits
- Add glare shields near seating
Layer Outdoor Lighting for Nighttime Use
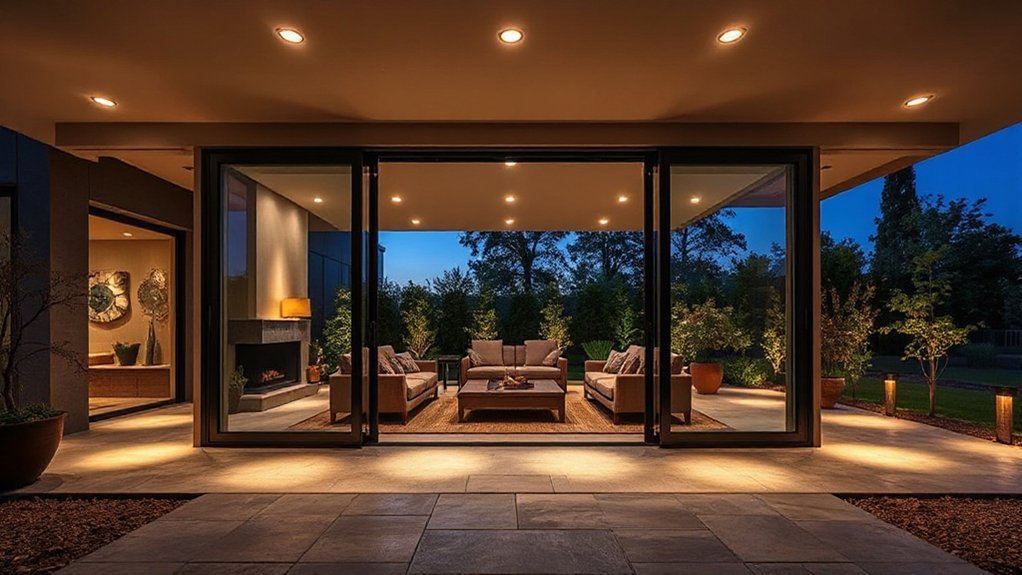
Although your patio may look fine in daylight, it won’t feel usable after dark unless you layer light the same way you do indoors: start with a dimmable ambient wash for safe circulation, add focused task light at the grill, prep, and dining zones, then finish with low-glare accent lighting that picks out steps, railings, and planting without flooding everyone’s eyes.
Choose warm LEDs (2700–3000K) to match interior tones, and shield fixtures to cut glare. Put each layer on separate switches or a smart dimmer so you can shift from dinner to cleanup. Aim for consistent light levels at thresholds to prevent harsh contrast.
For outdoor security, add motion-triggered sconces at entries, tuned low and brief. Coordinate fixture finishes and beam spreads with your landscape design for continuity.
Use Planting to Soften the Transition
Once you’ve handled lighting, let planting do the work of easing the edge between your interior and patio. Start by echoing indoor colors and textures outside, so the view reads as one continuous scene.
Use plant selection to bridge conditions: shade-tolerant foliage near doors, sun lovers beyond, and mid-height shrubs to blur hard lines.
- Flank thresholds with matching containers to “frame” the opening
- Layer heights: groundcovers, then perennials, then airy shrubs
- Align beds with garden pathways to guide movement and sightlines
- Repeat two or three key plants to create rhythm across zones
Keep foliage within circulation clearances, and choose plants with similar leaf scale to your interior palette for a calmer visual handoff.
Budget Fixes and Common Transition Mistakes
Even if you’re working with a tight budget, you can make an indoor–outdoor shift feel intentional by fixing a few high-impact details and avoiding the mistakes that telegraph “afterthought.”
Under budget constraints, prioritize one continuous element: matching stain, paint, or metal finish across the threshold. Add a slim exterior-rated runner, a pair of identical planters, and warm, consistent lighting temperature on both sides. Seal gaps, align door hardware, and clean sightlines so the view reads curated.
Watch for transition missteps: mixing too many materials, using different color temperatures, stopping flooring abruptly, or cramming furniture into the doorway.
Don’t ignore drainage; a soggy mat kills the effect. Keep heights aligned, and repeat two colors to unify.
Frequently Asked Questions
How Do Indoor-Outdoor Transitions Affect Home Resale Value?
Strong indoor-outdoor connections can raise your resale value by making spaces feel larger and more usable. You’ll impress buyers with cohesive interior design and improved home accessibility, cutting objections and supporting stronger offers and faster closings.
Do I Need Permits to Widen a Doorway or Install New Patio Doors?
Yes—you’ll usually need permits; skipping them can cost more later. Widening a doorway affects structure, so building code applies. Patio doors may trigger permit requirements for egress, tempered glass, and energy ratings.
Which Insect-Control Options Work Best Without Enclosing the Patio?
You’ll get the best results by combining Physical barriers with Natural repellents: hang fine-mesh screens, add door sweeps, seal gaps, and run oscillating fans. Then apply citronella or lemon-eucalyptus sprays, and remove standing water.
How Can I Reduce Outdoor Noise Entering Through Large Openings?
You’ll reduce noise by applying soundproofing strategies: add outdoor-rated acoustic curtains or sliding panels, and use window sealing techniques like compressible gaskets, brush seals, and door sweeps. Upgrade to laminated glazing near openings.
What Maintenance Schedule Keeps Sliding or Folding Doors Operating Smoothly?
Do it monthly—then you’ll avoid surprises. Vacuum tracks, wipe seals, check fasteners. Quarterly, apply door lubrication to rollers and locks. Twice yearly, perform hinge adjustment, level panels, and replace worn weatherstripping before binding starts.
Conclusion
You’ve set one clear indoor-outdoor goal, traced your daily pathways, and chosen the strongest connection point, so your home doesn’t “end” at the threshold—it exhales into the yard. By widening the opening and selecting the right patio door, you let movement flow like water through a channel. Carry your interior lighting language outside, then layer task and ambient fixtures for night. Use planting as a soft seam, and avoid quick fixes that trip traffic.


