Start this weekend by stopping drafts: add weatherstripping, door sweeps, and paintable caulk at trim, outlets, and wall penetrations. Shrink interior window film, then seal sills and sash tracks with V-seal or foam. Insulate fast by adding outlet gaskets, wrapping pipes with foam sleeves, and sealing/insulating the attic hatch. Boost comfort with warm, dimmable LEDs, heavy curtains, and a smart thermostat set to a simple schedule. Keep going to upgrade quiet, sleep, and clutter.
Key Takeaways
- Seal drafts with weatherstripping, door sweeps, and caulk around windows, doors, and wall penetrations to reduce heat loss and discomfort.
- Boost insulation DIY: add outlet foam gaskets, wrap pipes with foam sleeves, and insulate the attic hatch with foam board and weatherstripping.
- Improve temperature control with a smart thermostat schedule and keep indoor humidity between 30–50% using a hygrometer.
- Upgrade lighting comfort with warm, dimmable LED bulbs (2700K–3000K, CRI 90+) and layer overhead, task, and accent lights.
- Cut noise and boost coziness by sealing gaps, hanging heavy curtains, adding area rugs, and using bookcases or mineral-wool DIY panels.
Weekend DIY Comfort Fixes (Highest Impact First)
If you want the biggest comfort boost in a single weekend, start by sealing air leaks around doors and windows. Then verify results: hold a tissue near frames on a windy day and confirm drafts stop. Next, tune temperature control with a Smart thermostat; set wake/sleep schedules, enable adaptive recovery, and place the sensor away from vents and sun. Improve air movement by reversing ceiling fans seasonally and cleaning blades. Quiet harsh lighting and boost warmth by adding dimmable LED bulbs in frequently used rooms. Cut noise and echo with a thick area rug and felt pads under furniture. Finally, add indoor plants near seating to slightly raise perceived humidity and soften the room; keep soil dry and choose low-allergen varieties like snake plant.
DIY Air-Sealing: Doors, Trim, and Baseboards
Start by weatherstripping your exterior doors and frames so you block the biggest drafts at the threshold, jambs, and header. Then seal gaps where trim meets drywall and where baseboards meet floors using paintable caulk so air can’t slip through hidden cracks. You’ll feel fewer cold spots right away, and your heating and cooling won’t have to work as hard.
Weatherstrip Doors And Frames
When cold drafts slip in around your doors and frames, you’re paying to heat (or cool) the outdoors. Start by checking gaps with a flashlight at night or a dollar-bill test; if it slides easily, you’ve got leakage. For door insulation, install a snug door sweep that contacts the threshold without dragging, and replace worn bottom seals. Choose weatherstripping materials based on location: adhesive-backed foam for small, even gaps; V-strip (tension seal) for the sides and top of the jamb; and silicone or EPDM rubber for durability on frequently used exterior doors. Clean surfaces with isopropyl alcohol, measure twice, and apply in continuous runs. Close the door and verify smooth latching and full compression.
Seal Trim And Baseboards
Ever wonder why a room still feels drafty after you’ve weatherstripped the door? Air often sneaks through casing seams, baseboards, and wall penetrations. To fix it, pull off one register cover and check for open cavities; you’ll often see daylight or feel airflow. Use paintable acrylic-latex caulk for interior trim and baseboards, and a high-quality sealant or low-expansion foam for larger voids. Run a continuous bead where trim meets drywall and where baseboards meet the floor, then tool it smooth for clean trim details. Seal gaps at corner joints, around window stools, and at door casings. For wide cracks, insert foam backer rod first, then caulk. Let it cure, repaint, and recheck.
DIY Window Draft Fixes: Film, Caulk, Weatherstrip
Although windows look sealed, tiny gaps around the sash and trim can leak enough cold air to make a room feel clammy and spike your heating costs. Start by cleaning the frame, then install Window film on the interior: tape it tight to the trim, shrink it with a hair dryer, and check for wrinkles that can whistle in drafts. Next, handle a precise caulk application where casing meets drywall and where the sill meets the frame; cut the nozzle small, run a steady bead, and tool it smooth for full contact. For moving parts, add weatherstrip: compressible foam for the stop, V-seal for sash tracks, and a sweep at the meeting rail. Test with a candle or smoke.
Fast DIY Insulation: Outlets, Pipes, Attic Hatch
After you’ve handled window drafts, go after the sneaky air leaks at electrical outlets—shut off power, pull the cover, add a foam gasket, and seal the box edges with caulk if needed. Next, wrap exposed hot and cold pipes with foam sleeves and tape the seams tight to cut heat loss and prevent condensation. Finish by weatherstripping the attic hatch and adding rigid foam to its back so it closes snug and stops warm air from escaping.
Seal Drafty Outlets
When cold air sneaks in around electrical outlets, it can make a room feel drafty and force your HVAC system to work harder. You can tighten up comfort fast with simple draft prevention steps that don’t require major tools.
- Turn off power to the circuit at the breaker and verify the outlet is dead.
- Remove the cover plate and feel for airflow around the box edges.
- Install a pre-cut foam gasket behind the plate; trim for snug fit.
- Reinstall the plate, then seal gaps between trim and drywall with paintable caulk.
Focus on exterior-wall Electrical outlets first, especially in older homes. If the box itself is loose, add box shims so the plate sits flat and compresses the gasket evenly. Test again on a windy day.
Insulate Pipes And Hatch
Drafty outlets aren’t the only hidden leak—uninsulated hot-water pipes and a bare attic hatch can bleed heat fast and create cold spots. Start with Pipe insulation on accessible hot-water runs in basements, crawlspaces, and garages. Measure pipe diameter, then slit foam sleeves along the seam, fit them snugly, and tape every joint and elbow with foil tape. Keep insulation at least 6 inches from flues and use fiberglass wrap where heat sources are nearby.
Next, tackle hatch sealing. Add adhesive weatherstripping to the hatch frame so it compresses evenly when closed. Glue rigid foam board to the hatch lid, seal edges with tape, and add pull-down latches for consistent pressure. You’ll cut heat loss and drafts quickly.
DIY Soundproofing Between Rooms (Cheap Options)
- Install adhesive door sweeps and stick-on weatherstripping on jambs.
- Swap a hollow-core door for a solid-core, or add an MDF skin plus glue.
- Seal outlet boxes with foam gaskets; don’t block wiring ventilation.
- Hang heavy curtains, bookcases, or DIY panel frames with mineral wool.
Test after each step so you don’t waste money.
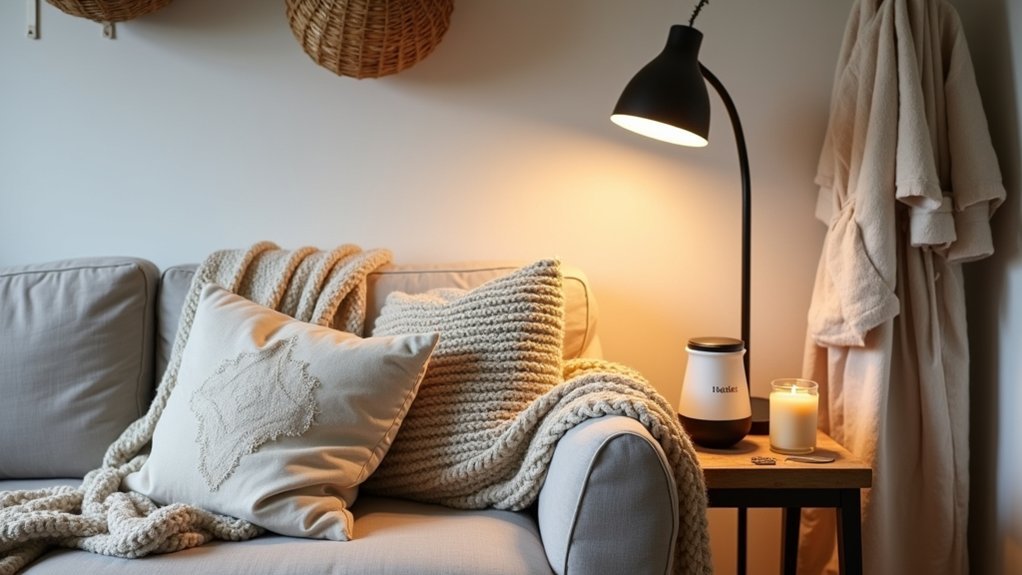
DIY Lighting for Coziness: Bulbs, Dimmers, Layers
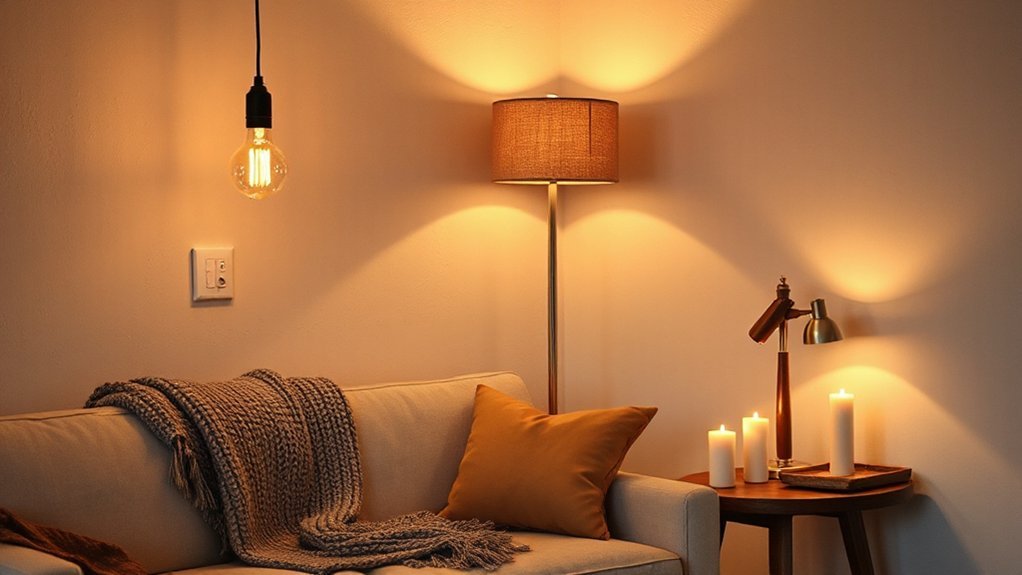
Even if you don’t change a single piece of furniture, you can make a room feel warmer and calmer by fixing the light first. Start with bulb selection: choose warm white LEDs (2700K–3000K) for living areas, and check lumens, not watts—800–1100 lumens suits most lamps. Keep color rendering high (CRI 90+) so skin tones and wood look rich.
Next, tackle dimmer installation. Confirm your switch and bulbs are dimmable, match LED dimmer ratings, and shut off power at the breaker before wiring. Use layers: overhead for general light, a floor lamp for bounce, and a task lamp near seating. Aim fixtures at walls or ceilings to soften shadows and reduce glare.
DIY Privacy Upgrades: Shades, Curtains, Window Film
When your rooms feel exposed—especially at street level—you can boost comfort fast by upgrading privacy at the windows with the right shades, curtains, or window film. Start by deciding whether you need daytime concealment, nighttime opacity, or both, then match the solution to the room’s light and heat needs. Choose window coverings that mount inside the frame for a clean seal, or outside to block sightlines around trim. Use privacy screens for balconies or sidelights where fabric won’t hang well. Apply film to glass you don’t want to lose daylight from, and clean thoroughly before installation to prevent bubbles.
- Top-down/bottom-up cellular shades for flexible coverage
- Sheer curtains plus blackout panels for night privacy
- Frosted or etched window film for bathrooms and entry glass
- Tension-rod café curtains for quick, drill-free privacy
DIY Storage That Removes “Daily Clutter Zones
You can eliminate “daily clutter zones” by giving the most-used items a fixed home right where you drop them. Build an entryway drop zone organizer with hooks, a mail slot, and a labeled tray; add kitchen counter clutter caddies to corral oils, utensils, and chargers into one lift-away unit. Upgrade your nightstand with a slim drawer insert or bedside shelf so glasses, books, and devices stay contained and off the floor.
Entryway Drop Zone Organizer
Because shoes, keys, and mail tend to pile up where you enter, a dedicated entryway drop zone organizer gives every “daily clutter” item a fixed home and keeps traffic paths clear. Build a slim wall rail with hooks above a narrow bench, then add a shallow shelf and labeled bins. For Entryway organization, place the organizer at arm’s reach of the door and keep it consistent: same spot, every day. Choose Shoe storage solutions that fit your household—open cubbies for grab-and-go pairs, or tilt-out bins for tighter spaces. Install it with wall anchors, and size compartments to your real items, not ideals. Include these essentials:
- Key hooks with name tags
- Mail sorter with “in/out” slots
- Shoe cubbies or tray below
- Small bin for sunglasses and chargers
Kitchen Counter Clutter Caddies
An entryway drop zone stops clutter at the door, but the kitchen counter often becomes the next dumping ground for daily items. Fix it with two DIY caddies sized to your routines: one for “incoming” and one for “daily use.” Build each from a small wood tray or shallow box, add a handle, and line it with wipeable contact paper. Assign zones: mail and receipts, keys, chargers, and a small notepad in the incoming caddy; cooking oils, salt, and utensils in the daily-use caddy. Label each slot with vinyl tape so items return fast. Keep caddies near outlets and away from prep space to protect hygiene. This kitchen organization system makes counter decluttering automatic.
Bedroom Nightstand Storage Upgrade
Where does all that bedside clutter come from—water glass, lip balm, charging cords, book stacks—when the day ends? Fix it with a nightstand storage upgrade that assigns every item a home. Add a slim drawer organizer or build a shallow tray insert from plywood, then label sections so you’ll reset in 30 seconds.
- Install an under-shelf basket for books and a notebook
- Mount a cable clip rail at the back to tame chargers
- Add a small lidded cup for lip balm, meds, and earbuds
- Swap to a wall sconce or clamp lamp for cleaner bedside lighting
Finish with one “landing pad” coaster for your water. With this nightstand organization, you’ll remove the daily clutter zone without losing essentials.
DIY Bedroom Upgrades for Cooler, Darker Sleep
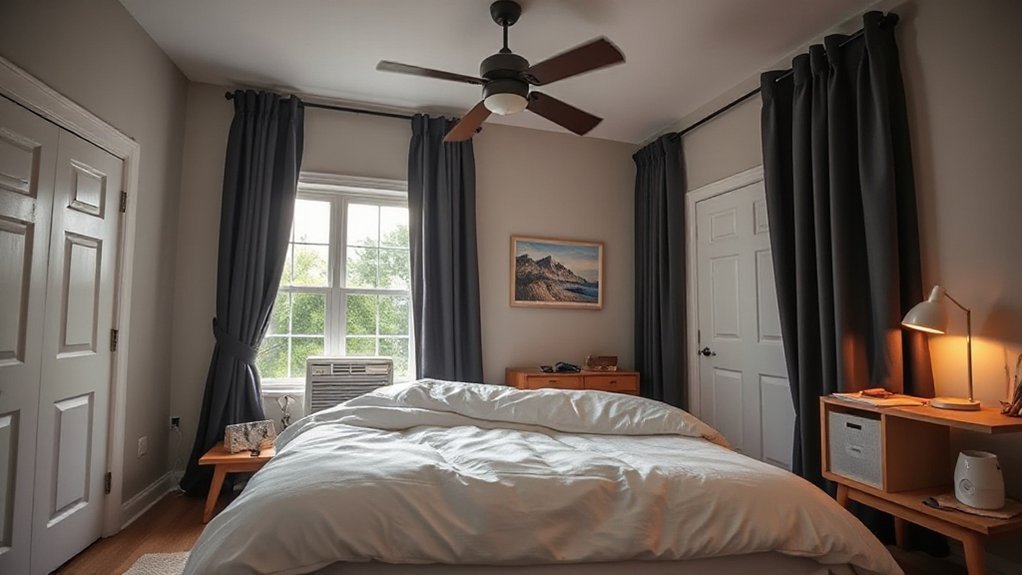
Even if you can’t change your home’s HVAC, you can still make your bedroom noticeably cooler and darker with a few targeted DIY upgrades. Start with light control: install a wraparound curtain rod, hang blackout curtains, and add adhesive foam weatherstripping along the window sash to block light leaks and hot air. Replace bright LEDs with warm, dimmable bulbs and put them on a plug-in timer so your sleep environment cues wind-down automatically. For cooling, mount a ceiling fan blade-balancing kit, then reverse the fan to counterclockwise for a direct breeze. Add a DIY “draft snake” at the door and seal outlet gaps on exterior walls with foam gaskets. Keep your bedding breathable—cotton percale or linen—and align these tweaks with consistent bedtime routines.
DIY Comfort Projects to Skip (and What to Do Instead)
Although plenty of DIY “comfort” hacks look easy online, you’ll save time and money by skipping projects that add noise, trap moisture, create fire hazards, or deliver only placebo-level results. If you want real comfort gains, focus on proven fixes that improve air quality, temperature control, and safety.
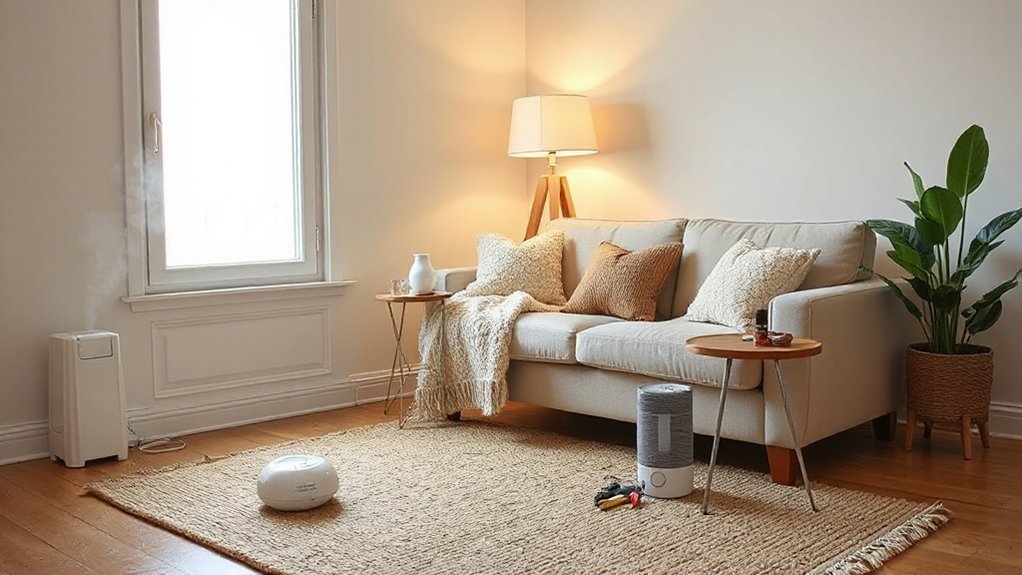
- Skip ultrasonic humidifiers without a hygrometer; instead, keep indoor humidity at 30–50% and clean weekly.
- Skip peel-and-stick “soundproofing” foam; instead, seal gaps, add door sweeps, and hang heavy curtains.
- Skip space heaters under desks; instead, weatherstrip windows and use a thermostatic electric blanket.
- Skip overloaded smart plug chains; instead, add a dedicated power strip with surge protection.
Use Decorative wall accents for warmth, and choose Custom furniture pieces that improve ergonomics.
Frequently Asked Questions
How Do I Make My Home Comfortable on a Tight Budget?
You’ll make your home comfortable on a tight budget by decluttering, rearranging furniture for flow, and adding cozy lighting with thrifted lamps. Layer soft textiles—throws, pillows, rugs—then seal drafts, clean thoroughly, and personalize with art.
Which DIY Projects Improve Comfort Most for Renters?
Start with peel-and-stick weatherstripping and blackout curtains; they’re your apartment’s shield and nightfall. Add rugs and draft stoppers for warmth and quiet. Choose Renting decor like removable wallpaper; prioritize Temporary upgrades: smart bulbs, tension-rod shelves.
How Do I Choose Comfortable Furniture Layout for Better Flow?
Start with main walkways: keep 30–36 inches clear, then anchor seating around a focal point. Use Furniture arrangement to face conversation, not walls. Prioritize Space optimization by scaling pieces and avoiding blocked doors.
What Indoor Humidity Level Feels Best Year-Round?
Aim for 40–50% indoor humidity year-round; it’ll feel comfortable and reduce dryness or clamminess. Use Humidity control with a hygrometer, humidifier/dehumidifier, and steady ventilation. Indoor plants help slightly, but don’t replace equipment.
Which Low-Voc Materials Help Reduce Odors and Headaches?
Even if you’re worried “green” won’t work, you’ll feel relief fast: choose Eco friendly paints, formaldehyde-free plywood, low-VOC sealants, and wool insulation. Add Natural air purifiers like activated charcoal and HEPA filtration to cut odors.
Conclusion
You don’t need a Hercules-sized remodel to feel the difference—just targeted weekend fixes. Seal doors, trim, and baseboards so comfort stops leaking out. Tame window drafts with film, caulk, and weatherstripping. Add quick insulation at outlets, pipes, and the attic hatch. Quiet thin walls with budget panels and soft surfaces. Control light and privacy with shades or film, and clear clutter with simple storage. Skip fussy projects; choose upgrades that pay back daily.