You’ll restore a thatched cottage beside the meadows gently by surveying every elevation, ridge, valley, and joint, then setting priorities around weatherproofing and heritage value. You’ll chase moisture first: lower ground levels, improve drainage, strip cement or gypsum that traps damp, and repoint in lime so walls can breathe. You’ll probe the thatch and flashings, patch only failed areas with matching reed layers, and splice timbers with minimal loss. Keep going to see seasonal checks and careful upgrades.
Key Takeaways
- Begin with a full survey: photograph thatch, flashings, chimneys, and timbers, and document wear, rot, insect holes, and past patches.
- Prioritise urgent weatherproofing while planning long-term upgrades that respect local thatching traditions and historic character.
- Improve moisture control by lowering ground levels, adding gentle falls and French drains, and removing cement renders to restore breathability.
- Repair thatch minimally: strip only failed areas, match reed or straw, rebuild in layered coats, and feather joins for seamless water-shedding.
- Preserve original joinery with splice or scarf repairs, lime-based finishes, and discreet modern services routed through existing voids with humidity monitoring.
Assess the Thatched Cottage and Set Priorities
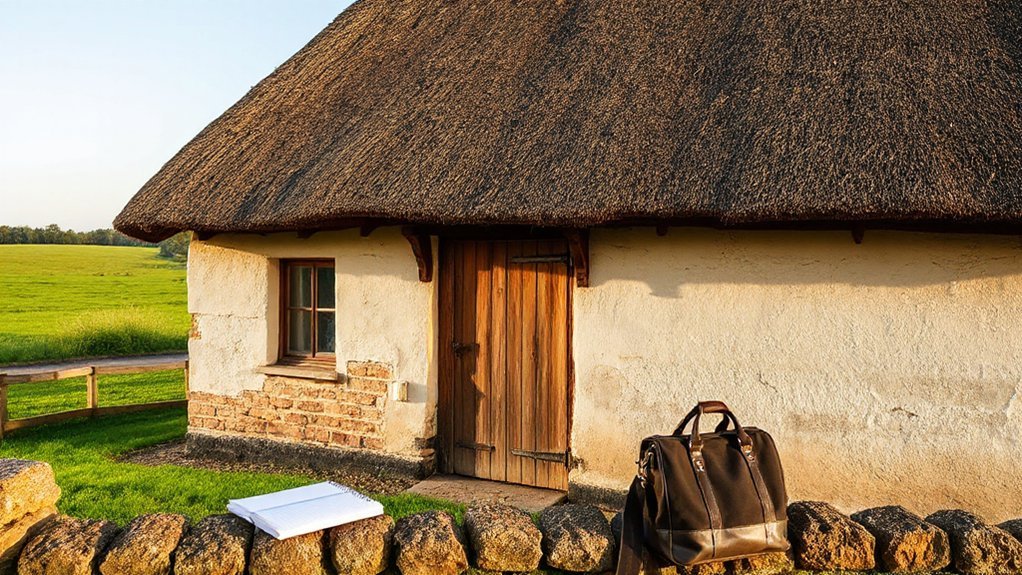
Before you touch a single reed, walk the entire cottage and document its condition so you can rank risks and prevent avoidable damage. Photograph elevations, ridge lines, valleys, flashings, and eaves; note bird wear, thin spots, moss loading, and previous patch interfaces.
Inside, map staining, soot tracking, and chimney breaches, and record timber deflection or insect exit holes. You’ll then set priorities by separating immediate weatherproofing from long-cycle upgrades, aligning each action with Historic preservation requirements and local thatching practice.
Verify roof pitch, coat thickness, and fixings so you can brief a thatcher precisely. For Material sourcing, sample existing straw or reed type, length, and binders, and confirm regional suppliers match historic character and fire-treatment expectations.
Fix Ground Drainage and Stop Rising Damp Early
Once you’ve logged roof and wall defects and ranked what threatens the building fabric, address moisture at the base of the cottage, because persistent wetting will keep timbers, daub, and thatch ends saturated no matter how well you repair the roof.
Start with Ground drainage: lower external ground levels where they’ve crept up, re-form gentle falls away from walls, and clear blocked gullies. Add a shallow French drain only if you can discharge safely, and keep it breathable with clean gravel, not impervious membranes.
Internally, lift non-breathable floor finishes and let earth or limecrete breathe.
Track salts and tide marks to map Rising damp, then remove cement renders and gypsum plasters that trap moisture. Repoint and re-render in lime, and ventilate voids so evaporation can outpace capillary rise.
Inspect the Thatched Cottage Roof, Ridge, and Flashings
Although a thatched roof sheds water by thickness and pitch rather than a waterproof skin, you’ll only control decay if you inspect the whole covering as a system—coatwork, ridge, valleys, and flashings—then trace every defect back to how water and wind actually travel across it.
Work methodically from eaves to ridge. You’ll probe for soft spots, hollows, and bird-pecked channels that funnel run-off into the body.
Check ridge fixings for lifted liggers, split spars, and open seams where wind-driven rain can bite.
At abutments and chimneys, examine lead for fatigue cracks, failed wedges, and back-gutter silt that forces overflow into thatch.
Record slopes, overhangs, and nearby tree loading to support Historical preservation and Landscape integration without altering character.
Patch and Recoat Thatch With Matching Reed Layers
You’ll start by gauging the existing thatch depth and identifying any thin, friable zones that need build-back.
Then you’ll source matching reed bundles—same species, cut length, and butt diameter—so the new work locks in and weathers at the same rate as the old.
Finally, you’ll patch and recoat in disciplined layers, aligning butts, tightening fixings, and feathering edges to restore a continuous, water-shedding surface.
Assess Existing Thatch Depth
Before you patch or recoat, measure the existing thatch depth across the roof so the new reed layers replicate the original build-up and preserve the roof’s profile. Set a consistent datum at eaves and ridge, then probe to the coatwork with a thin thatching needle or depth gauge at regular grid points. Record readings, noting thin zones, hollows, and overbuilt shoulders that could telegraph through fresh reed.
Check alignment at verges, dormers, and around chimneys where compression differs, and compare opposing slopes for symmetry. You’ll support thatched preservation by matching thickness gradations, not just average depth.
Map your findings and flag areas where decorative detailing—flush ridges, spar patterns, and edge rolls—depends on specific build-up to sit crisp and shed water cleanly.
Source Matching Reed Bundles
Where do you start when the old coatwork demands a seamless repair? You begin with reed bundle sourcing that respects the roof’s original material. Specify water reed or longstraw to match the existing stem sheen, diameter, and node spacing, then verify provenance, harvest season, and storage conditions to prevent brittleness or mold.
Ask suppliers for sample bundles and compare color temperature, taper, and butt density under the same light you’ll work in.
Apply thatch matching techniques by sorting bundles by length bands and stiffness, keeping butts aligned and stems uncrushed. Reject reeds with excessive leaf, split culms, or uneven moisture.
Label each batch, record counts, and stage them dry, shaded, and ventilated so the new material stays consistent until you’re ready.
Patch And Recoat Layers
Although patching looks localized, you’ll get the cleanest, least visible repair by rebuilding the roof in deliberate layers that mirror the original coatwork. You’ll strip only the failed section back to sound thatch, then square the margins so new reed keys in without ridges.
Set a fresh underlayer first, dressing butts to the same pitch and thickness, and pin it tight with spars so it won’t creep. Next, apply the top coat with matching reed bundles, aligning butt lines and maintaining the existing eaves roll and sway.
You’ll comb, beat, and shear to close the surface, then re-fix wire or hazel liggers to lock the lift. This Traditional craftsmanship extends service life while using sustainable materials and staying breathable.
Repair Cottage Timbers With Minimal Replacement
You’ll start by evaluating timber decay with a probe and moisture readings, marking soft fibers, insect channels, and failed bearing points without over-opening sound wood.
You’ll then execute splice and scarf repairs that transfer loads cleanly, cutting back only to competent grain and bonding new sections with compatible timber and mechanical fixings.
Throughout, you’ll preserve original joinery by retaining pegs, housings, and shoulders where they still register true, so the frame’s geometry and historic fabric remain intact.
Assess Timber Decay
Before you cut out a single beam, map the decay so repairs stay local and the cottage’s original fabric remains intact. Start with a dry, well-lit inspection: probe with an awl, tap for hollow tones, and record moisture readings at bearing ends, wall plates, and chimney-adjacent members.
Distinguish active rot from historic, arrested decay by checking for softness, mycelium, and damp sources such as failed thatch flashings or bridged masonry. Mark insect activity separately; note frass, flight holes, and weakened sapwood zones.
Open up only where necessary to confirm section loss and load paths. Then specify timber treatment only after you’ve addressed moisture routes; decay prevention begins with ventilation, drainage, and breathable finishes, not chemicals alone.
Document everything for future monitoring.
Splice And Scarf Repairs
Once you’ve mapped decay and confirmed the load path, splice and scarf repairs let you retain sound timber while replacing only the failed section. You cut back to clean, dry fibers, then form a long, tapered scarf or stepped splice that spreads stress and avoids abrupt section loss.
You match species and grain, pre-fit the insert, and clamp it tight to hold alignment. You bond with a breathable structural adhesive where appropriate, then reinforce with concealed hardwood pegs or stainless screws set to avoid splitting.
You keep moisture pathways clear so the repair won’t trap damp rising from the sill. Under a Thatched roof, drifting Reed bundles can shed fines; you detail drip lines and ventilation so debris doesn’t wick water into the joint.
Preserve Original Joinery
Splice and scarf work keeps sound fibers in place; the same restraint should guide how you treat the cottage’s original joinery. You’ll start by mapping every mortise, tenon, peg, and housing joint, then probe with an awl to distinguish surface decay from structural loss.
You shouldn’t chase “perfect” geometry—keep tool marks and slight offsets that record historical craftsmanship.
Where joints have slack, you’ll tighten them with tapered oak pegs, resin-free wedges, or thin, reversible shims, rather than cutting fresh shoulders. If a tenon’s bruised, you’ll graft a small dutchman and pin it, aligning grain and shear lines.
Choose sustainable materials: air-dried local timber, lime-compatible consolidants, and hand-cut fasteners. You’ll reassemble dry, then protect with breathable finishes.
Use Lime Plaster and Breathable Finishes Inside
Although modern gypsum plasters and vinyl paints can look tidy, they’ll trap moisture in a thatched cottage and drive damp into walls, timber, and lath. You’ll get better performance by choosing lime plaster and breathable finishes that let humidity migrate and evaporate naturally. Lime’s open pore structure buffers moisture, reduces salt stress, and accommodates subtle movement without cracking the substrate.
- Patch with compatible lime putty or NHL mixes, matching existing aggregate and suction.
- Key coats into riven lath; finish with a tight float for a dense, vapour-open skin.
- Use limewash, casein, or silicate paints; they bond mineral-to-mineral and stay permeable.
- Avoid acrylic primers and fillers; they create hard edges and block drying paths.
Keep surfaces matte, mineral, and repairable over time.
Modernize Heating and Electrics Without Damage
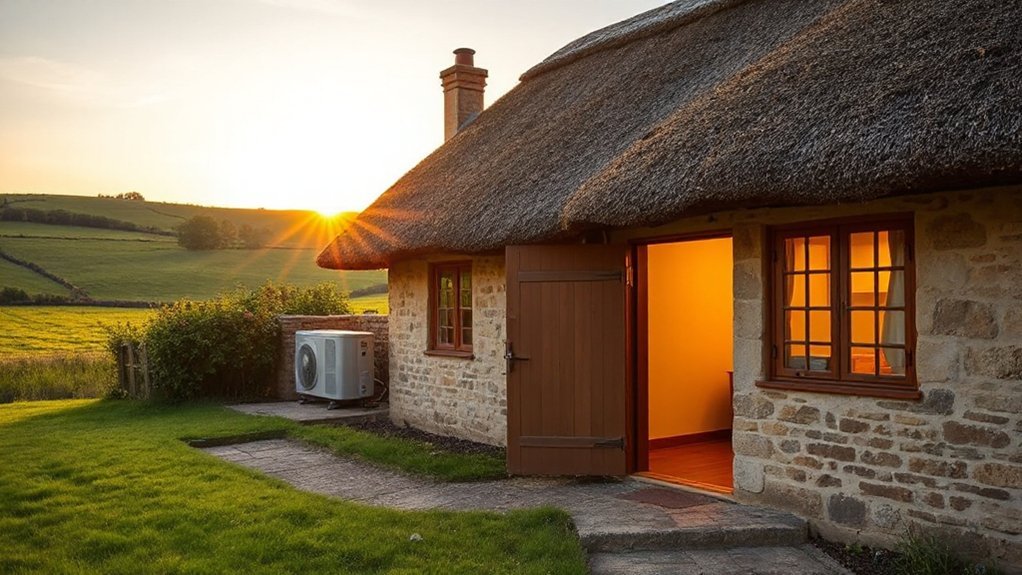
Because thatch and historic timber behave like a moisture-regulating system, you should modernize heating and electrics in ways that add comfort without cutting drying paths or weakening the frame.
Choose low-temperature emitters—slim radiators or discreet underfloor zones where buildup won’t trap moisture—then tune them with Smart heating for steady, gentle cycles instead of sharp peaks.
Route pipework through existing voids and service cupboards, not new chases in beams or cob.
For modern electrics, run surface-mounted, paintable conduit along skirtings and secondary members, keeping fixings minimal and reversible.
Specify RCD protection, surge suppression, and low-heat LED lighting to reduce fire load.
Use remote sensors to monitor humidity near rafters and adjust setpoints before condensation starts.
Choose Cottage Windows and Doors That Breathe
When you upgrade windows and doors in a thatched cottage, you’re not just sealing gaps—you’re managing how the whole envelope exchanges moisture and air. Choose joinery that buffers humidity, limits driven rain, and still lets vapor migrate outward.
Favor timber frames with breathable paint systems, and specify glazing that improves comfort without trapping moisture at reveals or sills. Around openings, detail lime-based bedding and capillary breaks so wetting can dry safely, protecting rafters above and plaster within.
- Fit draught seals that compress, not mastic that blocks pores.
- Use slim double glazing or secondary glazing to keep sightlines.
- Add trickle ventilation where needed, tuned to room use.
- Keep thresholds raised and drained, facing the Cottage garden.
Inside, align hardware and profiles with your Interior decor, so performance reads as craft.
Follow a Seasonal Thatched Cottage Maintenance Plan
If you treat your thatch like a living roof rather than a fixed finish, a seasonal maintenance plan becomes your best tool for controlling moisture, wind wear, and biological growth before they turn into decay.
In spring, clear gutters, lift compressed eaves with a leggett, and check ridges for hairline splits.
In summer, trim overhanging branches; smart garden landscaping increases airflow and reduces shade-driven moss.
In autumn, remove leaf litter, confirm wire fixings stay tight, and inspect flashings where dormers meet reed.
In winter, watch for wind-scour and snow drift loads, then record damp patches indoors to trace leaks early.
Coordinate interior decorating with ventilation: keep lime-plastered walls breathable, avoid sealing paints, and maintain steady, low humidity.
Frequently Asked Questions
What Insurance Options Cover a Restored Thatched Cottage?
You’ll cover a restored thatched cottage with a specialist Insurance policy: listed-building/homeowners, thatch fire endorsement, high-risk property cover, and rebuild-cost valuation reflecting Historic craftsmanship. Add contents, liability, alternative accommodation, and optional flood, storm, and subsidence extensions.
Do I Need Planning Permission or Listed-Building Consent for Restoration?
You’ll likely need planning permission for external alterations and listed-building consent if it’s designated; check your local authority early. You must document Historical accuracy and Material sourcing, ensuring specifications, heritage statements, and contractor methods align.
How Much Does Thatched Cottage Restoration Typically Cost per Square Metre?
You’ll typically pay £1,500–£3,500 per m², depending on access, structural repairs, and materials. Costs rise when you insist on Traditional craftsmanship and Historical accuracy, including bespoke detailing, limework, and specialist thatchers’ labour.
Can I Rent Out the Cottage During Restoration or Immediately Afterward?
You can’t rent it during active restoration; you can rent immediately afterward only once you’ve passed inspections—like a Wi‑Fi‑enabled quill. For Vacation rentals or Seasonal leasing, secure permits, safety certificates, and insurance first.
How Can I Reduce Fire Risk and Meet Current Safety Regulations?
Reduce fire risk and meet regulations by commissioning a fire safety risk assessment, upgrading detection and alarm systems, installing fire-rated barriers, improving wiring, maintaining clear egress, and documenting inspections; you’ll satisfy codes and insurers.
Conclusion
You’ve restored the thatched cottage by diagnosing its fabric, prioritizing drainage and damp control, then safeguarding the roof, ridge, and flashings. You’ve patched and recoated with matching reed, conserved timbers through minimal replacement, and finished interiors in lime plaster and breathable coatings. You’ve threaded new heating and electrics through the structure without scarring it, and chosen windows and doors that ventilate. Now maintain it seasonally, like tuning a precise instrument for weather.