
Pick a discreet spot with a clear view, solid Wi‑Fi, and easy power, and aim away from neighbours’ windows. Clean the surface with isopropyl alcohol, dry it well, then use a removable adhesive plate, VHB tape, a clamp (gutters/siding), or a magnetic mount to suit your wall. Press firmly and let adhesives cure 24–72 hours. Tuck cables into stick-on trunking and add a drip loop outside. Next, you’ll fine-tune motion zones and weatherproofing.
Key Takeaways
- Choose a discreet location with clear sightlines, strong Wi‑Fi, and power access, while avoiding neighbors’ spaces and using privacy zones.
- Clean and dry the mounting surface with isopropyl alcohol; avoid textured, dusty, or flaking paint for reliable adhesion.
- Use no-drill mounts like VHB adhesive plates, suction cups, magnetic bases, or clamp brackets matched to the surface type.
- Press mounts firmly and allow adhesive to cure 24–72 hours before loading; adjust the camera angle only after bonding.
- Manage cables with stick-on trunking and UV-rated clips, add outdoor drip loops, and seal exposed joins to prevent water ingress.
Choose the Best No-Drill Location
Before you stick anything to the wall, take a moment to choose a no-drill spot that gives you a clear view without looking like an afterthought. Walk the room and check sightlines from the camera’s height: you want faces, not foreheads, and you don’t want the lens staring into a window that’ll blow out your Camera resolution at night.
Aim down a hallway, across the landing, or towards the front door, keeping the camera tucked near a corner so it feels intentional and discreet. Stay within Wi‑Fi range and close enough to a socket if you’re not on battery.
Finally, respect surveillance privacy: avoid pointing at neighbours’ gardens, shared corridors, or public pavements, and use app privacy zones where needed.
Match the Mount to Your Surface Type
Once you’ve picked the spot, match the mount to the surface so it grips properly and still looks tidy.
You’ll use different no-drill fixes for drywall and painted walls than you’d for brick, stucco, and other masonry.
Glass, tile, and metal need the right adhesive pads or suction mounts to hold firm without leaving marks.
Drywall And Painted Walls
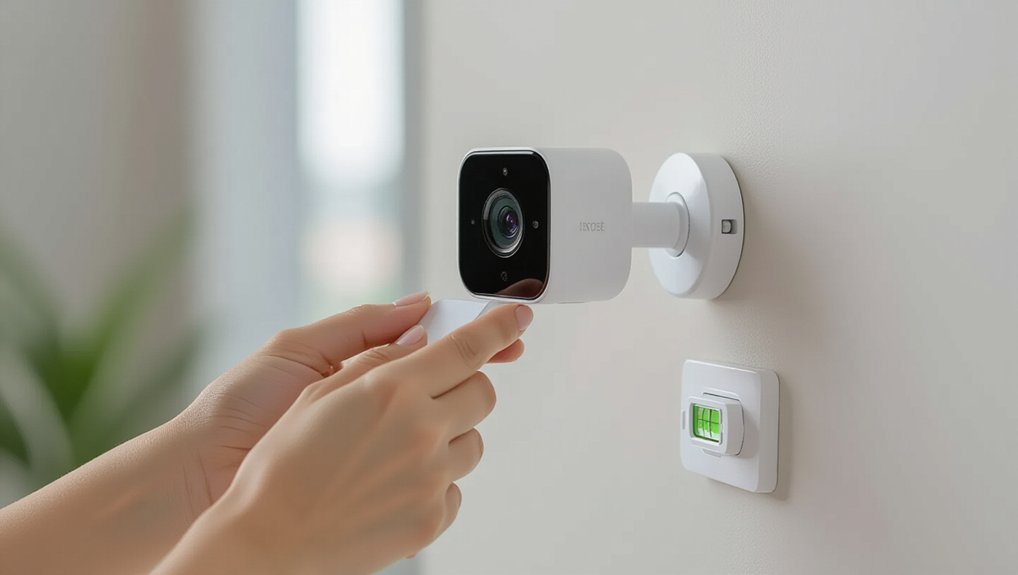
Because drywall and painted walls can mark or tear more easily than brick, you’ll get a cleaner, more design-friendly result by choosing a mount that matches the finish. Start by wiping the area with isopropyl alcohol so adhesives bond properly and don’t lift paint. Keep your camera light, and check Wireless connectivity before committing, so you’re not repositioning and scuffing the wall.
Higher Camera resolution also rewards careful placement: aim for faces at eye level, not ceiling corners.
- Use removable adhesive pads for smooth emulsion paint; press firmly for 60 seconds.
- Choose a low-profile corner shelf mount to avoid screws and hide cabling neatly.
- Try a tension pole or floor stand if you rent and want zero wall contact.
Brick, Stucco, And Masonry
Painted drywall forgives a light touch, but brick, stucco, and other masonry need a mount that grips to texture without looking bodged.
Choose exterior-rated adhesive pads with a flexible foam core, or a clamp-style bracket that bites into mortar lines without marking the face.
Clean with sugar soap, then wipe with isopropyl alcohol and let it dry fully.
Warm the pad with a hairdryer, press hard for 60 seconds, and leave it 24 hours before hanging the camera.
Keep weight low and route the cable with outdoor cable clips on render seams.
Use your Security camera features—motion zones and a wide field of view—to avoid awkward angles.
Your only installation tools should be a tape measure, level, and a clean cloth.
Glass, Tile, And Metal
Where you stick a no-drill camera matters most on smooth surfaces like glass, tile, and metal, so match the mount to the finish rather than forcing a one-size pad.
For Glass installation, use a clear suction mount or optically clear VHB tape; clean with isopropyl alcohol, then let it cure 24 hours.
On tile, avoid grout lines and choose a low-profile adhesive plate so it sits flush and looks tidy in a modern UK bathroom.
For Metal mounting, go magnetic if the surface is steel, or use VHB on aluminium and powder-coated frames—warming the tape with a hairdryer helps in chilly halls.
Prioritise:
- Degrease, then dry fully.
- Test position for Wi‑Fi and PIR range.
- Add a discreet safety tether indoors.
Pick a Camera That Supports No-Drill Mounts
Before you buy anything, make sure the camera itself is designed for a no-drill install, as not every model plays nicely with adhesive pads, clamps, or magnetic mounts. Look for cameras sold with a dedicated stick-on plate, tension clamp, or strong magnetic base, and check the stated surface compatibility and weight limits.
Prefer compact, lightweight units with a centred mounting point so they don’t cantilever and creep over time. If you’re placing it in a living room or on a front bay window, consider Camera aesthetics: a slim profile, neutral colours, and tidy cable routing (or true battery power).
Finally, don’t ignore the user interface—fast live view, clear motion zones, and sensible notifications matter more than gimmicky extras.
Clean and Prep Surfaces for Adhesives
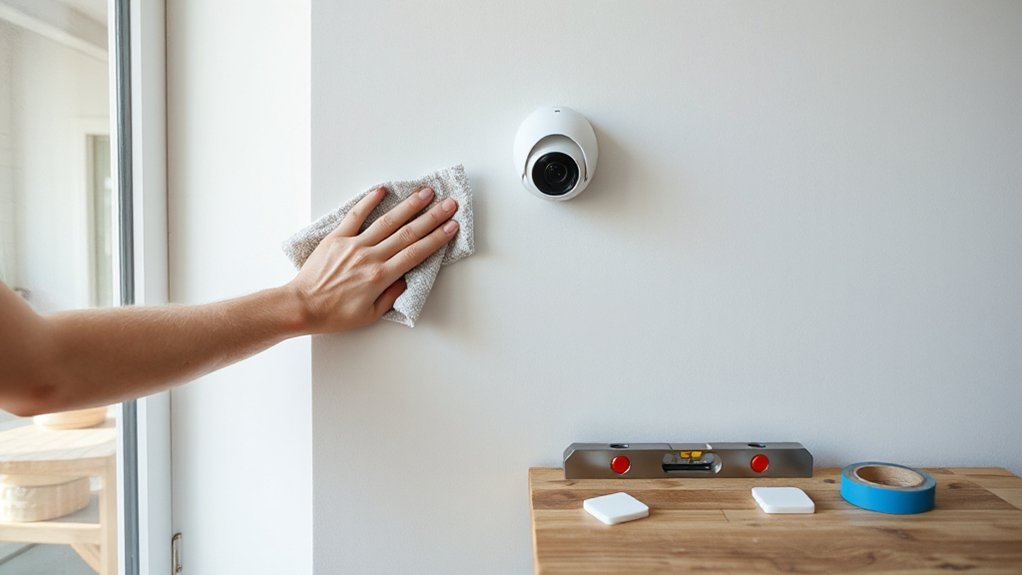
Once you’ve picked a camera that actually works with a no-drill mount, your next job is getting the surface ready so the adhesive can bite and stay put. Good surface preparation stops early peel, especially in damp UK hallways, kitchens, or soffits.
- De-grease first: Do adhesive cleaning with isopropyl alcohol on a lint-free cloth; washing-up liquid can leave residue.
- Dry and warm: Wipe again, then let it air-dry fully. If it’s chilly, warm the area gently with your hands so tack improves.
- Check the finish: Paint that’s flaking, dusty render, or textured brick won’t bond neatly. Choose a smoother patch so the install looks tidy and intentional.
Keep the area clear of polish, silicone sprays, and steam for a day beforehand.
Use Removable Adhesive Mounts (Step-by-Step)
Although peel-and-stick mounts look simple, you’ll get a far cleaner, longer-lasting install if you treat them like a mini fitting job rather than a quick slap-on. Start by marking Camera placement with low-tack painter’s tape, then step back and check sightlines, lighting glare, and whether the mount will look tidy against your décor.
Next, warm the wall slightly with your hand (cold UK walls can reduce adhesive strength). Peel the backing, align carefully, and press firmly for 30–60 seconds, pushing from centre out to avoid bubbles. Leave it undisturbed for at least an hour before attaching the camera.
Finally, clip the camera on, fine-tune the angle, and add a discreet cable route using removable clips, keeping edges neat.
Mount With 3M VHB Tape (Strongest Option)
If you want the most secure no-drill fix—especially on uPVC, metal, tile, or smooth painted plaster—3M VHB tape gives you a near-permanent hold without turning your wall into a mess of plugs and filler.
For tidy Camera placement, plan your angle first, then commit—VHB isn’t forgiving.
- Prep properly: Degrease with isopropyl alcohol, dry fully, and avoid freshly painted walls (wait 7 days).
- Apply with pressure: Stick the pad to the mount, peel, position once, then press hard for 30–60 seconds.
- Let it cure: Keep the camera off for 24 hours (72 for max strength), then cable-manage with slim trunking for a clean finish.
These mounting techniques look discreet and stand up to British weather and vibrations.
Use a Magnetic Mount on Metal Surfaces
If you’ve got a steel door frame, metal guttering, or a fuse box cover, you can fix your camera with a magnetic mount and keep the look clean.
Choose a mount with a strong rated pull and a rubberised face, then place it on a flat, solid section of metal for the steadiest view.
To prevent slips and vibration, clean off dust and condensation, route the cable neatly, and add a thin anti-slip pad if the surface is painted or slightly curved.
Choosing Strong Magnetic Mounts
When you’ve got a suitable metal surface to work with, a strong magnetic mount gives you a clean, drill-free way to position your security camera neatly and securely.
To avoid slips and ugly cable tugs, you’ll want a mount that balances Magnetic strength with Surface compatibility, and looks discreet against your décor.
- Check the pull rating: aim for a higher Magnetic strength than the camera’s weight, especially if you’ll angle it downwards.
- Choose a base with a rubberised pad to protect paintwork and stop micro-sliding on smooth steel.
- Look for an adjustable ball joint and a slim profile, so you can align the lens without a bulky bracket.
If you’re mounting outdoors, pick weather-resistant coatings and stainless fixings to prevent rust marks.
Best Metal Mounting Spots
Where can you actually stick a magnetic mount so the camera stays put and still looks tidy? Start with steel door frames (front, back, and garage), which give a clean line and natural sightlines to visitors.
In flats, look for metal window lintels, radiator covers, or the steel side of a utility cupboard for a discreet, design-friendly install.
In a driveway, a metal gate post or carport beam can cover approaches without cluttering brickwork.
Indoors, try a metal shelving upright in a hallway or a fuse-box cabinet door, keeping the lens high and out of reach.
Check you’ve got solid Wireless connectivity from that spot, then angle the view for effective Remote monitoring without pointing into neighbours’ windows.
Preventing Slips And Vibration
Even with a strong magnetic base, vibration from slamming doors, passing traffic, or a rattly gate can slowly walk your camera out of alignment, so lock the mount down with a few simple tweaks.
Clean the steel first (degreaser or IPA), then add a thin rubber pad to increase grip and protect paintwork for better Camera aesthetics.
Keep cables slack but tidy, so they don’t tug the unit.
- Add friction: stick a neoprene or silicone sheet between magnet and metal; it damps buzz.
- Stop rotation: use a magnetic base with a lock ring, or add a discreet safety lanyard to a hinge or bracket.
- Limit peeking: aim away from neighbours’ windows and set privacy masks in the app to support user privacy.
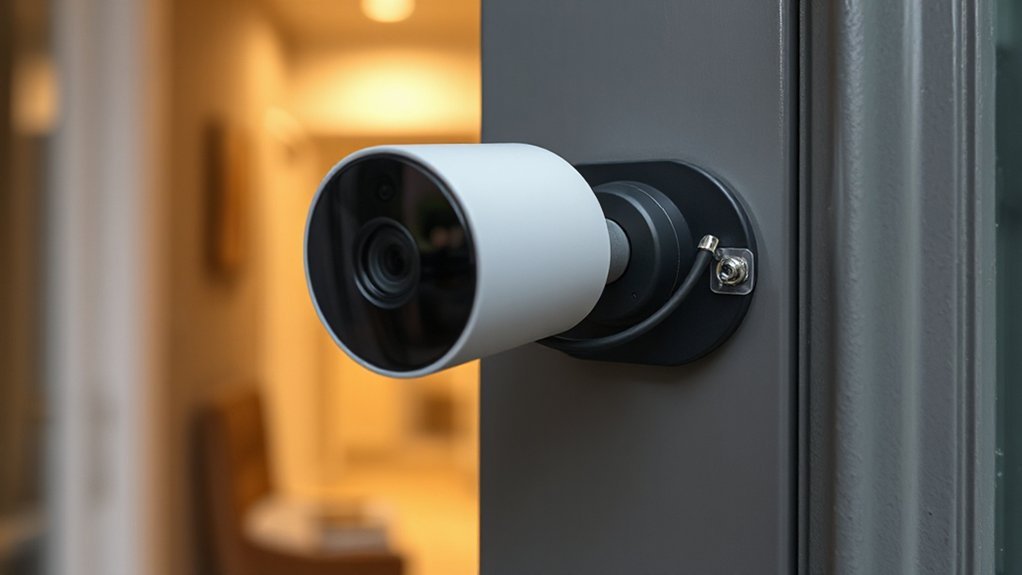
Clamp-Mount Cameras on Rails and Posts
If you’ve got a balcony rail, garden gate, downpipe, or fence post in the right spot, a clamp-mount camera gives you a tidy, drill-free fix that still looks intentional. Choose a clamp with rubber pads so it grips paintwork without scuffing, and tighten it until the camera doesn’t twist in wind.
For smart Camera placement, set the lens at head height, angle slightly down, and avoid pointing straight at neighbours’ windows or the pavement. Run the cable neatly along the rail with UV-rated ties, or go battery to keep lines clean.
For Lighting considerations, keep the camera out of direct security lights to prevent glare, and avoid aiming into low winter sun. Test night footage before you leave it.
Hang Cameras From Gutters Safely
If you’re hanging a camera from your gutter, pick a gutter-friendly mount that grips the lip securely without crushing the edge or scratching the finish.
You’ll want a rubberised clamp or hook with a safety tether so it won’t slip in wind or heavy rain and end up in the downpipe.
Set it level, keep the cable neat and discreet, and make sure you’re not blocking water flow or stressing the bracket.
Choose Gutter-Friendly Mounts
When you’d rather keep your brickwork pristine, gutter-friendly mounts let you hang a security camera from the gutter line without a single hole. Pick a clamp-style bracket designed for uPVC or aluminium gutters, with padded jaws and stainless fixings so it looks tidy and won’t mark the finish.
Aim for a low-profile arm that keeps the lens just below the fascia for a clean, modern sightline.
- Check compatibility with your gutter profile (half-round or squareline) and depth.
- Choose mounts that clear your Leaf guard and won’t hinder Gutter cleaning.
- Prioritise adjustable tilt/pan so you can frame the driveway without overhanging.
Route the cable neatly along the soffit with outdoor clips or a slim conduit, and you’ll keep the façade crisp.
Prevent Slips And Damage
Although gutter clamps make a no-drill install look effortless, you still need to stop the bracket creeping, rubbing, or overloading the guttering. Add a thin rubber pad between clamp and gutter lip, and choose stainless fixings so you won’t get rust streaks down your fascia.
Don’t clamp near a joint, outlet, or fragile end cap; pick a straight run that won’t flex when it rains.
Before final tightening, do a quick security assessment: confirm the view, PIR range, and blind spots, and keep Camera placement high enough to deter tampering but not so far out it acts like a sail.
Route the cable with UV-rated clips and a drip loop so water can’t track indoors. Recheck after the first storm.
Attach Cameras With Siding Clips
Because uPVC and timber cladding can be tricky to drill neatly, siding clips give you a clean, no-damage way to mount a security camera under the lip of a weatherboard. You’ll get tidy lines, keep your paintwork intact, and you can reposition later without filler or touch-ups.
For smart Camera placement, test sightlines first, then clip once you’re happy.
- Choose Siding clips sized for your board profile; they should grip firmly without bowing the cladding.
- Slide the clip up under the lap, then tighten or lock it so it sits flush and looks intentional.
- Fix the camera bracket to the clip, route the cable along the shadow line, and secure it with outdoor cable ties.
Give it a gentle tug test and check the view in the app.
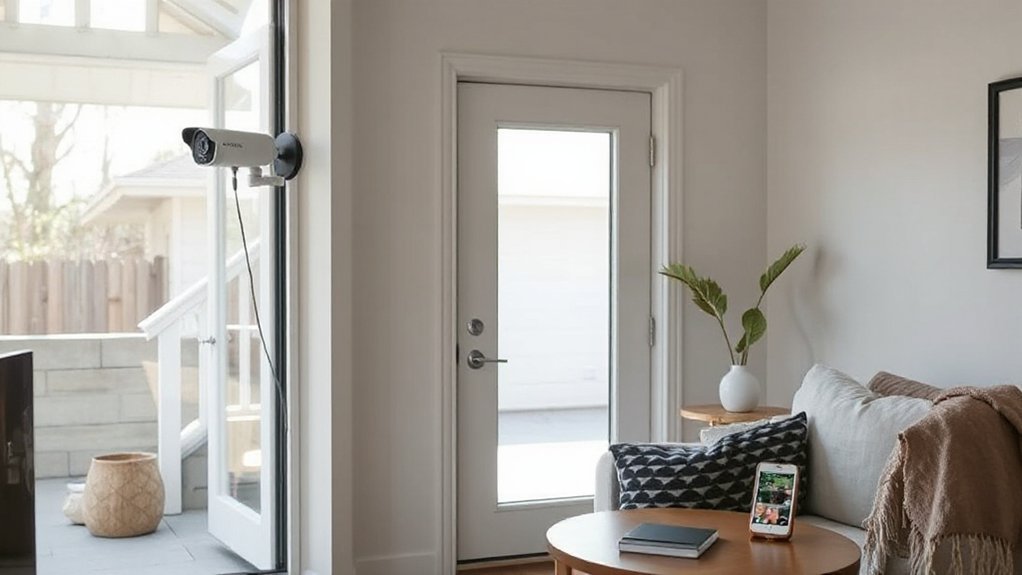
Mount a Camera on a Window (Glass Tips)
If drilling’s off the table but you still want a clean view of your entrance, mounting a camera on a window can work brilliantly with the right glass-friendly fixings. Start with Camera placement: pick a pane that faces the approach, sits out of direct sun, and avoids streetlight glare at night.
Clean the glass with isopropyl alcohol, then apply a suction mount or 3M VHB pad rated for glass—check Surface compatibility on the packaging. Keep the mount on the room side, high enough to deter tampering but within Wi‑Fi range.
Angle the lens slightly down to reduce reflections, and switch on any “window mode” or IR-off setting so night vision doesn’t bounce back. Finally, route the cable neatly along the frame with clear adhesive clips.
No-Drill Mounting for Doorbell Cameras
A window mount gives you a strong vantage point, but a doorbell camera works best when it sits right by the door at eye level. Choose a no-drill bracket that clamps to your uPVC or timber doorframe, or use a peel-and-stick plate rated for exterior paintwork and British weather. Keep the look tidy by picking a colour-matched mount and hiding the body behind a slim faceplate.
- Clean the surface with isopropyl alcohol, then dry fully for a secure bond.
- Angle the camera to avoid filming neighbours’ paths or the street, supporting user privacy.
- Re-check adhesion monthly, wipe the lens, and tighten any clamp points for routine camera maintenance.
Test the view in daylight and at night, then lock settings to prevent accidental repositioning.
Run Power Cables Without Drilling Holes
To power your camera without drilling, you can run an outdoor-rated extension lead along the safest edge of the wall and keep it clear of walkways.
Choose a weatherproof, UKCA/BS-compliant lead and route it to the nearest indoor socket via an existing gap, like under a door or through a vent grille.
Then clip on a slim cable raceway in a matching finish so the run looks tidy and intentional rather than bodged.
Use Outdoor-Rated Extension Cords
- Pick an IP-rated cord (IP44+), sized for outdoor use and your camera’s load.
- Use an RCD-protected socket or plug-in RCD for extra protection in UK weather.
- Keep connections off the ground and sheltered; avoid door seals and trip paths.
Conceal Cables With Raceway
When you can’t (or don’t want to) drill through brickwork, stick-on cable raceway lets you run the camera’s power lead neatly along skirting boards, door frames, or soffits without leaving a messy trail.
Choose low-profile PVC trunking with strong adhesive backing, and wipe surfaces with isopropyl first so it bonds on painted plaster, uPVC, or smooth brick.
Measure, cut with a fine-tooth saw, then click the lid on after you’ve laid the cable with a little slack at corners.
Paint the raceway to match your walls for a tidy finish that won’t clash with décor.
Keep joins away from weather exposure, and add a drip loop outdoors.
With Wireless connectivity, you’ll only hide power, not data, preserving camera resolution.
Hide Wires Neatly With Cable Raceways
Although you’re skipping the drill, you don’t have to live with messy leads—cable raceways (also called trunking) let you run camera power and Ethernet neatly along skirting boards, door frames, or the top edge of a wall for a clean, design-friendly finish.
Choose a slim, paintable PVC raceway that matches your décor, and stick it down with the supplied adhesive backing or proper Command-style strips for rented flats. Keep bends crisp with corner pieces, then snap the lid shut for a tidy line that won’t distract from your room.
If you’re relying on Wireless connectivity, you can still hide the power lead, and better routing helps preserve camera resolution by avoiding tugged connectors.
- Plan the shortest route
- Measure, cut, and dry-fit
- Label ends for quick swaps
Weatherproof the Mount and Cable Runs
If your camera or cabling sits outdoors, weatherproofing the mount and cable run keeps moisture out and your setup looking intentional. Start by checking the IP rating and security camera features like rubber gaskets and rear cable entry; use them, don’t bypass them with sloppy routing.
Clean the wall with isopropyl, then press on your adhesive mount and seal the top edge with exterior-grade clear silicone so rain can’t track behind it.
For cable runs, use UV-stable outdoor trunking or conduit, and add a drip loop before the camera to stop water wicking into connectors.
Wrap joints with self-amalgamating tape, then cover with heat-shrink if you’ve got it.
Keep installation tools handy: craft knife, tape measure, silicone gun, and clips.
Test Motion Zones and Fix Common Issues
Once you’ve got the camera up, open the app and fine-tune the motion zones before you commit to the final angle, because a few minutes here stops constant false alerts later. Stand where you’ll actually walk (front path, gate, porch) and watch the live view as you adjust.
- Set Motion detection to ignore roads, waving trees, and your neighbour’s drive; draw tight boxes around doors and windows.
- Drop sensitivity a notch, then test at dusk; headlights and low sun cause the most false alarms in UK streets.
- Fix common issues: reposition to avoid glass reflections, clean the lens, and check Wi‑Fi strength where it’s mounted.
Save settings, walk-test twice, then lock in the neatest angle.
Frequently Asked Questions
Do I Need Permission From My Landlord or HOA to Install Cameras?
Yes, you usually do. Check your tenancy and the HOA’s rules for leasing restrictions, then request property approval in writing. Choose discreet, tidy mounts, confirm privacy compliance, and avoid filming shared areas or neighbours.
Are There Privacy Laws About Recording Neighbors or Public Sidewalks?
Yes—privacy laws can apply even if you’re “just protecting your home”. In the UK, neighbour recordings and public sidewalks may trigger GDPR/DPA duties. You’ll need clear signage, minimise coverage, and respond to data requests.
How Much Internet Bandwidth Do Wireless Security Cameras Typically Use?
You’ll typically use 1–4 Mbps per 1080p camera, 4–10 Mbps for 4K, depending on frame rate and compression. Check your Internet speed and Bandwidth requirements, and budget upload capacity for multiple cameras.
How Long Do Battery-Powered Cameras Last Between Charges in Cold Weather?
In cold weather, you’ll usually get 2–8 weeks between charges; Battery life drops sharply below 0°C. You can stretch it by cutting motion alerts, lowering recording quality, and mounting it sheltered.
What Should I Do if My Camera Is Stolen or Tampered With?
If your camera’s stolen or tampered with, you’ll report it to police (get a crime number), save cloud footage, change passwords, and review camera placement for tampering prevention—add signage, lighting, and discreet mounting to deter repeat attempts.
Conclusion
You’ve now got a security camera up without a single drill hole, and it should look as tidy as a skirting board on fresh paint. Do a final check: press the mount firmly, confirm the feed is stable, and adjust motion zones so you don’t get pinged by passing cars or the neighbour’s cat. Neaten any slack cable in raceways, seal outdoor joins, and re-test at night. If it shifts, swap to stronger pads.


