Add structure to your outdoor space by choosing one anchor piece first, such as a dining set or fire pit, then measure clearances for door swing and 36–48 inch circulation paths. Map zones for dining, lounging, and utilities using hardscape surfaces, outdoor rugs, and clean edging with planters or metal borders. Repeat 2–3 finishes across furniture and hardware for cohesion, layer 2700–3000K lighting for safety and separation, and add weather-rated storage to reduce clutter. Continue for additional layout and material specifics.
Key Takeaways
- Choose one anchor piece, size it to fit, and orient it to key views to unify the layout.
- Define activity zones with hardscape borders, outdoor rugs, and consistent edging to clarify where each function belongs.
- Connect zones using direct 36–48 inch pathways with stable, edged materials for easy circulation and fewer trip hazards.
- Add vertical structure with planters, trellises, or screens to create separation, height, and privacy without blocking flow.
- Layer lighting—ambient, task, and accent—with separate controls to reinforce zones, improve safety, and add nighttime definition.
Choose One Outdoor Anchor Piece First
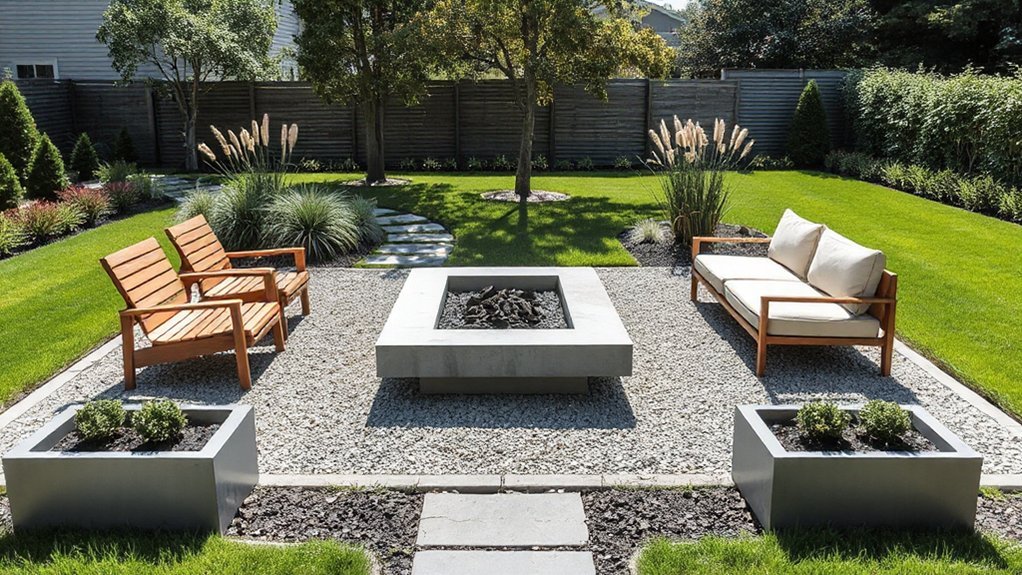
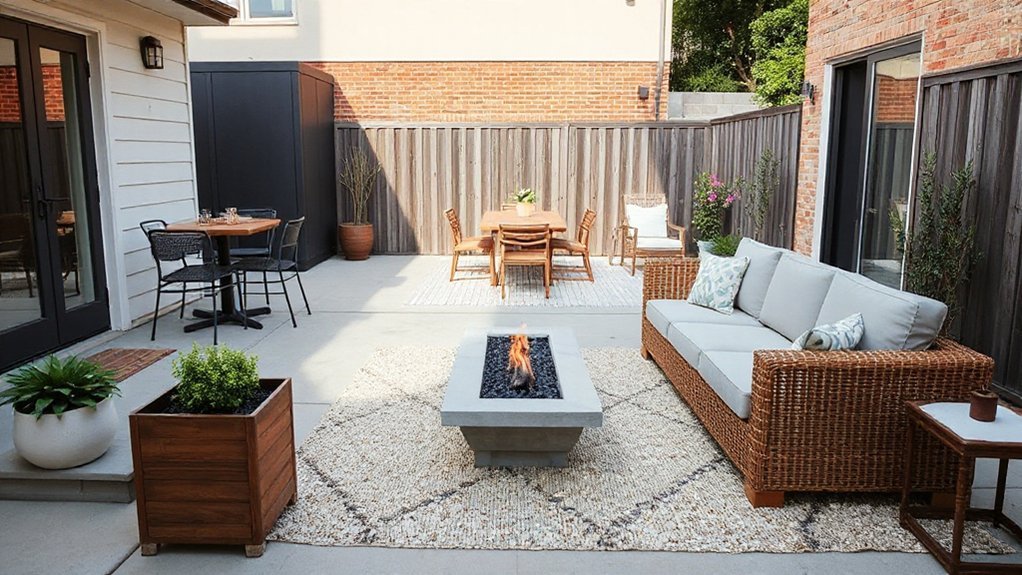
Although it’s tempting to buy smaller décor items first, you’ll get a cleaner, more structured layout by selecting one outdoor anchor piece before anything else. Choose a primary element—dining table, sectional, fire pit, or pergola—that fits your dominant use case and establishes a focal point.
Verify scale by measuring the footprint, circulation clearance, and door swing; you’ll want consistent passage widths and unobstructed egress. Orient the piece to optimize sightlines from interior windows and main entry paths, so it functions as a visual anchor from multiple approaches.
Then set supporting items to match its geometry, material, and height hierarchy, keeping secondary pieces subordinate. You’ll reduce visual noise and prevent mismatched micro-purchases that dilute cohesion over time.
Map Your Outdoor Space Into Clear Zones
Start by identifying your site’s natural activity areas—dining, lounging, play, and circulation—based on sunlight, views, and proximity to doors and utilities.
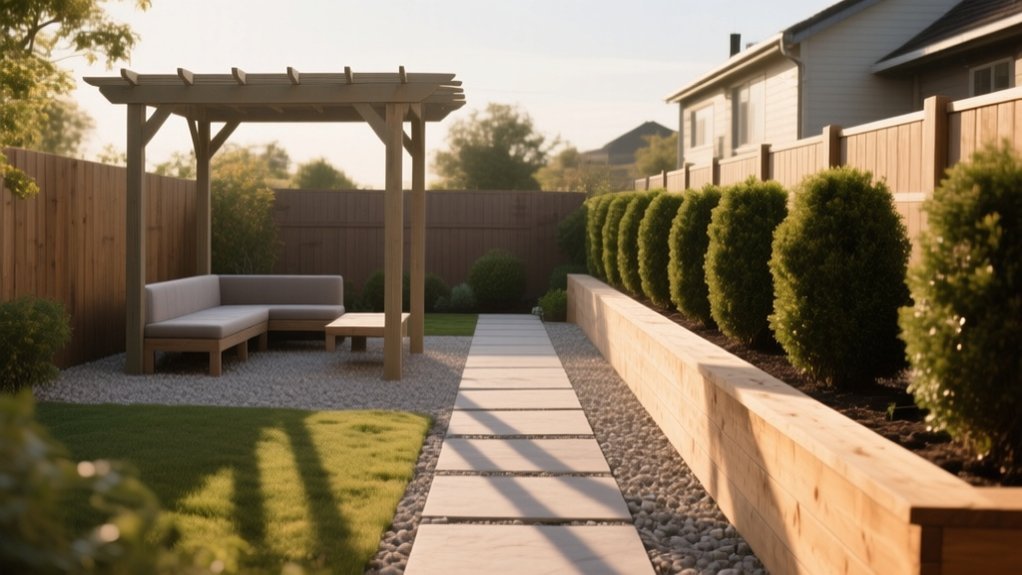
Define each zone’s boundary with hardscapes such as pavers, gravel bands, edging, or low retaining walls to create clear spatial limits and durable shifts.
Then connect the zones with pathways sized for expected traffic flow, using consistent materials and direct alignments to maintain legibility and function.
Identify Natural Activity Areas
Before you buy furniture or lay down hardscaping, map your outdoor space into clear zones based on how you already use it (and how you want to use it). Walk the site at morning, midday, and evening, then note sun angles, prevailing wind, drainage paths, and existing desire lines. Mark where you naturally linger, enter, store tools, or supervise pets and children.
Treat established vegetation as anchors: keep shade trees as cooling nodes, and preserve corners that function as wildlife habitats. Use natural plantings to reinforce these activity areas without forcing circulation.
For example, place higher, denser species where you want privacy, and lower, open-textured species where you need visibility. Allocate quiet zones away from noise sources, and reserve utility zones near water and power access points.
Define Boundaries With Hardscapes
Once you’ve identified where you naturally sit, walk, store, and play, lock those zones in place with hardscapes that set clear edges and durable routes. Start by selecting landscape materials matched to use and load: concrete or clay pavers for seating pads, compacted gravel for utility strips, and stone or steel edging for crisp separations.
Establish boundary markers at every transition so each zone reads as intentional: low retaining walls, curb stones, timber sleepers, or mow strips that stop turf creep. Keep heights and lines consistent to maintain visual order and reduce trip hazards.
Specify a stable base (geotextile over compacted aggregate) where settlement is likely. Leave small gaps for drainage, and align edges with existing grades to avoid ponding.
Link Zones With Pathways
How do you make separate outdoor zones function as one coherent layout? You link them with purposeful pathways that establish circulation and sightlines. Start by mapping primary routes between entries, seating, and service areas; keep widths at 36–48 inches for comfortable two-way passage. Use consistent paving—gravel, pavers, or decomposed granite—with defined edging to prevent migration and to sharpen geometry.
Set gentle curves only where they improve turning radius or reveal focal points, such as garden art at an intersection. Maintain level progressions and add slip-resistant texture in shaded or irrigated sections.
Integrate low path lighting for nighttime legibility and safety. Border routes with seasonal plants to visually stitch zones while preserving clearance and airflow. A clear path network makes every zone feel intentional.
Plan Simple Pathways for Easy Flow
Although your planting beds and patio features may look cohesive on paper, the space won’t function well without clear circulation routes. You should map primary paths between doors, garden furniture groupings, grills, sheds, and gates, then confirm each route stays direct and obstruction-free.
Maintain a minimum clear width of 36 inches for one-person travel, or 48 inches where two people pass. Use gentle curves only when they shorten travel or reduce grades.
Keep running slope under 5 percent and cross slope near 2 percent for stability and drainage. Select landscape materials that match use: compacted gravel for secondary paths, mortared pavers for high-traffic corridors, and textured stone where surfaces get wet.
Edge paths to prevent spread and trip points.
Define Zones With Outdoor Rugs and Mats
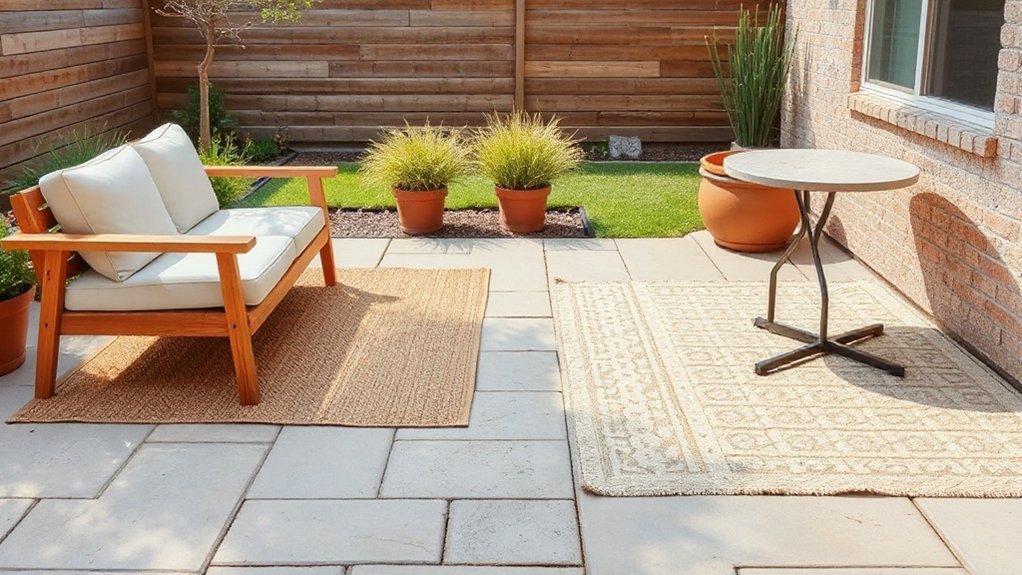
If your patio or deck needs clearer organization without permanent construction, you can define functional zones with outdoor rugs and mats. Place a rug under the dining set to signal an eating area, and use a second mat at the lounge seating to separate relaxation from circulation.
Prioritize Material selection: polypropylene or recycled PET resists UV, mildew, and staining; rubber-backed mats add slip resistance on composite boards. Match pile height to usage—low-pile for chair movement, flat-weave for high traffic.
For Color coordination, echo major hues from cushions or siding, then add contrast to improve wayfinding.
Size rugs so front legs of furniture sit fully on the surface, preventing edge curl and trip hazards. Secure corners with exterior-grade tape as needed.
Create Clean Edges With Planters and Edging
To make an outdoor area read as intentional rather than improvised, establish clean perimeter lines with planters and edging that physically separate surfaces and guide foot traffic. Use modular planters to define corners, progressions, and endpoints; align them with paving joints for visual continuity.
For hardscape, install metal or composite edging flush with grade to prevent gravel migration and lawn creep; stake at 12–18 inch intervals and keep curves consistent.
For garden borders, set pavers on a compacted base with a restrained sand bed so they won’t heave.
In planting beds, use edge planting to reinforce lines: place low, uniform species in a single row, maintaining equal spacing and a straight sightline. You’ll simplify maintenance and keep zones legible.
Add Height and Privacy With Screens or Trellises
When your patio or yard needs definition beyond ground-level borders, add vertical structure with screens or trellises to create privacy and control sightlines. Place privacy screens where neighbors’ windows align with primary seating zones, and angle panels to block oblique views without closing airflow.
Specify rot-resistant wood, powder-coated aluminum, or composite rated for exterior UV exposure, and anchor posts to frost depth in concrete for stability.
For trellis design, size openings to match plant habits: 4–8 inch grid for climbers, tighter for vine training. Keep a 1–2 inch standoff from walls to prevent moisture trapping and allow maintenance access.
Integrate screens with planters or edging lines so vertical elements read as intentional architecture and define zones. Use modular panels for easy reconfiguration and repair.
Pick Outdoor Furniture by Scale and Function
Vertical screens and trellises set the boundaries, but furniture determines how you’ll actually use each zone. Start by measuring clear circulation paths; you’ll need 30–36 inches for comfortable passage and chair pull-out.
Match scale to the footprint: choose armless or modular pieces for narrow patios, and full-depth sofas only when you can maintain walking lanes.
Define function first—dining, lounging, or work—and select Furniture ergonomics accordingly: seat height near 17–18 inches, back angle that supports the lumbar curve, and table heights that align with chair arms.
Prioritize Material durability based on exposure; specify UV-stable finishes, rust-resistant hardware, and quick-drain cushions.
Anchor each zone with one primary piece, then add compact, movable supports.
Repeat 2–3 Finishes for a Cohesive Outdoor Look
Although outdoor areas often combine many materials by necessity, you’ll get a cleaner, more intentional result by repeating just 2–3 finishes across the entire space—such as one dominant frame finish (powder-coated aluminum or painted steel), one wood tone (teak, ipe, or thermally modified ash), and one accent metal (brushed stainless or aged bronze).
Build Finish consistency by selecting those finishes for seating, tables, planters, railings, and hardware, then hold to them when you add replacements.
Use color coordination by matching undertones: keep woods either warm (golden/brown) or cool (smoke/gray), and pair metals with similar temperature.
Specify exterior-grade coatings (AAMA-compliant powder coat) and UV-stable oils to limit fading.
If you must mix materials, vary texture—not hue—so the palette stays structured overall.
Use Layered Outdoor Lighting to Shape Zones
Because light directs attention faster than furniture placement does, you can use layered outdoor lighting to define clear zones—dining, circulation, and lounge—without adding physical barriers.
Start with ambient light: place warm, dimmable string lights or a ceiling fixture over the central area at 2700–3000K to keep tones consistent.
Add task lighting next: mount downlights or step lights along paths to achieve even foot-candle levels and reduce glare.
Finish with Accent lighting: aim narrow-beam uplights at trees, textured walls, or planters to anchor the lounge and create purposeful Shadow play.
Separate zones by switching circuits or using smart scenes, so each layer activates independently.
Keep fixtures shielded and aim them downward to control light spill and maintain visual hierarchy.
Add Outdoor Storage to Keep It Tidy
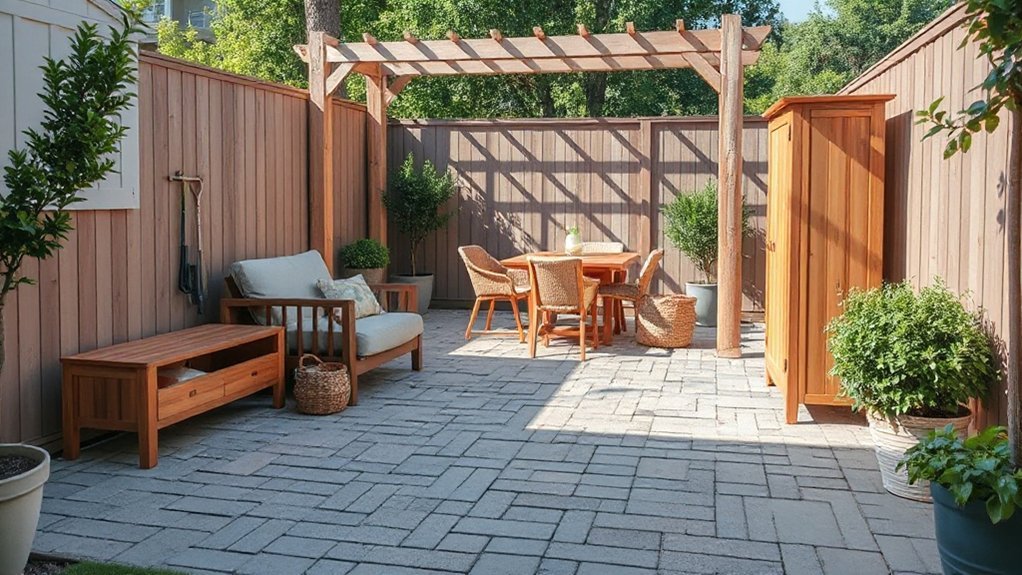
When you control outdoor clutter with dedicated storage, you make every zone read as intentional and easier to use. Select weather-rated cabinets, deck boxes, or vertical sheds with gasketed lids and UV-stable resin or powder-coated steel.
Position storage near task areas: keep Garden tools by the planting bed, grill accessories beside the cook station, and cushions near seating.
Use interior hooks, bins, and labeled totes to separate sharp edges, chemicals, and textiles, and add silica packs for moisture control.
Anchor tall units to framing or masonry to resist wind loads.
Choose finishes that match hardscape colors so storage reads as Outdoor decor, not utility.
Maintain clear walk paths by storing hoses on reels and stacking items by frequency of use.
Frequently Asked Questions
What Permits or HOA Rules Affect Adding Outdoor Structures?
You’ll need to check zoning restrictions for setbacks, height, lot coverage, and utility easements, and follow HOA guidelines on materials, color, and placement. You should confirm permit triggers with your building department before construction starts.
Which Materials Handle Harsh Sun, Rain, or Freeze-Thaw Best?
For harsh sun, rain, and freeze-thaw, you’ll get best performance from powder-coated aluminum, galvanized steel, fiber-cement, and sealed composite lumber. Use durability testing data and material comparisons; avoid untreated wood and low-grade plastics.
How Can I Add Structure to a Small Balcony or Rental Patio?
You can add structure by zoning with furniture placement: anchor seating on an outdoor rug and align a narrow table to edges. Install freestanding privacy screens or trellis panels, and use tall planters to define boundaries.
What’s the Best Way to Manage Drainage and Prevent Puddling?
You’ll manage drainage best by correcting slope 1–2% away from surfaces, using permeable decking tiles, and adding a discreet drain mat. For Rainwater management, keep scuppers clear; choose Drainage solutions like gravel trays, too.
How Do I Plan a Structured Outdoor Space on a Tight Budget?
You’ll plan a structured outdoor space cheaply by measuring zones, reusing materials, and pretending you’re not. Prioritize outdoor furniture arrangements for circulation, add low-voltage landscape lighting, and define edges with gravel or pavers.
Conclusion
Start with one anchor piece, then zone your yard like you’re drafting a site plan on a typewriter: clear areas, logical paths, and defined edges. You’ll tighten each zone with rugs, planters, and scaled furniture selected for function. Repeat two or three finishes to control visual noise. Layer lighting to reinforce boundaries after dark, and add storage to prevent clutter from eroding structure. If you keep these controls consistent, your outdoor layout will read cleanly.