
Install blinds without drilling by choosing a no-drill system that matches your frame and load: adhesive brackets for clean, sealed wood/metal/vinyl, tension mounts for in-frame spans, or clip-on brackets for compatible profiles. Check inside/outside clearances so sashes and handles don’t collide. Measure width top/middle/bottom and order the narrowest; confirm required depth and frame thickness. Degrease with 70% isopropyl alcohol, align marks, press or torque to spec, snap in the headrail, cycle twice, and recheck after 24 hours for long-term performance details.
Key Takeaways
- Choose a no-drill system (adhesive, tension, or clip-on) that matches your frame material, reveal depth, and blind weight rating.
- Confirm window type and clearances, ensuring brackets won’t hit locks, handles, sensors, weatherstripping, or moving sashes.
- Measure width at top, middle, and bottom; order to the narrowest measurement and verify the minimum depth required for your mount.
- Prep the frame by leveling ridges, then degreasing with 70% isopropyl alcohol and letting it dry fully for best adhesion.
- Install brackets on marked lines, press or clamp to spec, snap in the headrail, test operation twice, and recheck adhesion/tension after 24 hours.
Choose the Right No-Drill Mount (Adhesive, Tension, Clip-On)
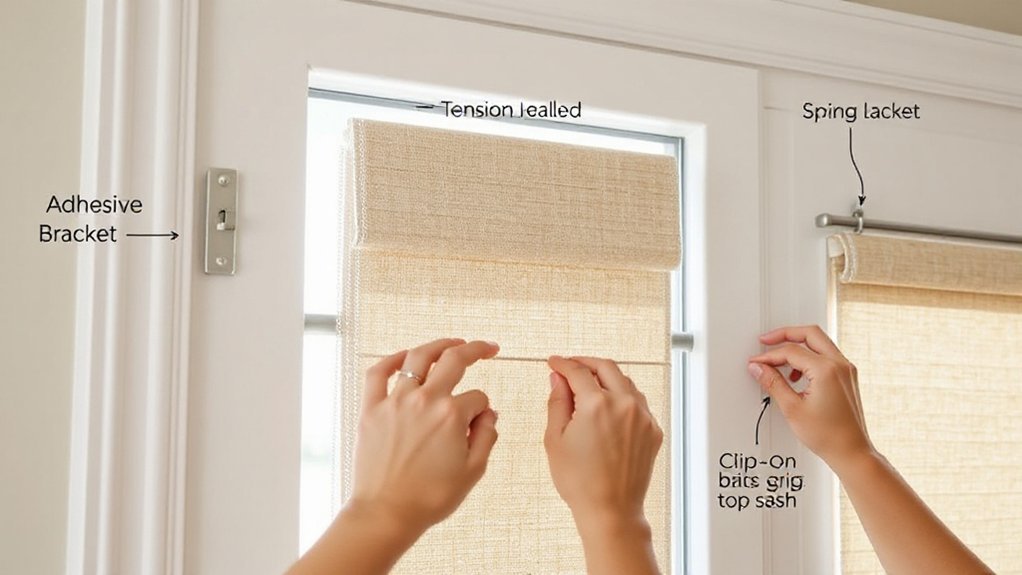
Before you buy blinds, match the no-drill mount to your window frame material, reveal depth, and load requirements, because each system (adhesive, tension, or clip-on) has specific limits.
Choose adhesive brackets when you can clean to bare, dry substrate and you’ll meet the manufacturer’s minimum adhesive strength; verify rated weight, temperature range, and cure time, and avoid textured or chalky paint.
Use tension mounts only where the span stays within the listed min/max width and the jamb surfaces resist compression; set even preload to prevent slip and skew.
Pick clip-on brackets when you’ve got compatible frame profiles; confirm the clip standard and lock feature, and check cord-load ratings.
Document mounting alternatives and follow the supplied torque and spacing guidance exactly.
Check Window Type and Clearances (Inside vs. Outside Mount)
Once you’ve selected an adhesive, tension, or clip-on system, verify your window type and clearances so the mount geometry actually fits and the blind operates within spec.
Identify whether you’re working with a standard window frame, a flush trim, a recessed jamb, or a metal/vinyl casing, since surface energy and edge radius affect adhesion and clip grip.
For an inside mount, confirm the jamb faces are square and free of obstructions like locks, crank handles, sensors, or weatherstripping; you need uninterrupted clearance space for brackets, headrail, and smooth lift/tilt travel.
For an outside mount, check that the surrounding wall or trim provides a continuous, clean mounting band and that the blind won’t foul on shutters or protruding casing.
Also confirm sash movement won’t collide with hardware.
Measure for No-Drill Blinds (Width, Depth, Thickness)
Although no-drill systems avoid fasteners, they’re far less forgiving on fit, so measure the opening with a steel tape and record width, usable depth, and frame thickness to the nearest 1/16 in (1 mm).
For inside mounts, take width at top, middle, and bottom; order to the narrowest value so the headrail won’t bind.
Measure usable depth from the front edge of the stop to any obstruction (crank, latch, trim return); confirm it meets the product’s minimum depth and flush-depth spec, especially for blackout options that need side channels.
Verify frame thickness where the bracket clamps or adheres; measure at both jambs if they differ.
For cordless operation, confirm clearance for the bottom rail to travel without contacting handles or sills.
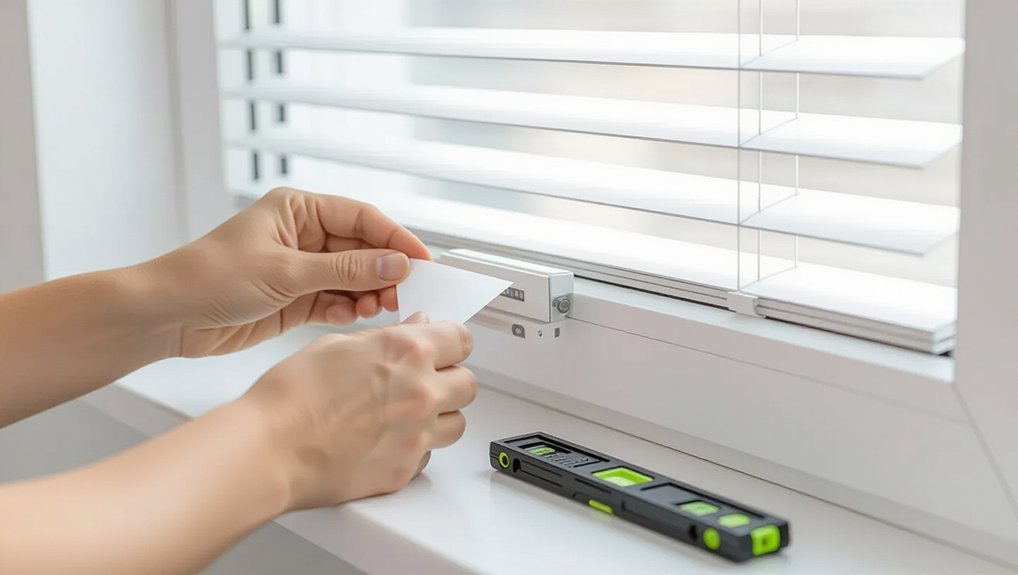
Prep the Frame for No-Drill Brackets to Stick

Because no-drill brackets rely on clamping force or pressure-sensitive adhesive, you need a clean, flat, stable mounting surface or they’ll creep, pop loose, or sit out of square.
Start by inspecting the jamb and head for paint ridges, loose caulk, or bowed trim; scrape high spots and sand to a level plane. Degrease with 70% isopropyl alcohol and a lint-free cloth, then let it fully dry to protect adhesive strength.
Verify the substrate: sealed wood, metal, or rigid vinyl performs best. Chalky paint, dusting MDF, or textured laminate needs extra prep.
If the frame feels soft or hollow, add Frame reinforcement by tightening casing fasteners or bonding a thin shim strip to create a firm, uniform bearing surface.
Mark reference lines for consistent alignment.
Install and Troubleshoot No-Drill Blinds (Step-by-Step Fixes)
After you’ve prepped and marked the frame, you can install no-drill blinds in a controlled sequence that keeps the headrail level, the brackets fully seated, and the adhesive or clamp force within the manufacturer’s tolerances.
Seat each bracket on the marks, press for the specified dwell time, or tighten clamps to the torque limit. Snap the headrail in, then verify level with a 600 mm spirit level and cycle the lift/tilt twice.
If the blind creeps, degrease again and replace pads; don’t exceed clamp torque. If it binds, square the brackets and re-center the headrail. If light gaps appear, adjust end caps or add shims.
Protect Decorative finishes with masking tape during alignment. For Blind maintenance, recheck adhesion/clamp tension after 24 hours and monthly.
Frequently Asked Questions
Will No-Drill Blinds Damage Paint or Leave Residue When Removed?
You typically won’t damage paint or leave residue if you use quality alternative mounting and clean surfaces first. You’ll protect paint safety by following cure-time specs, removing slowly, warming adhesive, and using low-tack pads.
How Do I Childproof No-Drill Blinds for Safety and Compliance?
Like a seatbelt in a crash, you’ll childproof no-drill blinds by using cordless designs, adding tension/wind-up devices, and securing breakaway connectors. Follow child safety standards and installation tips: eliminate looped cords, anchor cleats.
Can No-Drill Blinds Block Heat and UV as Well as Drilled Mounts?
Yes, you can match heat and UV blocking if you choose reflective, cellular, or solar fabrics and guarantee tight fit. Mounting alternatives don’t change optics, but installation challenges like gaps reduce performance; verify NFRC/EN ratings.
What’s the Best Way to Clean and Maintain No-Drill Blinds?
Use fabric-safe routines: identify Fabric types, then match Cleaning methods. You’ll vacuum with a brush weekly, wipe with microfiber and mild detergent monthly, and air-dry fully. You must avoid soaking, bleach, and high heat.
Are No-Drill Blinds Suitable for Rental Agreements and Security Deposits?
Yes, you can use no-drill blinds in most rentals: you avoid holes, you reduce damage, you simplify removal. Check rental restrictions, document condition, and select rated products to address security concerns and protect your security deposit.
Conclusion
You’ve now fitted blinds with minimal persuasion to your window frame, staying aligned with manufacturer tolerances and common installation standards. You chose a compliant no-drill mount, verified inside/outside clearances, and measured width, depth, and frame thickness to control fit risk. After you prepared the surface for reliable adhesion or tension, you set brackets square and confirmed level operation. If anything feels less than ideal, you recalibrate tension, re-seat clips, or re-clean and reapply.


