Choose herringbone boards that suit the room (engineered wood for UK humidity and UFH, LVT for waterproofing), and order 10–15% extra. Check the subfloor with a 2m straightedge and keep deviation within 3mm; test moisture, then fill low spots and repair cracks. Pick glue-down, nail-down, or click to match the product. Snap dead-square centre lines, dry-lay 6–10 boards, fix a starter spine, then build out symmetrically, cut edges, finish thresholds, and protect the surface—next you’ll see the key checks that prevent costly drift.
Key Takeaways
- Choose suitable herringbone material and method, then order 10–15% extra to allow for waste and cuts.
- Check subfloor flatness (≤3mm over 2m) and moisture, then repair dips and cracks with appropriate compounds.
- Snap square, perpendicular centre lines and dry-lay 6–10 boards to confirm alignment and symmetry before fixing.
- Install a straight starter spine on the centreline, then build out evenly on both sides, checking alignment and joint tightness often.
- Cut perimeter pieces neatly, maintain expansion gaps, finish edges and door transitions, then protect the surface with taped-down coverings only.
Pick the Best Herringbone Flooring for Installation
Before you start laying a herringbone pattern, you’ll need to choose a flooring type that suits the room, subfloor, and expected wear. Compare Flooring styles by plank size, bevel, and surface finish, because small blocks sharpen the zig-zag while wide boards can look busy. Review material options: engineered wood stays stable with UK humidity and works over underfloor heating; solid timber needs stricter moisture control. Rigid core LVT gives waterproof performance for kitchens and halls, with click systems speeding installation. Laminate is cost-led but demands careful edge protection. Check wear layer or AC rating, slip rating for entrances, and acoustic backing for flats. Choose compatible adhesives or underlays per manufacturer guidance, then order 10–15% extra for cuts.
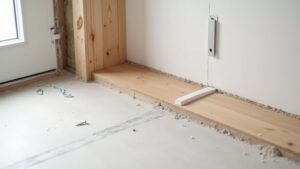
Prep a Flat Subfloor for Herringbone Flooring
Before you start laying herringbone, you’ll check the subfloor’s levelness with a straightedge and note any deviation across the room. You’ll repair low spots with a suitable levelling compound and fill cracks so the base is sound and continuous. If you skip this prep, the pattern won’t track true and you’ll fight lipping and gaps throughout the install.
Check Subfloor Levelness
How do you know your subfloor’s flat enough for herringbone? You check it to UK tolerances before you set out your centre line. Use a 2m straightedge (or long spirit level) and slide it across the room in overlapping passes, marking any daylight gaps. Aim for no more than 3mm deviation over 2m for most timber/engineered systems. Confirm the subfloor material (sand/cement screed, anhydrite, plywood, or concrete), because each can read differently under the straightedge. Then verify flooring moisture with a hygrometer or moisture meter to the flooring manufacturer’s limits; excess moisture can exaggerate cupping and make the surface appear uneven later. Finally, check around door thresholds, heating pipes, and along skirtings where dips often hide. Record readings.
Repair Low Spots Cracks
Once you’ve mapped the highs and lows, bring the subfloor back to tolerance by filling dips and stitching cracks so the herringbone doesn’t telegraph every defect. Treat low spot repair first: vacuum thoroughly, then prime where the leveller manufacturer specifies, and keep within typical UK tolerances (about 3mm over 2m). For flooring cracks, chase out loose edges, remove laitance, and stop movement before you pour.
- Use a polymer-modified smoothing compound for dips; feather to zero at edges.
- For cracks, inject epoxy or use a crack-stitch kit with metal staples set across the break.
- Spot-sand ridges and scrape adhesive residue, then re-check with a 2m straightedge.
- Let repairs cure fully; don’t trap moisture under underlay or adhesive.
Choose Your Install Method (Glue, Nail, or Click)
Although the herringbone pattern looks the same on top, your choice of install method—glue-down, nail-down, or click-lock—dictates the subfloor prep, tools, and long-term stability you’ll get. Match the method to your flooring material and site conditions.
Choose glue-down for engineered wood or LVT over concrete or anhydrite screeds; you’ll need a compatible primer, moisture control, and a notched trowel. Opt for nail-down on plywood or OSB over joists; you’ll use a flooring nailer, compressor, cleats, and felt or membrane, and you must hit sound fixing points. Pick click-lock for floating engineered boards where you want faster work; you’ll need underlay, spacers, and careful expansion gaps, but expect slightly more movement. Check manufacturer UK guidance first.
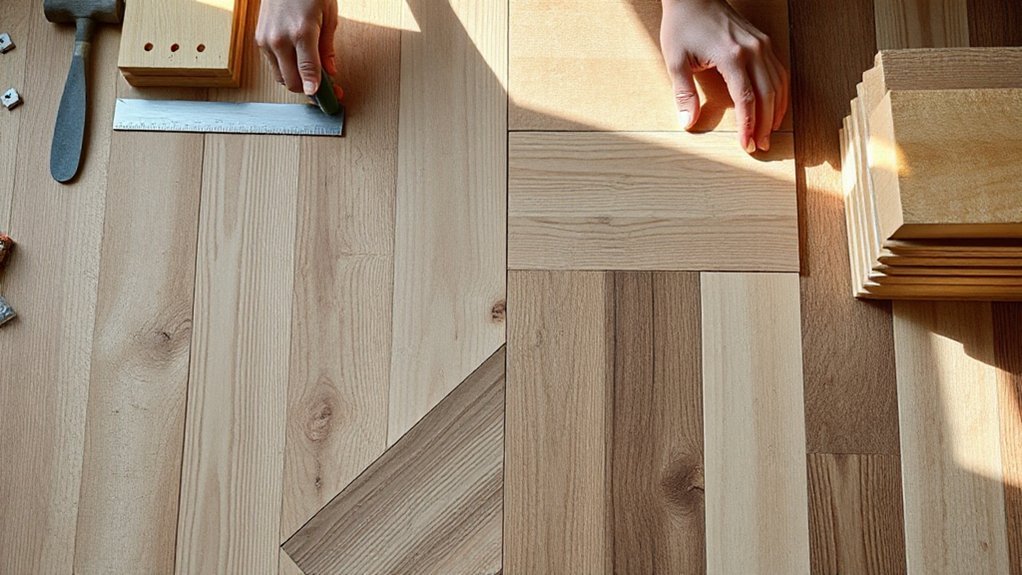
Snap Square Centerlines and Dry-Fit the Herringbone Layout
Before you open a tub of adhesive or fire up a nailer, lock in a true square reference by snapping perpendicular centre lines through the room and then dry-laying a few herringbone “V” pairs along them. Use a chalk line and a large framing square or the 3-4-5 method to confirm 90° in UK metric. Your goal is Centerline accuracy, because every chevron joint amplifies small errors. Dry-fit 6–10 boards either side of the lines, keeping tongues and grooves correctly oriented, and check Pattern alignment against the longest sightline from the main doorway. Adjust the centre lines now, not later.
- Mark midpoints on opposing walls and snap your first line
- Square the second line to it and snap through the intersection
- Dry-lay paired blocks tight, checking gaps and end-stagger
- Measure to walls both sides; tweak until symmetrical
Install the Herringbone Starter Spine and Build Out
Recheck your marked centreline and snap it cleanly so you’ve got a fixed reference for the spine. Install the starter spine boards tight to that line, keeping the angles consistent and the joints square as you go. Then build out in symmetric rows on both sides, measuring and adjusting early so the pattern stays true across the room.
Mark And Snap Centerline
Where should you start a herringbone layout so it stays square and balanced? Start by establishing a true centreline through the room, then reference every measurement from it. Measure the room’s width at both ends, halve each, and mark points on opposite walls. Join them with a straightedge and snap a chalk line. This becomes your primary marking guidelines and the key to centreline accuracy.
- Check both diagonals; if they differ, you’ve got an out-of-square room.
- Snap a perpendicular line using a 3-4-5 set-out or a framing square.
- Allow for skirting gaps and thresholds before committing any lines.
- Reconfirm with a laser level, then re-snap if the chalk line’s weak.
Keep lines crisp and protected from foot traffic.
Install Starter Spine Boards
Once your centrelines are snapped and you’re happy they’re true, you’ll set the herringbone starter spine along the primary line to lock the pattern square. Dry-lay several boards to confirm left/right orientation and end alignment before committing. For Material selection, choose straight, consistent-length planks and reserve any bowed pieces for cuts elsewhere. Spread adhesive with the manufacturer’s recommended notched trowel, keeping the bed even and within open time. Place the first spine board precisely on the line, then add the mirrored mate to form the initial “V”. Tap tight with a rubber mallet and use spacers to maintain your perimeter expansion gap. Check with a square every couple of boards. Prioritise Tool maintenance: clean trowels, replace worn blades, and wipe squeeze-out immediately.
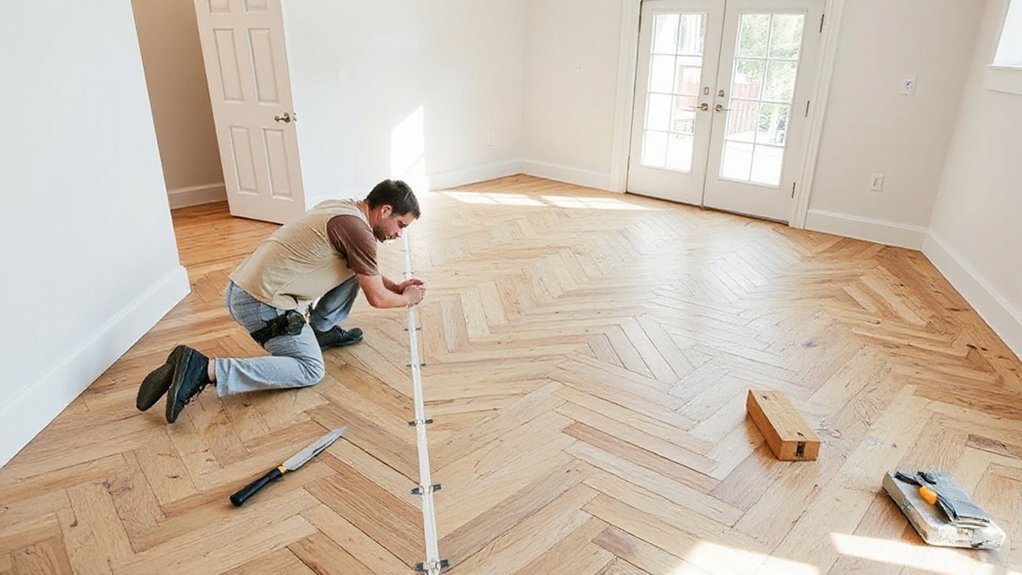
Build Out Symmetric Rows
With the starter spine locked on your centreline, start building out in mirrored pairs so the herringbone stays balanced and square. Lay one left board, then the matching right board, keeping your Symmetry balance as you progress. Dry-fit a few pieces ahead, then commit with adhesive or clicks, depending on your product. Check alignment every row against your reference lines so Design patterns don’t drift.
- Stagger work: complete two mirrored blocks before moving forward.
- Use a straightedge to confirm the “V” tips stay on-line.
- Keep joint gaps consistent; pull boards tight with a tapping block.
- Measure from centreline to both walls; adjust with minor trims early.
Stop periodically, sight along the spine, and correct any creep before it compounds.
Cut Edges, Finish Transitions, and Protect the Floor
After you’ve locked the herringbone field in place, cut the perimeter edges cleanly, then sort the thresholds, trims, and movement gaps before you let anyone walk on it. Mark your cut line off the wall using spacers for a 10–12mm expansion gap, then cut with a track saw or fine-tooth mitre saw, face up to reduce breakout. Dry-fit the last triangles to confirm the pattern stays true.
For edge finishing, fit matching skirting or scotia to cover the gap without pinning the floor. Plan transition design at doorways: use suitable thresholds to bridge height differences and protect exposed tongues. Seal around external doors where required, but don’t seal the expansion gap. Finally, vacuum grit, lay protective fleece or cardboard, and tape only to the protection, not the floor finish.
Frequently Asked Questions
How Much Extra Material Should I Buy for Herringbone Waste?
Buy 10–15% extra for herringbone; use 15% for small rooms, angles, or novice fitting. You’ll improve Material estimation by doing a Waste calculation from room plan, cut losses, defects.
Can Herringbone Flooring Be Installed Over Radiant Floor Heating Systems?
Yes, you can install herringbone over underfloor heating if you verify radiant heating compatibility, use engineered boards, and follow British Standards. You’ll commission gradually, keep surface temps below 27°C, and consider alternative flooring options.
What Room Sizes or Shapes Work Best for a Herringbone Layout?
Small, square spaces suit herringbone superbly; you’ll get balanced, bold Decorative patterns. In long, narrow rooms, run the spine lengthwise to avoid distortion. Design versatility improves in rectangles and regular shapes; complex angles need templating.
How Long Should Herringbone Flooring Acclimate Before Installation Begins?
You should acclimate herringbone flooring for 48–72 hours in the room, per UK manufacturer guidance. Keep heating stable, unwrap packs, and log RH/temperature. This safeguards flooring patterns and guarantees installation tools don’t force misaligned joints.
How Do I Clean and Maintain Herringbone Floors Without Damaging the Finish?
Vacuum little, mop lightly, dry quickly. You’ll protect herringbone finishes using pH-neutral cleaners, microfibre pads, and minimal water. Follow Cleaning techniques: spot-clean spills, avoid steam. Apply Maintenance tips: felt pads, entrance mats, periodic recoat.
Conclusion
You’ve picked the right boards, flattened the subfloor, and committed to glue, nail, or click—now it’s all about control. Measure, mark, dry-fit, then lock in the starter spine and work out in disciplined runs. Like a compass setting true north, your centrelines keep every chevron honest. Cut borders cleanly, fit trims and thresholds, and protect the surface while it cures. Do it methodically, and you’ll get a crisp, UK-spec finish.