
Nearly 80% of thatch failures trace back to hidden moisture paths, not the straw itself. You start by surveying the roof like a system—ridge, valleys, flashings, wire fixings, and chimney details—so you can separate cosmetic wear from structural risk. You’ll weigh a targeted repair against a full rethatch based on depth, spar sparing, and expected lifespan. Then you modernise with lime, breathable insulation, and discreet services, but one overlooked junction can undo everything…
Key Takeaways
- Survey the roof and walls: map pitches, photograph defects, and log moisture readings to pinpoint decay and water ingress.
- Decide repair versus rethatch by probing the basecoat, ridge condition, fixings, and extent of softness, bald patches, and bird damage.
- Compare costs and service life, including scaffold and ridge work: repairs last 3–7 years; rethatch typically lasts 20–40 years.
- Prevent damp with breathable materials: lime repointing, lime plaster, vapour-open paints, plus improved drainage, flashing repairs, and vegetation management.
- Upgrade comfort safely using vapour-open insulation and carefully routed modern services, avoiding impermeable barriers and adding fire protection features.
Start With a Thatched Cottage Survey
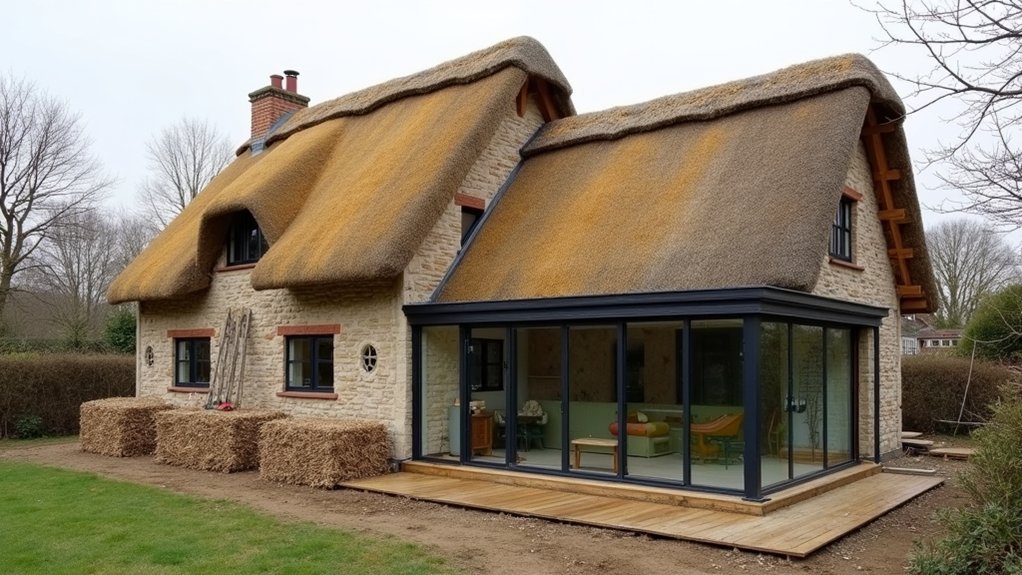
Before you touch a single reed, you’ll want to survey the cottage like a conservation pro—because a weather-worn thatch rarely fails in isolation.
Start outside: map roof pitches, ridge lines, and chimneys, then photograph each elevation in consistent light. Note thin spots, moss load, bird damage, and any uneven sag that hints at failed fixings or damp timbers. Check eaves drips, verge edges, and flashing junctions where water tracks behind coats.
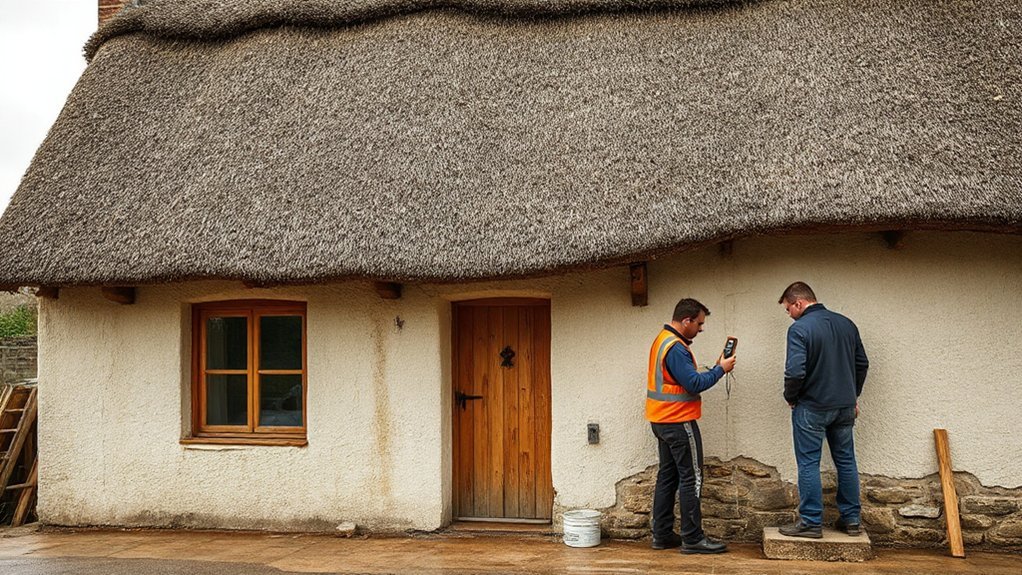
Move indoors with a moisture meter and torch. Trace staining, salt bloom, and musty odours along rafters, collar ties, and chimney breasts. Log ventilation paths, bathroom extract performance, and insulation type so you can protect Traditional aesthetics while respecting Thatched craftsmanship. Record everything in a dated schedule.
Decide Between Repair and Full Rethatch
Next, you’ll assess the thatch’s condition—ridge wear, spar coat depth, damp staining, and any bird or pest damage—to judge whether it’s structurally sound.
You’ll then compare a targeted repair (ridge replacement, patching, re‑dressing) against a full rethatch when widespread thinning or failed fixings show you’re past spot fixes.
Finally, you’ll weigh today’s labor‑heavy pricing against expected service life, so you’re spending for decades of performance rather than another short cycle of call‑backs.
Assess Thatch Condition
Although a thatched roof can look charmingly “aged,” you’ll need a disciplined condition check to decide whether targeted patching will hold or a full rethatch is the only sensible investment.
Start by identifying Thatch types—water reed, combed wheat reed, longstraw—because each weathers differently and carries different Historical significance in regional detailing.
Scan for bald patches, open fixings, and bird-pecked areas; probe with a thatching needle to judge depth and spring.
Inspect the ridge first: heavy moss, cracking, or loose liggers often telegraph broader decay.
Check chimneys, valleys, and eaves for persistent damp, staining, or softened thatch.
From inside, look for pinprick daylight, darkened rafters, and musty odor.
Document findings with dated photos and moisture readings for your thatcher.
Compare Repair Versus Rethatch
When your inspection shows mixed wear—sound depth in some bays but localized failures at the ridge, eaves, or around chimneys—you’ve reached the decision point: repair or full rethatch.
Choose targeted repair when the basecoat stays tight, fixings hold, and decay hasn’t tracked under the surface; you’ll strip and replace only failed sections, renew the ridge, dress and compact, and improve flashings and spar details.
Opt for a full rethatch when you find widespread softening, hollow sound, persistent damp lines, or patchwork that’s already layered beyond its working thickness.
Re-thatching lets you reset coatwork geometry, upgrade fire barriers discreetly, and align with current moisture-management practice while preserving Historical authenticity.
Weigh Environmental impact too: selective repair minimizes material, but full rethatch can reduce repeat interventions and waste.
Evaluate Costs And Lifespan
Once you’ve narrowed the choice to repair or full rethatch based on what’s failed and how far decay has traveled, put the numbers beside the service life you’re buying. Price repairs per square meter and add scaffold, ridge work, and disposal; then compare that total to a full coat that resets the clock.
A well-executed patch might buy 3–7 years, while a rethatch can deliver 20–40, depending on reed, pitch, and ventilation.
Factor in Historical preservation: listed-building constraints can require like-for-like materials and master thatchers, pushing labor rates up but protecting value.
Finally, run insurance considerations early—some policies demand certified fire barriers, spark arrestors, and documented maintenance, and they may discount premiums after a full rethatch.
Stop Damp With Lime and Breathable Finishes
Because a thatched cottage needs to shed moisture without trapping it, you’ll stop most “mystery damp” by switching to lime-based repairs and breathable finishes rather than sealing everything with modern gypsum, cement, or plastic paint.
Start by raking out failed joints, then repoint in lime putty or NHL matched to the masonry; it moves with the building and lets salts migrate outward. Use lime plaster internally, and finish walls with claywash or mineral silicate paint so vapour can pass.
Fix sources too: clear gutters, repair flashing, and keep splashback down with gravel margins—quietly boosting Roof durability.
Outside, grade soil away, cut back dense planting, and choose permeable paths to protect Landscaping aesthetics while improving drying. You’ll measure success with drying walls, not glossy surfaces.
Add Insulation Without Trapping Moisture
Although extra warmth sounds like a simple win, you’ll only get it in a thatched cottage if the insulation strategy keeps the wall and roof assemblies vapour-open and able to dry in both directions.
Choose hygroscopic, capillary-active options like woodfibre boards, hemp-lime, or sheep’s wool, and pair them with lime plaster so moisture can migrate safely.
Avoid impermeable moisture barriers and foil-faced boards that can drive condensation into rafters and timbers.
Detail junctions tightly: seal obvious drafts, but don’t choke the building’s breathing paths.
Use ventilation strategies that protect the thatch: maintain eaves airflow, keep a ventilated void where appropriate, and ensure rooms can purge humidity with discreet, controllable background ventilation.
Keep insulation continuous, but never at the expense of drying potential.
Modernise Electrics, Plumbing and Heating Safely
If you modernise services in a thatched cottage, you’ll need to treat electrics, plumbing, and heating as fire‑ and moisture‑critical systems rather than simple upgrades. Start with a condition survey and an electrician experienced in thatch: specify RCD/AFDD protection, metal‑clad accessories where appropriate, and low‑heat LED lighting, keeping cables away from chimney breasts and roof voids.
For plumbing, run services in accessible zones, insulate cold lines, and add leak detection with automatic shut‑off to protect lime plaster and timber.
Choose heating that limits high flue temperatures: consider a room‑sealed boiler, heat pump, or a stove with insulated twin‑wall flue and heat shields.
Document every intervention for Historic preservation and Architectural restoration, and use reversible fixings. Test, certify, and photograph.
Design Kitchens and Bathrooms for a Thatched Cottage
When you plan a kitchen or bathroom in a thatched cottage, treat the room as a controlled “wet and heat zone” that must protect timber, lime finishes, and the roof structure. Specify robust extraction (quiet, humidity‑sensing fans) and keep heat sources away from rafters.
Choose induction and sealed flues where possible. Use lime plaster, breathable paints, and vapour‑open insulation, but add discreet tanking only at splash zones.
Detail floors with stone or encaustic tile over breathable build‑ups, and include perimeter drainage gaps. Route plumbing in accessible chases, fit leak detectors, and avoid recessed downlights into the thatch void.
For Rustic charm with heritage preservation, pair shaker cabinetry, aged brass, and hand‑made tiles with concealed modern appliances and low‑profile underfloor heating.
Frequently Asked Questions
Do Insurers Require a Chimney Spark Arrestor for Thatched Roofs?
Many insurers do require a chimney spark arrestor for thatched roofs, or they’ll raise premiums or refuse cover. You should confirm Insurance requirements in writing; it’s a common Chimney safety condition in today’s risk models.
What Planning Permissions Are Needed for Altering a Listed Thatched Cottage?
You’ll usually need Listed Building Consent for any fabric changes, plus planning permission for external alterations or extensions. You’ll also follow Heritage regulations and secure Building approvals for structural, fire, insulation, or services upgrades.
How Can I Reduce Fire Risk Without Changing the Cottage’s Character?
You’ll slash fire risk like it’s a million alarms by fitting discreet spark arrestors, upgrading wiring, and adding mist suppression—pure Fire safety. Choose breathable insulation options (sheep’s wool, wood fibre), keep chimneys swept.
Which Pests Commonly Damage Thatch, and How Are They Prevented?
Rats, mice, squirrels, birds, and thatch beetles commonly damage thatch. You’ll prevent them with Pest control: tight netting, sealed eaves, reduced nearby food sources, and routine ridge inspections for thatch protection.
What Ongoing Maintenance Schedule and Costs Should I Expect After Restoration?
You’ll budget annual inspections, seasonal Roof cleaning, and regular Gutter maintenance; you’ll patch ridges every 8–12 years and rethatch at 25–40. Expect $500–$1,500 yearly, plus $5k–$15k ridge, $20k–$60k rethatch.
Conclusion
You’ve surveyed every ridge and spar, then picked repair or rethatch like it’s a streaming plan: “basic moss,” “premium decay.” Next, you banish damp with lime, not plastic “miracle” seals, and slip in insulation that breathes instead of sweating your rafters. You modernise electrics, plumbing, and heating without turning the loft into a firework test. Finally, you fit a kitchen and bath that feel current—without bullying the cottage’s character.


