You’ll usually fit plasterboard before finished flooring, because it protects the surface from compound, sanding dust, impact damage, and excess site humidity, while keeping wall-to-floor tolerances predictable. You should run flooring under linings when you need airtight continuity, wet-room upstands, or a fixed finished-floor datum for door linings and thresholds, especially with vinyl set-out. If you stop at the drywall edge, maintain 5–10 mm perimeter expansion gaps and fix skirting to studs, not the floor. More nuances follow.
Key Takeaways
- Most builders install drywall before flooring to reduce damage, improve access, and let interior humidity stabilize.
- Flooring under drywall can help set consistent finished-floor datum heights and simplify skirting alignment, but raises protection and moisture risks.
- Install flooring after drywall/plaster fully dries to avoid trapping moisture that can cause adhesive failure, swelling, or floor distortion.
- If flooring goes first, protect it from mud, joint compound, sanding dust, and impacts throughout wall finishing.
- Maintain continuous perimeter expansion gaps and fix skirting to walls, not floors, so floating floors can move without buckling.
Should Flooring Go Under Drywall?

Where should you start—flooring or drywall? You should decide based on tolerances, movement, and finishes. If you install flooring first, you create a continuous datum for setting drywall height, so skirting boards can sit cleanly without excessive scribing. You must, however, verify flooring thickness (including underlay, adhesive, and any levelling compound) so door linings, thresholds, and service penetrations don’t end up misaligned. If you install drywall first, you protect boards from site damage and moisture, but you’ll need to hold drywall height off the subfloor to prevent capillary uptake and allow for floating floors’ expansion gaps. You should coordinate with acoustic requirements, fire stopping, and vapour control layers to avoid compromised junctions.
The Builder Default Install Order (And Why)
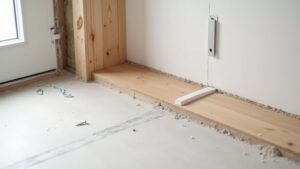
In practice, why do most builders hang plasterboard before laying the finished floor? You’re managing risk, access, and tolerances through disciplined construction sequencing. First-fix services, studwork, and plasterboard generate dust, impact, and moisture from jointing compounds; keeping the subfloor exposed prevents damaging or staining decorative finishes. You also need clear movement for towers, trolleys, and trades, and plasterboard sheets often require sliding and turning that would abrade timber, vinyl, or laminate.
You’ll then skim, allow drying, and complete second-fix joinery with predictable datum lines. This order supports material compatibility: adhesives, expansion gaps, and vapour control layers perform better once internal humidity stabilises and heavy works cease. It also simplifies snagging and protects edges at thresholds.
When Flooring Should Go Under Drywall
Although most programmes hang plasterboard first, you should run the finished floor under the boards when moisture control and continuity matter more than site protection—typically with floating systems (LVT, laminate, engineered timber) that need an unbroken DPM/VCL, consistent expansion gaps, and clean datum heights, and in wet rooms where the floor waterproofing must turn up behind linings to maintain a sealed perimeter. You’ll also favour this sequence where airtightness is specified: laying the floor first lets you tape the VCL to the sole plate and linings without breaks, reducing leakage at junctions. It helps you set Ceiling height accurately from a finished floor level datum, avoiding cumulative tolerances. If you’re upgrading wall insulation internally, carrying the floor beneath the boards reduces thermal bypass at the wall–floor junction and supports continuous edge sealing.
When Flooring Should Stop at the Drywall Edge
Running the finished floor beneath plasterboard solves continuity and sealing in some builds, but many sites still get better control by stopping the floor at the drywall line and laying it after the linings. You should do this when screeds, levelling compounds, or moisture management are still in flux, because late-stage adjustments will damage pre-laid finishes. It also suits projects where you must protect expensive timber, LVT, or carpet from plaster splashes, jointing compound, and abrasives during drywall finishing and snagging. By keeping the subfloor exposed, you can run trolleys, access thresholds, and rectify services without compromising the surface. You’ll also achieve a cleaner flooring interface at doorways and interfaces once floor heights are verified against frames and ironmongery tolerances.
Baseboards, Shoe Molding, and Expansion Gaps
Once you’ve decided whether the finish stops at the drywall line or continues beneath it, you must plan how skirting boards, quadrant (shoe moulding), and perimeter expansion gaps will work together. You must leave a continuous clearance at all walls and fixed upstands, then conceal it without restricting movement.
During baseboards installation, fix skirting to studs or masonry, not to the floor, so the floor can float. Set skirting height to cover the gap and any cut edge, but don’t force it down onto the finish. For irregular walls or thin skirtings, add quadrant; your shoe molding considerations should include profile depth, mitres at returns, and tolerance for out-of-square corners. Pin quadrant to the skirting only. Maintain expansion at door linings with undercuts or architraves, and seal only where specified for moisture control.
Hardwood & Engineered Wood: Best Practice
With skirtings, quadrant and perimeter expansion gaps planned, you can set out hardwood and engineered boards so they’ll accommodate seasonal movement without binding at the edges. You’ll typically fix solid boards after plastering and drying, but before final skirtings, so you can scribe neatly and keep tolerances tight. Where you must run boards to partitions, you should undercut plasterboard or studs only where specified, and maintain the manufacturer’s minimum edge clearance. You’ll protect boards with breathable coverings during follow-on trades. At doorways and room changes, you’ll design Flooring progressions using thresholds or rebates that preserve movement gaps and prevent differential levels. Around columns and pipework, you’ll template and seal appropriately to maintain aesthetic continuity without restricting expansion.
Laminate & Floating Floors: Best Practice
Although laminate and other floating floors don’t fix to the subfloor, you still need to plan perimeter clearances and movement joints so the deck can expand and contract without lifting or “jamming” under plasterboard and linings. You should finish drywall first, then install the floor, keeping a consistent expansion gap and masking it with skirting and scotia; don’t trap the boards under studs or plasterboard. Select stable flooring materials and match underlay to acoustic and moisture requirements. Use correct installation techniques: flat subfloor tolerances, staggered joints, and controlled humidity during acclimatisation. Maintain service penetrations and doorways with appropriate trims so movement remains free.
- 10–12 mm shadow gap at every wall
- Floating underlay rolled tight, taped seams
- Staggered planks like brickwork
- Door bars bridging rooms, not pinning
- Skirting fixed to wall, clear of deck
Tile & Stone: Best Practice
Why does the drywall sequence matter more with tile and stone? Because these rigid finishes demand a stable, accurately controlled build-up, and they don’t tolerate later movement or edge disturbance. You should finish plasterboard and skim first, then set levels for the tile assembly, including backer boards or uncoupling membrane, adhesive bed, and tile thickness, so thresholds and door undercuts land correctly.
Keep tile and stone out from under boards to prevent capillary moisture uptake and to avoid crushing at perimeters. You’ll then install tiles after decoration, but protect them so Decorative finishes don’t stain grout or etch stone. Maintain perimeter movement joints, seal penetrations, and verify substrate deflection limits to preserve structural integrity and reduce cracking risk.
Vinyl (LVP/Sheet): Best Practice
You should install LVP or sheet vinyl only after plasterboard and skirting work is complete, so you don’t trap the floor under partitions or risk damage from follow-on trades. You must maintain the manufacturer’s specified perimeter expansion gap, including at door linings, thresholds, and fixed kitchen units, to accommodate thermal movement. You’ll then cover the gap with skirting or a suitable trim without pinning the vinyl, preserving its ability to move.
Install After Drywall
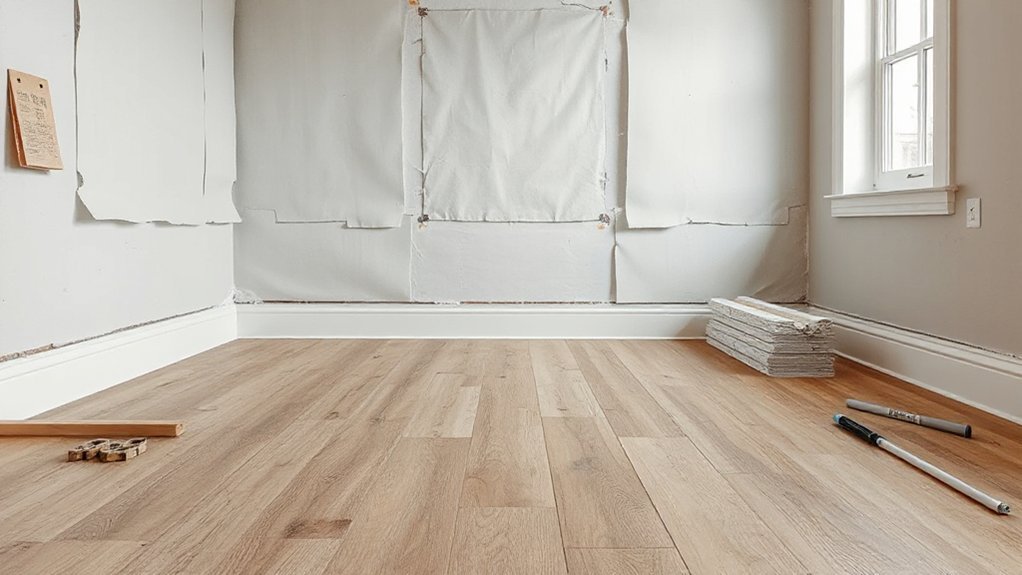
In most domestic fit-outs, installing vinyl (LVP or sheet) after the drywall has been hung, taped, and fully dried delivers the most reliable finish. This flooring placement sequence protects the surface from jointing compound, sanding dust, and impact damage, while ensuring drywall concealment by skirting and architraves remains crisp and level. You’ll also keep moisture-sensitive substrates stable, because plastering water and ambient humidity have already dissipated before you lay adhesive or click-lock boards. Coordinate the final set-out with door linings and thresholds, then complete trims after the vinyl settles.
- Freshly skimmed boards drying uniformly on a still wall
- A clean screed, vacuumed, ready for primer and adhesive
- LVP planks aligned to a laser datum at the hallway
- Sheet vinyl rolled out flat, seams cold-welded neatly
- Skirting fixed last, edges tight and professionally finished
Expansion Gap Considerations
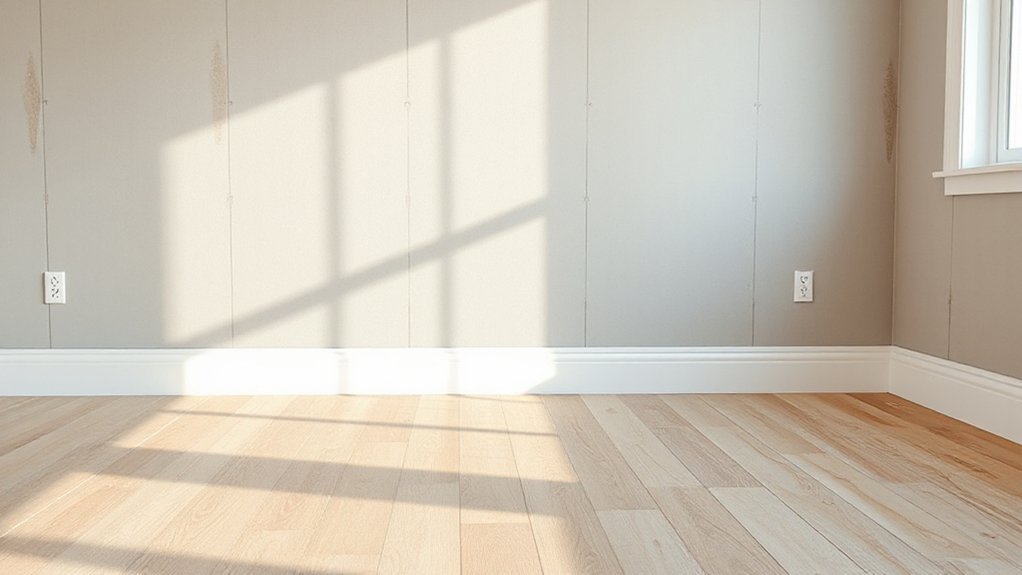
Although vinyl flooring feels dimensionally stable, it still needs a perimeter expansion gap to accommodate thermal movement, subfloor tolerances, and building deflection without tenting, peaking, or noisy edge bind. You should keep the manufacturer’s stated gap, typically 5–10 mm at all walls, columns, pipe penetrations, and door linings, and you shouldn’t bridge it with adhesive, grout, or sealant. If you run skirtings after plasterboard, you can hide the gap with adequate cover, but you must preserve free movement. Where you install moisture barriers, you should terminate them short of the wall and tape seams flat to avoid ridges that pinch the edge. With acoustic insulation underlay, you must maintain a continuous perimeter isolation strip to prevent flanking and edge compression.
Frequently Asked Questions
Does Installing Flooring First Affect Drywall Moisture Absorption or Mold Risk?
Installing flooring first can increase drywall moisture absorption and mould risk if moisture migration from screed occurs; you’ll improve mould prevention by ensuring substrates dry, using DPMs, maintaining ventilation, and separating materials with perimeter gaps.
How Does Flooring-Under-Drywall Impact Future Room Remodel Costs?
You’ll typically cut future remodel costs, since refits avoid reboarding; UK labour can run £250–£450 per day. It reduces flooring damage during studwork changes and improves drywall alignment, lowering rework and skirting replacement.
Will Flooring Order Change Door Swing Clearance or Hinge Alignment?
Yes—altering flooring order can change door swing clearance and hinge alignment; you’ll need to adjust hinge packing or plane the door. Flooring aesthetics and drywall installation timing affect finished floor level and threshold tolerances.
Are There Insurance or Warranty Issues From Nonstandard Install Sequencing?
Like walking a tightrope, you can trigger Insurance concerns and warranty considerations if you deviate from manufacturers’ sequencing. You’ll jeopardise claims if moisture barriers, expansion gaps, or tolerances breach BS standards; document approvals and installer accreditation.
What’s the Best Install Order When Using Radiant Heated Floors?
You’ll install radiant heating after subfloor preparation, then apply moisture barriers as specified, lay the floor covering, and complete skirting boards last. Keep plasterboard and walls finished beforehand to avoid heat-system damage and tolerances.
Conclusion
You’ll usually achieve the cleanest finish by running drywall to the subfloor, then installing the floor with correct expansion provision. That sequencing protects floating systems and simplifies moisture control, while skirtings and scotia conceal the perimeter gap. Importantly, wood-based products can change dimension by around 0.2–0.4% across seasonal humidity swings, so trapping boards under plasterboard can concentrate stress and cause edge lift. Follow manufacturer tolerances, especially at door thresholds.