
Brick looks solid, yet it can be a poor base for plaster if you don’t prep it correctly. You’ll need to check for damp, loose mortar, and movement, then choose a suitable UK system such as bonding plus multi-finish or a sand-and-cement render. Once you’ve cleaned, raked out joints, and sealed with diluted PVA or a bonding agent, your scratch coat has to key properly—because the next steps decide whether it stays flat or fails.
Key Takeaways
- Inspect bricks for damp, loose faces, salts, and hollow areas; fix leaks and repair cracks or holes before plastering.
- Clean thoroughly, rake joints 10–15mm, and key smooth bricks so plaster bonds well.
- Seal with diluted PVA or bonding agent to control suction, then fit plumb corner beads and level guide screeds.
- Apply a scratch coat 8–10mm, press into joints, and score while green; add an 8–10mm float coat and rule flat.
- Finish by trowelling, light sponging, and polishing; let coats cure slowly with steady temperature and minimal draughts before painting.
Check If Your Brick Wall Can Be Plastered
Before you mix any plaster, check that your brickwork is suitable and stable enough to take a new coat. Tap bricks and joints for hollow sounds, rake out loose mortar, and repoint where needed. Scrape off paint, salts, and friable faces; any dust or soot will kill adhesion.
Check for damp: look for tide marks, mould, or powdery efflorescence, and fix leaks, gutters, or bridging at DPC level before you cover anything up.
Assess wall texture: very smooth engineering bricks or dense faces may need mechanical keying, not just cleaning.
In older properties, consider historical preservation—don’t trap moisture in soft lime brickwork, and keep ventilation paths clear.
If movement cracks persist, stabilise first.
Pick the Best Plaster System for Brick
Once you’re confident the brickwork is sound, dry, and properly keyed, choose a plaster system that matches the wall’s density, moisture behaviour, and the finish you need.
For modern, dense engineering brick, a bonding coat with a gypsum Plaster mix controls suction and gives a stable base for skim.
For older, softer bricks or walls that see intermittent damp, use a breathable lime-based system so moisture can evaporate without blowing the finish.
If the wall’s uneven, specify a base coat that tolerates thickness without shrinking, then apply a compatible skim for tight trowel control.
In kitchens and bathrooms, prioritise systems rated for higher humidity and plan your finishing techniques to suit paint or tiling, avoiding polished finishes where tiles need key.
Tools and Materials for Plastering Brick
Although you can plaster brick with a fairly small kit, the right tools and materials make the difference between a flat, well-bonded coat and a wall that drags, hollows, or cracks.
You’ll need a hawk and stainless steel finishing trowel, plus a bucket trowel for loading and a small margin trowel for tight returns.
Mix in a clean 30L tub with a paddle mixer on a 110V drill.
Keep a straightedge, feather edge, and spirit level for ruling and checking.
For bonding, have PVA or SBR, and scrim tape for junctions.
Choose suitable gypsum finish or renovating plaster, and clean sharp sand if you’re using a backing coat.
Add pigments for Color matching, and use a sponge float or plastic trowel for texture finishing.
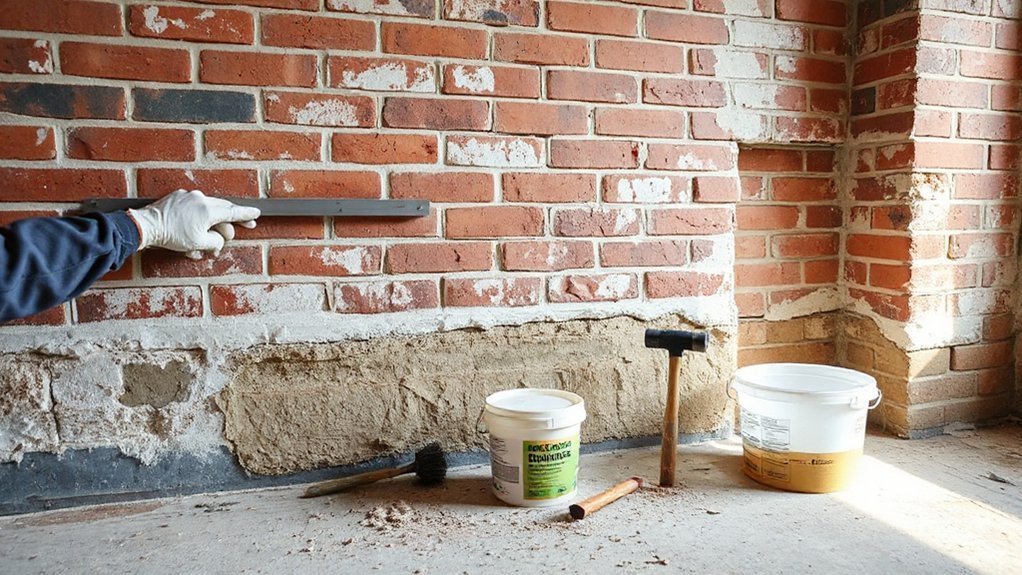
Prep the Brick Wall: Clean, Rake, and Repair
Before you plaster, you’ve got to strip the brick back by removing all dirt, dust, and loose debris so the new coat bonds properly.
Rake out weak mortar joints to a sound edge, then brush and vacuum the wall to clear out fines.
Patch cracks and holes with a suitable repair mortar and let it cure before you start plastering.
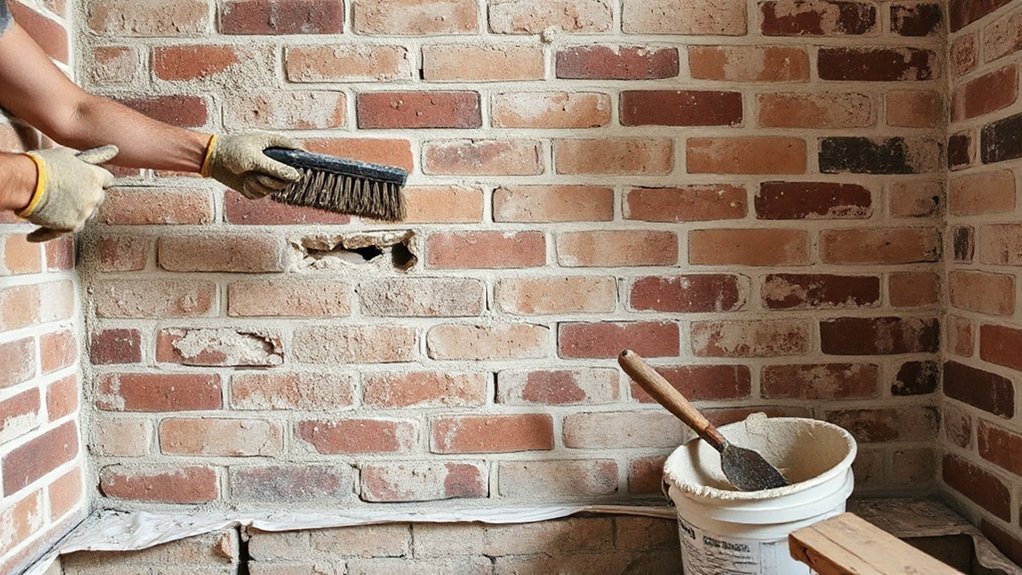
Remove Dirt And Debris
Why start with cleaning when you’re itching to get plaster on the wall? Because plaster won’t bond to loose dust, soot, or salts.
Begin with dry brushing: use a stiff nylon or wire brush to scrub brick faces and corners. Vacuum as you go, ideally with a shop vac and brush head, to stop fine grit spreading.
For stubborn grime, wash down with warm water and a small amount of sugar soap, then rinse clean. Keep water controlled so you don’t saturate the masonry; a pump sprayer and sponge work well.
Finish with thorough dirt removal and debris clearance: pick off paint flakes, cobwebs, and any friable bits.
Let the wall dry fully before moving on.
Check for efflorescence and treat it.
Rake Out Mortar Joints
Once the brickwork’s clean and dry, rake out the mortar joints to give the plaster a reliable key and to expose any weak bedding. Use a plugging chisel, lump hammer, or an angle grinder with a mortar raking blade, then work methodically along the bed and perpend joints. Aim for 10–15mm depth, or until you reach sound mortar, keeping the arrises sharp and avoiding scarring the brick faces.
Wear goggles, FFP3 mask, and use dust extraction where possible, as silica dust is a real UK site risk. Brush out loose grit with a stiff churn brush and vacuum the joints.
On older walls, respect Historical techniques and any Decorative patterns in the pointing profile before you disturb them too much.
Patch Cracks And Holes
Where do you start with defects in a brick wall—hairline cracks, blown spots, and missing mortar? Begin by widening cracks to a shallow V with a bolster and club hammer, then brush and vacuum out dust. Dampen the area so the brick doesn’t suck moisture from the repair and weaken the bond.
For small cracks, press in a polymer-modified filler or fine sand/cement repair mortar, then strike it flush.
For deeper holes, build up in layers, keying each coat with a scratcher and letting it firm up before the next.
Replace loose mortar in joints you’ve raked out, packing it tight with a pointing trowel. Finish repairs slightly rough for better plaster adhesion and future texture enhancement or decorative finishes.
Seal Brick With PVA or Bonding Agent
Before you put plaster anywhere near bare brick, seal the surface with a PVA mix or a purpose-made bonding agent so the masonry doesn’t suck the moisture out of your coat too fast. Brush off dust, then damp down lightly; you want it cool and slightly matt, not dripping.
For PVA, use a common UK mix: 1 part PVA to 3–5 parts water for the first coat, worked into pores with a brush. Let it go tacky, then apply a second coat at 1:1 to 1:2, timing plaster while it’s still tacky.
If you choose bonding agents, follow the tub’s coverage rates and drying windows. These sealing techniques even out suction and improve adhesion on old, variable brickwork.
Install Corner Beads and Wall Guides (If Needed)
Measure each external corner, choose galvanised or PVC corner beads, and cut them to length with tin snips.
Fix the beads with dabs of bonding or plaster, then check they’re plumb and square using a spirit level before they set.
If the wall’s uneven, set guide screeds (wall guides) at the correct finished thickness so you’ve got straight rails to rule your plaster to.
Choose And Cut Beads
Two bead types handle most plastering jobs on brick: galvanised steel or uPVC corner beads for external edges, and stop beads or plastering guides where you need a clean finish line or a straight reference.
For bead selection, match the bead to exposure and impact: steel suits high-traffic areas; uPVC resists rust in damp spots. Check depth so your plaster build-up covers the arris without leaving it proud.
Use clean cutting techniques so beads sit tight without snagging your trowel:
- Measure the run, then mark both flanges with a fine marker.
- Cut with tin snips (steel) or a fine-tooth saw (uPVC), keeping cuts square.
- Deburr sharp edges with a file and nip back any distorted metal.
Dry-fit each bead and confirm lengths at openings and returns.
Fix Beads Plumb Square
How do you keep corners razor-straight once the plaster goes on? You fix your beads true before anything else. Offer the corner bead up dry, mark its position, then knock off high spots and brush dust away.
Dot-and-dab with bonding plaster or a stiff sand/cement mix: small dabs every 300mm, more at the ends. Press the bead into place and tap it with your trowel until it sits plumb square on both faces.
Check with a 1.2m spirit level and a framing square; adjust while the dabs are wet. Scrape away squeeze-out through the bead wings so keys stay open.
For internal angles, use angle bead and the same bead installation checks. Let it firm up before plastering.
Set Wall Guide Screeds
With your corner beads now set plumb and square, establish wall guide screeds so the rest of the plaster has something true to ride on. Snap a vertical chalk line, then dot-and-dab stiff bonding plaster or lime along it, ready to rule off. Press a straightedge into the dabs and tweak until it reads dead true with a spirit level.
- Set screed width: Keep guides about 1.2m apart so your 1.8m Darby bridges them.
- Match thickness: Use washers or packing to hit your target coat, especially for Decorative finishes that can’t tolerate hollows.
- Respect fabric: For Historical restoration, choose lime guides and avoid over-tight metal beads on soft, damp brickwork.
Let guides firm up before you start filling between them.
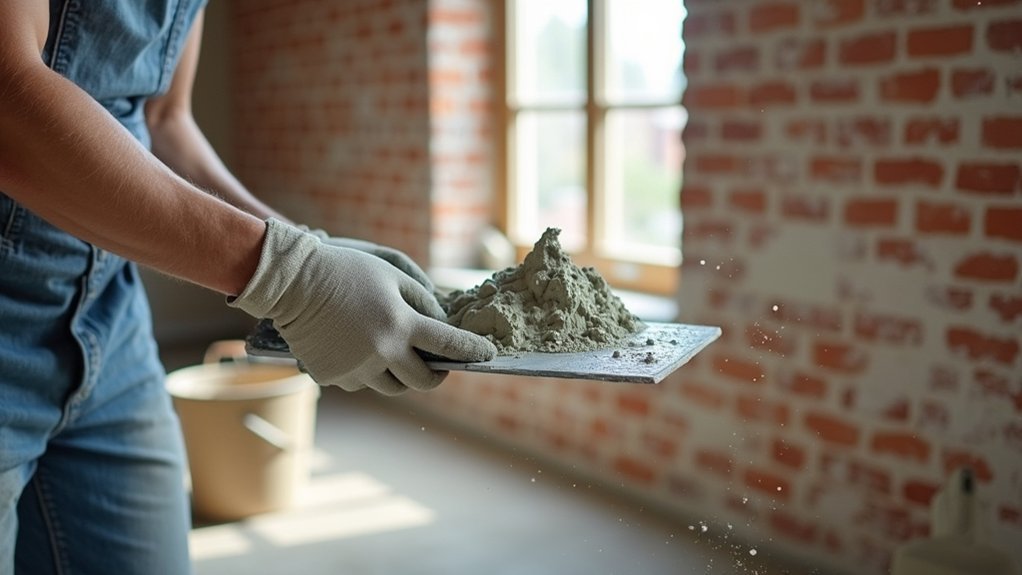
Apply the First (Scratch) Coat on Brick
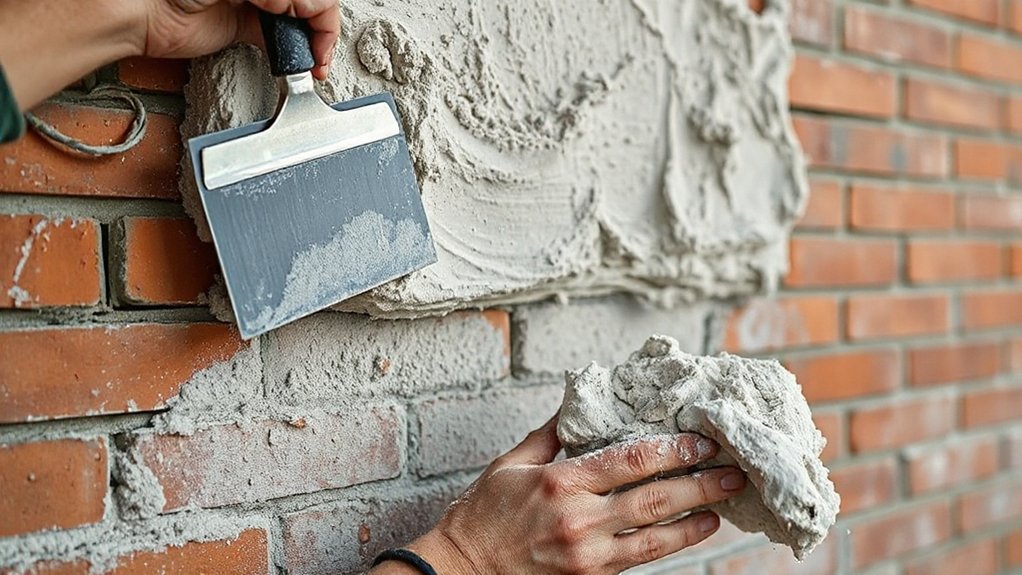
Once your brickwork is clean, dampened, and keyed, you can get the scratch coat on quickly before the surface dries out. Mix your backing plaster to a firm, spreadable consistency (follow the bag ratios), then load your hawk and use a plastering trowel to press plaster hard into joints and pores for a solid key.
Work from the bottom up between your wall guide screeds, keeping a wet edge.
Aim for around 8–10mm thickness, but don’t try to make it perfect yet. While it’s still green, score it horizontally with a scarifier to form reliable Texture patterns for the next coat.
Keep scratches shallow so you don’t expose brick. If you’re using tinted render, do quick color matching checks under UK daylight.
Apply the Second Coat: Flatten and Level
After the scratch coat has firmed up to a “thumbprint” set, apply your second (float) coat to bring the wall flat and true. Load your hawk and trowel, then spread evenly to about 8–10mm, working from the bottom up. Keep a consistent Surface texture so you don’t trap ridges that throw your levels.
- Set your beads and check plumb with a 1.8m straightedge; fill low spots first, then close in around them.
- Rule off with a feather edge in vertical and diagonal passes; shave highs and reapply to hollows for even thickness.
- Cross-trowel lightly to knit the coat and improve coating adhesion, but don’t overwork it or it’ll drag.
Let it firm before further finishing work.
Trowel, Sponge, and Polish for a Smooth Finish
Once the second coat’s on, you’ll use your finishing trowel to flatten high spots and close in the surface, working in tight arcs with steady pressure.
When it starts to firm up, you’ll sponge-buff lightly with clean water to knock back trowel lines without washing the plaster out.
Finally, you’ll polish with a clean, slightly damp trowel to tighten the face and leave a smooth finish ready for mist coating.
Trowel Techniques For Leveling
- Lay on and rule off: Apply evenly, then flatten with long strokes, working from a solid edge and crossing your passes.
- Close in: As it picks up, tighten the angle and increase pressure to shear high spots into lows.
- Check and correct: Use a straightedge and side light; fill hollows immediately, then re-flatten with minimal water.
Sponge Buffing And Polishing
When the plaster’s firmed up to a “thumbprint” set (it dents without smearing), you can start sponge buffing to refine the face and bring up a tight, even finish. Dampen a clean plasterer’s sponge, wring it well, then work in small circles with light pressure, keeping edges feathered. You’re not washing it off; you’re closing pores and evening the surface texture.
Follow immediately with a clean stainless finishing trowel. Hold it flatter than before and make long, overlapping passes to compact the surface. Mist lightly with a spray bottle if it drags, but don’t flood.
For final polishing techniques, increase pressure, keep the blade spotless, and burnish only when the sheen starts to rise. This minimises trowel marks and creates a paint-ready finish.
Drying Times and Curing Tips to Prevent Cracks
Although plaster can feel touch-dry within a few hours, it still needs controlled drying and proper curing to gain strength and avoid shrinkage cracks on brickwork. Your drying process should be slow and even: keep windows on the latch, avoid heaters, and protect from direct sun and strong draughts.
In UK homes, allow roughly 2–3 days per coat before decorating, longer in winter or on cold external walls. Use simple curing methods to manage moisture loss and reduce debonding.
- Keep the room at a steady 15–20°C; don’t “force dry” with dehumidifiers.
- Lightly mist the surface for 24–48 hours if it’s drying too fast.
- Wait until the plaster turns uniformly pale before mist coating or painting.
Frequently Asked Questions
Can I Plaster Over Painted Brick Without Removing the Paint First?
Yes, you can plaster painted brick, but you shouldn’t skip Surface preparation. Do Paint removal if it’s flaking. Otherwise, degrease, key with SBR, apply bonding coat, then skim with finishing plaster.
How Do I Plaster Brick in a Bathroom or Other High-Moisture Room?
Measure twice, cut once: you’ll plaster brick in bathrooms by applying Waterproof coatings, then bonding agent, then cement-based render and skim. You’ll finish with breathable sealer or Decorative finishes, ensuring ventilation and sealed junctions.
What’s the Best Way to Fix Hollow-Sounding Plaster After It Dries?
Fix hollow plaster by locating voids, drilling 6mm holes, injecting bonding plaster/adhesive, then re-screeding. Follow plaster adhesion tips: prime with PVA. For soundproofing challenges, chase out loose areas and patch properly.
How Do I Match the Plaster Texture to Existing Surrounding Walls?
To match surrounding texture, you’ll play “artisan” not “slinger”: practise on a scrap first. Nail Surface preparation—PVA, keying, and patch thickness—then use Texture blending with sponge, brush, or stipple, feathering edges.
Can I Plaster Over Brick to Improve Soundproofing or Insulation?
Yes, you can plaster over brick, but it won’t add much alone; you’ll need Soundproofing techniques like resilient bars and acoustic plasterboard, plus Insulation options such as PIR or mineral wool, in UK builds.
Conclusion
If you’ve prepped well, plastering brick feels less like luck and more like setting out a straight run of blocks: your screeds do the thinking. On my first job, I skipped sealing and the scratch coat dried in under 30 minutes—crazing everywhere, like mud on a droughted canal bed. Don’t repeat it. Keep PVA/bonding consistent, key the scratch coat, then flatten and sponge the second. Control draughts, mist lightly, and let it cure properly.


