
Around a third of UK homes report some form of wall defect each year, from blown plaster to recurring cracks. You can’t just skim over damaged areas and expect it to last. You need to assess what’s failed, strip back anything loose, and deal with causes like damp or movement before you mix a batch. If you get the prep and first coat wrong, the finish won’t bond—so start with the checks that most DIYers miss…
Key Takeaways
- Inspect damage, fix damp or leaks, and remove all loose plaster and paint until the surface is solid and stable.
- Clean dust and grease, then seal porous or chalky areas with diluted PVA or bonding agent, letting it go tacky.
- Choose the right plaster: patching for small defects, bonding for deep fills, and skim plaster for a smooth final finish.
- Apply base coat firmly from edges inward, fill deep voids in layers, and scratch the first coat to key the next.
- Skim 1–2mm, flatten and cross-trowel as it sets, then allow 2–7 days drying before mist-coating and painting.
Assess Damaged Wall Plaster and Choose a Fix
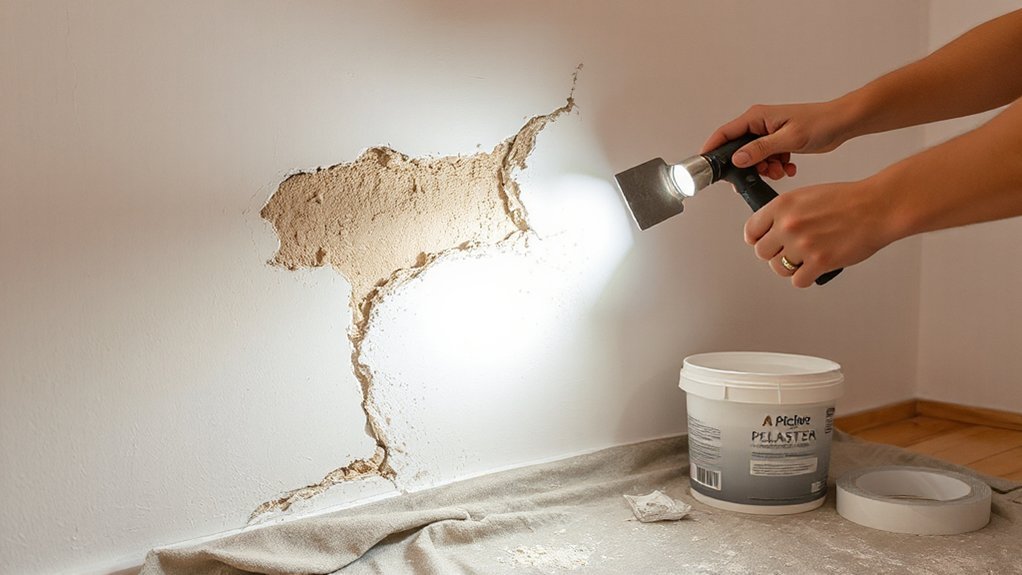
Before you mix any plaster, inspect the wall closely so you can match the repair to the damage. Tap for hollow sounds, scrape back loose edges, and check for blown areas where the plaster has debonded from brick or lath. Measure crack width, note any movement around doors or windows, and look for staining that suggests leaks.
Decide whether you’re dealing with surface defects, failed adhesion, or substrate problems. If damp’s present, fix the source and let the wall dry before repair.
Where Wall insulation has been retrofitted, check for cold-spot condensation and salts. If the wall carries decorative finishes, test a small area for paint, limewash, or wallpaper paste that could block bonding.
Mark the repair boundary, square up edges, and plan for mechanical fixing if needed.
Choose Plaster: Patch, Bonding, or Skim
Although most wall repairs look similar once painted, you’ll get a stronger, flatter finish if you match the plaster type to the depth of the damage and the background.
For shallow scrapes or hairline defects, use patching plaster to minimise shrinkage and simplify colour matching around existing paint edges.
For deeper holes, blown areas, or uneven masonry, choose bonding plaster to rebuild level quickly and provide a key for finishing.
If the surface is broadly sound but rough, apply skim plaster to unify texture and remove trowel marks.
In period homes, consider lime-based options for historical restoration and breathability, rather than trapping moisture with hard gypsum.
- Patch: small dents and fine cracks
- Bonding: deep fills on brick/block
- Skim: final 2–3mm coat
- Lime: older, breathable substrates
- Gypsum: modern, dry interiors
Get Plastering Tools and Materials (DIY List)
Match your plaster to the repair, then gather the right kit so you can mix, apply, and flatten it inside its working time. You’ll need a clean mixing bucket, paddle mixer or stout stick, measuring jug, and water brush.
For application, get a plasterer’s hawk, 11–14in finishing trowel, small gauging trowel, and a bucket trowel. Add a jointing/edging trowel for tight corners, plus a feather edge or straightedge for ruling off.
Keep a spray bottle, clean sponge float, and fine abrasive paper for final touch-ups once set.
For Plastering safety, wear gloves, FFP2 mask, and safety specs; bagged gypsum dust irritates.
For historic wall preservation, include lime-compatible tools and hessian scrim.
Prep the Damaged Wall So Plaster Bonds
Before you mix plaster, you’ve got to prep the damaged area so the new coat bonds properly.
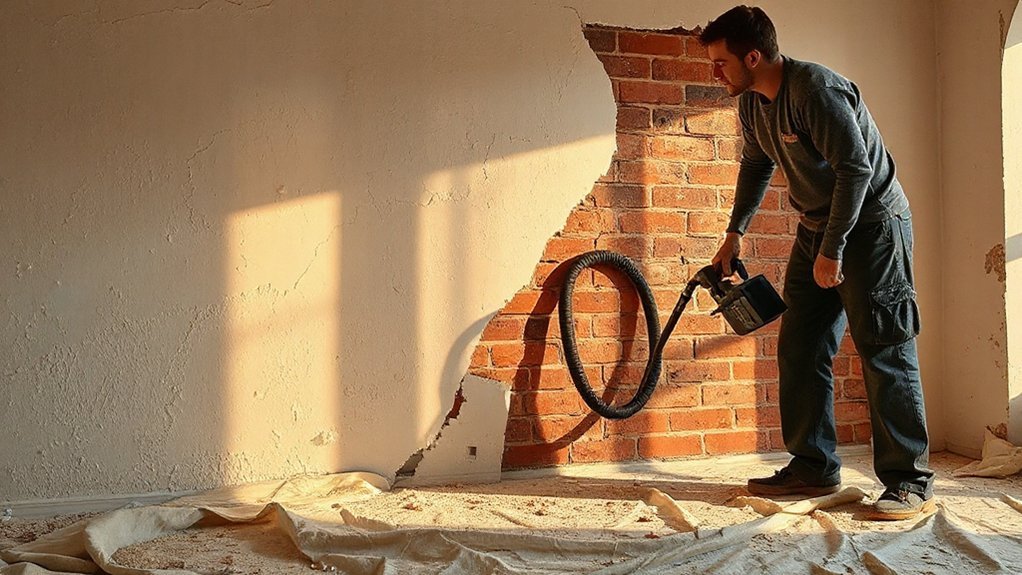
Scrape back all loose plaster and friable paint to a firm edge, then brush and vacuum off dust and debris.
Wash off any grease, let it dry, then seal the surface with a suitable PVA or bonding agent to control suction.
Remove Loose Material
Where do you start when a wall’s blown or cracked? You start by stripping back anything that won’t support new plaster. Treat this as mechanical prep: you’re aiming for a stable wall surface with sound edges, not a pretty finish. Work methodically and stop when everything left is firm.
- Tap the area with a hammer handle; hollow sounds mean it’s coming away.
- Scrape off flaking paint, failed skim, and friable plaster with a filling knife.
- Use a bolster and club hammer to chase cracks back to solid material.
- Undercut loose edges slightly so patches don’t feather onto weak plaster.
- Brush out loose debris from voids and joints so you can see what’s sound.
Bag up waste and check again by tapping and scraping until nothing shifts.
Clean And Seal Surface
Once you’ve stripped back to sound plaster, clean the area thoroughly and seal it so the new coat keys properly instead of drying out or letting go. Brush off dust, then vacuum the edges and any lath gaps. Wash greasy patches with sugar soap, rinse, and let it dry fully; damp walls will blister and slow set.
If you’ve got friable, chalky surfaces, scrape again until firm.
Apply a PVA bonding mix (about 1:4 PVA to water) with a brush, working it into wall textures and cracks. Let it go tacky, not dry.
For very porous backgrounds, add a second coat or use SBR for better grab. Mask adjacent paintwork; neat edges matter for later painting techniques and finishing.
Open Cracks, Fill Holes, and Tape Weak Areas
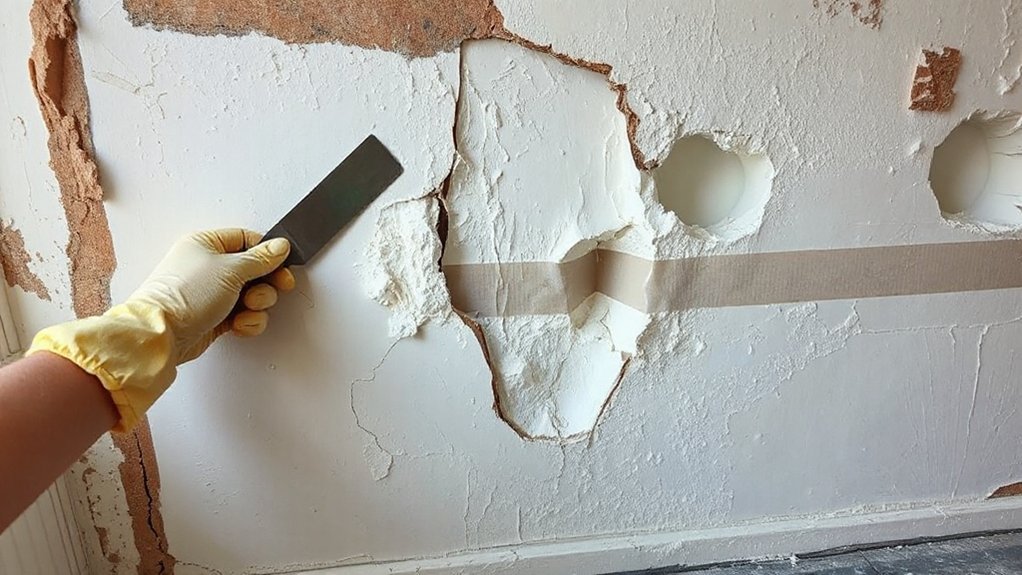
You’ll get a stronger plaster finish if you open up hairline cracks slightly, rake out loose material, and brush out the dust so filler can key properly.
You should pack and patch holes with a suitable repair compound, then scrape it level with the wall to avoid high spots telegraphing through the skim.
On seams and other stress-prone areas, you’ll bed scrim tape firmly so movement doesn’t re-crack the new plaster.
Widen And Clean Cracks
Before any fresh plaster goes on, widen and clean every crack so the repair bonds to solid material rather than loose edges and dust. Use a sharp Stanley knife or a crack-chasing tool to open hairlines into a neat V, then brush and vacuum out grit. Keep your cut consistent so later texture patterns don’t telegraph through, helping paint matching when you redecorate.
- Score along both sides, then lever out friable plaster to a firm edge.
- Rake joints to at least 3–5mm depth; stop at sound substrate.
- Dust off with a stiff brush; finish with a vacuum and nozzle.
- Dampen with a mist spray; don’t soak plasterboard paper.
- Apply self-adhesive scrim tape over weak, moving cracks, pressing flat.
Patch And Level Holes
Where do you start when a wall has gaps, blown patches, and missing corners? First, open out any remaining loose edges with a filling knife, then dust off and seal porous masonry or old plaster with diluted PVA (per UK practice) so your filler won’t dry too fast.
For deep holes, build in layers: press in a backing plug of scrim or a bit of plasterboard offcut, then apply setting-type filler or bonding coat, keying each pass with the edge of your knife. Once firm, skim a fine surface filler to bring it flush.
Feather 50–100mm beyond the repair to blend wall texture. When dry, sand lightly, then spot-prime for consistent suction, aiding paint matching on the final coat.
Tape Stress-Prone Seams
Although a crack or joint might look like a simple fill, it’ll usually reopen unless you stabilise it first, so start by cutting it back to sound material and then reinforce the weak line. Rake the crack into a shallow V, vacuum dust, and mist lightly so filler bonds. Pack deep gaps with bonding or setting compound, then bed tape while it’s still workable for proper joint reinforcement and surface reinforcement.
- Widen hairline cracks with a utility knife, not a screwdriver.
- Fill proud in two lifts to reduce shrinkage.
- Apply self-adhesive scrim over seams and board joints.
- Use paper tape in corners: bed, crease, then knife tight.
- Feather edges 150–200mm with a wide UK taping knife.
Seal With PVA or Primer (When and How)
Once you’ve finished preparing the damaged area, seal the wall with either diluted PVA or a suitable plaster primer so the surface doesn’t suck the moisture out of your new plaster too fast. This controls suction, evens out wall texture, and prevents weak, dusty edges.
Use PVA on sound, porous backgrounds like old plaster, bonding coat, or sand/cement render. Mix 1:4 with clean water for the first coat; brush or roll it on and work it into scratches. Let it dry, then apply a second coat at 1:3. Plaster while it’s tacky, not wet.
Choose a proprietary primer for painted surfaces, low-suction boards, or where you need reliable moisture barriers. Follow the tin’s coverage rate and drying times, and keep the room ventilated.
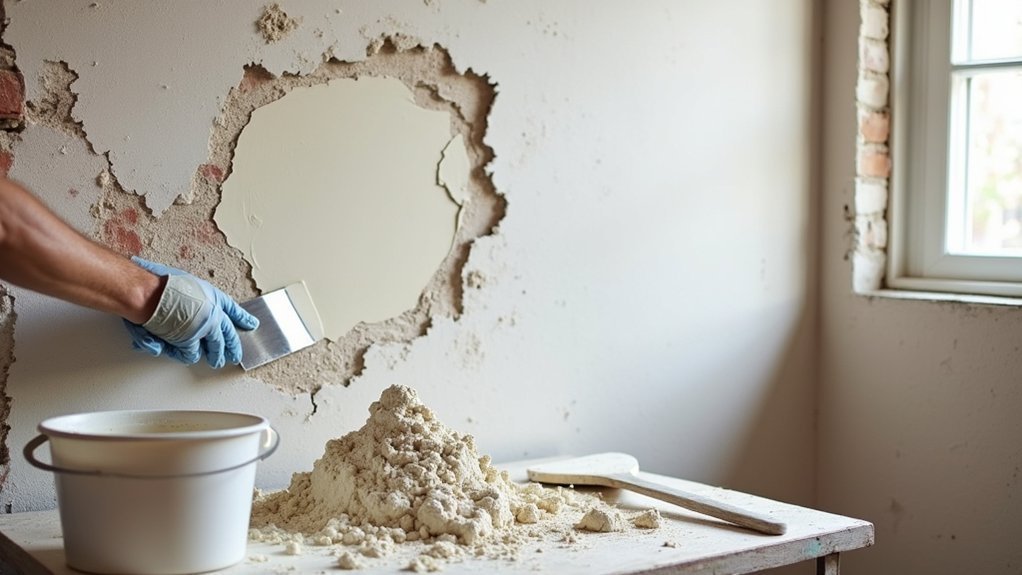
Mix Plaster to the Right Thickness
Before you put plaster on the wall, mix it to a smooth, creamy consistency so it spreads easily, stays on your hawk, and doesn’t slump on the repair.
In a clean UK bucket, add water first, then sprinkle Multi-Finish in, letting it soak before you mix.
Use a paddle mixer on a slow drill and keep the head submerged to reduce air, which can weaken edges and affect texture blending.
Aim for a ribbon that drops off the trowel, holds a soft peak, and levels within seconds.
Mix small batches so set times stay predictable and colour stays consistent for later colour matching.
- Use cold, clean water to slow set
- Measure water for repeatability
- Mix 2–3 minutes, rest 1 minute, remix
- Scrape sides and base to remove lumps
- Stop once glossy and lump-free
Apply the First Coat and Scratch It In
Load your hawk and lay on the base coat with a plastering trowel, pressing it firmly into the damaged area to achieve an even cover. Keep it to a consistent thickness and pull it flat, working from the edges in so you don’t trap voids.
While it’s still green, scratch in a light cross-hatch with a scratch comb to create a solid key for the next coat.
Lay On Base Coat
With your wall prepped and bonding agent tacky, lay on the base coat by loading your plastering trowel from a hawk and spreading the mix firmly across the damaged area, working from the edges inwards to keep a clean shift. Keep pressure consistent so you’re pushing plaster into pits, not just skimming over them. Aim for an even thickness that matches surrounding levels, especially where historical plaster meets new backing, and don’t mask dampness issues—stop and address any active moisture first.
- Load small amounts to stay in control
- Flatten high spots with long trowel passes
- Fill deep voids in two tight applications
- Keep edges feathered to avoid proud ridges
- Clean tools often; grit drags and tears the coat
Scratch For Keying
Once you’ve flattened the base coat to level, scratch it while it’s still green so the next coat has a mechanical key rather than relying on suction alone. Use a scarifier, devil float, or notched trowel and pull light, even lines across the whole patch. Aim for 2–3mm deep grooves; don’t cut back to brick or plasterboard.
Keep spacing consistent, and change direction slightly if you’re covering a large area to avoid ridges telegraphing through.
Mind the edges: feather them but still scratch right up to the perimeter so the second coat bonds without a cold joint. Let it firm up, then mist lightly if it’s drying too fast.
A uniform key helps final Wall texture and makes paint matching easier.
Apply a Skim Coat and Flatten at Set Times
After your base coat has firmed up but still holds a slight “green” feel, spread a thin skim coat (around 1–2mm) with a stainless steel finishing trowel to close up pores and bring the surface true. Work from top left, keeping your leading edge clean, and use light pressure so you don’t drag grit into the finish.
Time your flattening passes as the plaster tightens, not by the clock.
- First flatten: trowel flat, cross-trowel to knock down ridges.
- Second flatten: as it dulls, close up with firmer pressure.
- Keep a spray bottle handy for controlled lubrication, not soaking.
- Feather into sound edges to suit Decorative finishes.
- Maintain crisp arrises for historical restoration work.
Let Plaster Dry, Fix Flaws, Then Sand and Prime
Although the plaster may feel touch-dry within hours, you should let it dry out fully before you start chasing defects, because trapped moisture will tear under abrasive and can cause primer to fail. Aim for a uniform pale pink; in UK conditions that’s often 2–7 days with ventilation and low heat, not dehumidifiers blasting the surface.
Once dry, rake out nibs and fill pinholes with a tight skim of finishing plaster or fine filler, then knife off flush for texture matching.
When it’s cured, sand lightly with 180–240 grit on a block, using a work light to spot hollows; don’t over-sand edges. Dust off thoroughly, then apply a plaster sealer/mist coat (diluted emulsion) to lock down suction and assure paint compatibility before your topcoat.
Frequently Asked Questions
What Does Plastering a Damaged Wall Typically Cost per Square Metre?
You’ll typically pay £15–£30 per m² in the UK for plastering, rising to £40+ for patch repairs. For cost comparison, factor labour, access, and finish; material options include bonding, finish plaster, or lime.
Can I Plaster Over Painted Walls Without Removing the Paint?
Yes, you can plaster over painted walls if you key the surface, remove loose paint, and use PVA or bonding primer. For Painting preparation, degrease and sand. For Wall texture matching, skim uniformly, then feather edges.
How Long Should I Wait Before Painting Newly Plastered Areas?
Wait 5–7 days for small patches, 2–4 weeks for full skim; you must follow drying time until it’s uniformly pale. Sort surface preparation: mist coat emulsion first, then finish coats once dry.
Is It Safe to Plaster Over Walls With Suspected Damp or Mould?
It isn’t safe to plaster over suspected damp or mould; you’ll trap moisture and worsen decay. You should fix Damp prevention first and complete Mold remediation, then let the substrate dry fully before replastering.
When Should I Call a Professional Instead of DIY Plastering?
Call a professional if you’ve structural cracks, persistent damp/mould, blown plaster, or need large ceilings skimmed. You’ll follow DIY tips for small patches only; take safety precautions, and hire pros for electrics or gas.
Conclusion
Now you’ve turned that battered wall from a crumbling cliff into a solid runway. You’ve checked the substrate, removed loose material, sealed and bonded, opened and taped cracks, then built up with a keyed first coat and a timed skim. Let it dry fully (don’t rush with heat), scrape high spots, fill pinholes, then sand lightly. Finish with a mist coat or suitable primer before paint, and you’ll get a flat, durable UK-ready finish. This could be a renovation in an old cottage or a newish build after flood damage.


