You probably don’t know that the biggest failure in reclaiming a derelict barn usually starts below ground, where trapped moisture quietly unravels lime, timber, and stone. You’ll get further by surveying what’s worth keeping, then making the shell safe with propping, bracing, and simple drainage before you touch a joint or repoint a wall. Once you start grading reclaimed timbers and matching lime mortars, one hidden decision will determine whether the building can breathe or rot.
Key Takeaways
- Survey and record structural condition, timber species, dimensions, and moisture damage to guide accurate, traditional repairs and material matching.
- Stabilize the frame with reversible bracing and adjustable supports before disturbing joints, walls, or roof coverings.
- Manage water first: regrade, cut swales, add French drains, and extend gutters to keep sills and walls dry.
- Repair timbers using mortise-and-tenon joinery and pegged fixings, re-cutting true bearing faces to restore original load paths.
- Rebuild stonework and roofs with lime mortar, matching slate or tile and proper lead flashings to shed driven rain without trapping moisture.
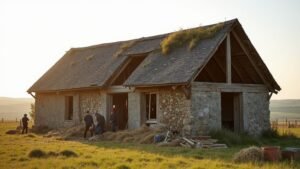
Survey a Derelict Barn: What to Keep
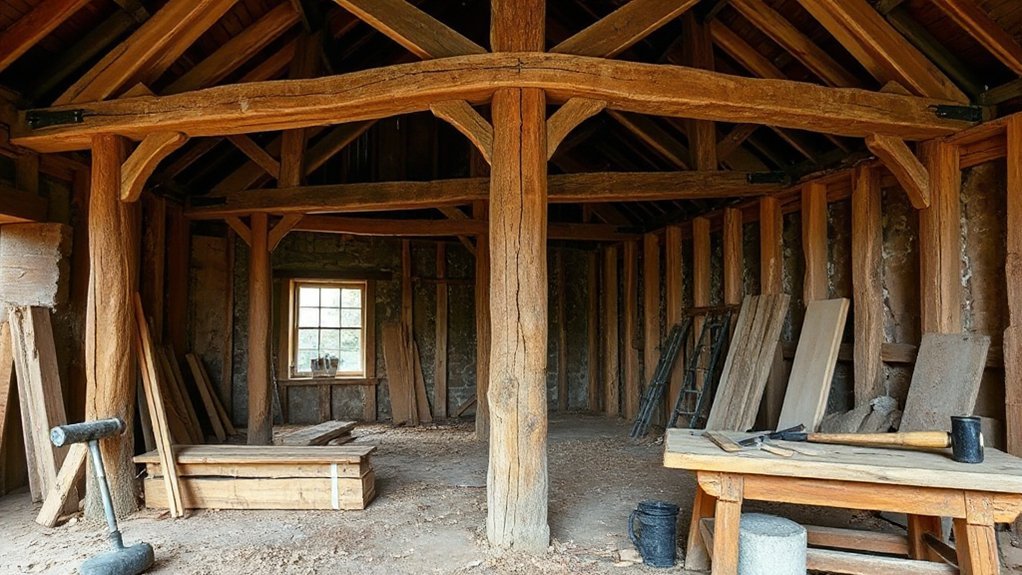
Before you lift a tool, survey the barn methodically so you can separate sound, reusable fabric from decay and unsafe elements. Walk the perimeter and note roofline sag, rafter alignment, and joint separation.
Probe sills, posts, and plates with an awl to confirm dense fibers and continuous bearing. Tag straight timbers with tight growth rings for re-use as braces, girts, or new threshold stock.
Inspect siding for intact lap edges and minimal insect tunneling; keep boards that still hold fasteners without crumbling. Save hardware with unrounded heads and threads that turn cleanly after brushing.
Identify flooring thick enough for Barnyard crops handling and stall traffic in livestock shelters. Record species, dimensions, and moisture staining so you can match replacements accurately.
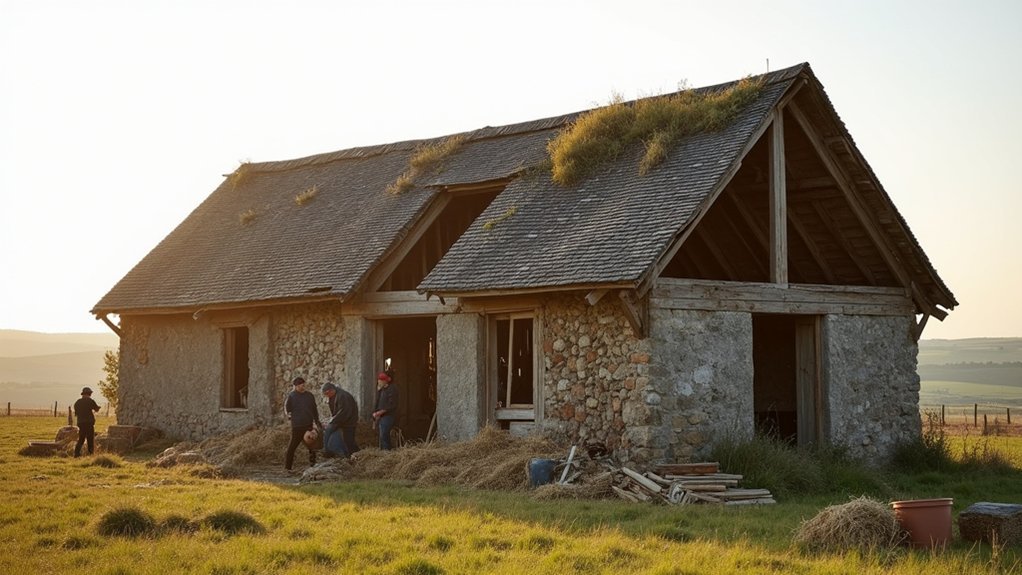
Make It Safe: Prop, Brace, and Drain First
Before you touch any salvageable timber or stone, you’ll stabilise the structure with a temporary propping strategy that carries roof and wall loads safely to firm ground.
You’ll then brace weak frames—posts, ties, and joints—so racking can’t progress while you work.
Finally, you’ll improve site drainage by clearing falls, cutting shallow grips, and keeping water off the plinth so your repairs don’t fail at the base.
Temporary Propping Strategy
Where do you start when a barn’s frame has gone soft and the roofline’s begun to wander? You start by stabilizing loads with reversible supports, then controlling water so decay doesn’t accelerate.
Set temporary scaffolding on firm pads; distribute point loads with timber sole plates, not bricks or loose stone. Install emergency shoring under sagging purlins and compromised tie beams, keeping posts plumb and slightly snug—never jacked hard.
Work from the perimeter, limit vibration, and mark every prop for inspection. Drain roof runoff away from sills and excavate small sumps if the floor holds water. Recheck daily, especially after wind.
Focus on safe access and load paths, not permanent fixes yet.
- Timber pads under every post
- Sole plates to spread load
- Adjustable posts, pinned
- Clear walk zones, taped
- Water diverted from sills
Bracing Weak Frames
When a tired frame starts to rack under wind and its joints no longer hold geometry, you brace it to lock the building back into a stable box. Set braces before you disturb any members: measure diagonals, plumb posts, then pull the bay square with a ratchet strap or come‑along.
Install temporary X-bracing using straight, sound softwood, fixed with coach screws and large washers to resist slip. Wherever possible, land brace ends near nodes in the timber joinery—post-to-beam junctions—so you don’t crush weak infill. Add cleats to spread bearing, and predrill to avoid splitting.
If a mortise has opened, clamp and wedge it tight, then brace across it. Keep braces clear of future repairs, and use simple weatherproofing techniques to stop water tracking along fixings.
Improve Site Drainage
Bracing holds the geometry you’ve just reclaimed, but standing water will undo it by softening footings, wicking into posts, and washing fines out from under pads.
You’ll stabilize the structure faster by controlling flow at the surface, then giving water a defined exit.
- Regrade to shed water 5% away from walls for 3 m minimum.
- Cut a shallow swale on the uphill side and outlet it to daylight.
- Add a perimeter French drain in gravel with geotextile to prevent silt clogging.
- Extend gutters to a tank for Rainwater harvesting, not splashback.
- Verify Soil absorption with a simple percolation test before using soakaways.
Keep discharge away from neighbors, wells, and the barn’s pads.
Inspect after storms and clear leaves, sediment, and crushed stone fines.
Assess and Grade Reclaimed Barn Timbers
Before you reuse any reclaimed barn timber, you’ll need to assess it like structural stock, not rustic décor. For Historic preservation, document each member’s species, dimensions, and original location, then tag it for traceability.
Start with a moisture check; aim for stable readings before you judge defects. Probe for soft rot, insect galleries, and shake, focusing on bearings and midspan zones. Sight down faces for bow, crook, twist, and cup, and measure wane and checks against allowable limits.
Remove metal with a detector, then scan for hidden fasteners that could compromise milling. Apply timber grading criteria: assign a structural grade or downgrade to secondary use based on knots, slope of grain, and remaining section.
Record decisions in an inspection log for future review.
Repair Frames With Traditional Joints and Fixings
Although you can stabilize a tired barn frame with modern steel and screws, traditional mortise-and-tenon joinery and pegged fixings restore load paths without introducing hard, incompatible points. You’ll square members, re-cut shoulders, and keep bearing faces true so compression transfers cleanly.
Use Traditional joint techniques to match the original geometry, then lock repairs with Rustic fixing methods that allow seasonal movement and future reversibility. When splicing, stagger joints away from high-bend zones and keep grain orientation consistent.
Drive pegs slightly offset (draw-bored) to pull the joint tight without clamps, and seat wedges only where the timber can resist splitting. Finish by checking plumb, sighting twist, and tightening braces in sequence.
- Gauge and mark with a story stick
- Cut housed mortises for bearing
- Use scarf joints for long runs
- Draw-bore oak pegs, not screws
- Add hardwood dutchmen for localized rot
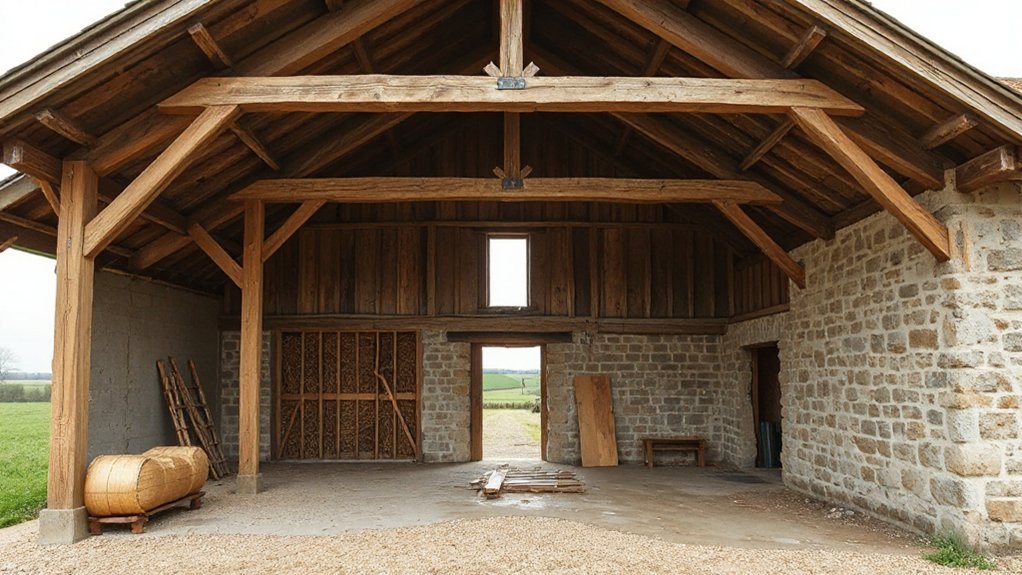
Rebuild Stone Walls With Lime Mortar and Pointing
Where do you start when a barn’s stonework has bulged, washed out, and lost its bond? You begin by recording faces, numbering stones, and raking out loose joints by hand to avoid edge damage. Take down unstable sections to sound masonry, and rebuild on a firm footing, keeping original batter and through-stones aligned.
Use Lime mortar matched to the existing aggregate and strength; it must stay weaker than the stone. Dampen the wall, butter beds fully, and pack hearting tight so voids don’t create future movement. Finish with Pointing techniques that shed water yet breathe: compact in thin layers, keep arrises crisp, and tool a flush or slight recess.
Protect from sun, frost, and rapid drying with damp hessian.
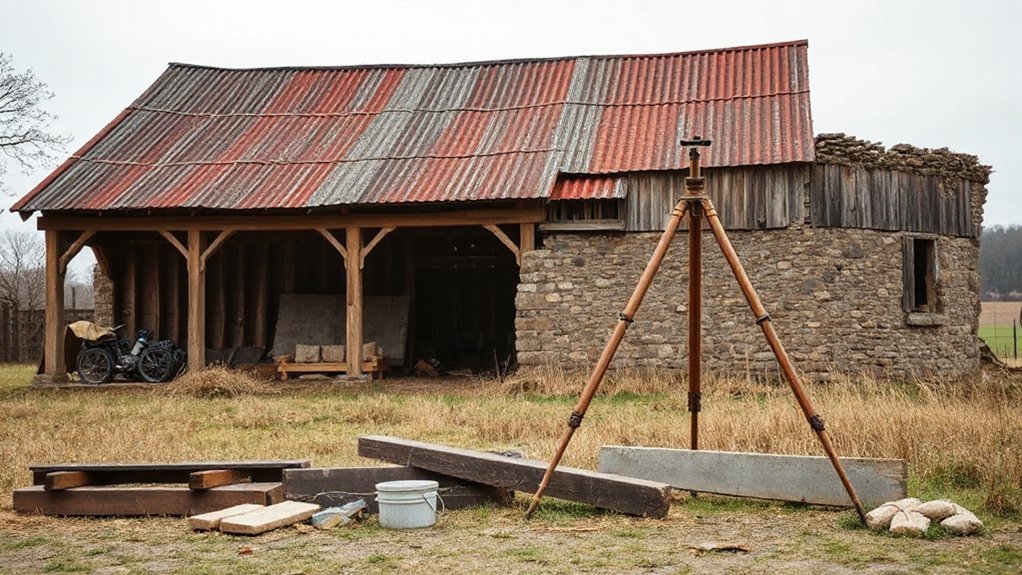
Repair the Barn Roof: Slate, Tiles, and Flashings
You’ll start the roof repair by choosing slate or tile that matches the barn’s pitch, exposure, and local weathering. Then you’ll set a consistent gauge to keep courses true.
You’ll renew flashings at valleys, abutments, and penetrations with properly dressed lead or metal, lapping to shed water without capillary draw.
You’ll finish by re-bedding or re-clamping the ridge, replacing cracked units, and sealing joints so wind-driven rain can’t track under the covering.
Selecting Slate Or Tile
How do you choose between slate and clay tile when every course has to shed water, resist wind uplift, and match a barn’s original character? You start with Historical restoration: survey surviving units, measure gauge and lap, and match color, texture, and thickness so the roof reads as one field.
Then weigh material durability against structure: slate is lighter per area and suits tighter rafters; clay tile lasts well but needs stronger battens and fixings and steeper pitches. Specify only frost-rated, low-porosity units, and reject delaminated slate or spalled tile.
- Verify roof pitch against slate/tile minimums
- Match size, lap, and headlap to exposure
- Check rafter capacity and batten spacing
- Select proven quarry or kiln batches
- Standardize fixings to local wind zone
Flashings And Ridge Repairs
Once you’ve matched slate or clay tile to the barn’s pitch, gauge, and exposure, focus on the joints that actually stop driven rain: flashings and the ridge. Strip back defective lead, zinc, or bitumen patches and inspect the masonry arrises and undercloak.
You’ll get the best service from code-appropriate lead soakers and stepped flashings, dressed tight, wedged into chases, and pointed with lime mortar compatible with traditional materials. Keep laps generous and avoid nailing through the cover where movement will tear it.
At the ridge, re-bed loosened ridge tiles on a lime-rich mortar, pin only where required, and re-point neatly. Maintain a straight line and consistent overhang to preserve barn aesthetics and shed water cleanly.
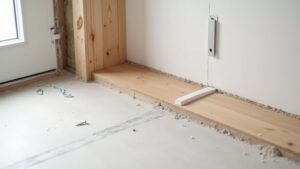
Breathable Floors and Finishes That Suit Old Barns
Because old barns manage moisture by moving it—not trapping it—your floor build-up and surface finishes need to stay vapour-open while still tolerating grit, traffic, and seasonal movement.
Start with a limecrete or well-compacted, free-draining stone base, then set brick pavers, flagstones, or breathable timber on sleepers; avoid polyethylene membranes and glossy sealers.
Finish surfaces with limewash, claypaint, or hardwax oils so abrasion doesn’t force peeling.
During chimney restoration, protect adjacent hearth slabs with sacrificial lime mortar pointing.
Plan interior lighting early so you can chase conduits in lime joints, not dense screeds, keeping the assembly serviceable.
- Limecrete or stone base
- Brick/flagstone breathable toppings
- Vapour-open lime/clay finishes
- Hardwax oil for timber floors
- Service routes for interior lighting
Insulate, Ventilate, and Prevent Damp Long-Term
Although an old barn can feel dry in summer, it often holds hidden moisture in winter, so you need insulation and ventilation that work with the building’s natural drying paths rather than blocking them.
Start by stopping liquid water: repair gutters, fit drips, and keep ground levels below sills.
Then insulate with breathable build-ups—woodfibre, hemp-lime, or sheep’s wool—so vapour can migrate and disperse.
If you must use Modern insulation, specify vapour-open boards and avoid foil-faced layers that trap condensation against stone or timber.
Maintain cross-ventilation: clear eaves, retain ridge gaps, and add discrete low-level air inlets behind grills.
Control internal humidity with intermittent extract fans and a small dehumidifier during first-season drying.
That balances performance with Heritage preservation.
Frequently Asked Questions
What Planning Permissions Are Required to Convert a Derelict Barn?
You’ll usually need full planning permission or prior approval for change of use, plus listed building consent if applicable. You must satisfy Building regulations, consult Historic preservation officers, and secure approvals for access, drainage, ecology, and design.
How Much Does a Traditional Barn Restoration Typically Cost?
You’ll typically spend $200–$400 per sq ft for traditional barn restoration; 70% of budgets go to structure and envelope. Historical preservation and Sustainable building upgrades raise costs, but you’ll cut lifecycle maintenance and energy.
How Long Does Reclaiming a Derelict Barn Usually Take?
You’ll usually need 6–18 months, depending on access, permits, and damage. Historic preservation reviews and structural integrity repairs drive timelines; expect added weeks for timber curing, masonry repointing, and weather-dependent sequencing.
Do I Need Specialist Insurance During Barn Restoration Works?
Yes, you’ll usually need specialist insurance during works, since standard policies exclude building sites. Check Insurance requirements with your broker and secure Restoration coverage for public liability, contractors, materials, and existing structure damage until completion.
Where Can I Source Reclaimed Rural Materials Locally?
You’ll uncover reclaimed rural materials almost everywhere: salvage yards, demolition contractors, local farms, heritage trusts, and online marketplaces. Prioritise Historic craftsmanship with Sustainable sourcing—verify provenance, grading, moisture content, and dimensions before you buy anything.
Conclusion
When you reclaim a derelict barn with rural materials, you’re tuning a working instrument, not building a replica. Start by keeping what’s sound, then brace, drain, and repair with graded timbers, pegged joints, and lime-pointed stone. Re-roof with slate or tile, and finish with breathable floors and limewash. On one project, moisture readings dropped 40% after restoring drainage—like clearing a blocked ditch, the whole field dries out.