We’ll start by surveying and photographing every elevation and detail, then map constraints like party walls and landmark rules so the plan stays compliant. Next, we’ll set a room-by-room budget with a 15–25% contingency and track spend by phase. We’ll stop water first—roof, flashings, gutters, and lime repointing—then tackle structural risks. We’ll upgrade electrics, plumbing, and heating, add breathable insulation and better ventilation, and restore period joinery while fitting discreet, reversible kitchens and baths. Keep going for the step-by-step sequence.
Key Takeaways
- Survey and document every element; map legal constraints and hidden conditions before designing scope, schedule, and permissions.
- Build a line-item budget by room and phase, with 15–25% contingency, weekly cost tracking, and clear separation of essentials vs upgrades.
- Stop water ingress first: repair roof, flashings, gutters, downpipes, and lime repointing to protect structure and finishes.
- Control damp with breathable insulation and restored ventilation, avoiding moisture-trapping materials on solid brick without hygrothermal design.
- Preserve and repair period joinery and plaster; route modern services discreetly, keeping upgrades reversible and visually consistent with Victorian character.
Survey Your Victorian Townhouse (and Constraints)
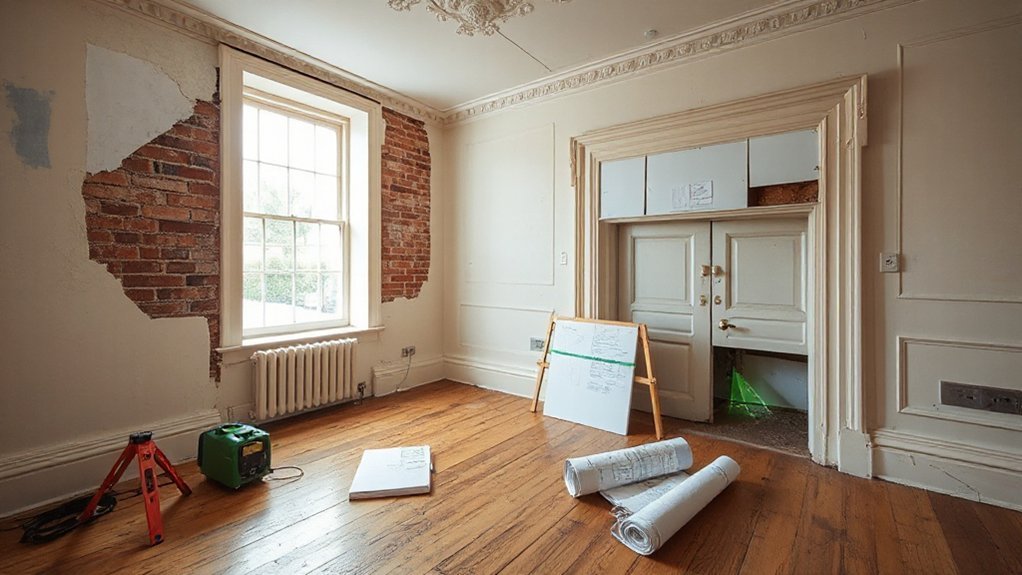
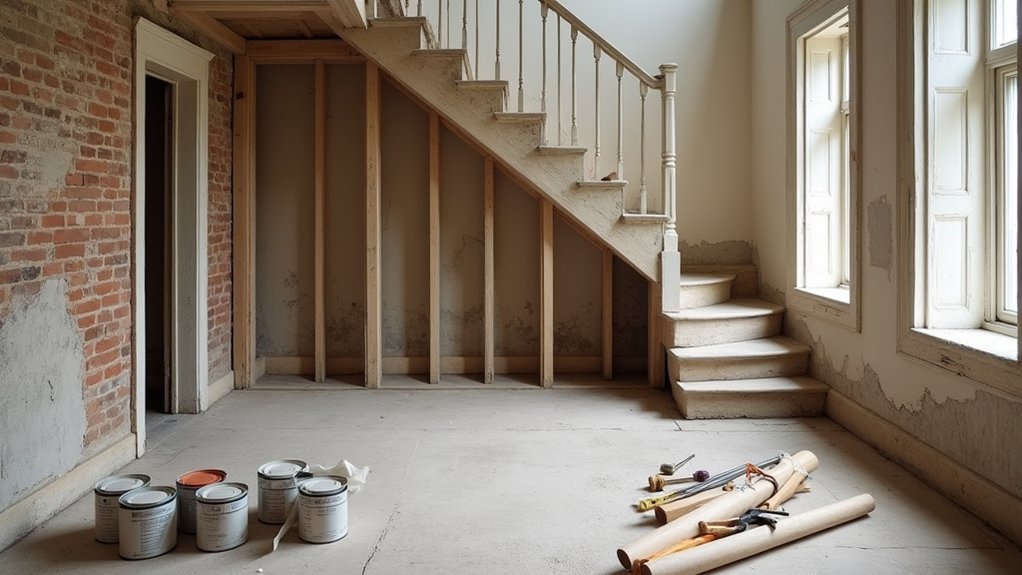
Before we pick up a pry bar or order materials, we’ll survey the townhouse room by room and document what we’re actually working with—and what we’re not allowed to change. We’ll photograph every elevation, molding run, stair detail, and window profile, then label conditions: intact, altered, missing, or unsafe.
Next, we’ll map constraints—party walls, shared chimneys, easements, landmark rules, and any HOA or conservation-area requirements—so our plan fits the building and the neighborhood.
We’ll open a few strategic access points to confirm framing, plaster keys, joist spans, and moisture paths, and we’ll log previous repairs. This baseline protects Historical accuracy and guides Material sourcing, letting us match profiles, species, and finishes while staying compliant and coordinated as a team.
Set a Restoration Budget + 15–25% Contingency
Now we’ll set a restoration budget by pricing the true scope—surveys, permissions, labor, materials, access, waste removal, and professional fees—so you’re not caught by “hidden” costs.
We’ll then add a 15–25% contingency to cover the typical Victorian surprises behind floors and plaster without stalling the work.
Finally, we’ll track every spend against clear phases (structure, services, envelope, interiors) so we can control cash flow and make informed trade-offs early.
Calculate True Project Costs
Although it’s tempting to price a Victorian restoration by adding up visible repairs, we’ll get a truer number by building a line-item budget and then adding a realistic 15–25% contingency for the unknowns.
We start with a room-by-room scope: structure, roof, damp, windows, plaster, joinery, stairs, chimneys, and services.
Next, we price labor and time, not just materials, and we separate “must-do” safety work from “nice-to-have” upgrades.
For historical accuracy, we specify finishes and details early—cornices, sash profiles, hearths—so quotes match intent.
Material sourcing matters too: reclaimed bricks, lime, and period hardware can shift lead times and costs.
We’ll request itemized quotes, confirm VAT, permits, waste, skips, and site access.
Add 15–25% Contingency Buffer
An itemized budget gives us the baseline, but it doesn’t protect the project from the surprises Victorian houses specialize in—hidden rot behind skirtings, failed lintels over bay windows, collapsed flue liners, or damp that runs deeper than the plaster.
That’s why we add a 15–25% contingency buffer before we commit.
We treat it as Contingency planning, not “nice-to-have” padding: 15% suits light cosmetic refreshes with recent surveys; 25% fits structural work, unknown services, or listed-building constraints.
We ringfence the contingency in a separate line, release it only for verified scope changes, and document the reason so decisions stay calm.
This approach preserves Budget flexibility while keeping workmanship and materials at the right standard, together, without rushed compromises.
Track Spend Against Phases
Before we sign off on any contractor schedule, we break the restoration budget (plus the 15–25% contingency) into clear phases and track spend against each one, not just against the total. We set phase caps for survey and design, enabling works, structure and damp, MEP, plaster and joinery, finishes, and external envelope.
You’ll log every invoice to a phase, then review weekly: planned vs committed vs paid. When a phase drifts, we correct fast—pause scope, resequence trades, or draw on contingency with a written reason.
This is where Historical accuracy meets discipline: we protect funds for cornices, sash repairs, and limework. Material sourcing gets its own line item for samples, lead times, and salvage.
Together, we stay aligned and on track.
Stop Water Ingress: Roof, Gutters, Brickwork, Damp
Before we touch finishes, we’ll stop water at the source by inspecting and repairing roof coverings—replacing slipped slates/tiles, renewing flashing, and fixing failed valleys.
Next, we’ll clear and test gutters and downpipes so they run free and discharge away from the walls, not into them.
Finally, we’ll repoint defective brick joints with an appropriate mortar and renew failed sealants around openings to cut off penetrating damp.
Repair Roof Coverings
Where does rainwater get in first on a Victorian town house—through slipped slates, failed flashings, overflowing gutters, or porous brickwork? We start at the covering, because one missing slate can soak rafters fast.
From the ground, we’ll scan for cracked, delaminated, or slipped slates, lifted ridge tiles, and sagging lines that hint at nail fatigue.
For slate repair, we’ll replace like for like, fixing with copper nails and slate hooks rather than smearing mastic.
We’ll check valleys and abutments next: Roof flashing should sit tight, stepped into mortar joints, and be dressed to shed water cleanly.
Inside the loft, we’ll look for dark staining and wet insulation so we can target the exact bay, then re-test after rain.
Clear Gutters And Downpipes
Although the roof covering usually takes the blame, blocked gutters and downpipes often cause the first serious damp in a Victorian town house by forcing rainwater back under eaves, down the face of brickwork, and into party walls.
We’ll clear them methodically: scoop out silt and moss, flush with a hose, and check every joint while it’s running. If water overflows at a corner, we’ll reset the fall or clear the outlet; if it trickles behind, we’ll reseat brackets and renew seals.
For Gutter maintenance, we’ll fit leaf guards only where trees demand them and still inspect twice yearly.
For Downpipe repair, we’ll rod blockages, replace cracked sections, and ensure shoes discharge into a gully, not onto paving.
Repoint Brickwork And Sealants
Once we’ve stopped rainwater overflowing from gutters and downpipes, we’ll tackle the next common entry point: failed mortar joints and perished sealants around openings and abutments.
We’ll inspect elevations after rainfall, mark damp lines, then rake out loose mortar to a sound depth (typically 15–20mm) without scarring arrises. For historical accuracy and material compatibility, we’ll match the original mortar: usually lime-rich, softer than the brick, and vapour-open.
We’ll repoint in thin layers, compact well, and finish to the existing joint profile; we’ll protect fresh work from sun, frost, and wind.
Around windows, doors, and roof junctions, we’ll remove cracked sealant, repair backing, and apply a breathable, high-movement sealant only where appropriate.
Make It Safe: Electrics, Plumbing, Heating Upgrades
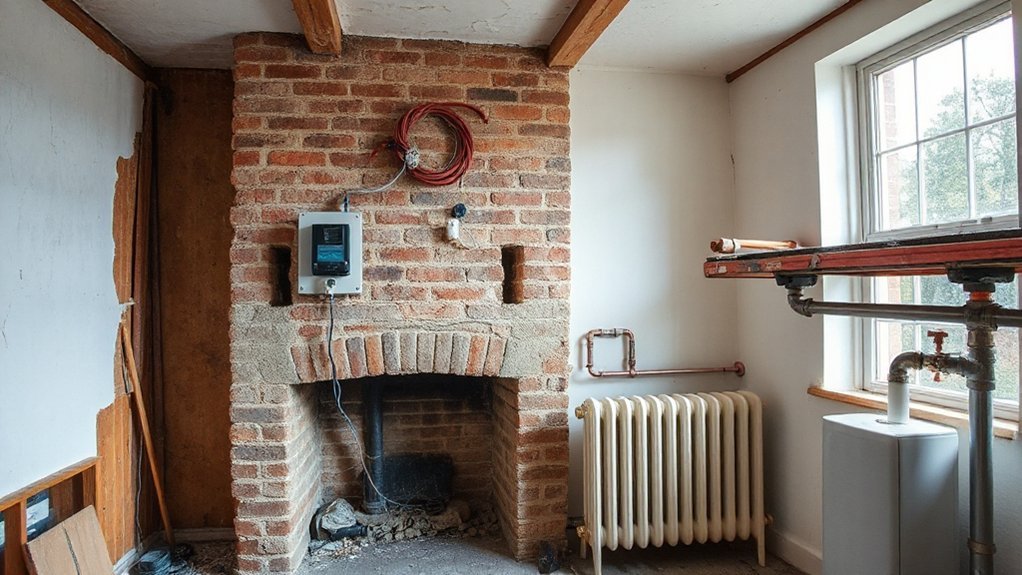
Before we strip back plaster or refit rooms, we need to make the house safe by upgrading the electrics, plumbing, and heating to modern standards. We’ll feel more confident, and you’ll know every later finish sits on reliable systems.
Start with Electrical safety: have a qualified electrician test circuits, replace perished cable, and fit an RCD-protected consumer unit.
Then plan plumbing upgrades by tracing old lead, iron, or failing joints, renewing stopcocks, and pressure-testing before walls close up.
For heating, we’ll size the boiler correctly, flush pipework, and add modern controls so rooms heat evenly and efficiently.
Keep the work coordinated, documented, and signed off.
- Full electrical inspection and certification
- New consumer unit and earthing
- Replace suspect pipes and valves
- Commission heating and controls
Add Insulation and Ventilation (Keep It Breathable)
With the electrics, plumbing, and heating made safe and dependable, we can now tackle comfort without trapping moisture in the old fabric. Our goal is steadier temperatures while letting walls dry as they always have.
We’ll start by checking damp sources: leaking gutters, bridged air bricks, and blocked chimneys.
Then we’ll add breathable insulation where it works best—between joists with wood fibre or sheep’s wool, and on loft slopes with vapour-open boards.
We won’t use foil-backed products on solid brick unless a full hygrothermal design supports it.
Next, we’ll restore Natural ventilation: clear subfloor vents, fit trickle vents where appropriate, and use low-energy extract fans in wet rooms on humidistat timers.
Together, these measures keep the house warm, dry, and welcoming.
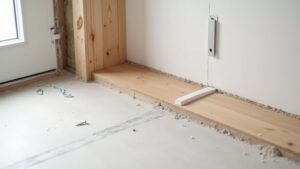
Restore Period Features While Updating Kitchen/Bath
Although a Victorian town house deserves its cornices, fireplaces, and joinery intact, we can still fit a modern kitchen and bathroom without erasing the building’s character. We’ll treat period features as the lead, then layer modern updates discreetly, so the house still feels like ours, not a showroom.
- Keep original doors, skirtings, and architraves; extend profiles with matching timber, not MDF.
- Place services in existing chases and voids; box-in neatly and ventilate, avoiding hacked plaster.
- Choose cabinetry that echoes joinery proportions; use framed fronts and painted finishes.
- In baths, pick traditional-style taps with efficient valves, and use stone or encaustic-look tiles.
We’ll repair, not replace, and we’ll let every new line read as respectful and reversible.
Frequently Asked Questions
Do I Need Planning Permission for Replacing Original Sash Windows?
You might not need planning permission to replace sash windows, but it depends. We’ll check Window regulations, listed status, and conservation areas. For Historical preservation, we’ll match profiles and materials, and confirm with your council.
How Do I Find Reputable Tradespeople Experienced With Victorian Properties?
We’ll find reputable Victorian-experienced trades by checking heritage trust directories, asking conservation officers, and visiting completed local projects. We’ll verify insurance, references, and portfolios showing historical authenticity and skilled craftsmanship, so you’re part of trusted restorers.
What Restoration Work Adds the Most Resale Value in Victorian Townhouses?
We’ll boost resale most by fixing roof, damp, wiring, and plumbing, then restoring original windows, cornices, and fireplaces with Historical accuracy and Material restoration. You’ll also win buyers with efficient heating, tasteful kitchens, and bathrooms.
Can I Live in the House During Restoration, and for How Long?
Yes, you can—at first. We’ll keep you living there for weeks or months if we phase work, protect Interior decorating zones, and maintain Historical accuracy; but once plumbing, electrics, or lead arise, we’ll relocate.
What Insurance Covers a Victorian Townhouse During Major Renovation Works?
We’ll need specialist renovation/builders risk insurance, plus public liability and existing-structure cover; standard home policies won’t. For Historic preservation, add listed-building cover and document works for smoother insurance claims. We’ll review occupancy limits too.
Conclusion
We’ve surveyed the bones, budgeted with a sensible 15–25% “surprise fund,” and chased water from roof to gutter to brick—because nothing says “heritage” like damp. We’ve made it safe with modern electrics, plumbing, and heating, then added insulation and ventilation without trapping moisture. Finally, we’ll restore cornices, floors, and sash windows while fitting kitchens and baths that actually work. Funny how respecting the past demands so much planning.