You don’t need a full renovation to make your home feel better; you just need the right upgrades for your time, budget, and the impact you want. Start with quick wins that suit UK homes: a durable paint finish in high-traffic areas, warmer LED lighting in key spots, and simple draft-proofing around doors and sash windows. Add a tidy drop zone by the front door, then tackle the one change that lifts every room…
Key Takeaways
- Set a realistic budget with 10–15% contingency, then prioritize safety, efficiency, and high-visibility upgrades for the best payoff.
- Refresh rooms with well-prepped paintwork, choosing colours and finishes to match light levels and traffic for an instant lift.
- Upgrade lighting with modern fixtures and warm or neutral LED bulbs, layering task and ambient light to make spaces feel larger.
- Swap dated hardware and fix small issues—knobs, taps, switch plates, caulked gaps—to modernize rooms quickly with minimal disruption.
- Improve curb appeal fast by weeding, cleaning paving, repainting gates, adding clear house numbers, and using matching planters at the entrance.
Start Here: Choose Upgrades by Time, Cost, Impact
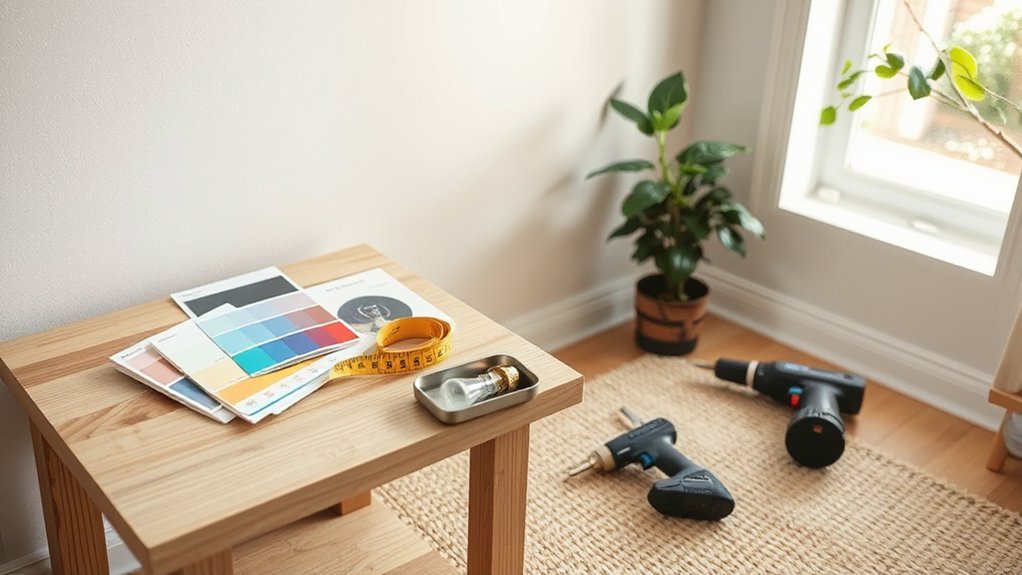
Before you buy anything, decide what you can realistically tackle based on time, budget, and the difference it’ll make to your home. List every idea, then score each for cost, disruption, and payoff for day-to-day use or resale. Use budget planning to set a hard cap, add 10–15% contingency, and note what you can DIY versus what needs a qualified tradesperson.
Next, do project prioritization: tackle safety and compliance first (loose handrails, faulty sockets, dripping waste traps), then efficiency (draught-proofing, LED swaps, radiator bleeding), then visible upgrades like new handles, tap replacements, or better storage.
Check leasehold or listed-building constraints, and confirm any electrical work meets Part P. Buy materials in one trip to avoid delays and delivery charges.
Refresh Walls Fast With the Right Paint and Finish
You can refresh a room in a weekend if you pick the right colour and sheen for the space—matt hides bumps, while durable eggshell or satin works well in busy hallways and kitchens.
Before you open a tin, you’ll get a cleaner finish by filling and sanding dings, washing off grease, and masking skirting boards and sockets.
Then you can cut in neatly, roll in a W pattern, and stick to the right drying times so you’re not repainting patches tomorrow.
Choose Color And Sheen
Although a full repaint can feel like a big job, the right colour and sheen refresh a room quickly and make everyday wear far less noticeable. Use Color psychology: soft greens and warm greiges calm busy living rooms, while pale blues suit bedrooms. North-facing UK rooms read cooler, so pick warmer undertones; south-facing spaces handle crisper whites. Test swatches in morning and evening light under your actual bulbs.
Match finish to traffic and cleaning needs. For Sheen durability, choose matt for ceilings and low-touch walls, but expect scuffs. Go with durable matt or eggshell in hallways and kids’ rooms for wipeable coverage without high shine. Use satin on woodwork to resist marks, and semi-gloss for kitchens and bathrooms where moisture and splashes are common.
Prep And Paint Quickly
Once you’ve chosen your colour and sheen, a fast wall refresh comes down to disciplined prep and the right tools: clear and cover the floor and furniture, wash off grease and grime (sugar soap works well in UK homes), fill dings with ready-mix filler, sand smooth, then dust and spot-prime any bare plaster or stain-prone patches.
For Surface preparation, use low-tack masking tape on skirting boards and a 2-inch angled brush to cut in cleanly.
Your paint selection matters: pick a quality trade emulsion for coverage, and choose matt for imperfect walls or durable washable matt/vinyl for hallways.
Stir thoroughly, decant into a kettle, and roll a “W” pattern with a medium-pile sleeve.
Keep a wet edge, apply two thin coats, and you’ll finish faster with fewer snags.
Upgrade Lighting: Fixtures, Bulbs, and Placement
Next, you can lift the feel of any room by swapping dated fittings for modern light fixtures that suit your ceiling height and existing wiring.
Switch to LED bulbs to cut energy use, choose the right colour temperature (warm for living spaces, neutral for kitchens), and check the lumen output rather than watts.
Then optimise placement by layering ceiling, task, and accent lighting so worktops, desks, and entrances are evenly lit without harsh glare.
Choose Modern Light Fixtures
Where does your home feel dim, dated, or just a bit flat? Swap tired pendants and flush mounts for cleaner-lined fittings that suit your ceiling height and room size. In a low hallway, choose a slim semi-flush; over a dining table, hang a pendant 75–90cm above the top.
Use statement lighting to anchor key zones: a bold pendant in the lounge, a sculptural fitting above the stairwell, or matching wall lights beside the bed. If you love character, mix modern forms with Vintage fixtures, but keep finishes consistent—brushed brass, matte black, or polished chrome—to avoid a jumble.
Check IP ratings for bathrooms, and always use a qualified electrician for new wiring or ceiling roses.
Switch To LED Bulbs
Ever wondered why a room still feels gloomy even after you’ve updated the fittings? Often it’s the bulb, not the fixture. Switching to LED bulbs gives you brighter, cleaner light with far better Energy efficiency than halogen or CFL.
For living areas, pick warm white (2700–3000K); for kitchens and bathrooms, go neutral white (4000K). Check lumens rather than watts: around 800lm replaces an old 60W.
If you’ve got dimmers, buy “dimmable” LEDs and confirm compatibility to avoid flicker. In enclosed shades, choose LEDs rated for enclosed fittings to prevent overheating.
You’ll notice immediate cost savings on your electricity bill, and most quality LEDs last years, so you’ll climb the step ladder far less often too.
Optimize Light Placement
Three quick placement tweaks can make your lighting feel twice as effective without changing a single bulb: layer light at different heights, aim it where you work, and cut shadows.
Start with ambient ceiling light, add task lamps at desks, hobs, and mirrors, then finish with a softer floor or wall light for evenings.
In kitchens, mount under-cabinet strips at the front edge so your hands don’t cast shadows on the worktop.
In lounges, place lamps behind seating to reduce glare on the telly.
In hallways, use wall lights halfway down the run to avoid dark patches.
Maximise Natural light by keeping heavy shades off and checking window placement: shift a reading chair within a metre of the window and angle a lamp across it for cloudy UK days.
Swap Hardware: Pulls, Knobs, Faucets, Switches
Although it’s a small change, swapping tired hardware—cabinet pulls and knobs, taps, and light switches—can modernise a room fast without touching the layout.
Start with Hardware updates that match your finish: brushed nickel for a clean look, matt black for contrast, or aged brass for warmth. Measure existing hole centres (often 96/128mm) so new pulls fit without drilling.
In kitchens and bathrooms, replace mixer taps with WRAS-approved models and check your pipe centres before you buy.
Upgrade switches to slimline plates; in period homes, choose metal or dolly styles that suit the era.
Turn off power at the consumer unit before changing fittings.
These small aesthetic enhancements make everything feel newer, especially in rentals too.
Add Storage Quickly With Hooks, Shelves, and Bins
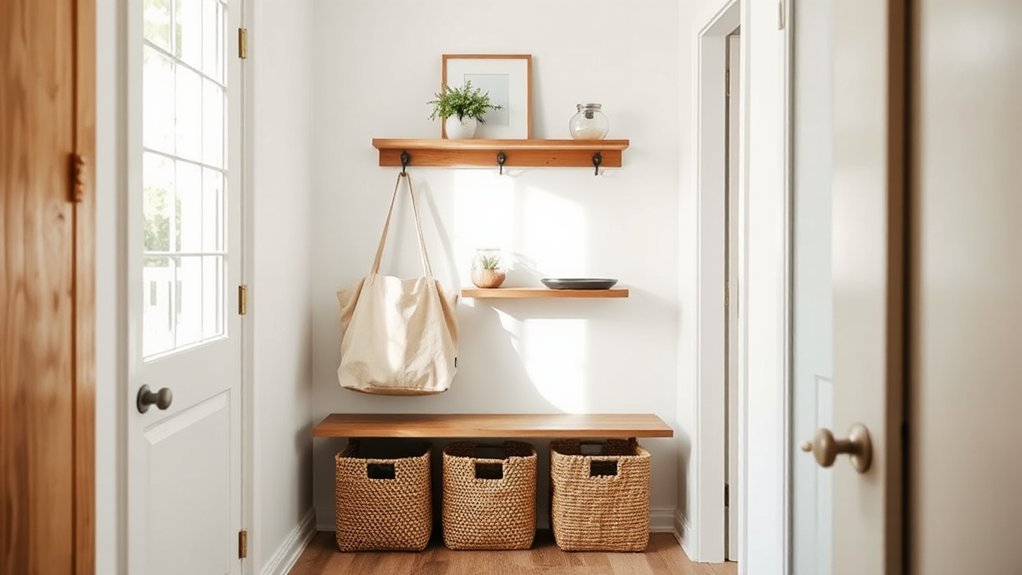
Once you’ve freshened up the finishes with new pulls, taps, and switches, you can make the whole place work harder by adding storage in the spots you actually use.
Fix a row of sturdy hooks by the utility area for brooms, mops, and reusable bags, and you’ll clear floor clutter fast. Add a slim shelf above radiators (with safe clearance) for baskets that corral gloves, chargers, and post—instant Decor organization.
In cupboards, use stackable bins and labelled trays so tins, spices, and cleaning bits don’t disappear at the back. Try adhesive hooks inside doors for tea towels, measuring spoons, or hair tools.
For space maximization, choose vertical solutions: corner shelves, over-door racks, and under-shelf baskets. Keep screws and wall plugs suited to plasterboard or brick.
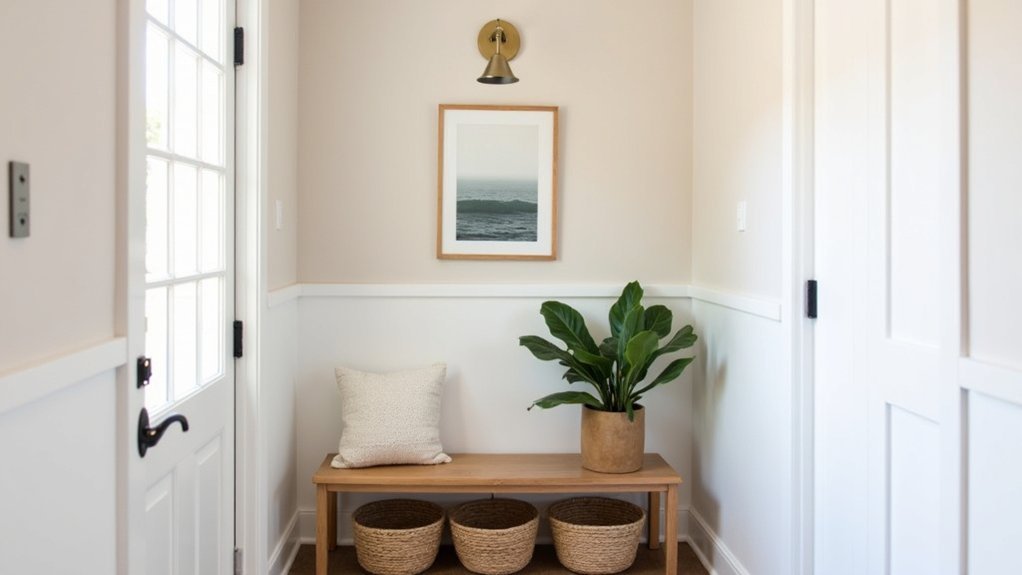
Make Your Entryway Functional With a Simple Drop Zone
If you set up a small drop zone by the front door, you’ll stop keys, post, and bags from drifting across the house. Choose a slim console, wall shelf, or narrow bench that fits a typical UK hallway and keeps the walkway clear.
Add a tray for coins and keys, plus a lidded box for letters so the area looks tidy, not cluttered.
Mount a few hooks at shoulder height for coats and dog leads, and add a small mirror to check you’ve got everything before you leave.
For reliable Entryway organization, label one basket per person and set a weekly emptying routine.
Finish with shoe storage: a closed shoe cabinet, vertical rack, or under-bench cubbies to keep pairs contained and floors clean.
Boost Curb Appeal With Cleanup, Plants, and Numbers
Because the front of your home sets expectations before anyone knocks, start with a quick curb-appeal reset: sweep the path, pull weeds from cracks, and rinse paving with a bucket and stiff brush (or a low-pressure hose where allowed) so moss and grime don’t linger.
Tidy borders, edge the lawn with a half-moon spade, and add a thin gravel top-up for neat outdoor landscaping.
For instant colour, swap tired pots for two matching planters by the door and fill with hardy evergreens or seasonal bedding.
Make driveway enhancements by clearing leaf litter, re-sanding block paving joints, and touching up the gate or fence in a weatherproof satin.
Finally, fit a larger, well-lit house number in a contrasting colour so deliveries find you fast.
Save Energy Cheaply: LEDs, Sealing Drafts, Smart Controls
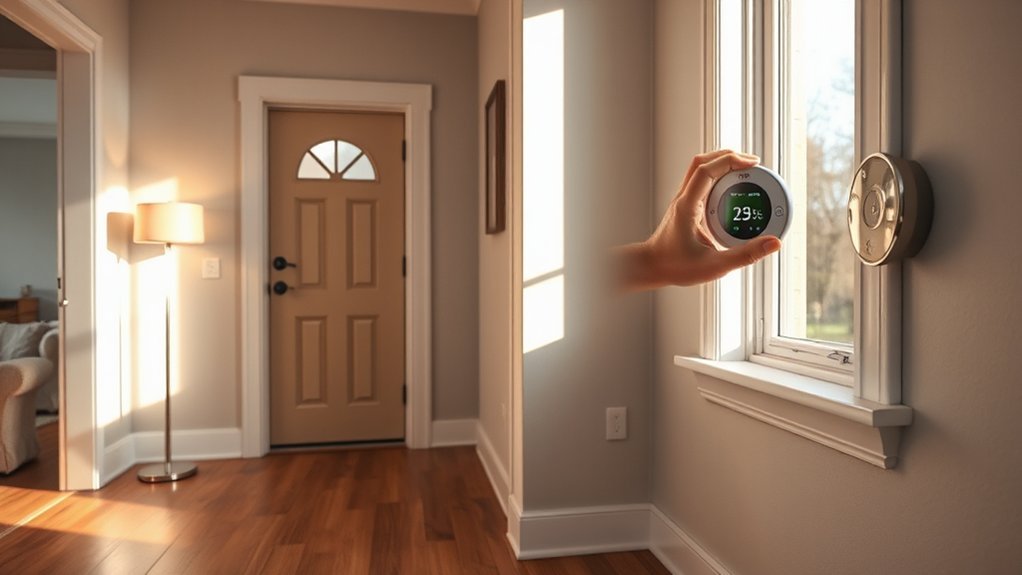
Why pay more for heat and light than you need to? Swap halogen and CFL bulbs for warm-white LED lamps (look for A-rated under the UK label) and you’ll cut lighting use fast.
Next, hunt draughts: fit self-adhesive foam strips to door frames, add a brush strip to the letterbox, and seal skirting gaps with decorators’ caulk. If you’ve got a chimney, use a removable draught excluder when it’s not in use.
Then sharpen control: set your boiler timer properly, drop the thermostat by 1°C, and add smart TRVs so bedrooms run cooler than living spaces.
These energy efficient upgrades are genuinely cost effective solutions that pay back through lower bills, year-round.
Frequently Asked Questions
How Do I Choose Improvements That Increase Resale Value the Most?
You’ll boost resale most by doing a cost analysis and tracking UK market trends: prioritise kitchens, bathrooms, insulation, and kerb appeal; check local sold prices, get three quotes, and avoid over-spec’ing for your postcode.
Do I Need Permits for Small Upgrades Like Replacing Fixtures or Faucets?
You usually don’t need renovation permits for like-for-like fixtures or tap swaps, but you should check your council’s permitting process. If you alter plumbing, electrics, or listed buildings, you’ll often need approval.
What Tools Should Every Beginner Have Before Starting DIY Improvements?
You’ll want a tape measure, spirit level, screwdrivers, adjustable spanner, hammer, utility knife, pliers, drill/driver (Power tools), and bits. Add Safety gear: goggles, gloves, ear defenders. In the UK, buy 13A-rated kit.
How Can I Make Upgrades Renter-Friendly Without Damaging Walls or Surfaces?
Want upgrades without upsetting your landlord? You’ll use Decorative peel and stick wallpaper, Removable adhesive hooks, and freestanding shelves. Choose Command strips, test adhesives on hidden spots, clean with sugar soap, and follow UK deposit rules.
Which Projects Should I Avoid if My Home Has Asbestos or Lead Paint?
Avoid sanding, drilling, cutting, or stripping old plaster, textured coatings, tiles, soffits, or painted woodwork. Don’t DIY Asbestos removal or Lead paint abatement; you’ll risk fibres/dust. Use UKAS testing and licensed UK contractors.
Conclusion
Step back and you’ll feel it: brighter rooms, smoother mornings, and a home that looks cared for. Fresh paint catches the weak UK daylight, while well-placed LEDs lift corners that used to sit in shadow. New pulls and taps turn daily use into something crisp and reliable. Hooks, shelves, and a tidy drop zone stop clutter at the door. Outside, clean paths, bold house numbers, and a few hardy plants quietly raise the whole view.