
You can change how your kitchen feels more by fixing its “visual noise” than by buying new cabinets. Start by setting a tight budget and picking one or two pain points—dark corners, dated hardware, cluttered counters. Then take quick wins: deep clean, swap pulls, upgrade bulbs, and add under-cabinet lighting. If you want the biggest payoff, paint and a peel-and-stick backsplash can shift the whole vibe—but only if you do them in the right order…
Key Takeaways
- Set a realistic budget with a 10–15% cushion, prioritizing functional upgrades like lighting, storage, and work surfaces before style changes.
- Declutter and deep-clean cabinets, backsplash, and counters; discard expired items and reorganize by zones to instantly improve usability and appearance.
- Swap cabinet hardware and upgrade lighting with modern fixtures, efficient bulbs, and under-cabinet LED strips for a fast, high-impact update.
- Refresh with paint on walls or cabinets using proper prep and primer; choose timeless neutrals or one bold accent color for maximum effect.
- Add peel-and-stick backsplash or refinish existing countertops, then update small fixtures like faucets, drains, and sink accessories to modernize without demolition.
Set Your Kitchen Refresh Budget and Priorities
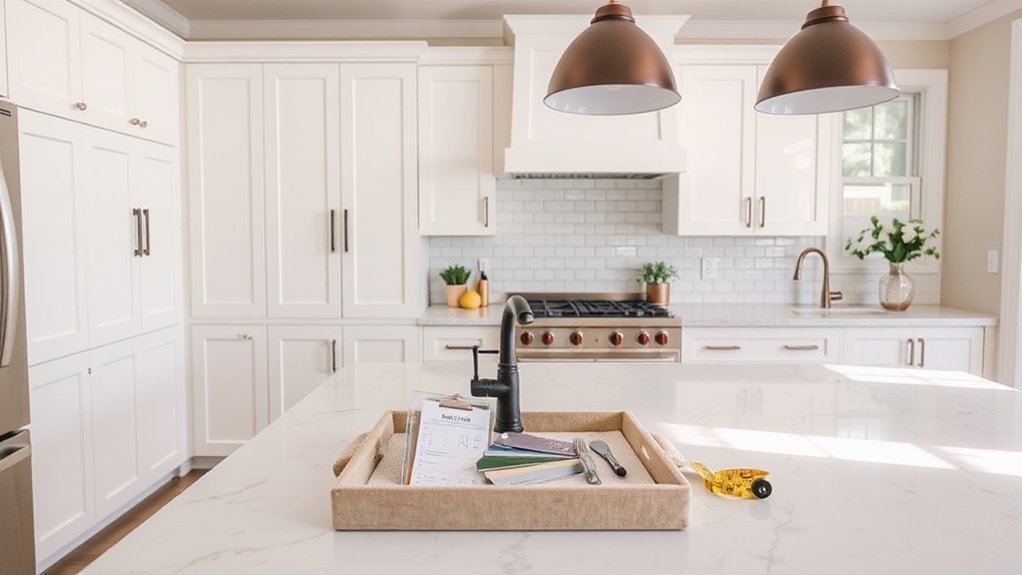
Before you start swapping hardware or ordering paint samples, set a clear budget and decide what matters most in your kitchen. Treat this as Budget planning: pick a realistic number, then add a 10–15% cushion for surprises like extra trim, delivery fees, or tools.
Next, do Priority setting by ranking upgrades that change daily function first—lighting quality, storage pain points, and worn work surfaces—then style updates like pulls, faucets, or a fresh backsplash.
Measure and list what you already have so you don’t buy duplicates. Compare high-impact, low-cost options (LED under-cabinet strips, peel-and-stick tile, contact paper) against pricier splurges.
Keep a running spreadsheet, track unit costs, and stop when you hit your cap.
Start With Quick Wins: Declutter and Deep Clean
In 60 minutes, you can make your kitchen feel newer for almost zero dollars by decluttering and deep cleaning. Start by clearing counters and putting away anything you don’t use daily. Toss expired spices, recycle duplicates, and corral loose packets into one bin so surfaces look intentional, not chaotic.
Next, use smart Organizational strategies: group by zone (coffee, prep, baking), store like with like, and label one “drop zone” tray for mail and keys.
Then hit high-impact grime: wipe cabinet fronts, degrease the backsplash, and scrub sink and faucet until they shine.
For Eco friendly cleaning, mix dish soap with warm water for grease, use vinegar on glass, and finish with baking soda for stuck-on messes.
Your kitchen will look brighter, calmer, and current.
Swap Cabinet Hardware for an Instant Update
Swap your cabinet hardware for a fast, budget-friendly upgrade that can make your whole kitchen feel current.
You’ll get the best result by choosing finishes that complement your faucet and lighting, then updating knobs and pulls for a consistent, modern look.
Measure twice and install carefully so everything lines up cleanly and you avoid extra holes or wasted hardware.
Choose Complementary Finishes
When you want your kitchen to feel current without touching the layout, updating cabinet hardware delivers a fast, affordable finish upgrade. To make it look intentional, choose complementary finishes that echo what’s already in the room.
Start with your faucet, lighting, and appliances, then pick one primary metal and one accent. Warm brass plays well with wood tones; matte black sharpens white cabinets; brushed nickel bridges mixed stainless.
Aim for material pairing that repeats twice—like brass on lighting and hardware—so it reads cohesive. Use texture contrast for depth: pair a satin metal with a lightly hammered or knurled surface, or mix matte and brushed rather than glossy.
Keep your palette tight to avoid visual noise and stay within budget.
Update Knobs And Pulls
Because your cabinets dominate the visual field, new knobs and pulls can refresh the entire kitchen in an afternoon without touching a single door.
Start by matching scale: longer pulls modernize wide drawers, while compact knobs suit uppers and tight spaces.
For a trend-aware look, mix finishes thoughtfully—matte black with warm brass, or brushed nickel with soft champagne tones—so it feels curated, not chaotic.
If you want character on a budget, hunt for Vintage accents like glass knobs, aged bronze bin pulls, or porcelain dots, then balance them with simpler pieces elsewhere.
Choose decorative accents only where you’ll notice them most, such as the island or pantry.
Buying multi-packs and sticking to one style keeps costs down and makes the change feel intentional.
Install Hardware Carefully
How you install new cabinet hardware matters just as much as the finish you choose—crooked pulls or mismatched hole spacing can make even pricey pieces look cheap. Start by measuring your existing center-to-center spacing and buy pulls that match, or plan to fill and re-drill.
Use a cardboard or acrylic jig so every handle lines up fast and looks designer. Mark holes with painter’s tape, then pre-drill to prevent splitting, especially on MDF.
For hardware installation, tighten screws by hand; power drivers can strip threads and scar finishes. Test-fit one door first for precision fitting, then repeat on the rest.
If you’re mixing metals, keep shapes consistent so the look feels intentional, not accidental.
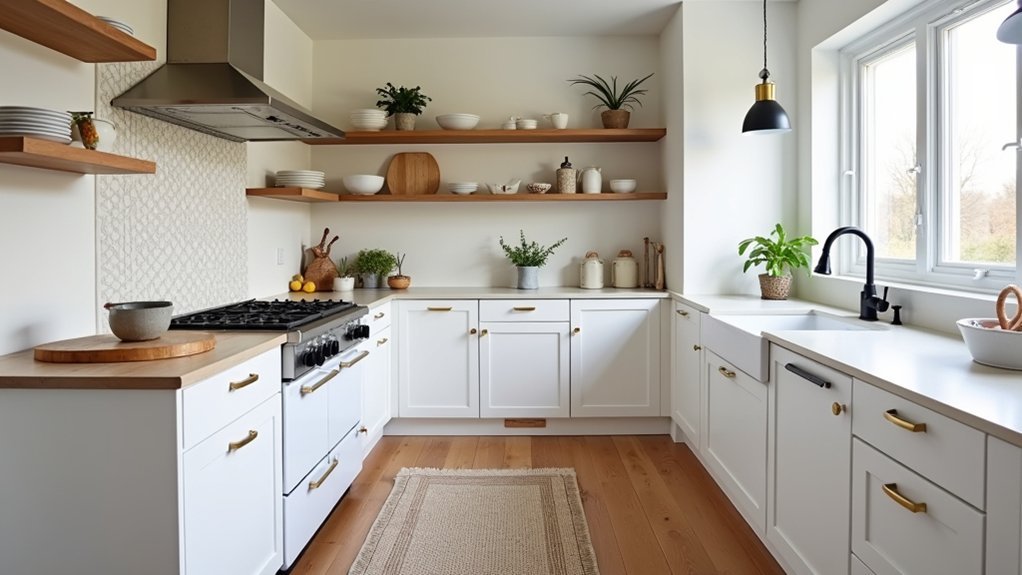
Upgrade Kitchen Lighting (Bulbs, Fixtures, Under-Cabinet)
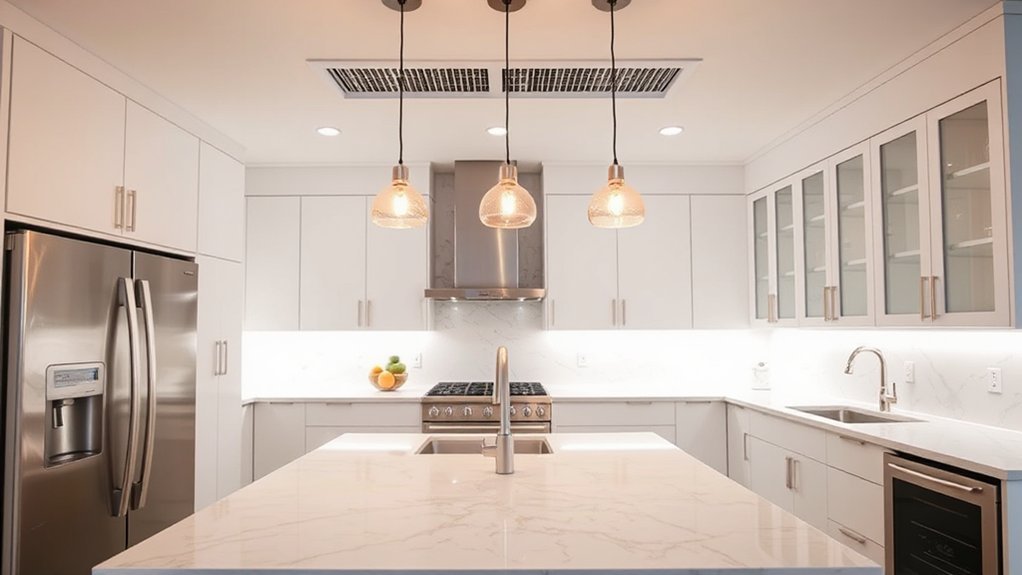
Even if you don’t change a single cabinet, upgrading your kitchen lighting can make the whole space feel newer, brighter, and more expensive. Start by swapping in energy efficient bulbs (look for warm-white 2700–3000K) to reduce glare and make counters look cleaner.
Add smart lighting in key zones—pendants, recessed cans, or a main flush mount—so you can dim for dinner and brighten for prep without rewiring.
Next, update dated fixtures with simple matte black, brushed brass, or clean nickel styles that match your hardware.
Finally, install under-cabinet LED strips or puck lights to eliminate shadows on work surfaces. Choose plug-in kits if you want the easiest, renter-friendly upgrade today.
Paint Walls or Cabinets for the Biggest Change
If you want the biggest visual change for the least money, paint your walls or cabinets in a high-impact color—think warm off-whites, muted greens, or deep navy for a modern look.
You’ll get the best results by prepping properly: clean and degloss, sand lightly, then use a bonding primer and durable cabinet enamel.
Pick the right roller and brush, work in thin coats, and you’ll end up with a smooth finish that looks custom, not rushed.
Choose High-Impact Colors
When you want the biggest visual change for the least money, high-impact color delivers fast. Use color psychology to set the mood: soft greens and warm whites feel calm and clean, while deep navy or charcoal reads modern and hides scuffs.
If your kitchen lacks sunlight, choose lighter, warmer tones to keep it from feeling flat.
Decide where color works hardest. Paint walls for a quick reset, or go bold on cabinets to create a focal point. For cost control, limit strong hues to one main surface and keep everything else neutral.
Practice smart color coordination by sampling with peel-and-stick swatches, then matching undertones to countertops, floors, and backsplash. You’ll get a cohesive look without replacing anything.
Cabinet Painting Techniques
Because cabinets dominate your sightline, a well-planned paint job can modernize your kitchen faster—and cheaper—than most upgrades. For Cabinet painting, start with a deep clean, degloss, and a bonding primer so the color won’t chip when life gets busy. Spray for the smooth, new-build look, or use a microfiber roller and high-quality angled brush for crisp edges on a budget.
Choose trend-proof tones—warm whites, greige, or muted sage—and swap hardware after paint cures.
- You’ll feel instant “new kitchen” pride
- You’ll ditch dated oak regret
- You’ll love how light bounces brighter
- You’ll relax knowing it’s DIY-friendly
- You’ll smile at the money you kept
Finish with Finishing techniques: sand between coats, add a durable topcoat, and cure patiently.
Style Open Shelves and Counters With Intention
Although open shelves and bare counters can make a kitchen feel bigger and more modern, they’ll only look polished if you style them with a clear plan. Start by editing: keep daily dishes and donate duplicates.
For Open shelving styling, group items in threes, vary heights, and stick to a tight palette—whiteware plus one accent color reads curated, not cluttered. Mix in one budget-friendly “soft” element like a small plant or linen tea towels to warm up hard surfaces.
For an intentional counter arrangement, limit what lives out: coffee setup on a tray, cutting board leaned behind, and a single utensil crock near the stove. Hide the rest in drawers.
Leave one clear landing zone for prep so your kitchen feels fresh and functional daily.
Add a Peel-and-Stick Backsplash (No Demo Needed)
If you want the look of a fresh tile wall without the mess or price tag of a remodel, peel-and-stick backsplash panels deliver fast impact with zero demo. You’ll clean, measure, and apply in an afternoon, instantly sharpening your kitchen’s style. Choose matte subway, zellige-inspired gloss, or warm stone looks—today’s peel and stick tiles feel surprisingly upscale for the cost.
Use an Adhesive backsplash to hide minor wall flaws and create a cohesive focal point behind your range or sink area.
- You’ll feel proud seeing a “new” kitchen by dinner
- You’ll breathe easier skipping dust, noise, and contractors
- You’ll get a trendy look without the guilt of overspending
- You’ll enjoy easy wipe-downs after splatters
- You’ll love the peel-off option if tastes change later
Refresh Countertops, Faucets, and Sinks Without Replacing
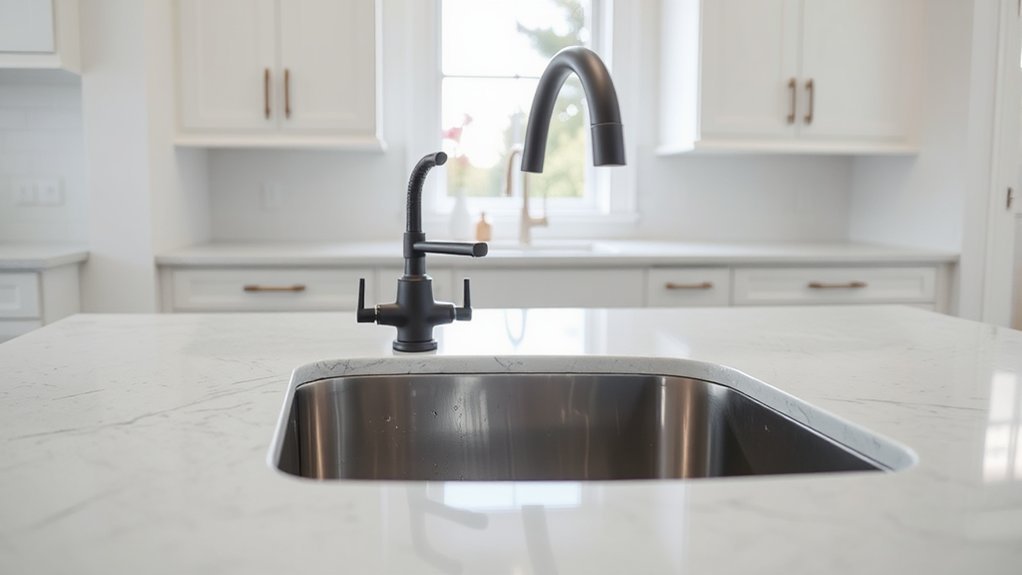
When your kitchen looks tired but your budget says “not today,” you can still get a high-end refresh by updating what you touch most: the counters, faucet, and sink—without ripping anything out.
Clean and re-seal stone, degloss laminate, or use a countertop refinishing kit to mimic popular countertop materials like quartz or concrete for a fraction of the cost. Swap in a slim, low-profile sink grid and a new drain cover to make the basin look newer.
Next, change the vibe with faucet styles that feel current: matte black, brushed brass, or stainless with a pull-down sprayer. If your sink’s sound and you hate the color, refinish it with an epoxy coating.
Finish with fresh silicone caulk and a deep scrub for instant polish.
Frequently Asked Questions
What Refresh Projects Add the Most Value When Selling a Home?
You’ll add the most value by updating Kitchen lighting, swapping cabinet hardware, painting walls and cabinets, and upgrading faucets. You’ll also boost appeal with new countertops or a clean backsplash, and professional deep cleaning.
How Can I Refresh a Kitchen if I Rent and Can’T Make Permanent Changes?
Nearly 60% of renters say peel-and-stick upgrades boost satisfaction—so you can refresh fast without drilling. Use removable wallpaper for a backsplash, apply countertop decals, swap hardware, add lighting, and style with rugs, plants.
What Are the Safest DIY Upgrades for Beginners With Limited Tools?
You’ll stay safest with peel-and-stick backsplash, swap-in hardware upgrades, and no-drill lighting. Try beginner paint techniques like cabinet touch-ups and removable wallpaper. Use a screwdriver, level, and painter’s tape; skip plumbing, gas, rewiring.
How Do I Coordinate Kitchen Updates With Adjacent Open-Concept Rooms?
You coordinate updates by repeating Color coordination across sightlines: match undertones in paint, flooring, and hardware. Tie rooms together with Lighting enhancements—consistent temperature, fixtures, and dimmers. Stick to one metal finish, budget-friendly.
What Mistakes Make a Kitchen Refresh Look Cheap or Unfinished?
If your kitchen screams “bargain bin,” you’ve likely skipped prep: sloppy Cabinet painting, mismatched sheens, cheap hardware, and rushed caulk lines. Half-done backsplash updates, wrong grout color, and poor lighting choices also leave it looking unfinished.
Conclusion
You don’t need a wrecking ball to get a new kitchen—just a few smart sparks. Set your budget like a compass, then clear the clutter and scrub until the room feels lighter. New hardware works like fresh jewelry, while better lighting flips the “after” switch. Paint gives you the biggest mood shift for the least cash. Style shelves with purpose, add peel-and-stick tile, and refresh faucets or countertops to make the whole space hum.


