You can make your home feel newer in a weekend by tackling high-visibility fixes. Start by decluttering entry, counters, and main surfaces, then assign simple “homes” with labeled bins and a key tray. Swap dated bulbs for 800–1100-lumen LEDs (3000–4000K), update cabinet pulls and door hardware, and touch up trim with semi-gloss paint after caulking gaps. Rearrange furniture for 30–36-inch walkways, deep-clean floors, and refresh curb appeal with edging, mulch, and clean lighting. Keep going for more quick wins.
Key Takeaways
- Declutter high-impact zones first, then assign labeled storage homes so counters and surfaces stay clear.
- Refresh walls, trim, and doors with light neutral paint; caulk gaps and patch holes for a clean, new-home look.
- Upgrade lighting with bright neutral LEDs and layered lamps; replace dated fixtures and bulbs for instant modern brightness.
- Swap small hardware like cabinet pulls, faucets, and doorknobs to update style quickly without construction.
- Boost curb appeal in an afternoon by edging, mulching, cleaning the entry, updating house numbers, and improving exterior lighting.
Start With High-Impact Weekend Upgrades (Cost/Time)
If you want noticeable results without committing to a full remodel, start with weekend upgrades that deliver the biggest visual and functional payoff for the least money and time. Begin with Budget planning: set a hard cap, price materials first, and reserve 10% for surprises. Refresh high-traffic rooms by swapping cabinet pulls, updating faucets, and installing a modern light fixture; you’ll change the feel fast with minimal tools. Patch nail holes, caulk gaps, and repaint trim in semi-gloss for crisp lines. Improve comfort by adding weatherstripping, a smart thermostat, and LED bulbs. Use timeline management: batch store runs, stage tools, and schedule drying or cure times so you’re not waiting. Finish with a deep clean of surfaces and floors for instant polish.
Declutter First: The Fastest Visual Upgrade
Start by decluttering the high-impact zones you see and use every day—entryway, kitchen counters, living-room surfaces—because clearing these areas changes your home’s look fastest. Sort every item into four categories: keep, relocate, donate/sell, or toss, and don’t let “maybe” piles linger. Then assign what you keep a simple storage home (a labeled bin, a tray, or a drawer section) so the clutter doesn’t creep back.
Start With High-Impact Zones
Before you buy anything or move a single piece of furniture, tackle the high-impact zones that shape your first impression—your entryway, living room surfaces, and kitchen counters—and declutter them aggressively. Clear the landing strip: leave one tray or bowl for keys, one hook for bags, and nothing else. On coffee tables and consoles, keep only a lamp, one book stack, and a small plant; store remotes in a lidded box. In the kitchen, reset counters to essentials: coffee maker, soap, and one cutting board. This creates instant breathing room and makes furniture arrangement feel intentional, not crowded. It also tightens color coordination because fewer objects compete. Finish by wiping surfaces, aligning items, and removing anything that doesn’t support daily use.
Sort Using Four Categories
Once you’ve cleared the obvious hotspots, speed up the rest of your decluttering by sorting every item you touch into four categories: keep, relocate, donate/sell, or toss. Keep only what you use or truly like; everything else creates visual noise. Relocate means it belongs in another room—carry a bin with you and do one drop-off loop when you’re done. Donate/sell anything in good condition that you wouldn’t buy again today; these quick exits free space for Budget friendly decor upgrades that actually show. Toss broken, expired, stained, or duplicate items without debate. Set a 20-minute timer, start at one surface, and touch items once. Finish by resetting the area with fewer, cleaner lines and room for Seasonal updates.
Create Simple Storage Homes
After you’ve pared down what you own, give every remaining item a simple “home” so clutter doesn’t creep back in. Start with high-traffic zones: entry, kitchen, bathroom, and your bedside. Assign one container or drawer per category—keys, mail, chargers, toiletries—and label it so everyone follows the system. Keep the “homes” close to where you use items; distance creates piles.
Use vertical space with creative shelving: slim picture ledges for spices, a rail system for tools, or stackable cubes in closets. Add hidden compartments to solve stubborn messes, like an ottoman that stores throws, a bed frame with drawers, or a toe-kick drawer in the kitchen. Leave 10% empty space in each zone so it stays easy to maintain.
Paint for a Clean, New-Home Feel
After you’ve decluttered, a fresh coat of paint gives your home that clean, new-build look fast. Choose light neutral colors to brighten rooms, then refresh trim and doors for crisp lines that read “finished.” Use low-VOC paint so you get the upgrade without lingering odors and harsh fumes.
Choose Light Neutral Colors
If you want your home to feel instantly cleaner and more “new-build” without tearing anything out, start with light neutral paint. Use color psychology: soft whites, warm greiges, and pale taupes read as bright, calm, and orderly, while masking minor wall flaws better than saturated hues. For shade selection, match the undertone to fixed finishes you can’t change—flooring, countertops, and large tile. Check undertones by holding swatches against those materials in daylight and at night; LEDs can shift neutrals greener or pinker. Choose an eggshell or satin sheen for most rooms so light bounces without highlighting every bump. Paint one large test area per candidate color and live with it for 48 hours before committing.
Refresh Trim And Doors
Because trim and doors sit at eye level and catch the most touch-and-scrape wear, repainting them delivers one of the fastest “new-home” upgrades without changing a single layout. Start by washing grime with a degreaser, then sand lightly to dull the sheen and feather chips. Fill dents, caulk gaps along baseboards, and re-sand for crisp edges. Tape off walls and floors, then prime any stained spots or raw wood so your topcoat levels evenly. For Decorative molding, use a high-quality angled sash brush and “cut in” with steady, continuous strokes to avoid lap marks. For door repainting, remove hardware, lay the door flat, and roll panels first, then stiles and rails. Let coats cure fully before rehanging.
Use Low-VOC Paint
Even though a fresh coat of paint can transform a room overnight, the wrong formula can leave lingering fumes that make your “new-home” update feel anything but clean. Choose low-VOC or zero-VOC paints to reduce off-gassing and protect Indoor air quality, especially in bedrooms, nurseries, and tight hallways. Check the label for VOC grams per liter, and avoid added fragrances that can mask odors without solving them.
Prep like a pro: patch, sand, and vacuum dust so you don’t need extra coats. Use a quality primer on stained walls to block bleed-through, then apply two thin coats with proper dry time. Ventilate with fans and open windows for 24–48 hours. You’ll get durable, Eco friendly finishes without the chemical hangover.
Upgrade Lighting for Instant Brightness

Three lighting upgrades can make your home feel instantly brighter without touching a wall. First, replace dim, warm bulbs with higher-lumen LEDs (800–1100 lumens for most rooms) in a neutral 3000–4000K range, so spaces look clean but not harsh. Second, add smart bulbs to key fixtures and set schedules or scenes; you’ll get brighter mornings, softer evenings, and consistent light without constantly flipping switches. Third, layer in accent lighting: plug-in picture lights, under-shelf LED strips, or a slim floor lamp aimed at the ceiling to bounce light across the room. Use reflective shades and clear globes to reduce absorption. Keep consistent color temperature to avoid patchy light.
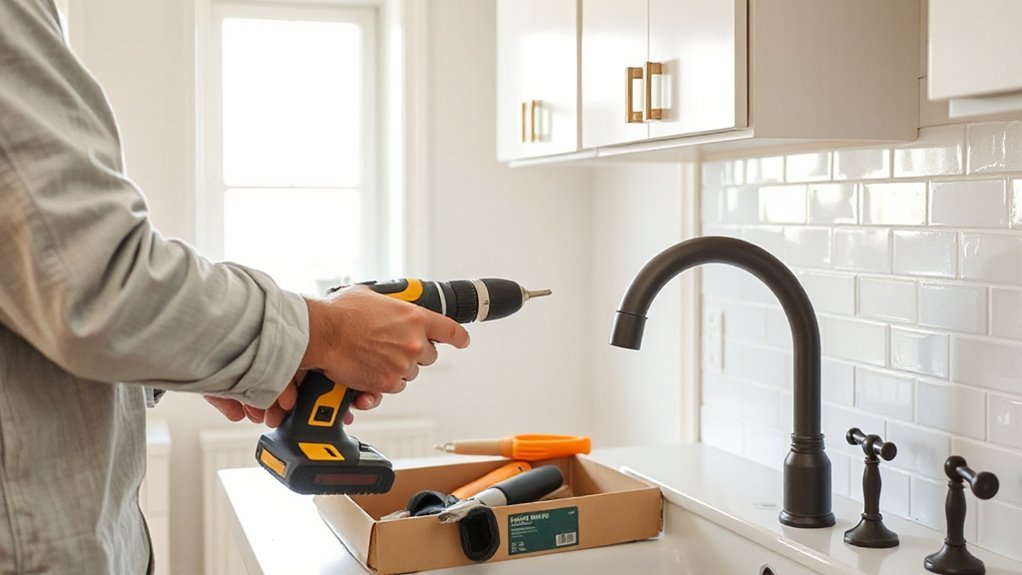
Swap Cabinet and Door Hardware Cheaply
If you want a fast, low-cost upgrade that reads like a renovation, swap your cabinet pulls, knobs, and interior door hardware. Measure your existing hole spacing (center-to-center) before you buy, and stick to matching sizes to avoid patching. Choose one finish throughout—matte black, brushed nickel, or warm brass—to make Hardware updates feel intentional. For doors, replace mismatched knobs and hinges, and upgrade builder-grade latches for a cleaner close. Use a template or painter’s tape to mark screw holes, and hand-tighten first to prevent cross-threading. Keep the old pieces labeled in a bag for future resale or rentals. These Budget swaps deliver daily impact where your hands land most.
Peel-and-Stick Fixes: Backsplash, Trim, Tiles
When you want a cleaner, more finished look without pulling out tools and dust sheets, peel-and-stick materials let you upgrade surfaces in an afternoon. Start with a peel and stick backsplash: degrease with a strong cleaner, dry fully, then measure and dry-fit sheets. Use a level to keep the first row straight, overlap only where the product specifies, and press from the center out to avoid bubbles. Around outlets, cut with a sharp utility blade and reinstall cover plates for a crisp edge. For trim, apply adhesive molding or vinyl cove along uneven seams, then caulk lightly if allowed. For tile accent walls, choose moisture-rated panels, stagger seams, and roll firmly with a wallpaper seam roller for lasting adhesion.
Rearrange Furniture to Improve Flow
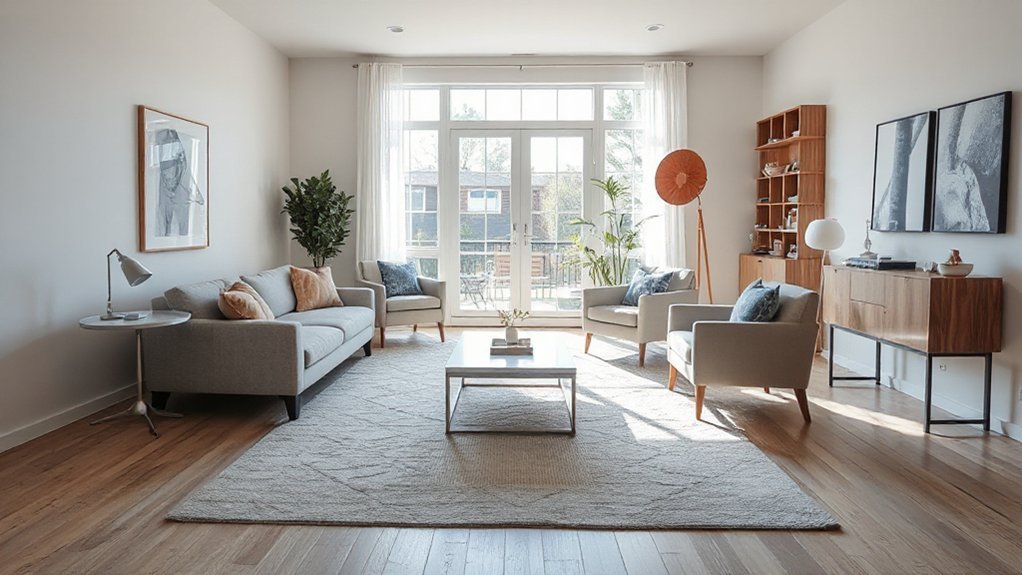
Start by defining clear walkways: you shouldn’t have to sidestep a coffee table or squeeze between chairs to cross the room. Pull pieces off high-traffic paths and keep consistent spacing so doors, drawers, and seating areas function without collisions. Then balance scale and spacing by pairing large anchors with appropriately sized companions and leaving enough breathing room so the layout feels intentional, not crowded.
Define Clear Walkways
Although new paint or décor can refresh a room, you’ll feel a bigger day-to-day difference by defining clear walkways and rearranging furniture to support how you actually move through the space. Start by identifying your primary routes: entry to seating, seating to kitchen, and bed to bath. Clear a consistent path wide enough for you to pass without turning sideways, and keep floors free of cords, baskets, and low tables for better walkway safety. Anchor routes with a runner or lighting so traffic naturally follows them.
Carry the same approach outside. Trim plants back from outdoor pathways, level pavers, and add grit or mats where surfaces get slick. You’ll reduce trips, protect finishes, and make the home feel calmer instantly.
Balance Scale And Spacing
Even if you don’t buy a single new piece, you can make a room feel larger and easier to use by balancing furniture scale and leaving consistent breathing room between items. Start by anchoring the biggest piece (sofa, bed, dining table), then size supporting pieces to match it, not fight it. If your sofa is bulky, choose slimmer chairs or a lighter coffee table to maintain scale balance.
Next, set spacing rules and stick to them. Leave 30–36 inches for main paths, 18 inches between a sofa and coffee table, and 24–30 inches around dining chairs. Pull pieces off the walls when it improves access and proportion. Repeat gaps and align edges so the room reads orderly. That consistency creates spacing harmony and smoother flow.
Add Storage: Hooks, Shelves, and Hidden Bins
When clutter keeps creeping back, you can reclaim usable space fast by adding storage where you already have “dead zones.” Mount sturdy hooks by the entry for bags and coats, install slim shelves above doors or along narrow walls for books and baskets, and slide hidden bins under beds, sofas, or inside ottomans to corral seasonal items. For Hooks organization, place a row at two heights so adults and kids hang items without piling them. Choose shelves with lips or paired brackets for secure loads. For Hidden storage, label bins on two sides and standardize sizes so they stack and swap easily.
- Add a key hook and mail slot by the door
- Use corner shelves in tight rooms
- Store chargers in a lidded box
- Tuck a bin in each closet zone
Refresh Floors Fast: Deep Clean, Rugs, Runners
If your rooms feel tired despite tidy surfaces, start at floor level because it affects the whole space. Begin with Deep cleaning: vacuum edges and under furniture, then mop hard floors with the right cleaner for wood, tile, or vinyl. Spot-treat scuffs with a melamine sponge and rinse so residue doesn’t attract dirt. For carpets, sprinkle baking soda, let it sit, then vacuum slowly in overlapping passes. Add a runner to high-traffic paths to protect flooring and visually guide the room. For Rug maintenance, rotate rugs every season, use a quality pad to prevent slipping and wear, and shake them outside weekly. Blot spills immediately, never rub, and schedule professional cleaning annually for wool or large area rugs.
Boost Curb Appeal in One Afternoon
Fresh floors make the inside feel sharper, but the fastest visible upgrade happens outside at the curb. In one afternoon, you can reset first impressions with simple, high-impact moves. Start by clearing debris, then work from the street inward so you catch what visitors see.
- Edge the walkway and beds, then add fresh mulch for crisp garden landscaping lines.
- Wash the front door and hardware; touch up paint where it’s chipped.
- Swap in a clean doormat, matching house numbers, and a straightened mailbox.
- Check exterior lighting: replace mismatched bulbs, wipe lenses, and aim fixtures to highlight the entry.
Finish by trimming shrubs below windows, watering, and taking one photo from the sidewalk to verify alignment and balance.
Frequently Asked Questions
What Improvements Add the Most Resale Value Without Remodeling?
You’ll add the most resale value by improving curb appeal with Landscaping enhancements, upgrading lighting and hardware, applying fresh neutral paint, and installing Smart technology like thermostats and security. You’ll also deep-clean and stage.
Do I Need Permits for Cosmetic Updates Like Replacing Fixtures?
Most times, you don’t need permits—it’s as simple as flipping a switch—for cosmetic updates like swapping fixtures, paint, or hardware. But you should verify local permit requirements for any electrical, plumbing, or structural work.
How Can I Reduce Noise Between Rooms Without Construction?
You can reduce noise by using Soundproofing techniques: add thick rugs, heavy curtains, and door sweeps, seal gaps with weatherstripping, and place bookcases on shared walls. Use Acoustic treatments like panels and soft furnishings.
Which Upgrades Improve Energy Efficiency Without Changing Windows?
Like a steam locomotive, you’ll save most by tightening the envelope: air-seal gaps, add insulation upgrades in attic/walls, insulate ducts, set smart thermostats, and boost appliance efficiency with ENERGY STAR, heat-pump water heaters.
How Do I Choose a Cohesive Style When Mixing Old and New Pieces?
Choose one consistent palette and repeat two materials across rooms to unify old and new. Anchor antique pairing with simple silhouettes, then add restrained modern accents. You’ll balance scale, limit patterns, and keep finishes consistent.
Conclusion
You don’t need a sledgehammer to make your home feel new—you need a smart checklist. Start by decluttering, then add fresh paint and better lighting to lift every room. Swap dated hardware, rearrange furniture for cleaner flow, and install simple storage like hooks and shelves. Deep-clean floors and anchor spaces with rugs. Finish outside with quick curb-appeal fixes. These small moves stack like compound interest—fast, affordable, and noticeable by Sunday.