You can modernize old doors and trim fast by matching the scope to your time and budget: swap knobs and hinges (verify 2-1/8″ bore and 2-3/8″ or 2-3/4″ backset), then clean, degloss sand (150–180 grit painted, 180–220 bare), and prime with a bonding or stain-blocking primer. You’ll get the crispest look with satin or semi-gloss enamel, tight caulk lines, and filled dents. Keep going for molding, Shaker skins, and thicker casing.
Key Takeaways
- Start by defining scope, budget, and downtime; hardware swaps take hours, while painting, repairs, and new casing can take days.
- Prep surfaces thoroughly: remove hardware, clean, fill dents, sand to degloss, and vacuum profiles before priming for a smooth finish.
- Use the right primer and topcoat: bonding for glossy paint, stain-blocking for tannins, and durable enamel in satin or semi-gloss.
- Modernize quickly with updated hardware: confirm backset and bore size, then choose durable, matching finishes (ANSI/BHMA Grade 2+).
- Upgrade visual impact by adding thicker casing where reveals are uneven or gaps show, using shims, level lines, and clean miters.
Pick a Door-and-Trim Update by Budget and Time

Before you touch a sander or order new casing, pick a door-and-trim update that matches your budget, available hours, and tolerance for disruption. If you’ve got one afternoon, focus on door hardware: swap knobs, hinges, and strike plates, then verify latch alignment and 1/8-in reveal consistency. With a weekend, repair dings with filler, re-caulk to ASTM C920-compatible sealant, and spot-prime to prevent flashing. If you can spare several days, replace casing or add backband; plan for miter-saw setup, dust control, and nail schedule that meets manufacturer specs. Build your scope around paint color selection early so you can order matching primer, trim enamel sheen, and touch-up kits. Always stage one door first and document materials for repeatability.
Decide First: Paint or Stain Your Old Doors
Although you can change your mind later, you’ll get better results if you decide up front whether you’re painting or staining, because each path sets the prep standard, compatible products, and tolerance for defects. Treat paint versus stain as a specification: paint builds a uniform film; stain highlights substrate variation and demands consistency in species, grain, and patching.
- Choose paint when you need maximum defect-hiding, want fast color changes, or must match factory trim profiles.
- Choose stain when you want the wood figure to read, you can accept natural variation, and you’ll commit to a clear topcoat schedule.
- Plan door hardware now: bores, backset alignment, hinge finish, and knob/lever sheen should coordinate with the final sheen and color temperature.
Lock your decision before buying coatings, sealers, or topcoats.
Prep Old Doors and Trim (Clean, Sand, Prime)
Where do most door-and-trim makeovers fail—at the coating stage or in prep? In prep. Start by removing knobs, hinges, and strike plates; bag screws so hardware upgrades go back cleanly. Degrease with a TSP substitute or alkaline cleaner, rinse, and let dry. Vacuum dust from profiles and joints. Repair dents with a paintable filler; spot-seal any knots or stains. Sand to degloss: 150–180 grit for previously painted surfaces, 180–220 for bare wood; feather edges and scuff corners. Wipe with a damp microfiber or tack cloth. Prime based on the substrate: bonding primer over glossy paint, stain-blocking primer over tannins, and a high-adhesion primer on MDF. Primer choice affects paint colors’ accuracy.
Paint Doors and Trim for a Crisp Modern Finish
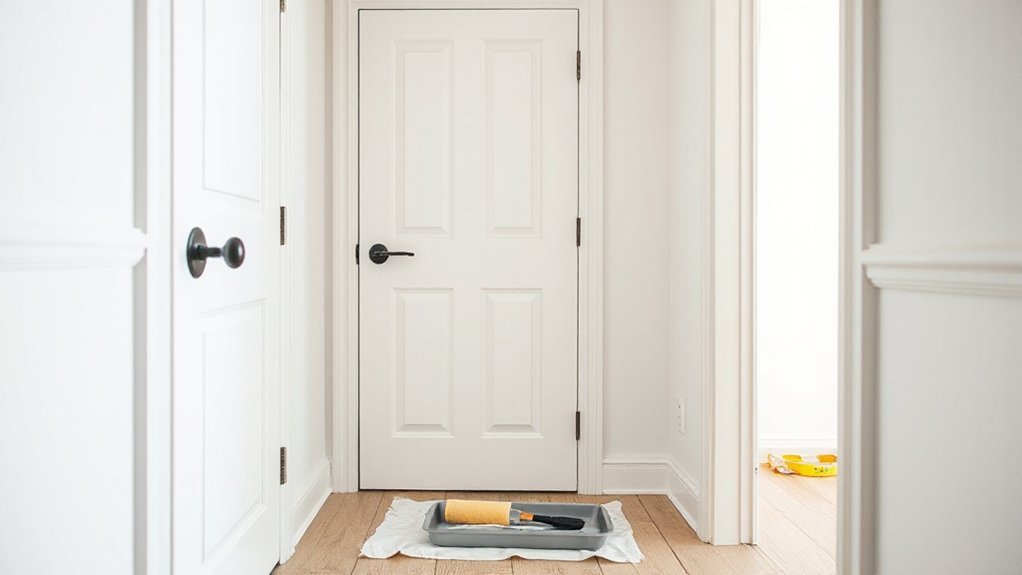
Once your primer cures and you’ve scuff-sanded it smooth, you can lay down a finish coat that reads sharp, flat, and factory-clean. Choose an enamel rated for doors/trim and follow the label for spread rate, recoat windows, and cure time. Apply with a microfiber mini-roller, then tip off with a high-quality nylon/polyester brush to control lap marks and edge build. Use Color theory to coordinate undertones with adjacent walls and flooring; keep sheen consistent to avoid visual “patchiness” across planes. For paint finishes, satin is a modern default; semi-gloss boosts cleanability but highlights defects.
- Control light: higher sheen exaggerates waviness and brush lines.
- Control color: undertones shift under warm vs cool bulbs.
- Control film: maintain wet edge for uniform gloss and hardness.
Stain and Seal Trim to Revive Real Wood
Paint gives doors and trim a uniform, modern skin, but stain lets you keep real wood grain while correcting faded tone and wear. Start by cleaning with a degreaser, then scuff-sand to 180–220 grit and vacuum dust. Spot-repair dents with stainable filler, then test stain on an inconspicuous area to confirm color. Apply conditioner on softwoods to control blotching. Wipe on oil-based or gel stain with a lint-free cloth, keep a wet edge, and back-wipe to even coverage; let it cure per label. Protect the finish with durable sealing techniques: brush or pad on a clear polyurethane, or use waterborne acrylic for low odor. Sand lightly between coats and seal end grain to reduce moisture pickup.
Swap Door Hardware for a Fast Style Upgrade
Because door hardware sits at eye and hand level, swapping it out delivers an immediate style update without touching the door slab or trim. Start by identifying your latch backset (typically 2-3/8″ or 2-3/4″) and bore size (often 2-1/8″) so the new set fits without modification. Choose finishes that match adjacent metals and meet ANSI/BHMA Grade 2 or better for durability in high-use rooms. When you install, align the latch bevel to the strike, torque screws evenly, and verify smooth operation and 1/8″–3/16″ reveal at the jamb.
- Spec first: backset, bore, and hand
- Standardize finish to reduce visual noise
- Test fit, then tighten and re-check latch throw
Add Molding to Upgrade Flat Hollow-Core Doors
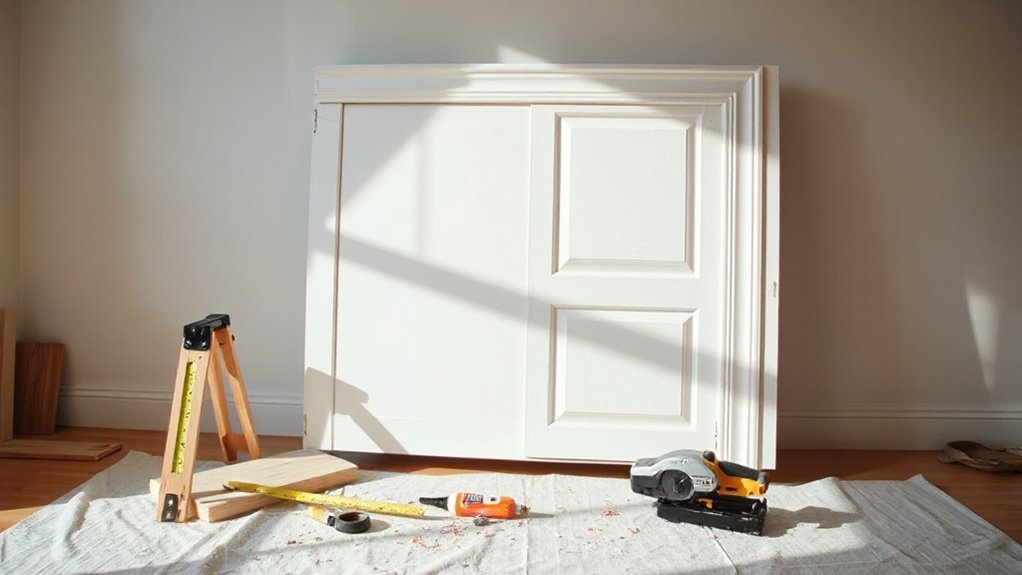
If your hollow-core doors look flat and dated, you can add applied molding to create a true stile-and-rail profile without replacing the slab. Lay out rails and stiles with a story pole so the grid stays square and consistent across doors. Use straight, kiln-dried stock (1/4–3/8 in. thick), miter corners, and pre-fit to avoid telegraphing seams. Bond with construction adhesive rated for wood-to-wood, then pin with 18-gauge brads into the perimeter blocking; avoid the hollow field. Fill, sand to 180 grit, prime, and topcoat. Seal edges and add perimeter weatherstrip for better Door insulation. If the added thickness shifts reveals, plan hinge replacement or shim hinges to restore 1/8-in. margins. Verify latch alignment.
Skin Door Panels With MDF for a Shaker Look
Start by measuring the door face, confirming hinge clearance and knob backset, and laying out Shaker-style rails and stiles with square, centered reveals. Cut MDF stiles and rails to consistent width with straight, chip-free edges, and dry-fit them to verify alignment before adhesive. Attach the panels with construction adhesive and 18-gauge brads or pins, then fill, sand flush, prime MDF edges, and caulk seams for a paint-ready finish.
Measuring And Planning
Before you cut any MDF, measure each door individually and map out a consistent Shaker layout that respects real-world variation in stile-and-rail widths. Use a tape and square to verify slab height, width, thickness, hinge setback, and knob bore location; record to 1/32 in. Snap centerlines and confirm reveals so your applied frames align with existing casing and stop. Plan for paint film build and seasonal movement; keep margins symmetrical and maintain minimum 2 in rail width for visual balance. Decide early on color coordination and hardware selection so rail spacing doesn’t conflict with hinges, latches, or pull height.
- Confirm door swing and clearances at jamb and floor
- Standardize rail/stile widths across the set
- Mark reference edges to prevent mirrored layouts
Cutting MDF Door Stiles
How do you get crisp, consistent Shaker stiles without rebuilding the whole door? You cut MDF strips to exact width and keep every edge dead-straight. Use 1/4-in. MDF for skins; rip stiles on a table saw with a sharp 60–80T carbide blade. Set a repeatable fence stop and run a test strip, then lock settings and cut all pieces in one batch. Support long rips with an outfeed table to prevent taper. Crosscut to length with a miter saw and a stop block, keeping ends square within 1/64 in. Label hinge-side and latch-side parts so you don’t interfere with door hardware. Dry-fit around existing hardware options and mark clearances at hinges and the strike area.
Attaching And Finishing Panels
With your MDF stiles and rails ripped and cut to tight, repeatable dimensions, you can skin the existing door to create flat Shaker panels without changing the core. Dry-fit everything, then scuff-sand the door face to 120 grit for reliable bond. For panel attachment, spread a thin, continuous bead of construction adhesive or wood glue rated for MDF, avoiding squeeze-out at the reveals. Pin with 18-gauge brads as temporary clamps, keeping fasteners 3/8 in. from edges. Check diagonals and sight the face for flatness before the adhesive skins.
- Control moisture: prime MDF edges first to limit swelling.
- Control tolerance: use 1/16 in. spacers for consistent reveals.
- Control finish: seal, sand 220, then topcoat.
Caulk seams lightly, then apply paint per manufacturer mil thickness.
Upgrade Trim With Thicker Casing (When It’s Worth It)
You’ll get the most from thicker casing when your current trim looks undersized for the ceiling height, reveals drywall gaps, or can’t sit flush over uneven jambs. Before you buy, compare linear-foot cost to the visual gain—wider profiles can modernize a room faster than replacing doors, but only if the proportions stay consistent at openings and corners. Plan for installation issues like jamb extensions, back-banding, and out-of-plumb walls, and use shims plus a level line so your reveals stay uniform.
Signs Thicker Casing Helps
Although new paint and caulk can tidy up existing trim, thicker casing makes the bigger difference when the current profiles look undersized, uneven, or out of plane with the wall. You’ll notice it most where jamb reveals vary, corners won’t close, or the casing can’t sit flat because drywall humps or a twisted stud bay pushes it proud. Upgrade when your molding design can’t visually balance wide doors or tall ceilings, or when door hardware reads oversized against narrow trim.
- Reveals exceed 1/8 in. consistently, and you can’t correct them with shims behind casing.
- The face of trim bridges voids, causing nail pull-through or visible caulk joints.
- Miters open after seasonal movement because thin stock lacks stiffness and bearing surface.
Cost Versus Visual Impact
When you compare the dollars to the finished look, thicker casing often delivers the highest “perceived upgrade” per linear foot because it corrects reveal inconsistencies and adds shadow lines that read as higher-quality trim work. For cost control, price the upgrade by total openings, not by board-foot: measure each side and head, then add 10% waste. Use budget considerations to decide where it counts—main hallways, living areas, and any door you see from multiple angles. In secondary rooms, you can keep existing casing and still meet typical 1/8-inch-to-3/16-inch reveal norms at the jamb. If you’re replacing doors, thicker casing can visually rebalance wider slabs and taller headers, increasing visual appeal without changing wall finishes substantially.
Install Challenges And Tips
Bigger casing pays off visually, but it also tightens the install tolerances around every opening. You’ll need flatter jambs, cleaner reveals, and consistent miters; otherwise the thicker profile telegraphs every defect. Start by verifying jamb-to-drywall offsets and shim to a straight plane before you cut. Cope inside corners when possible, and preassemble head-and-legs to control square.
- Set a uniform 3/16-in reveal with a story stick, then check hinge-side plumb.
- Confirm hardware selection won’t bind: thicker casing can crowd strike plates, door stops, and backset clearance.
- Account for moisture effects by acclimating stock, sealing end grain, and leaving hairline caulk gaps at outside corners.
Use 15–16 ga nails into framing, and back-prime MDF or finger-jointed pine.
Fix Dents, Gaps, and Caulk for Clean Lines
Before you paint or rehang anything, repair the dents, gaps, and failed caulk that telegraph through a finish and make trim lines look wavy. Start with dents removal: set popped nails, then steam shallow dents with a damp cloth and iron, or fill with two-part wood filler for edges and corners. Sand flush to 180–220 grit and vacuum dust. For gaps under 1/4 inch, use backer rod or wood slivers first; don’t bridge wide voids with caulk alone. Prime raw filler and exposed wood to prevent flashing. For Caulk application, cut the tip small, gun a consistent bead, and tool it within the open time. Use paintable acrylic-latex; use silicone only where you won’t paint. Let it cure fully.
Frequently Asked Questions
Do I Need a Permit to Replace Interior Doors or Trim?
You usually don’t need a permit to replace interior doors or trim, but verify local building codes and Historical regulations. If you alter framing or egress, you’ll need one. Follow DIY safety and manufacturer standards.
How Do I Update Doors and Trim Without Disrupting Lead Paint?
You’ll update doors and trim by encapsulating paint: clean, degloss, then prime and repaint; avoid sanding. For Lead paint removal, don’t disturb surfaces—hire certified pros. Follow Safety precautions: HEPA vacuum, wet methods, containment.
What Paint Sheens Best Hide Imperfections on Old Doors and Trim?
Choose satin or eggshell; they’re practically magic at hiding Surface imperfections in old doors and trim. Paint finishes: flat hides most but scuffs; semi-gloss highlights flaws. Follow manufacturer specs for durability, washability.
How Can I Reduce Noise With Upgraded Doors and Trim?
You’ll cut noise by sealing gaps with perimeter gaskets and an automatic door sweep, then upgrading to solid-core doors. Add soundproofing techniques like caulked backer rod, and insulation materials like mineral wool around frames.
What’s the Best Way to Fix Sticking Doors After Trim Updates?
Start with Door hinge adjustments: tighten screws, shim or mortise hinges, and verify reveal per standard clearances. Plane or sand binding edges, then seal raw wood. For Paint peeling prevention, prime, allow cure, and lubricate.
Conclusion
You’ve treated your doors and trim like a house’s compass: once you true them, every room points cleaner and brighter. If you chose paint, you’ve built a uniform film over a sound, primed substrate; if you chose stain, you’ve restored grain, then locked it in with a compatible seal coat. By fixing dents, caulking gaps, and adding molding or MDF panels to spec, you’ve turned tired lines into crisp, code-ready finishes.