You don’t get “perfect” marble by luck—you get it by controlling basics most people skip. You check subfloor flatness to within 3mm over 2m, then grind highs and smooth lows instead of buttering out with extra adhesive. You test screed moisture with in-situ RH or CM tests and only fix within adhesive limits. You dry-lay to match veining to room light, plan shifts for 10–12mm build-up, and minimise lippage with sane grout widths. There’s more you can tighten up next.
Key Takeaways
- Marble needs an exceptionally flat subfloor: no more than 3mm deviation over 2m to prevent lippage, cracking, and uneven sealing.
- Moisture must be tested with RH probes or CM tests; “dry to the touch” can still exceed adhesive limits and fail.
- Dry-laying and vein matching under real lighting prevents tone shocks; mark tile backs for consistent vein direction before fixing.
- Thickness build-up at thresholds is often underestimated; plan transitions, door clearances, and subfloor deflection control to avoid cracks.
- Grout width and edge profiles affect appearance and maintenance; pre-seal, grout carefully, then seal again to reduce staining and etching.
Subfloor Flatness for Marble Tile (Real Tolerances)

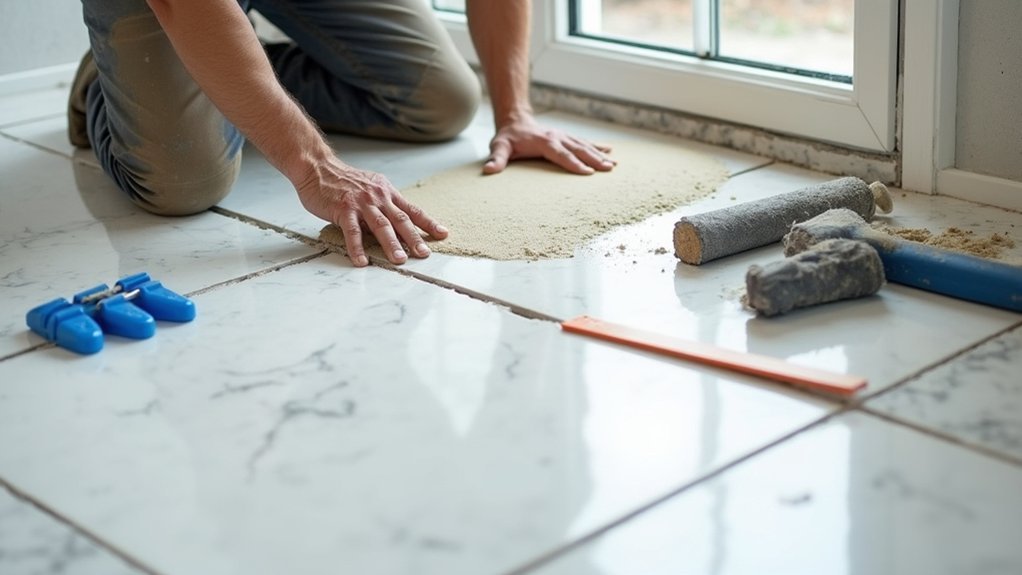
Before you even think about adhesive, you need to confirm the subfloor is genuinely flat, because marble won’t tolerate the dips and humps that ceramic might hide. In UK practice, aim for no more than 3mm deviation over 2m, checked with a 2m straightedge in multiple directions and across door thresholds. Mark highs and lows, then correct highs by grinding and lows with a suitable smoothing compound; don’t “butter it out” with extra adhesive because you’ll telegraph lippage and crack risk. Keep edges level at junctions and plan movement joints so stress doesn’t build. Once it’s flat, your Marble sealing performs predictably. For Maintenance tips, flat tiles mean fewer exposed edges, less chipping, and easier cleaning.
Moisture Testing Before Marble Flooring (What Passes, What Fails)
Although marble looks impervious once it’s sealed, it’s highly sensitive to moisture coming up from a screed or concrete slab, so you need moisture test results that actually meet the adhesive and stone manufacturer’s limits. In the UK, you’ll typically use an in-situ RH probe (BS 8203/8204 context) or a carbide (CM) test; don’t rely on surface “dry” feel.
- Pass if in-situ RH is within the adhesive spec (often ≤75% RH; some systems allow 85%)
- Fail if RH is over limit, or readings vary widely across bays
- Pass if CM % is within screed type limits (confirm with supplier)
- Fail if DPM is missing/compromised or moisture rises after heating cycles
- Before Marble sealing, confirm dryness; it’s one of the best maintenance tips you’ll follow
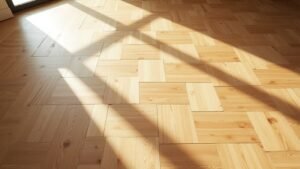
Marble Tile Layout: Vein Matching and Light Direction
Once you’ve confirmed the base is genuinely dry, plan your marble tile layout around vein direction and how natural and artificial light will rake across the floor, because both will change what you see day to day. Dry-lay several boxes first, under site lighting, and mark arrows on the backs so the veining runs consistently or deliberately book-matched.
In UK homes, side light from bay windows exaggerates lippage and highlights Marble coloration shifts between tiles. Keep grout joints uniform, and avoid placing darker or busier pieces at door sightlines unless you want a focal strip. Rotate tiles to minimise abrupt tone jumps, not just vein clashes. Photograph your proposed layout and get sign-off before fixing. As maintenance tips, seal after installation and use pH-neutral cleaners to prevent etching that makes veining look patchy over time.
Marble Tile Thickness: Transitions, Deflection, and Doors
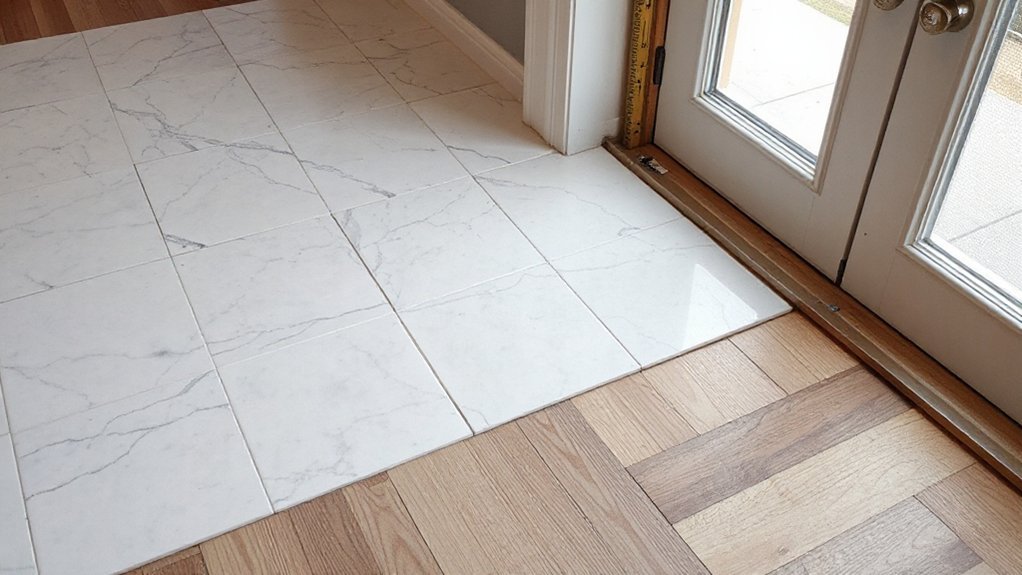
Your vein matching can look spot-on under site lighting, but tile thickness will still make or break how the floor feels underfoot and how cleanly it meets adjoining finishes. In UK refurb work, 10–12mm marble plus adhesive can sit proud of LVT or engineered boards, so you’ll need planned progressions and door tweaks. Check subfloor stiffness: excessive deflection cracks stone and loosens bonds, so meet BS 5385 expectations and stiffen joists or use decoupling where needed. Don’t forget thresholds and clearances before Marble sealing, and pick cleaning techniques that won’t drive grime into height breaks.
- Measure build-up at every doorway
- Allow for progressions strips or feathered screed
- Plane or rehang doors for clearance
- Verify joist span/deflection before tiling
- Keep expansion gaps at perimeters and upstands
Lippage, Grout Width, and Edge Choice for Marble
Because marble reflects light so sharply, even minor lippage and sloppy grout lines read as defects, not “character”, so you’ve got to set tolerances and detailing before the first tile goes down. Use a straightedge and aim for minimal lippage; keep the substrate flat to BS 5385 expectations and back-butter to control bed thickness. Pick a grout width that suits tile calibre: 2–3 mm for rectified, 3–5 mm for tumbled or variable edges, allowing for Color variation and slight size differences. Don’t force tight joints if the batch isn’t consistent. Edge choice matters: eased edges hide micro-lippage; sharp arrises exaggerate it and chip. Pre-seal faces and edges with appropriate sealing techniques, then seal again after grouting.
Frequently Asked Questions
What Marble Finish Is Safest for Wet Bathrooms and Entryways?
Choose a honed or lightly textured marble finish; it boosts slip resistance in wet bathrooms and entryways. You’ll still weigh Marble color options and installation cost considerations, since sealing, anti-slip treatments, and labour rates vary UK-wide.
How Do I Seal Marble, and How Often Should It Be Resealed?
For Sealing marble, you’ll clean, dry, then apply a UK-approved impregnating sealer with a microfibre applicator, buff off excess. You’ll reseal every 1–3 years, sooner if water darkens. Marble polishing won’t replace sealing.
Can Marble Be Installed Over Radiant Floor Heating Systems?
Yes, you can install marble over radiant heating, but you must use decoupling membranes, flexible adhesive, and controlled heat-up per UK standards. Follow Marble installation tips, and plan Marble maintenance to reduce thermal cracking.
What Cleaners Should I Avoid to Prevent Etching and Dullness?
Avoid acidic cleaners (vinegar, lemon, limescale removers), bleach, ammonia, abrasive powders, and harsh degreasers—they’ll etch marble insanely fast. For Marble cleaning, use pH‑neutral stone soap; follow Maintenance tips: blot spills, rinse, dry.
How Do I Repair Scratches, Chips, or Etch Marks After Installation?
You’ll handle etch marks with Marble polishing powder and a damp felt pad; tackle Scratch repair using progressively finer wet-and-dry abrasives. Fill chips with colour-matched epoxy, then hone and seal. Call a UK stone restorer for deep damage.
Conclusion
You’ve seen that marble flooring isn’t just “lay and pray”; it’s precision work. You check subfloor flatness to real tolerances, test moisture so the stone doesn’t drink trouble later, and plan layout so veins and light run like a well-drawn map. You mind thickness for thresholds, deflection, and door swings. Finally, you control lippage with sensible grout widths and edge choices—because in the UK, finish is your signature.