How to refresh your home’s exterior without major work, Start with a 15-minute walkaround, then rank fixes by safety, water intrusion, and curb appeal. Clean top-down: rinse siding, scrub algae with mild detergent, wash windows, degrease walkways, and clear gutters and downspouts. Scrape and sand peeling spots, re-caulk trim gaps, prime bare wood, and feather in matching paint. Refresh the front door with coordinated hardware, swap house numbers, and add warm 2700–3000K LED lighting with motion sensors. Next, tackle simple, low-maintenance landscaping for a finished look.
Key Takeaways
- Do a 15-minute perimeter walkaround, then fix safety and water-intrusion issues first: loose shingles, cracked caulk, soft steps, wobbly railings.
- Clean top-down: rinse siding, scrub algae with mild detergent, and cautiously power-wash durable areas after testing to avoid damage.
- Spot-prep and touch up paint: scrape, sand, prime bare spots, re-caulk trim gaps, and color-match paint with test swatches for seamless blending.
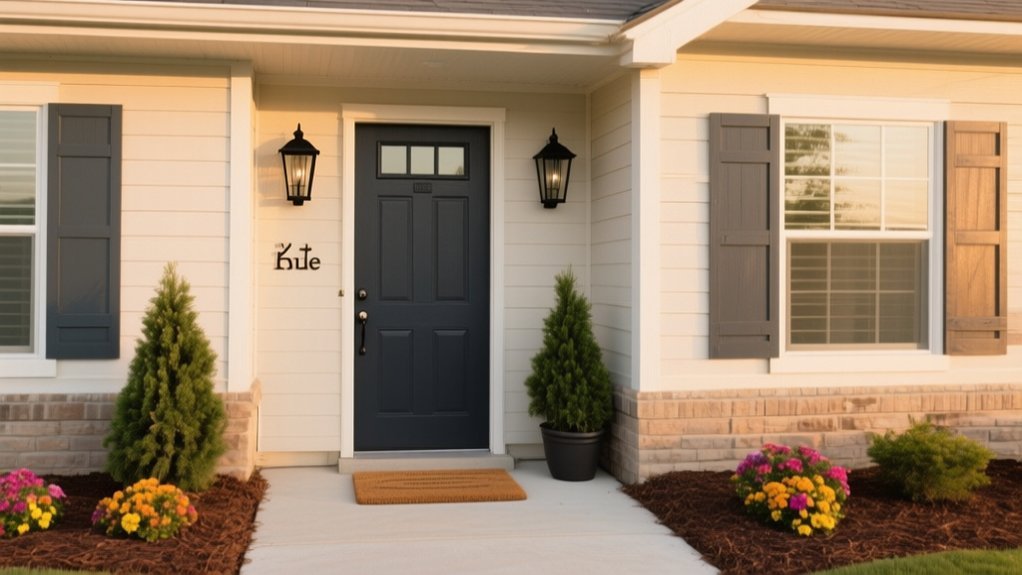
- Modernize curb appeal quickly by updating front door hardware, house numbers, mailbox, and porch light with matching, corrosion-resistant finishes.
- Improve safety and ambiance with warm 2700–3000K LED lighting and motion-sensor fixtures aimed downward along entries, corners, and walkways.
Do a 15-Minute Walkaround and Prioritize Fixes
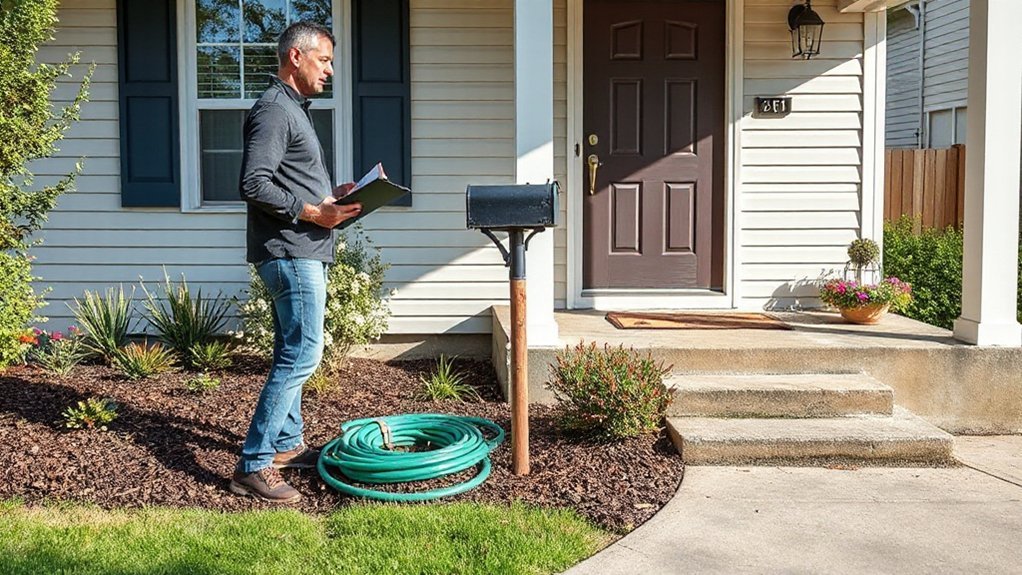
Before you buy paint or book a contractor, take 15 minutes to walk the full perimeter of your home and note what actually needs attention. Carry a notepad and look at the big three: structure, trim, and landscape edges. Flag loose shingles, popped nails, cracked caulk, wobbly railings, and sticking gates. Check steps and porch boards for soft spots, then scan for peeling paint limited to small sections you can spot-prime.
Next, rank items by impact and urgency. Tackle safety and water intrusion first, then curb-appeal wins.
Add quick garden maintenance: redefine bed lines, prune scraggly shrubs, and replace missing mulch. Clean and spruce up decking or patio areas. Finally, plan seasonal decorations only after repairs, so hooks, wreaths, and lights don’t hide problems.
Clean First: Siding, Walkways, Windows, and Gutters
Your walkaround list tells you what to fix; now make sure you’re not judging dirt as damage. Start with a top-down clean so grime doesn’t re-streak finished surfaces. Rinse siding with a hose, then use a mild detergent and soft brush on shaded algae. Save Power washing for durable materials and keep the nozzle moving; test a hidden spot first to avoid etching wood, forcing water behind siding, or stripping caulk.
Move to walkways: pre-wet, scrub oil spots with degreaser, and rinse toward the street, not the foundation.
Clean windows last: wash frames, then glass, and squeegee to prevent spots.
Finish with gutter cleaning—scoop debris, flush downspouts, and check that water exits several feet from your house.
Touch Up Trim and Siding Paint for a Crisp Look
After you’ve cleaned everything, you’ll get the crispest upgrade by touching up trim and siding the right way. You should spot-prep and repair dings, popped nails, and failed caulk.
Then use the exact paint color and sheen so the finish stays consistent. Apply thin coats and feather the edges into the surrounding paint so patches disappear instead of flashing in the sun.
Spot Prep And Repair
Although a full repaint can wait, smart spot prep and repair instantly sharpens your home’s exterior by making trim lines crisp and siding color consistent.
Start by scraping loose paint with a carbide scraper, then sand edges feather-smooth so patches disappear. Use power washing to remove chalking, dirt, and mildew; let surfaces dry fully before you proceed.
Dig out failed caulk, re-caulk gaps around trim, and tool a tight bead to block water intrusion. For dents, holes, or checks, apply an exterior-grade filler, then sand flush once cured.
Seal any bare wood, exposed end grain, or repaired spots with surface priming to lock down fibers and prevent flashing.
Finish by dusting off, masking cleanly, and confirming repairs feel solid under light pressure.
Match Paint For Consistency
Once the surface prep is solid, matching paint becomes the difference between a “patched” exterior and a clean, continuous finish. Start by identifying the existing product: check leftover cans for brand, sheen, and formula (exterior acrylic, alkyd, etc.).
If you don’t have it, take a quarter-size chip from an inconspicuous spot and bring it to a paint store for paint matching. Confirm sheen carefully—flat, satin, and semi-gloss reflect light differently and can break color consistency even with the same tint.
Use the same base and tint system whenever possible. Before committing, brush a small test swatch, let it dry fully, and view it in morning and late-day light. Record the final code for future touch-ups.
Feather Edges For Blend
Matching the right paint gets you the correct color and sheen; feathering the edges makes that touch-up disappear. Don’t stop at covering the scuff—focus on blending.
Lightly sand the repair and surrounding area with 180–220 grit to soften ridges, then wipe clean.
Load a quality angled sash brush or small roller, apply paint to the damaged spot, and immediately pull it outward with lighter pressure. You’re creating feather edges, not a hard outline.
If the surface is textured, stipple or roll in the same direction and nap as the original so the pattern matches.
Let it dry, then add a second thin coat, again fading outward. This technique delivers seamless blending and a crisp, refreshed exterior.
Update the Front Door Color and Hardware Together
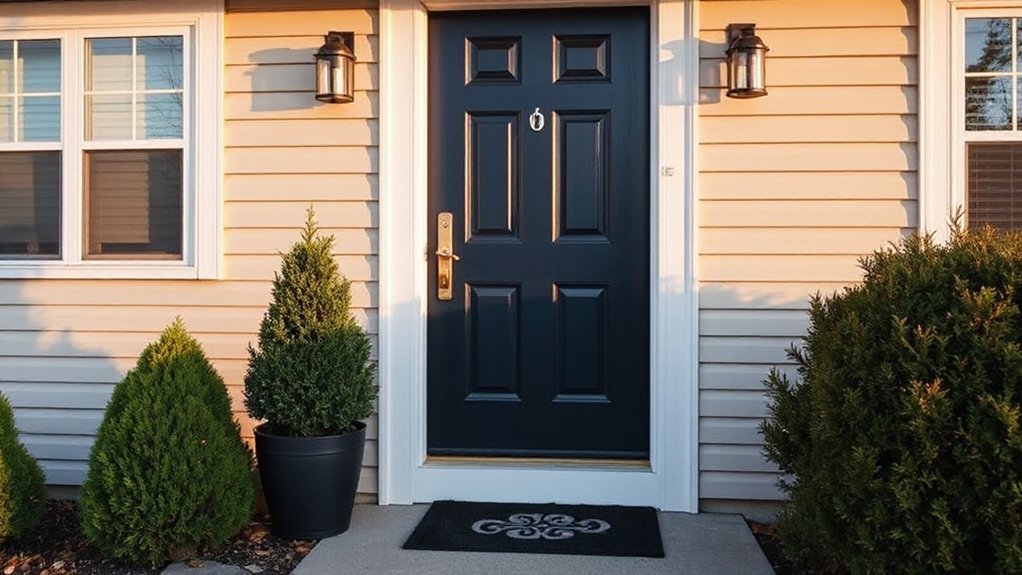
If your entry still feels dated after you’ve tidied up landscaping and lighting, focus on the front door—then upgrade the color and hardware as a single, coordinated move.
Choose a Front door color that complements your siding and roof undertones: warm homes suit deep greens, oxblood, or charcoal; cooler palettes handle navy or crisp black. Test swatches in morning and late-day light, then commit to a quality exterior enamel for durability and clean leveling.
Pair that paint with a deliberate hardware update. Replace the knob, deadbolt, and hinge finish together so nothing clashes. Match style to architecture: simple lever sets for modern lines, traditional handlesets for classic trim.
Measure backset and bore hole size before buying, and confirm the lock’s Grade rating for security.
Replace House Numbers for Instant Modern Curb Appeal
Fresh door paint and coordinated hardware set the tone, but dated or hard-to-read house numbers can still drag your entry back a decade.
A quick house number upgrade delivers outsized curb appeal with minimal effort and cost. Choose numbers that match your home’s style: clean sans-serif for modern facades, classic serif for traditional ones.
Size matters—aim for 4–6 inches tall so they’re legible from the street. Pick a finish that contrasts sharply with the mounting surface; black on light siding or brushed nickel on dark trim works well.
Mount them level, evenly spaced, and aligned with your doorbell or mailbox for a deliberate look. If your surface is rough brick or stucco, use a backer plaque for cleaner installation.
Upgrade Exterior Lighting for Safety and Style
Upgrade your exterior lighting with energy-efficient LED fixtures that cut power use while keeping brightness consistent.
Place focused lights along walkways and at entry doors so guests see every step and your home reads welcoming after dark.
Add motion-sensor security lights at garages, side yards, and rear entries so you’re alerted to movement without running lights all night.
Choose Energy-Efficient Fixtures
A few smart lighting swaps can instantly make your exterior safer, sharper-looking, and cheaper to run. Start by replacing old halogen or incandescent bulbs with LED fixtures rated for wet locations, and match color temperature (2700K–3000K) for a clean, welcoming look. Choose ENERGY STAR-certified options and look for high lumens per watt to maximize output while cutting wattage.
Add dusk-to-dawn photocells or motion sensors so lights run only when needed, reducing waste and extending bulb life. If you’ve already upgraded indoor lighting, apply the same mindset outside: consistent LEDs simplify maintenance and improve reliability.
For appliance efficiency, check your breaker load and pick fixtures with low standby draw, especially for smart controls. Verify IP rating, corrosion-resistant housings, and replaceable drivers too.
Highlight Paths And Entrances
Because most exterior mishaps happen where you step, turn, and open doors, you should prioritize lighting that clearly defines paths and entrances without glare. Place low, shielded path lights 24–36 inches apart, offsetting them to avoid a runway effect and to reveal edges and elevation changes.
Match beam spread to your Pathway materials: tighter beams for narrow pavers, wider washes for gravel or flagstone. Aim fixtures down and across the walking line so textures don’t create harsh shadows.
For Entrance lighting, mount sconces at eye level on both sides of the door when possible, or use a single centered fixture sized to the door width. Choose warm 2700–3000K LEDs for welcoming color and accurate key visibility.
Keep all lights on one simple switch circuit.
Add Motion-Sensor Security Lights
Once your paths and entry get clear, glare-free illumination, add motion-sensor security lights to cover the blind spots where someone could approach unseen. Mount fixtures at corners, garage doors, and side gates, aiming beams downward to prevent spill into windows and neighbors’ yards.
Choose Motion activated lighting with adjustable sensitivity, range, and on-time so pets and traffic don’t trigger constant cycling.
For reliable Security illumination, pick LED units rated for wet locations and 2700–3000K color for natural visibility. Set the sensor height to match the manufacturer’s specs, usually 6–10 feet, and test the detection zone by walking the perimeter at night.
If you’ve got existing wiring, swap in new heads; otherwise, use solar models with high-lumen output and a replaceable battery.
Add Simple, Low-Maintenance Landscaping in Key Spots
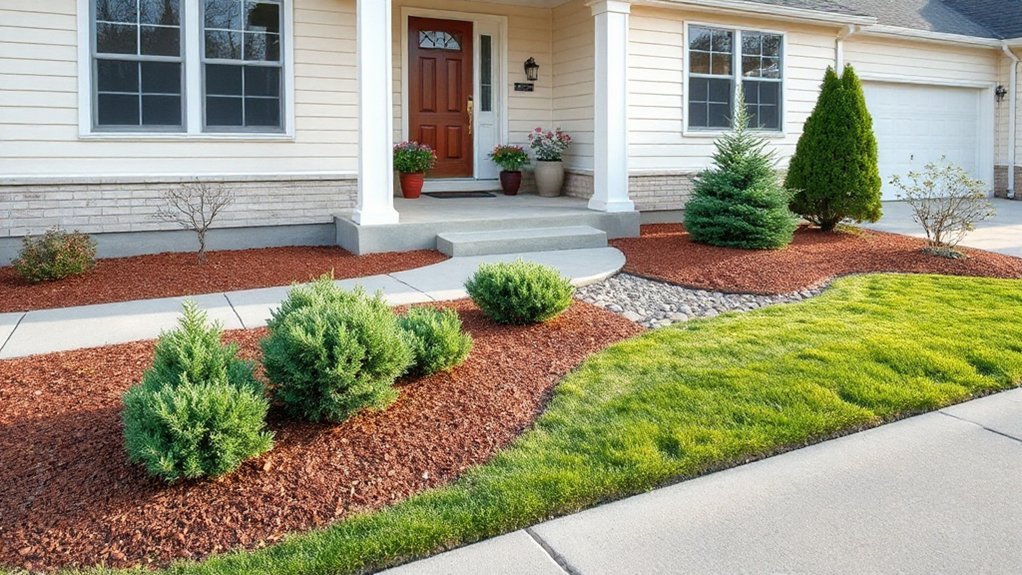
Even if you don’t want to commit to weekly yard work, you can boost curb appeal fast by adding low-maintenance landscaping in a few high-impact spots—along the front walkway, around the mailbox, and at the base of your entry.
Define small garden beds with clean edging, then choose hardy plants that hold shape: dwarf boxwood, lavender, sedum, or ornamental grasses. Group plants in odd numbers for a designed look, and keep heights low near paths for visibility.
Finish with mulch layering: lay cardboard or landscape fabric to block weeds, add 2–3 inches of shredded mulch, and pull it back from stems to prevent rot.
Water deeply once after planting, then weekly for the first month. After that, it largely runs itself.
Swap Small Exterior Hardware for a Finished Look
Fresh landscaping sets the stage, but tired exterior hardware can still make the front of your home look dated. Swap small pieces and you’ll get a cleaner, more finished look fast.
Start with your front door: replace the knob, deadbolt, and strike plate in a matching finish, and add a modern handle set if your door supports it.
Update the doorbell button, house numbers, mailbox, and porch light so they read as one coordinated set of Exterior accents.
Choose Decorative hardware rated for outdoor use, with corrosion-resistant coatings and stainless fasteners.
Check hole spacing before you buy, patch misaligned screw holes with exterior filler, and touch up paint.
Finally, tighten everything and align plates so nothing looks crooked.
Frequently Asked Questions
Do I Need HOA Approval Before Changing Exterior Colors or Hardware?
Yes, you usually do, since HOA regulations often cover paint, trim, and exterior hardware. Check your covenants, submit the required samples, and follow the Approval process before purchasing materials or scheduling contractors.
What Exterior Upgrades Offer the Best Return on Investment When Selling?
You’ll practically print money with fresh exterior paint, a new front door, and updated garage door; you’ll boost curb appeal fast. Add landscape lighting, tidy landscaping, and tasteful outdoor décor—they’ll photograph beautifully and sell quicker.
How Can I Refresh Curb Appeal on a Very Tight Budget?
Start with a deep clean, then paint the front door, update house numbers, and add tidy mulch. You’ll boost impact with inexpensive landscape lighting and coordinated outdoor decor. Keep edges crisp, weeds pulled, clutter removed.
Which Exterior Updates Are Best for Improving Energy Efficiency?
You’ll boost energy efficiency most with air-sealing and insulation upgrades; coincidentally, tighter gaps also quiet your home. Add solar panel installation for clean power, and switch to LED exterior lighting to curb nighttime waste.
What Permits Might Be Required for Minor Exterior Changes?
You’ll often need permit requirements for Minor exterior modifications like repainting historic façades, replacing windows, adding awnings, or altering driveways. Check zoning, HOA rules, and local building departments; you can avoid fines by confirming before starting work.
Conclusion
You don’t need a renovation to make your home look sharper—you just need smart, targeted updates. Start with a quick walkaround, then clean thoroughly so every improvement reads clearly. Touch up trim, refresh the front door with matching hardware, and swap dated house numbers for instant polish. Upgrade lighting for better safety and a modern look, then add low-maintenance plants where they’ll frame the entry. Why wait when results are that fast?