
Start with a 10‑minute room scan and fix obvious friction: add non‑slip mats, cable trunking, and a simple recycling station. Swap cabinet pulls using the same hole centres (often 96mm or 128mm) and fit warm‑white 2700K bulbs or plug‑in lamps for instant cosiness. Refresh kitchens with peel‑and‑stick splashback tiles on clean, dry surfaces, then re‑caulk sinks with sanitary silicone. Stop draughts with adhesive weatherstrips and a door brush strip—next up, you’ll see the quickest order to tackle it all.
Key Takeaways
- Do a 10‑minute room walk to spot friction points like drafts, poor lighting, clutter, and unsafe steps.
- Upgrade comfort quickly by sealing gaps with weatherstrips, V-strip, or a door brush strip to cut drafts and noise.
- Improve atmosphere by switching to warm-white 2700K bulbs and adding plug-in lamps or under-cabinet LED strips.
- Refresh kitchens or bathrooms using peel-and-stick backsplash panels or vinyl tile stickers on clean, flat, dry surfaces.
- Boost safety and organization with non-slip mats, cable trunking, and renter-friendly hooks or tension rods for storage.
Start Here: Pick a Home Upgrade in 30 Minutes
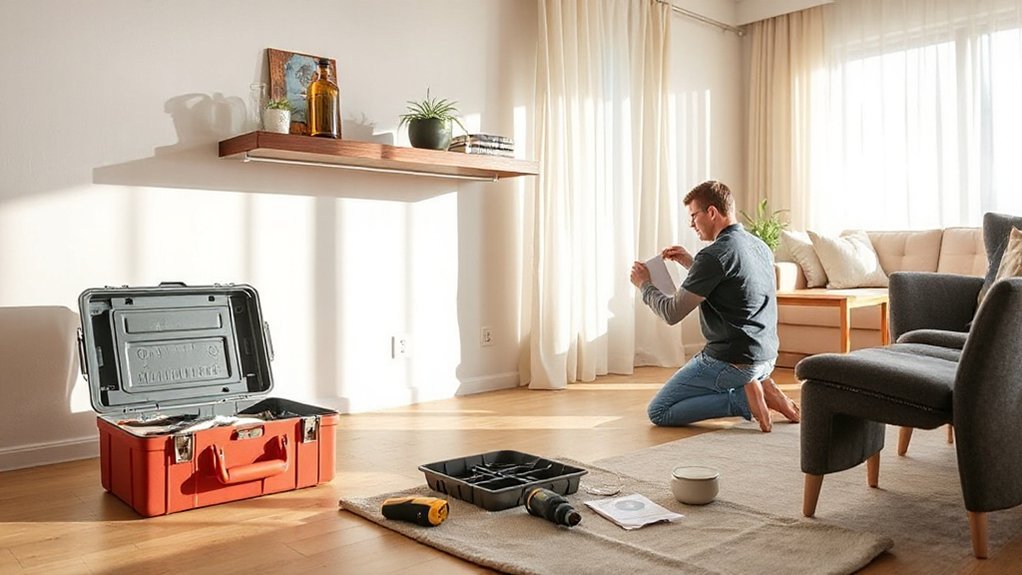
If you’re not sure where to start, you can choose a worthwhile home upgrade in 30 minutes by focusing on what will make the biggest day-to-day difference. Walk room to room with your phone timer set for 10 minutes, noting friction points: draughts, poor lighting, cluttered entryways, or unsafe steps.
Next, match one issue to your DIY budget and home safety needs. In the hall, add a non-slip mat and tidy cables with trunking. In bedrooms, fit blackout lining or draft excluders to cut heat loss. In the kitchen, create a labelled recycling station that fits your council scheme. Finally, check your kit: tape measure, screws, wall plugs, and a stud/pipe detector for UK plasterboard and masonry.
Fast Hardware Swaps That Modernize Everything
You can modernise a room in under an hour by swapping cabinet pulls, upgrading door handles, and replacing light switch plates. Measure hole centres on cupboards, match your latch size on handles, and choose faceplates that fit UK back boxes (single or double) before you buy. Stick to one finish—brushed nickel, matte black, or brass—and you’ll get a clean, consistent look across the whole house.
Swap Cabinet Pulls
Although a full kitchen refit can cost a fortune, swapping cabinet pulls delivers a surprisingly modern look in under an hour with just a screwdriver and a bit of measuring. Start by checking the hole centres on your existing handles (often 96mm or 128mm in the UK) so your new cabinet hardware fits without drilling. If you’re changing sizes, use a simple drilling template and mark with masking tape to stop the bit wandering. Remove one handle first and take it to B&Q or Screwfix to match thread length; most doors take M4 screws. For drawer pulls, choose a style with a comfortable grip and a finish that matches your taps. Tighten gently to avoid stripping MDF, then line everything up with a spirit level.
Upgrade Door Handles
Fresh cabinet pulls make kitchens feel newer; matching that upgrade on your internal doors can modernise the whole house just as quickly. Start by counting how many handles and latches you’ll swap, then choose a consistent style: lever on rose, traditional backplate, or a simple door knob for period rooms. Measure the existing spindle size (usually 8mm in the UK) and check the backset so new sets align with your latch. Stick to one hardware finish—brushed nickel, satin brass, or matte black—and you’ll get an instant, cohesive look. Use a screwdriver, keep the old screws as backups, and tighten evenly so the handle sits square. Test each door for smooth closing. Buy spares for future fixes.
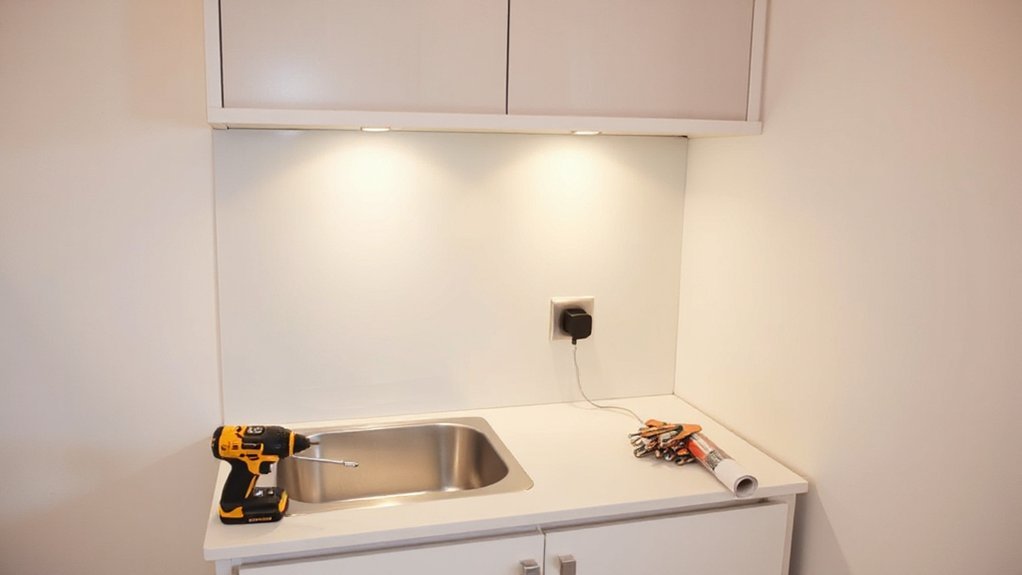
Replace Light Switch Plates
If your walls look tidy but the rooms still feel dated, tired light switch plates are often the giveaway. Swapping them is quick, cheap, and instantly sharpens a space, especially if you match finishes to taps, door furniture, or sockets for a consistent look. Choose Decorative switch covers in brushed steel, matt black, or white moulded for a clean UK-standard refresh.
Follow electrical safety tips: isolate the circuit at the consumer unit, lock it off if you can, and test the switch is dead with a voltage tester. Unscrew the old plate, note the wire positions, and move one wire at a time to the new plate. Don’t overtighten, and keep earths secure. Restore power and check operation.
Peel-and-Stick Kitchen and Bath Upgrades
You can freshen up your kitchen or bathroom quickly with peel-and-stick backsplashes that go straight over clean, dry tiles or plasterboard for a crisp new look. If your floor’s tired, you can lay vinyl tile stickers with a ruler, sharp knife, and firm pressure at the seams to keep water out and edges down. For the bath, you can fit removable tub surround panels to cover dated surfaces without messy grout, making wipe-clean maintenance far easier.
Peel-And-Stick Backsplashes
Ever wondered how to sharpen up a tired kitchen or bathroom without booking a tiler? Peel-and-stick backsplashes give you a quick, tidy refresh, and you can fit them in an afternoon. Choose a Decorative tile look that suits your worktop and cupboards, then measure the splash zone, adding 5–10% for cuts. Clean the wall with sugar soap, rinse, and let it dry fully. Use a spirit level to mark a straight baseline, and dry-lay a row to plan joins around sockets. Peel gradually, press from the centre out, and use a silicone roller for firm contact—simple adhesive techniques that prevent bubbles. Trim with a sharp snap-off blade, then seal edges near sinks with clear sanitary silicone.
Vinyl Tile Floor Updates
Want a smarter-looking kitchen or bathroom floor without the mess of screed and grout? Peel-and-stick vinyl tiles give you a quick refresh with only a straightedge, tape measure, utility knife, and roller. Start with a flat, clean subfloor; fill dips, remove loose paint, and degrease around cookers. Dry-lay a row to centre the pattern, then work outwards so cuts land at skirting boards or under the kickboards. Press firmly, especially at edges, and seal perimeter gaps with silicone in bathrooms. Check Durability concerns: choose thicker wear layers, avoid cheap tiles in high-traffic hall-through kitchens, and keep water from sitting on seams. For Style compatibility, match grout-line patterns and tone to your units and worktops too.
Removable Tub Surround Panels
If your bath surround looks dated but you can’t face hacking off old tiles, removable peel-and-stick panels offer a tidy, weekend-friendly upgrade with minimal dust. You’ll get a cleaner look fast, and you can remove them later if you’re renting or planning a refit. Choose removable tub panels rated for wet zones and pair them with waterproof bathroom solutions like mould-resistant silicone and sealed edge trims.
- Prep: Degrease tiles with sugar soap, rinse, dry fully, and fill deep grout lines for a flat bond.
- Fit: Measure twice, cut with a fine-tooth saw or knife, then stick from the centre out to avoid bubbles.
- Seal: Run silicone at corners and the bath lip, then leave 24 hours before showering.
Easy Lighting Upgrades for Instant Warmth
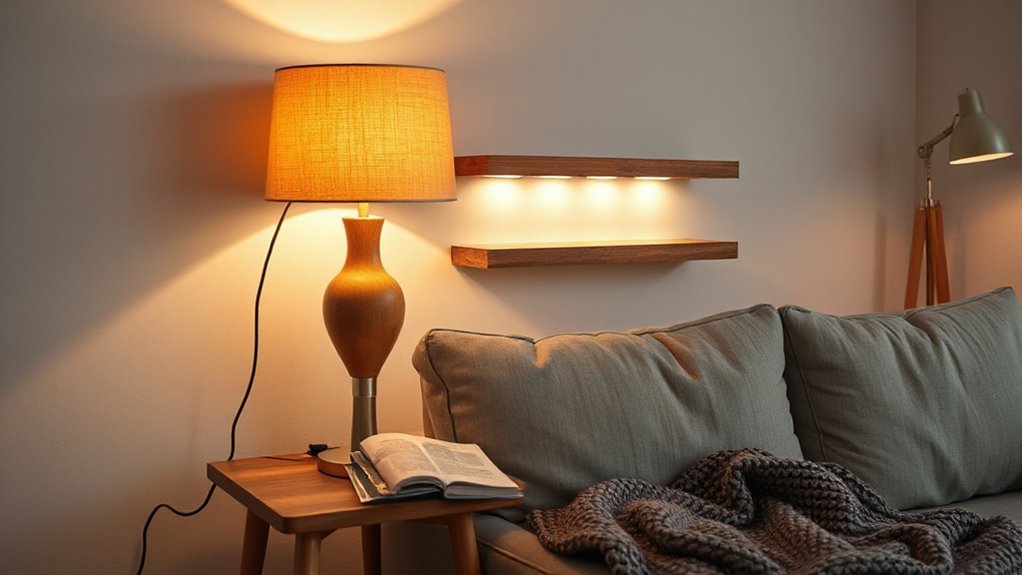
Because lighting sets the mood faster than almost any other change, a few simple swaps can make your home feel instantly warmer without touching the décor. Start by replacing harsh LEDs with warm bulbs (around 2700K) in your main lamps and ceiling fittings for softer colour. Add ambient lighting with a plug-in table lamp, a floor lamp in a dark corner, or under-cabinet LED strips in the kitchen. Fit dimmable smart bulbs if you don’t have a dimmer switch; you’ll control brightness from your phone without any wiring. Swap a cold white bathroom bulb for warm-white where safe (check IP rating near water). Finally, use lampshades in linen or opal glass to diffuse glare.
Paint and Caulk Touch-Ups That Look Clean
Even when you don’t redecorate, crisp paint edges and fresh caulk instantly make a room look cleaner and better cared for. Start by wiping skirting boards and trim with sugar soap, then spot-sand drips for edge smoothing. For Color matching, take a chip (or a dried flake) to B&Q or Dulux and get a tester pot mixed; label it for later. Mask with low-tack tape, cut in with a 2-inch brush, and pull tape while the paint’s still tacky.
- Fill small dings with lightweight filler, sand flush, then dab paint with a mini roller.
- Re-caulk baths, sinks, and window boards; smooth with a wet finger or profiling tool.
- Clean smears with a damp cloth before they skin over.
Stop Drafts and Cut Noise in One Afternoon
When cold air creeps in around doors and windows, you feel it straight away—and you’ll hear it too. Spend one afternoon sealing gaps and you’ll boost comfort, cut bills, and soften street noise.
Start by checking for draughts with a lit candle and your hand, especially around uPVC frames, letterboxes, and loft hatches. Fit adhesive foam or rubber weatherstrips on door frames, and add a brush strip to the bottom of external doors. For windows, apply self-adhesive V-strip or silicone sealant where frames meet walls. Upgrade keyhole and letterbox covers to stop whistling. These simple soundproofing techniques also act as energy efficiency tips, reducing heat loss and rattles. Finish by adjusting hinges so doors close snugly.
Renter-Friendly Upgrades You Can Remove Later
Sealing draughts gets you quick wins, but you can still make your place warmer, brighter, and more practical without upsetting your landlord or losing your deposit. Focus on Temporary decor and non permanent fixtures that leave walls, tiles, and sockets untouched, and keep the original bits in a labelled bag for move-out.
- Swap lampshades, add plug-in LED under-cabinet strips, and use smart bulbs for better light without rewiring.
- Use peel-and-stick vinyl on tired worktops or splashbacks; warm it with a hairdryer to lift cleanly later.
- Upgrade storage with tension rods, over-door hooks, and removable adhesive strips (rated for weight) for rails, frames, and mirrors.
Before sticking anything, wipe surfaces with sugar soap, then test a hidden patch.
Frequently Asked Questions
How Much Do These Upgrades Typically Cost for a Small Apartment?
For a small UK flat, you’ll typically spend £50–£300 total. Decorative accents run £10–£80, Lighting fixtures £20–£150 each. You’ll keep costs low by DIYing and shopping sales at B&Q, IKEA.
Which Upgrades Increase Resale Value the Most for Homeowners?
You’ll boost resale most with a fresh kitchen, modern bathroom, and better kerb appeal—gentle touches that make rooms quietly shine. Add Smart lighting and prioritise Energy efficiency via insulation, boiler upgrades, and EPC improvements.
What Basic Tools Should I Buy Before Starting Any Project?
Buy a cordless power drills kit, Safety goggles, tape measure, hammer, screwdrivers, spirit level, utility knife, adjustable spanner, pliers, stud/pipe detector, and a set of wall plugs. You’ll handle most UK DIY tasks safely.
How Can I Avoid Damaging Walls in Older Plaster Homes?
Go gentle, not gung-ho: you’ll stop plaster cracking by drilling pilot holes, using sharp bits, and avoiding hammer blows. Fix small chips early with wall repair filler; finish with proper paint preparation—mist coat, then topcoat.
When Should I Hire a Professional Instead of DIY?
Hire a professional when work involves electrics, gas, structural changes, or damp diagnosis; you can’t meet DIY safety standards, lack certification, or can’t keep up with tool maintenance. In the UK, Part P and Gas Safe apply.
Conclusion
You don’t need experience to make your home feel newer—just a spare afternoon and a simple plan. Swap tired handles, add peel-and-stick splashback panels, warm up rooms with LED bulbs, and tidy edges with fresh caulk and paint. Seal drafts with weatherstrips to cut noise and save on heating. If you rent, choose removable options and keep the old fittings. These small fixes stack up like bricks, leaving your space sharper, calmer, and more yours.