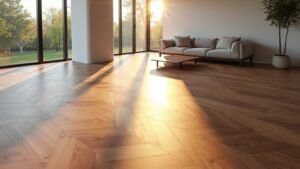
You can upgrade a small space with beginner-friendly DIYs that match your budget and time. Start with a no-drill entryway drop zone using removable hooks, an adhesive rail, and a lidded bin for mail, plus a washable mat and shoe basket. Add floating shelves with rated brackets and a level line, or build under-bed drawers on casters for hidden storage. Try nesting tables for flexible surfaces, or a fold-down desk anchored securely for WFH. Keep going for more step-by-step ideas.
Key Takeaways
- Plan projects by budget and time, choosing quick builds with minimal cuts, drying time, and simple tools for faster success.
- Create a no-drill entryway drop zone using removable hooks, adhesive rails, and a tray or lidded bin for mail sorting.
- Add vertical and hidden storage with floating shelves and under-bed rolling drawers, using rated brackets, anchors, and smooth painted finishes.
- Build a fold-down wall desk with sturdy plywood, hinges, and folding brackets, mounting level into studs or rated anchors and load-testing gradually.
- Upgrade any project with pro-looking finishes: fill and sand, prime and paint thin coats, swap hardware, and add puck lights or removable wall decor.
Choose a Small-Space DIY by Budget and Time
If you start by sizing up your budget and the time you can realistically spare, you’ll pick a small-space DIY that actually gets finished. Begin with budget planning: list what you already own, set a hard spending cap, and price the basics (fasteners, paint, adhesives) before you commit. Then use time management to match the project to your schedule—one evening for a peel-and-stick update, a weekend for building a compact side table, or several sessions for refinishing.
Choose projects with few cuts, minimal drying time, and simple tools. Prioritize pieces that serve two jobs, like storage plus seating. Finally, write a short checklist and stop when you hit your cap or timeline.
DIY Small-Space Entryway Drop Zone (No-Drill Options)
Because small entryways collect the most daily clutter, a no-drill drop zone gives you a reliable landing spot for keys, mail, bags, and shoes without risking drywall damage or breaking a lease. Start by claiming one narrow wall strip or door-adjacent corner and commit to it for Entryway organization.
- Stick up removable hooks for bags, umbrellas, and a leash; align them at shoulder height for quick grabs.
- Add a slim adhesive rail with S-hooks for keys and sunglasses, keeping jingles off tables.
- Park a lidded bin or tray on a small stool for mail; sort immediately into “action” and “file.”
- Use a grippy, washable mat plus a low basket for shoes to prevent spillover.
Choose No drill solutions rated for your item’s weight, and clean surfaces before applying.
Easy DIY Floating Shelves for Small Spaces
Once your entryway drop zone stops the daily pileup, floating shelves help you push storage upward and reclaim precious floor space in any tight room. Start by finding studs with a stud finder, then mark a level line at eye height or above furniture. Choose a simple bracket-and-board kit or a concealed-floating-shelf bracket rated for the load you’ll store. Pre-drill, drive screws into studs, and use wall anchors only for light décor. Cut boards to span awkward wall nooks, sand edges, and seal with wipe-on poly or paint for easy cleaning. Style with a few bins, books, or plants, leaving breathing room. You’ll improve Small space organization while keeping surfaces clear and traffic paths open.
DIY Under-Bed Storage That Looks Built In
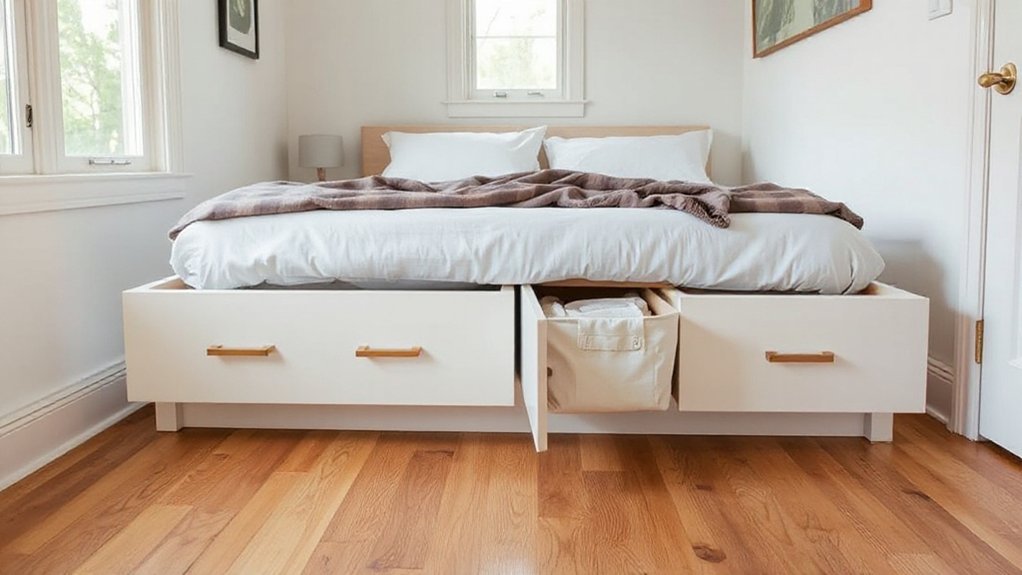
Even when your bedroom feels tapped out, you can turn the space under the bed into built-in-looking storage with a clean, furniture-grade finish. Measure your clearance, then build low plywood drawer boxes sized to stop short of the frame so they glide freely. Add full-extension casters or low-profile sliders, and attach a simple face frame that matches your bed’s finish for seamless space optimization. For crisp storage organization, follow this order:
- Cut and edge-band 1/2-inch plywood; predrill to prevent splitting.
- Assemble boxes square, glue and screw, then sand flush.
- Install casters/slides and test pull-out clearance.
- Prime, paint, or stain, then add slim pulls and felt bumpers.
Small-Space DIY Over-the-Door Organizer Upgrade
Under-bed drawers handle the hidden overflow, but the back of your door can carry the daily-use stuff you need within arm’s reach. Upgrade a basic over-the-door organizer by stabilizing it, adding custom pockets, and protecting your paint. Start by tightening hooks with adhesive felt or rubber shims so it won’t sway or scratch. Swap flimsy fabric for canvas or denim panels, then stitch or rivet on labeled pockets sized for chargers, mail, hair tools, or cleaning sprays. Add a thin plywood or corrugated-plastic backing to keep everything flat and quiet. For better door storage, mount two command-strip loops near the bottom corners to prevent swing. You’ll get clean space optimization without drilling, plus a setup you can reconfigure fast.
DIY Nesting Tables for Small Living Rooms
Where do you put a coffee table when your sofa’s already fighting for floor space? Build nesting tables that slide together, then pull apart when you need a perch for drinks, books, or remotes. You’ll keep pathways clear and still get usable surfaces.
- Cut two square or round tops from plywood or hardwood, sizing the smaller one 2–3 inches narrower.
- Assemble simple U-frames from 1x2s or metal hairpin legs, checking for wobble with a level.
- Sand, prime, and seal for Material durability; add felt pads to protect floors and reduce noise.
- Finish with stain or paint for Color coordination, matching your sofa legs, shelving, or rug tones.
Stack them, separate them, and reclaim your living room.
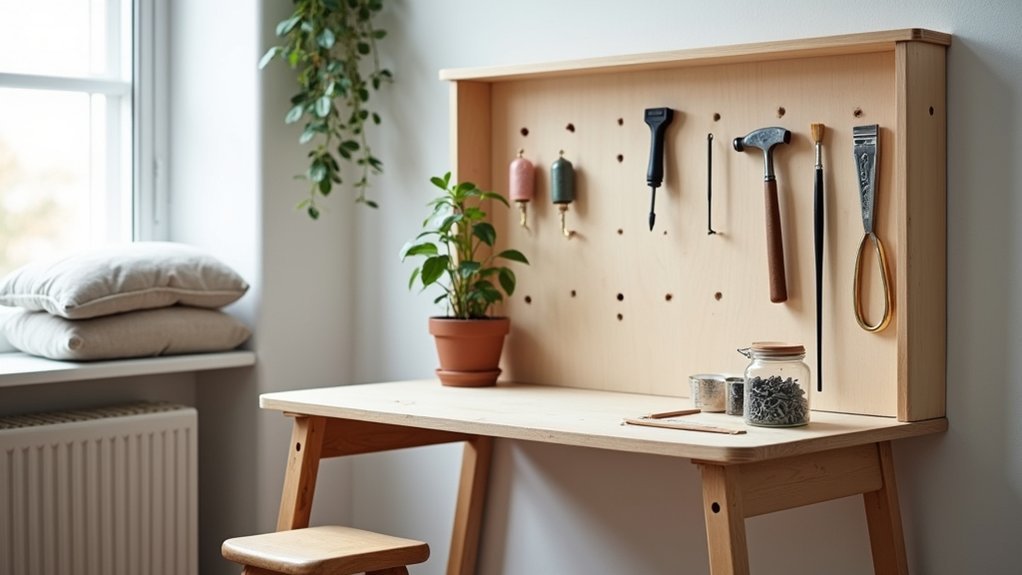
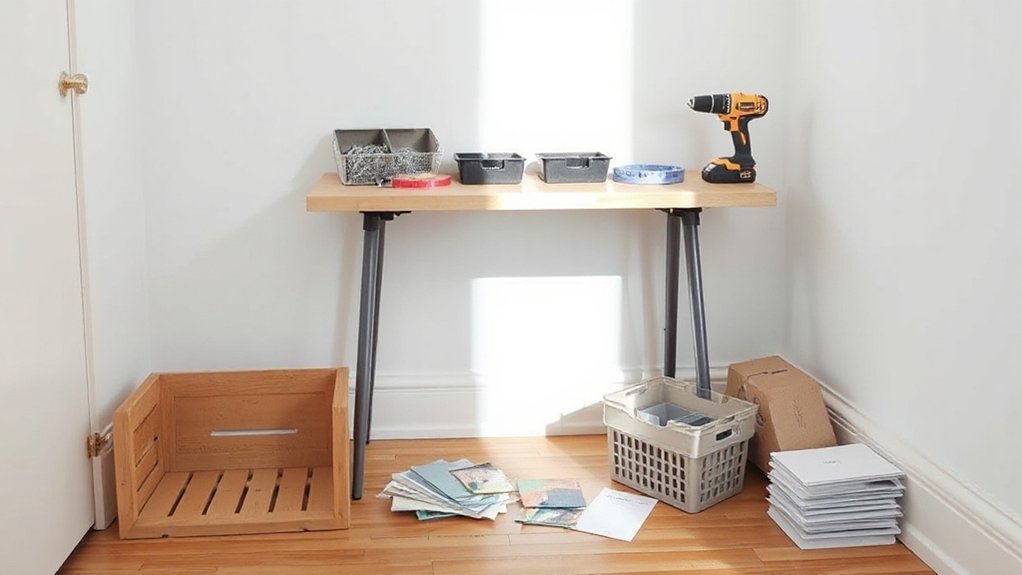
Small-Space DIY Fold-Down Desk for WFH
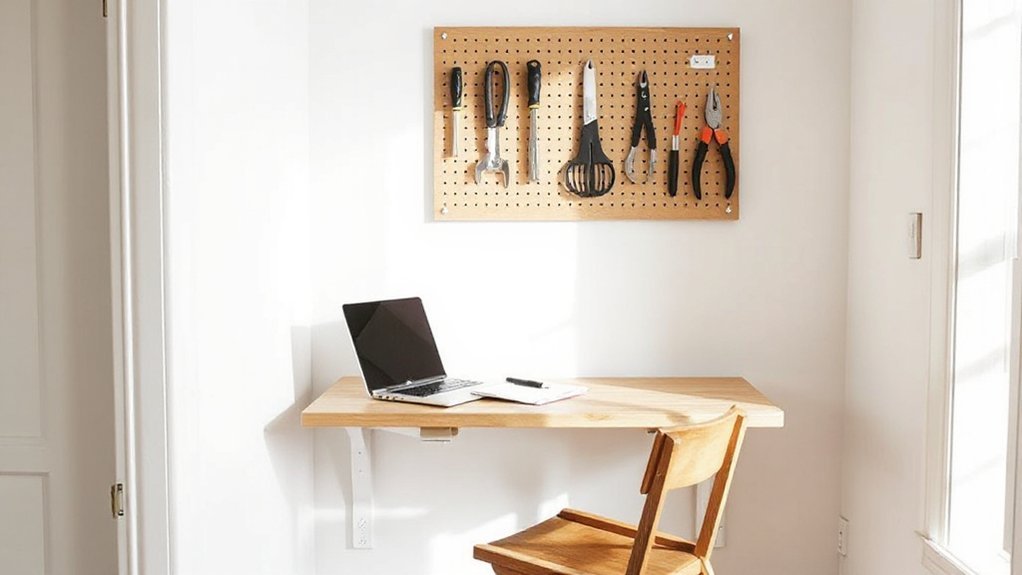
You can reclaim floor space with a fold-down desk that mounts to the wall, folds flat when you’re off the clock, and still gives you a stable work surface. You’ll line up the right materials and tools—sturdy plywood, heavy-duty hinges, folding brackets, anchors, and a level—so the build goes smoothly. Then you’ll install it into studs or rated anchors, verify the load capacity, and add simple safety checks like positive latches and clean cable routing.
Space-Saving Desk Design
Ever wish your home office could appear only when you need it? A fold-down desk makes that possible, and smart design keeps it comfortable and tidy. Start by choosing a wall zone that won’t block doors, then size the surface for your laptop and one notebook, not clutter. Plan for Ergonomic comfort by setting desk height to your seated elbows and leaving knee clearance when it’s open. Build in lighting solutions by positioning the desk near daylight and reserving a cord path for a task lamp.
- Use a shallow profile so it folds flat and stays unobtrusive.
- Add a ledge lip to stop items sliding when closing.
- Route cables to one side for clean, snag-free folding.
- Include a simple latch so it won’t drift open.
Materials And Tool List
Before you cut a single panel, gather materials and tools that keep the desk slim, sturdy, and easy to fold without binding. Choose 3/4-inch birch plywood or furniture-grade MDF for the work surface, plus 1×2 hardwood cleats for edge stiffness. Pick a continuous piano hinge, two folding shelf brackets rated for your load, and short wood screws that won’t poke through. Add wood glue, iron-on edge banding, sandpaper (120/180/220), primer, and a durable water-based polyurethane. Plan color schemes with paint or stain samples and grab a foam roller and angled brush for clean coats. For lighting options, include a low-profile LED strip, cord clips, and a grommet kit for tidy cable routing. Tools: circular saw, drill/driver, countersink bit, square, clamps, and tape measure.
Installation And Safety Tips
With your plywood, hinge, brackets, and finishing supplies on hand, focus next on installing the fold-down desk so it opens smoothly, carries weight safely, and doesn’t damage your walls. Gather installation tools, then mark a level line at seated height and locate studs. If you can’t hit studs, use a rated toggle anchor system and follow the manufacturer’s torque limits. Keep Safety precautions in place: wear eye protection, clamp parts before drilling, and don’t work under an unsupported panel.
- Pre-drill pilot holes to prevent splitting and ensure straight screws.
- Mount the hinge to the desktop first, then fasten the hinge leaf to the ledger.
- Set brackets square, test-fold, and adjust for even gaps before final tightening.
- Load-test gradually, tightening hardware after 24 hours.
Renter-Friendly Small-Space Wall Decor (No Holes)
Although you might be working with strict lease rules (and thin walls), you can still create high-impact wall decor in a small space without drilling a single hole. Start with Wall decals to add a graphic focal point above a desk or bed; choose matte finishes so they look painted, not plastic. For bigger change, use removable wallpaper on one “feature strip” behind shelves or along an entry nook, then trim with a sharp utility knife and a straightedge. Hang lightweight art with removable picture strips, and press firmly for 30 seconds to bond. Swap in adhesive hooks for keys, hats, or a small hanging plant (check weight ratings). To remove, warm adhesives with a hair dryer, pull slowly downward, and patch-free.
Make Small-Space DIYs Look Custom (Paint + Hardware)
You can make even the smallest DIY built-in look custom with a tight paint plan: fill seams, sand smooth, prime, then use a cabinet-grade enamel with a foam roller for a crisp finish. Add instant “made-for-the-space” credibility by swapping basic pulls for substantial hardware and aligning every knob and screw with a template. When you match the sheen, spacing, and finish tone across the piece, your small-space project reads as built-in rather than built-on.
Paint Techniques For Built-Ins
When a built-in spans just a few feet, paint and hardware choices do most of the heavy lifting in making it look truly custom. Focus on Color blending and finish techniques that hide seams and elevate simple plywood edges. Prep well, then work in thin, controlled coats for a factory-smooth result.
- Fill and sand: Use wood filler on nail holes and joints, then sand to 180–220 grit for crisp lines.
- Prime for uniformity: Choose a bonding primer and spot-prime patches so the topcoat doesn’t flash.
- Blend your color: Feather adjacent tones with a damp brush or soft roller to create subtle depth, not stripes.
- Refine the finish: Tip off the final coat, de-nib between coats, and keep edges wet to avoid lap marks.
Hardware Upgrades For Custom Look
Once the paint cures and the finish reads seamless, hardware becomes the fastest way to push a small-space built-in from “DIY” to truly custom. Swap builder knobs for oversized pulls, leather tabs, or slim edge handles to change the whole silhouette. Keep finishes consistent—brushed brass, matte black, or polished nickel—so your room reads intentional, not mixed.
Measure twice: center pulls on drawers, align knobs vertically on doors, and use a template to repeat holes precisely. If you’re adding hidden storage, choose touch-latches or recessed pulls to keep fronts clean. For Smart lighting, add low-profile puck lights under shelves and match their trim to your hardware. Finish with soft-close hinges for a quiet, high-end feel.
Frequently Asked Questions
What Tools Are Essential for Beginners Starting Small-Space DIY Projects?
You’ll need a tape measure, level, cordless drill/driver, stud finder, utility knife, hammer, screwdriver set, and safety gear. Add a pencil and clamps for Creative storage builds and Wall decor ideas, ensuring clean, secure installs.
How Can I Ensure DIY Projects Meet Apartment Safety and Fire Codes?
Funny coincidence—you’ll meet codes by checking your lease, pulling permits when required, and following manufacturer specs. Prioritize fire safety: maintain clearances, use rated materials, install detectors. Guarantee electrical compliance: licensed work, proper breakers, GFCIs.
Where Can I Find Affordable Materials or Secondhand Supplies Locally?
You’ll find affordable materials locally at Habitat ReStore, thrift shops, salvage yards, Buy Nothing groups, and Facebook Marketplace. Use upcycling ideas and budget friendly tips: ask contractors for offcuts, check curb alerts, and visit reuse centers.
How Do I Fix Common Beginner Mistakes Without Starting Over?
Fix mistakes by patching, sanding, and remeasuring—don’t restart. Nearly 80% of DIY slipups vanish with simple touch-ups. Use Budget friendly tips like scrap shims, and apply Creative storage solutions to keep parts labeled.
What’s the Best Way to Protect Floors and Furniture During DIY Work?
You protect floors and furniture by laying Protective coverings and adding Surface safeguards: rosin paper, drop cloths, painter’s plastic, and corner pads. You’ll tape seams, secure edges, move pieces away, and wipe spills immediately.
Conclusion
You’ve now got a lineup of small-space DIYs you can tackle by budget and time, without sacrificing style—or your security deposit. Start with one upgrade: a no-drill drop zone, floating shelves, under-bed storage, or a fold-down desk. Keep measurements tight, choose sturdy fasteners, and finish with paint and upgraded hardware so everything looks built in. With a few smart tweaks, your tiny space will feel a million times bigger.