Confirm woodworm by checking for clean, round pinholes (about 1–2 mm) and fresh, pale frass on white paper; cracks follow the grain, holes don’t. If activity looks likely, isolate the piece in a sealed polythene wrap, keep it dry (about 45–55% RH), and inspect weekly. Treat by applying a suitable boron-based spray/gel or injecting fluid into exit holes, then stabilise weak timber and rebuild loose joints. Next, you’ll see how to treat finishes and when to call a pro.
Key Takeaways
- Confirm infestation by finding fresh pale frass or new clean-edged exit holes, not old dark holes or cracks following the grain.
- Isolate the item in a dry, ventilated quarantine area, sealing it in polythene and placing white paper underneath to monitor new dust.
- Reduce humidity and keep stable conditions (about 15–20°C, 45–55% RH) to slow larvae and prevent reinfestation.
- Treat active woodworm with an appropriate woodworm insecticide, ensuring deep penetration into holes and joints, then repeat monitoring for weeks.
- Stabilize damage by vacuuming frass, consolidating soft timber, rebuilding weakened joints, and call a professional if activity persists or structure is compromised.
Confirm Woodworm in Furniture (Holes vs Cracks)
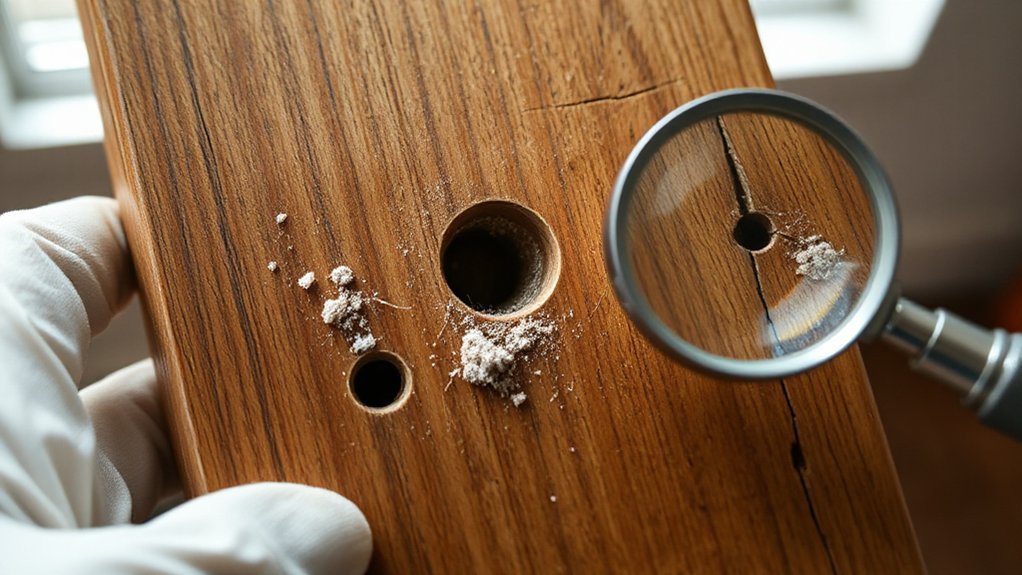
Where should you start when you suspect woodworm in a piece of furniture? Begin with a close visual check under good light. You’re looking for Surface damage that matches insect exit holes: usually round, clean-edged pinholes (about 1–2 mm for common furniture beetle), sometimes slightly larger for other species. Use a hand lens and measure a few holes; consistent diameter supports Pest identification. Next, separate holes from cracks. Cracks follow the grain, vary in width, and often run in lines from joints or dried-out areas. Exit holes cut across grain and appear scattered, including on concealed faces and drawer runners. Don’t rely on age darkening alone; check edges for crisp drilling and neat rims.
Check if the Woodworm Is Active
Once you’ve decided you’re looking at genuine exit holes rather than cracks, the next step is to work out whether the infestation is still active. Start with simple detection methods: lay white paper beneath suspect areas for a week and check for fresh, pale frass (grit-like dust). Look for sharp-edged, clean holes rather than darkened, worn ones.
Use a torch and mirror to inspect undersides and joints, then tap with a screwdriver handle; a hollow sound can indicate internal tunnelling. Probe gently with a bradawl—sound timber resists, but active damage may feel soft or crumbly. Mark holes with pencil and recheck after heating comes on, as emerging adults often appear in warmer months in UK homes. These are your key signs of activity to confirm before treatment.
Inspect Other Furniture for Woodworm Spread
Although you may only see exit holes on one item, you should inspect nearby furniture and stored timbers because adult beetles can spread through a room and lay eggs in other susceptible wood. Work methodically across the room, including loft joists, skirting, and built-in cupboards, noting timber species and any damp risk.
- Check adjacent pieces for fresh frass, new pinholes, and crumbly end grain under torches.
- Examine undersides, drawer runners, backs, and joints where larvae favour sapwood.
- Map findings room-by-room, date them, and photograph areas to track change without harming Furniture aesthetics.
- Assess vulnerable antiques separately, prioritising historical preservation by avoiding abrasive cleaning; use a soft brush and vacuum nozzle nearby.
If multiple items show activity, plan a coordinated treatment scope and consult a UK timber surveyor.
Isolate and Store the Furniture Safely
Move the affected piece into a dedicated quarantine area, ideally a separate room or shed away from other timber and soft furnishings. Wrap it in heavy‑duty polythene or seal it in a bag to contain dust and any emerging beetles while you plan treatment. Keep storage conditions stable and dry—aim for good ventilation and low humidity to limit further activity and prevent secondary mould issues.
Choose A Quarantine Area
Pick one dedicated quarantine spot before you treat anything, so you don’t spread larvae, dust, or frass into the rest of the house. Choose a low-traffic area you can ventilate and monitor, such as a garage, utility room, or outbuilding, and keep it away from soft furnishings and stored textiles. Aim for a stable temperature and low humidity, as damp conditions can mask activity and encourage further damage. Set a clear quarantine duration based on suspected infestation severity and when you’ll inspect next.
- Sweepable hard floor (not carpet)
- Good lighting for exit holes and frass
- Space to access all sides of the piece
- A log station for furniture labeling and dates
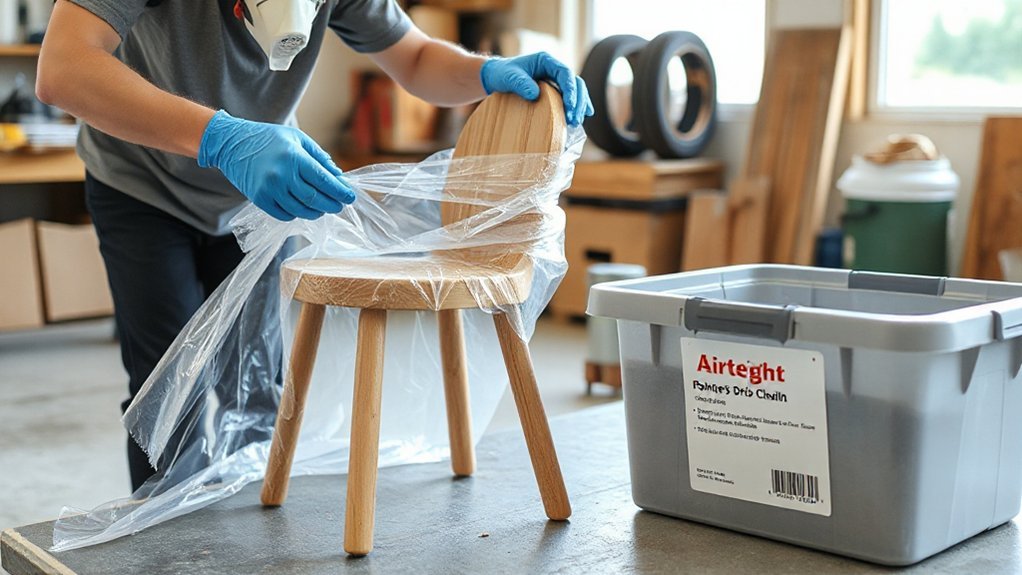
Use Protective Wrapping
Once you’ve set up your quarantine area, wrap the furniture to contain frass and any emerging beetles while still allowing you to inspect it. Use Protective wrapping such as clear polythene sheeting or heavy-duty bin liners, then seal seams with strong parcel tape. Leave access points so you can check flight holes, fresh dust, and surface cracking without fully unwrapping. Fit a tray or disposable sheet underneath to catch debris for monitoring and easy disposal.
If you’re treating with a liquid or gel insecticide, wrap only after the solvent has flashed off and the surface feels dry, so you don’t trap residues against finishes. Label the package with the date, item name, and any treatment used. This supports Furniture preservation and avoids accidental handling in shared UK homes.
Control Storage Conditions
Because woodworm thrives in damp, still air, you’ll get better control if you isolate the wrapped item in a dry, well‑ventilated storage spot and keep the temperature and humidity steady. Choose a lock‑up, spare room, or loft with airflow, not a damp cellar or unheated garage. Aim for Humidity control at 45–55% RH and avoid condensation on cold surfaces; a small dehumidifier and hygrometer help. For Temperature regulation, keep it broadly stable (about 15–20°C) and avoid daily swings that stress timber and open new cracks. Don’t stack items tightly; leave clearance for air circulation. Check traps and frass weekly and log readings so you spot changes early.
- Elevate off concrete
- Keep vents clear
- Use desiccant packs
- Reinspect monthly
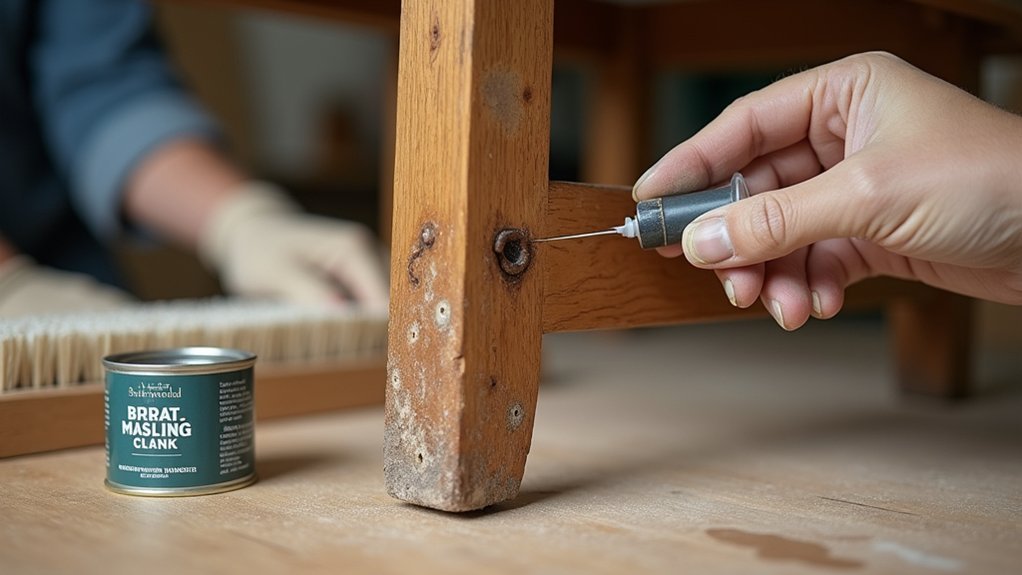
Choose a Woodworm Treatment (Spray, Gel, Injection)
Whether you’re dealing with a few flight holes in a chair leg or widespread activity across an old floorboard, you’ll get the best results by matching the treatment format to the timber’s condition and access. For open, bare surfaces, choose a brush-on or low-pressure spray woodworm fluid so it can wet the grain and soak into sapwood. For vertical faces or where you can’t strip finishes fully, use a gel: it clings, gives longer contact time, and reduces run-off on skirtings and ornate mouldings. For thick sections, structural beams, or persistent attack, drill and inject into 6–10 mm holes along the grain to reach deeper galleries. If you want chemical alternatives, check boron-based products; natural remedies rarely penetrate enough to stop larvae.
Apply Woodworm Treatment Safely Indoors
Before you open a tin or load a sprayer, set up the room so you don’t breathe in vapours or contaminate soft furnishings. Open windows on opposite sides for cross-ventilation, switch off pilot lights, and cover carpets and curtains with polythene dust sheets. Keep pets and children out until the product’s re-entry time has passed. Wear nitrile gloves, goggles, and an FFP3 mask, and wash exposed skin straight after.
- Read the label for UK HSE hazard symbols and dosing rates.
- Apply sparingly; treat holes and flight paths, not the whole room.
- Catch drips with a tray, then wipe spills with disposable rags.
- Bag waste, seal it, and dispose per local council guidance.
Good furniture maintenance supports Woodworm prevention.
Treat Woodworm in Painted or Varnished Furniture
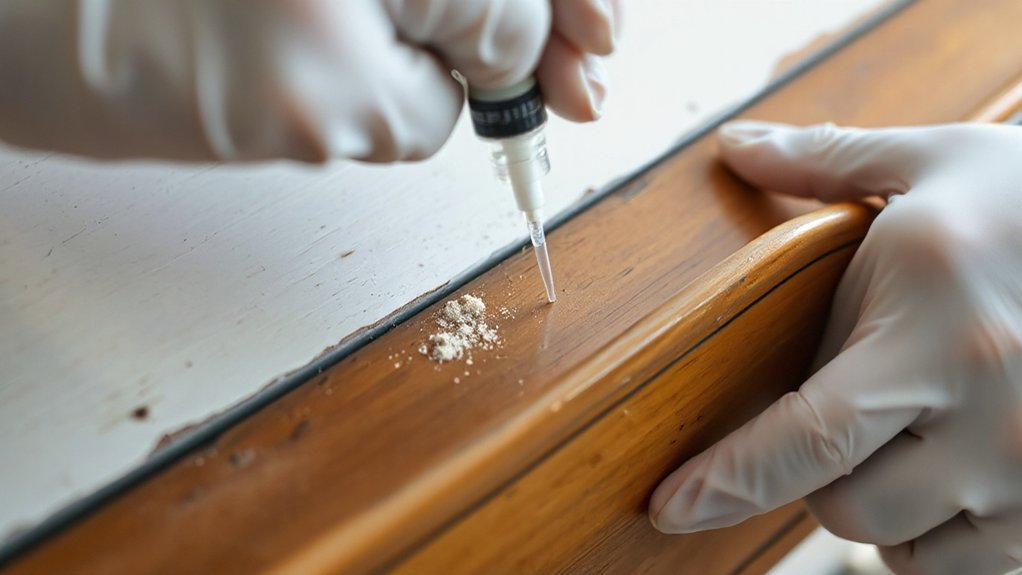
Paints, varnishes, and lacquers can block woodworm fluids from soaking into the timber, so you’ll need to open up a path to the bare wood at the right spots rather than just brushing treatment over the finish. Identify fresh exit holes and lightly score the coating around them with a craft knife, then abrade a small halo with 120–180 grit to expose timber. For heavy build-up, do targeted varnish removal using a scraper or chemical stripper suitable for interior use, following UK COSHH guidance and label timings. Inject or brush boron-based treatment into exposed areas and holes until refusal, then wipe off residue from the finish immediately. Keep the piece dry and ventilated for the stated curing period before resuming Painting maintenance.
Repair and Strengthen Furniture After Woodworm
Once you’ve treated the infestation, you’ll need to consolidate any weakened timber so it can take load again. You can inject a suitable wood hardener into flight holes and punky areas, then fill and sand to restore a sound surface. Next, rebuild damaged joints by stripping back loose fibres, re-gluing with a strong wood adhesive, and clamping square before you refit screws or dowels.
Consolidate Weakened Wood
Although you’ve stopped the active infestation, woodworm often leaves timber soft, friable, and prone to crumbling around exit holes and joints, so you’ll need to consolidate it before any proper repair. Your aim is to stabilise fibres, lock in dust, and create a sound surface for later filling and finishing, as part of effective Wood treatment and Furniture restoration.
- Vacuum thoroughly, then brush with a stiff nylon brush to remove loose frass without tearing sound grain.
- Mask surrounding polish, then wick a low-viscosity consolidant (e.g., epoxy or acrylic resin) into holes and punky areas using a syringe.
- Let it soak, then repeat until absorption slows; keep the piece warm (18–22°C) for UK workshop conditions.
- Once cured, lightly abrade to level raised grain and check hardness with a bradawl test.
Rebuild Damaged Joints
Because woodworm often hollows out tenons, dowels, and mortices from the inside, joints that still “look” intact can rack or fail as soon as you load the piece, so you should rebuild them before any cosmetic filling or refinishing. Strip the joint, mark reference faces, then dismantle carefully with wedges and a mallet to avoid splitting. Scrape out frass and soft fibres, then cut back to sound timber. Rebuild joints by splicing in matching hardwood with a tight, long-grain glue line; use sash cramps to keep everything square. If the original joinery is beyond saving, drill and fit new beech dowels or loose tenons. Reinforce connections with corner blocks, glue blocks, or screws into sound wood, plugging holes afterwards. Use exterior-grade PVA or hide glue for period pieces.
When to Call a Woodworm Professional
If you can’t confirm whether the holes and frass are from an active infestation—or you’re seeing fresh dust, new exit holes, or weakening joints—call a UK woodworm professional straight away. They’ll identify the species, moisture source, and spread, then specify treatment to protect Furniture aesthetics and support Historical preservation.
- You’ve got widespread flight holes across multiple pieces or nearby skirting/joists.
- You can’t access hidden galleries, veneers, or upholstered frames for proper application.
- The timber feels spongy, joints won’t hold, or you suspect structural involvement.
- You need certification, insurer evidence, or a targeted boron/insecticide plan.
Ask for an inspection report, moisture readings, and a written method statement. You’ll avoid overtreatment, staining, and missed reinfestation.
Frequently Asked Questions
Can Woodworm Come Back After Treatment, and How Can I Prevent Reinfestation?
Yes, woodworm can return if eggs or larvae survive the Woodworm lifecycle or new beetles enter. You’ll prevent reinfestation with regular Furniture inspection, keeping timber dry, improving ventilation, sealing bare wood, and treating nearby sources.
Are Woodworm Treatments Safe Around Children, Pets, or Food Preparation Areas?
Generally yes, but only if you treat them like fire: respect the label. Prioritise Child safety, pet protection. Use UK-approved products, ventilate well, exclude kids/pets, cover food areas, and wipe surfaces afterwards.
How Long Should I Wait Before Using the Furniture After Treatment?
Wait 24–48 hours before using it; allow full drying and ventilation. For Furniture restoration, keep it off-limits until the solvent odour’s gone and the label’s re-entry time passes for Chemical safety, especially indoors.
Will Woodworm Treatment Affect Antique Value or Original Finishes and Patina?
It can, but you’ll minimise risk by choosing Antique preservation methods that protect Finish integrity. Avoid solvent-heavy products; test discreetly first. You shouldn’t strip patina. Use conservator-approved boron treatments, apply sparingly, document work.
Do Woodworm Infestations Indicate Underlying Damp or Ventilation Problems?
Yes—often. Around 80% of wood-boring beetles prefer timbers above 16–18% moisture levels, so infestations can flag damp. You should check ventilation issues: blocked airbricks, leaking gutters, condensation, and elevated RH.
Conclusion
Once you’ve confirmed active woodworm, you can stop it before it turns sound timber into powder. Picture fresh frass like fine sawdust on a dark sideboard, holes dotting the grain like pinpricks. You’ll isolate the piece, choose the right spray, gel, or injection, and work safely indoors with ventilation and gloves. If paint or varnish blocks penetration, you’ll prep carefully. Then you’ll consolidate, fill, and refinish—unless spread or structural loss means calling a UK specialist.