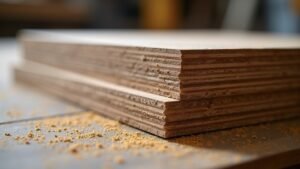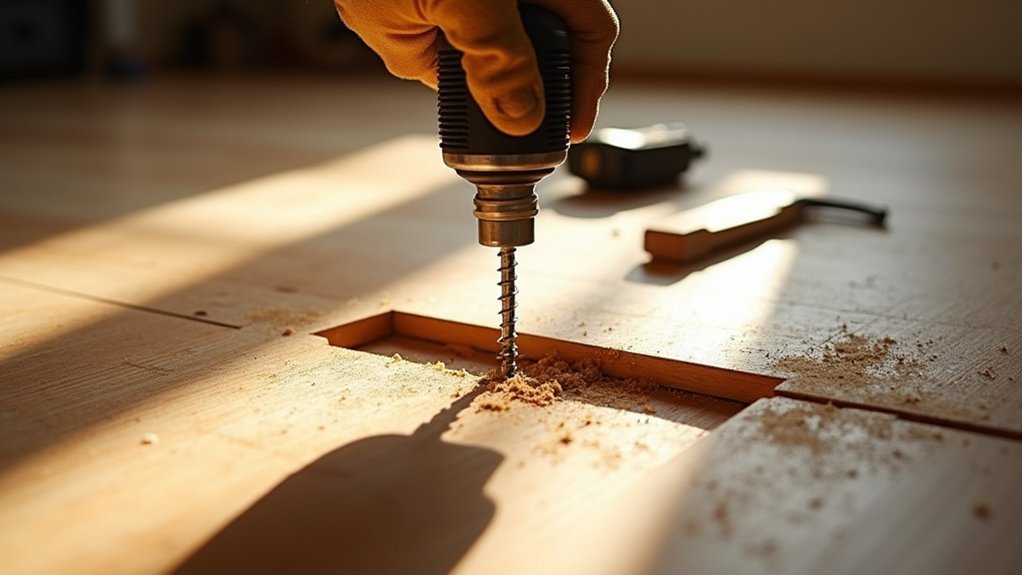
Track the squeak first: clear the area, walk heel-to-toe in a tight grid, and mark hotspots with masking tape. Work out joist direction by spotting nail lines or lifting a threshold. If boards are rubbing, dust talc/graphite or run a wax stick into the joint and wipe clean. If a board lifts or dips, pre-drill and countersink screws into the joist to pull it tight. There’s more to try if it still creaks.
Key Takeaways
- Locate and mark each squeak by walking heel-to-toe in a tight grid, confirming the hotspot from multiple angles.
- Identify floor type and joist direction by finding nail/screw lines or lifting a threshold strip, then target fixes into joists.
- Quiet rubbing joints fast by working talc, graphite, or wax into gaps, then brushing it in and wiping residue.
- Permanently fix movement by pre-drilling and countersinking screws through boards or subfloor into joists to pull everything tight.
- Reinforce from below with angle brackets or noggins between joists to reduce flexing and stop recurring squeaks.
Find the Exact Creaking Floorboard Spots Fast

Where’s the creak actually coming from? You’ll find it faster by working methodically, not guessing. Clear the area, take your shoes off, and walk heel-to-toe in a tight grid, listening for the first squeak. Mark each spot with low-tack masking tape, then step again from different angles to confirm. Use a torch to study Flooring patterns so you can track the sound along a single board line rather than the whole room. Next, add weight: press down with your knee, then shift your stance to mimic everyday movement. If the noise changes, you’ve got the hotspot. Record a quick note on your phone for each mark; that speeds up targeted Noise reduction later on.
Figure Out Your Floor Type and Joist Direction
Before you reach for screws or adhesive, work out whether you’ve got suspended timber floorboards, tongue-and-groove boards, or a sheet floor (chipboard/ply) and which way the joists run, because the fix depends on what’s moving against what. Different Flooring materials are fixed differently, and you’ll waste time treating the wrong layer.
- Lift a threshold strip or radiator pipe collar to see the board edge: square-edged boards suggest old floorboards; interlocking edges suggest tongue-and-groove; large panels point to chipboard/ply.
- Find Joist orientation by locating nail/screw lines: they usually run across joists; chalk them so you can follow the joist centres.
- Check access: an under-stairs cupboard, air brick, or hatch may let you view joists and confirm spacing.
Diagnose: Loose Boards, Rubbing, or Subfloor Squeaks
Once you know what floor you’ve got and which way the joists run, track down exactly what’s making the noise: a board that’s loose, two timber edges rubbing, or the subfloor moving on the joists. Walk the area in socks and mark the exact squeak with masking tape. If a single board lifts or dips underfoot, it’s loose; check for popped nails, missing screws, or a widened tongue-and-groove joint, which varies with floorboard materials. If the sound appears along a joint line, edges are rubbing; look for tight boards, swelling, or trapped debris. If the squeak sits between boards or follows a joist line, suspect subfloor construction: loose sheet edges, failed fixings, or movement where panels meet joists.
Understand What Makes Floorboards Creak
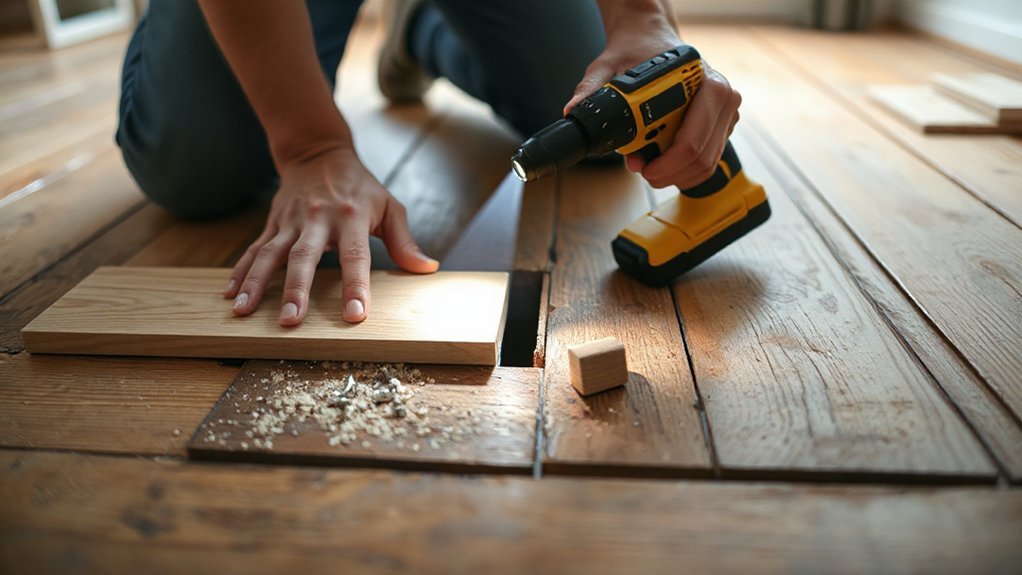
Why do floorboards creak in the first place? You’re hearing movement and friction: timber flexes, fixings shift, and joints rub as you walk. In many UK homes, seasonal humidity makes wood expand and contract, widening gaps and loosening nails over time. Different floorboard materials (softwood, hardwood, engineered boards) react differently to moisture and load, so the noise can vary room to room. The acoustic properties of your floor structure also amplify small movements into loud squeaks, especially with voids under suspended timber floors.
- Movement: boards bend between joists and at tongue-and-groove joints.
- Friction: board edges, nails, or screws scrape as weight transfers.
- Amplification: air gaps and plaster ceilings act like a drum, carrying sound.
Try Quick, Low-Mess Fixes (Talc, Graphite, Wax)
If your floorboards are creaking but you want a quick, low-mess fix, start by working talc or graphite powder into the gaps between boards to cut friction. You can brush or squeeze it in, then walk over the area to help it bed down and quieten the noise. For stubborn spots, run a wax lubrication stick along the joints to coat the contact points without lifting the floor.
Apply Talc Or Graphite
A quick, low-mess way to quieten creaky floorboards is to lubricate the joints with talc, graphite powder, or wax. For Talc application, sprinkle a small amount into the gap between boards, then work it down with a stiff paintbrush. Walk over the area to help it settle, and vacuum the excess so it doesn’t track through the house.
For Graphite lubrication, use a dry graphite powder (often sold for locks) and puff it into the seams sparingly. It’s cleaner than oil, won’t swell timber, and reduces friction where boards rub on nails or each other.
- Locate the squeak and mark it.
- Apply talc or graphite into the joint.
- Test, then repeat in small doses.
Use Wax Lubrication Sticks
When you want a cleaner option than powders, wax lubrication sticks let you silence a squeak fast without mess. Pick a clear or neutral stick so you don’t stain pale boards, then work on a dry floor with good light.
Press the stick into the gap where two boards rub, and draw it along the joint, following the wood grain so you fill the full length. Step on the area to flex the boards, then apply a second pass where you still hear noise. Wipe any smears immediately with a soft cloth to protect the surface finish, especially on sealed timber or laminate. On older UK floorboards, pay attention around doorways and radiators where movement’s common. If the squeak returns quickly, you’ll likely need fixing or refastening instead.
Shim Gaps to Stop Rubbing Floorboards
Even though floorboard squeaks often sound like a loose nail, they’re frequently caused by boards rubbing against each other or against a joist in a small gap. To stop it, you can pack the gap so the timber can’t move and chatter. Bear in mind Floorboard expansion and Moisture effects: in UK homes, seasonal humidity makes boards swell and shrink, reopening gaps.
- Lift the carpet/underlay and find the noisy spot by stepping and listening.
- Tap in a thin timber shim (or folded card as a temporary fix) from the side, keeping it snug, not forced.
- Trim flush, then dust the seam with talc or graphite so fibres don’t bind.
Check you’re not blocking ventilation gaps at skirtings.
Fix Creaking Floorboards With Screws From Above
Packing gaps with shims can stop boards rubbing, but if the squeak comes from a board lifting or working on its fixings, you’ll get a longer-lasting result by screwing it down from above. First, locate the joist line: use a stud/joist finder, existing nail lines, or lift a threshold strip to confirm direction. Mark the squeaky spot, then pre-drill and countersink to avoid splitting. Drive 50–60mm wood screws through the board into the joist, stopping just below the surface. Use two screws per joist crossing to prevent twist. Fill the countersunk holes with colour-matched wax or filler to protect Floorboard aesthetics. Note the Floor squeak history: repeated squeaks usually mean loosened fixings, so replace any rusty nails nearby too.
Pull the Subfloor Tight to the Joists (Above)
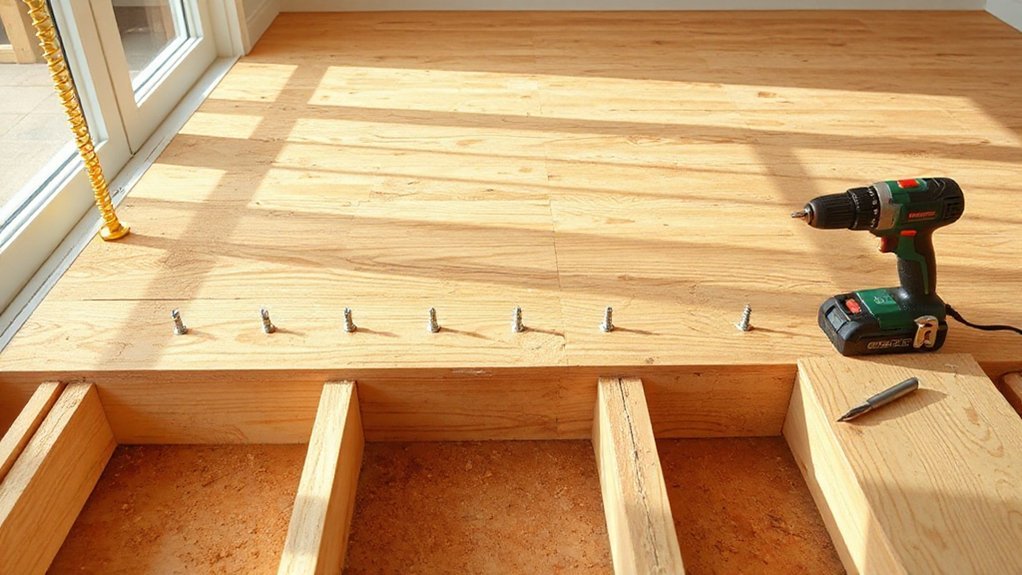
If the squeak’s coming from the subfloor lifting and flexing on the joists, you can stop it by pulling the sheets back down tight from above. Start with Subfloor inspection: lift the floor covering at the noisy area and find the panel edge, nail line, or movement point. Mark joist centres with a stud finder or by tapping for fastener lines, then confirm Joist alignment so you’re not fixing into thin air.
- Drill pilot holes through the subfloor along the joist line to prevent splitting and screw jacking.
- Drive flooring screws until the sheet pulls snug; don’t overdrive and dish the surface.
- Add extra screws at panel edges and seams, spacing about 150–200mm where it moves.
Fix Creaking Floorboards From Below (Brackets, Blocks)
If you can access the floor from underneath (a cellar or suspended timber floor), you can stop creaks at the source without lifting boards. Fit joist brackets to pull loose boards tight to the joists, then add timber blocking between joists to stiffen the span and prevent movement. These fixes are quick, tidy, and ideal when you want a solid feel underfoot.
Install Joist Brackets
Where does that annoying squeak actually come from? It’s usually floorboards rubbing on fixings as the joist flexes, especially where joist spacing is wide or the subfloor material has dried and shrunk. From below, you can stiffen the joint with joist brackets so the board can’t move.
- Lift a small section of ceiling below or access the void; locate the noisy bay and mark the joist line.
- Offer up a galvanised angle bracket tight to the joist and the underside of the board, then screw into the joist first and the board second (don’t pierce through the top).
- Test by walking above, then add a second bracket either side of the squeak if needed.
Use appropriate wood screws and eye protection; isolate electrics where you’re unsure.
Add Blocking Supports
Although joist brackets can lock down a single trouble spot, adding solid blocking between joists tackles the wider cause by stopping the joists twisting and reducing the bounce that makes boards squeak. Get access from below, then measure the joist spacing and cut noggins from 38 x 63mm or 47 x 75mm treated timber to fit snugly. Tap them in so they’re tight, then fix through each joist with 75–100mm structural screws or nails; add adhesive for extra grip. Stagger blocks along the run to avoid splitting and to spread loads. This floor blocking ties the joists together and stiffens the whole bay. If services run through, notch or drill carefully, keeping within UK guidance. Done well, it’s straightforward support reinforcement.
Stop Squeaks Caused by Nails and Staples
When nails or staples loosen over time, they let the floorboard lift and rub against the joist, creating that familiar squeak with every step. Your goal is to clamp the board tight without splitting it, then stop the movement returning.
- Locate the squeak, then re-fix: drive 50–60mm flooring screws into the joist beside the loose nail line, countersinking slightly so the head sits below the surface.
- If staples are the culprit, pull any proud legs with end-cutters, then add two screws either side of the old fixing to lock the board down.
- Reduce future loosening: improve Moisture control (ventilate, fix leaks) and keep Floor insulation clear of damp so timber movement stays minimal.
Fix Creaks at Doorways, Edges, and Transitions
At doorways and room edges, movement between materials is often what’s creaking, so you’ll need to lock those areas down. Start by securing the threshold strip and any loose trim, then reinforce the edge joist support where the boards have less backing. Finish by sealing gaps at junctions so nothing can rub or flex when you walk over it.
Secure Threshold And Trim
If your floor only creaks as you step through a doorway or along the edge of a room, the culprit is often a loose threshold strip or skirting/trim that’s rubbing or lifting as the boards flex. Sort it before you chase bigger fixes: movement here amplifies noise. Check for gaps, proud nails, or failed adhesive, and make sure carpets or underlay aren’t bunching at transitions.
- Remove the threshold, clean off old glue, then refit with fresh grab adhesive and countersunk screws into solid timber, not just chipboard.
- Re-pin skirting/trim with lost-head nails or screws, leaving a hairline gap above the floor so it can move without rubbing.
- Improve floor insulation and moisture control under the floor; damp swelling makes edges bind and squeak.
Reinforce Edge Joist Support
Although thresholds and trim often take the blame, creaks at doorways, room edges, and floor shifts usually come from weak edge support where the last board meets a joist (or doesn’t quite catch it). Lift the board if you can, or access from below, and check whether the edge actually lands on timber. If it’s floating, add noggins between joists or fit a timber ledger fixed to the joist side to create a proper bearing. Then screw the board down with flooring screws, not nails, pre-drilling to avoid splits. Where you’ve got a thin strip by a doorway, add a short batten beneath it and fix through. This edge reinforcement is simple, solid support reinforcement that stops movement and noise.
Seal Gaps At Transitions
When floorboards meet a threshold strip, tile edge, or skirting, even a small gap can let the boards rub and click every time you walk through. Sealing gaps at these transitions stops sideways movement and takes the noise out of high-traffic spots. Work carefully so you don’t lock the boards tight against each other; you’re aiming to cushion and stabilise, not bind.
- Lift the threshold or trim if possible, vacuum out grit, and check for loose fixings at the doorway edge.
- Add Transition insulation: push in compressible foam backer rod, then apply a flexible decorators’ caulk or MS polymer sealant for movement.
- Refit the strip, leaving a neat expansion gap, and pin any lifting boards with lost-head nails or screws into joists.
Stop Floor Squeaks Under Carpet or Laminate
Even with carpet or laminate in place, squeaks usually come from loose floorboards rubbing on joists or nails beneath the surface, so you’ll need to secure the floor from above without tearing the whole room apart. Find the squeak by walking slowly and marking the spot with masking tape. For carpet, locate the joist line (use a stud finder), then drive specialised breakaway screws through the pile into the joist; snap the heads off below the surface and brush fibres back. For laminate, lift the nearest trim, release a few boards, and re-fix the subfloor with screws into joists, then relay, keeping click joints tight. If you’re refitting, add Floor insulation and underlay, and choose Decorative patterns that disguise seams.
Prevent Return Creaks: and Know When to Call a Pro
You’ve tightened the boards and sorted the surface finish, but stopping squeaks long-term means preventing them from working loose again and recognising signs that point to a bigger issue. Keep movement down by stabilising the whole floor build-up and controlling moisture swings typical in UK homes. Add Floor insulation between joists and use Soundproofing techniques (acoustic mineral wool, resilient bars, and dense underlay) to reduce vibration that reopens gaps.
- Refix boards into joists with proper screws, then mark joist lines so you don’t miss them later.
- Maintain even humidity: ventilate subfloors, fix leaks, and avoid over-washing timber floors.
- Call a pro if you spot bouncing floors, cracked plaster, rotten joists, woodworm, or persistent noise after refixing—these suggest structural or subfloor defects.
Frequently Asked Questions
Will Fixing Creaks Affect Underfloor Heating or Its Warranty?
Fixing creaks can affect underfloor heating and its warranty if you damage pipes, cables, or insulation, so you’ll follow the manufacturer’s guidance. Use Soundproofing techniques and careful Flooring material choices, and keep receipts for compliance.
Can Creaky Floors Indicate Structural Problems or Foundation Movement?
Like a town crier, you should treat creaks as possible structural warnings: they can indicate movement, though often harmless. Arrange a Structural assessment if cracks, sticking doors, or sloping appear, to confirm Foundation stability.
How Much Do Floorboard Squeak Repairs Typically Cost per Room?
You’ll typically pay £80–£300 per room, rising to £400+ for larger areas. Costs depend on floorboard materials and repair techniques: refixing loose boards, adding screws, glue blocks, or lifting carpets.
Are There Noise-Reduction Building Codes or HOA Rules for Upstairs Floors?
Yes—UK flats may require building code compliance under Approved Document E for airborne/impact sound, while HOA regulations or lease covenants can add stricter rules. You should check your council, managing agent, and tenancy documents.
What’s the Best Fix for Creaks in Historic or Protected Properties?
Choose reversible, conservation-approved repairs: lift boards carefully, secure joists with packers, and refix using cut nails. You’ll protect Decorative floor finishes and apply Acoustic insulation techniques like resilient layers, avoiding invasive alterations.
Conclusion
Once you’ve pinned down the squeak, you’re not just fixing timber—you’re quieting a little warning bell in your home. Work methodically: locate the spot, match the fix to the floor type, and secure movement at the joist or between boards. Use low-mess lubricants where rubbing’s the issue, and proper screws where fasteners are failing. If creaks keep returning or the floor feels springy, call a trusted UK joiner.