Want to learn a few simple ways to upgrade your garden layout without breaking the bank? Walk your garden at different times and map sun, shade, wind, drainage, compaction, and pest hot spots. Sketch a to-scale layout, then set one main path that connects entry, key beds, and a clear destination, and add 18–24 inch secondary paths for tools and harvest runs. Simplify beds into clean rectangles or arcs, group plants by microclimate and irrigation, and layer heights tall-to-low. Repeat 2–4 anchor plants and crisp edging for unity. Next, you’ll see how to lock in flow fast.
Key Takeaways
- Walk your garden at different times, map sun, shade, drainage, and problem spots, then prioritize fixes by impact.
- Draw a simple to-scale base map, block in beds, utilities, and zones, and label crops and irrigation to match light exposure.
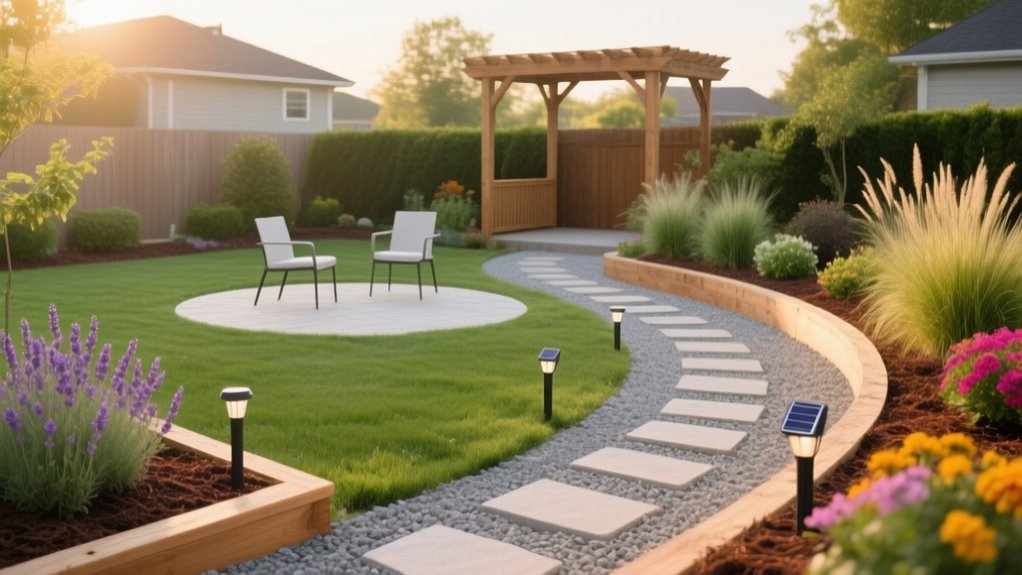
- Create one main path linking entry, key beds, and a destination, keeping width consistent for easy circulation.
- Add secondary paths between beds, compost, and water sources, using durable materials and 18–24 inch widths for tool access.
- Simplify bed shapes and group plants by microclimate and water needs, then sharpen edges with clean edging and a clear focal point.
Walk Your Garden and Note the Trouble Spots

Before you move a single plant or edge, walk your garden at different times of day and log what isn’t working. Track sun, shade, and wind corridors, then flag heat sinks near walls and frost pockets in low spots.
After rain or irrigation, map where water ponds, channels, or dries too fast. Note compaction, bare patches, and erosion at slopes or downspouts.
Inspect leaves and stems weekly to spot garden pests early; record which crops get hit, when, and where.
Check soil nourishment by sampling texture and moisture, and by noting chlorosis, stunting, or uneven vigor.
Photograph each issue, mark dates, and prioritize fixes by impact on plant health, access, and maintenance time.
Sketch a Simple Garden Layout (Paths + Beds)
Now that you’ve mapped the problem areas—sun gaps, wet spots, compaction, and pest pressure—put them onto paper with a quick, to-scale sketch of your paths and beds.
Measure key edges, then draw a simple base map: house line, fences, trees, and utilities. Block in beds as rectangles or arcs sized to your reach, and leave clear maintenance margins for edging and mulching.
Mark drainage flow with arrows and note where soil needs aeration or raised beds.
Drop in Garden furniture zones so you don’t plant where you’ll sit, store tools, or turn a wheelbarrow.
Reserve a wildlife habitat pocket: native shrubs, water dish, and leaf litter.
Label light bands and bed crops to match irrigation and exposure.
Set One Main Route Through the Garden
Set one main route through your garden by choosing a primary path that connects the entry, key beds, and high-use features.
Keep the walkway width consistent along this route so movement feels predictable and circulation stays efficient.
You’ll reduce visual clutter, prevent awkward pinch points, and make the layout read as intentional.
Choose A Primary Path
Although you can add side trails later, you’ll get a cleaner, more functional layout by choosing one primary path that defines how people move through the garden. Start by mapping where you enter, pause, and exit, then draw a single continuous line that connects those points with minimal turns.
You’ll reduce trampling, simplify maintenance, and make plant groupings read as intentional “rooms.” Use the path to frame focal elements, not compete with them, and align it with sightlines from key windows or seating.
- Use Garden lighting to mark junctions and reinforce direction after dusk.
- Place Water features along the route to create a natural pause point.
- Terminate the path at a clear destination: bench, arbor, or sculpture.
Keep Walkway Width Consistent
Once you’ve established your primary route, keep its width consistent so the garden reads as a single, intentional circulation line. Pick a dimension—36–48 inches for two-way walking, 30 inches for a tight service run—and hold it through curves, nodes, and progressions.
If you need a pause point, widen deliberately into a landing, not an accidental bulge. Maintain the same edging type and reveal to reinforce alignment and simplify maintenance.
Set garden lighting at a regular offset from the path edge so fixtures form a measured rhythm and eliminate dark gaps.
Keep planting beds from encroaching; use root barriers or set-back stakes to preserve clearance.
Consistent width also protects wildlife habitats by concentrating foot traffic and reducing soil compaction in refuge zones nearby.
Add Secondary Paths for Access and Maintenance
Add secondary paths where you’ll repeatedly work—between beds, to compost, and along fence lines—so you don’t compact soil or damage plantings.
Choose durable materials like compacted gravel, pavers, or mulch based on drainage, load, and slip resistance.
Keep widths and clearances consistent so you can move tools, hoses, and carts efficiently for fast maintenance access.
Strategic Path Placement
When you place secondary paths with intent, you reduce soil compaction, prevent plant damage, and streamline routine maintenance. Map routes from hose bibs, sheds, compost, and harvesting zones, then connect them with the shortest, safest lines that still respect bed geometry. Keep paths just wide enough for your tools and turning radius, and align them to let you reach every plant without stepping into soil.
Garden folklore says “never tread where you sow,” and horticultural history backs it: controlled foot traffic preserves structure and root aeration.
- Route paths to service points you visit weekly
- Add cross-aisles so you can deadhead, stake, and prune efficiently
- Leave clear sightlines at intersections to avoid clipping stems
Durable Path Materials
Three path materials do the most work in secondary access lanes: compacted gravel, wood chips, and pavers. Choose compacted gravel when you need a firm, permeable surface that supports garden drainage; set it over geotextile and a crushed-stone base to limit rutting.
Use wood chips where you want low glare and quiet footing; keep them 2–3 inches deep, refresh seasonally, and edge the lane to stop migration into beds.
Install pavers for the highest load and cleanest line; bed them in screeded sand over a compacted base, and lock joints with polymeric sand.
Whatever you pick, crown or slope the lane to shed water and prevent soil compaction at bed edges.
Easy Maintenance Access
Once you’ve chosen a durable surface, the layout matters just as much for keeping beds workable. Add narrow secondary paths so you can reach every planting zone without compacting soil. Aim for 18–24 inches wide, keep turns generous for a wheelbarrow, and place access points at bed ends for quick entry.
Tie these routes into Irrigation planning by running mainlines under paths and adding valve boxes where you can reach them fast. For Pest prevention, use paths as inspection lanes so you can spot damage early, prune airflow blockers, and remove infested debris without trampling crops.
- Slip stepping-stone spurs between dense beds for spot weeding.
- Keep path edges crisp to limit grass creep and hiding sites.
- Leave a small staging pad for tools, mulch, and harvest bins.
Group Plants Into Clear, Easy-Care Zones
Even if your garden has great plants, it can still feel high-maintenance if everything needs different care. Use Plant grouping to standardize inputs: water, light, soil type, and pruning cycles.
Start by mapping microclimates—sun, shade, wind, drainage—and match plants to those conditions. Then cluster by irrigation demand: hydrozone thirsty species near the tap or drip line, and place drought-tolerant plants where you can water less.
Create Care zones for feeding and mulch schedules, too, so you’re not fertilizing every corner differently. Keep high-touch crops (herbs, cut flowers, salad greens) close to paths, and push low-touch perennials outward.
You’ll reduce tool changes, mistakes, and wasted water.
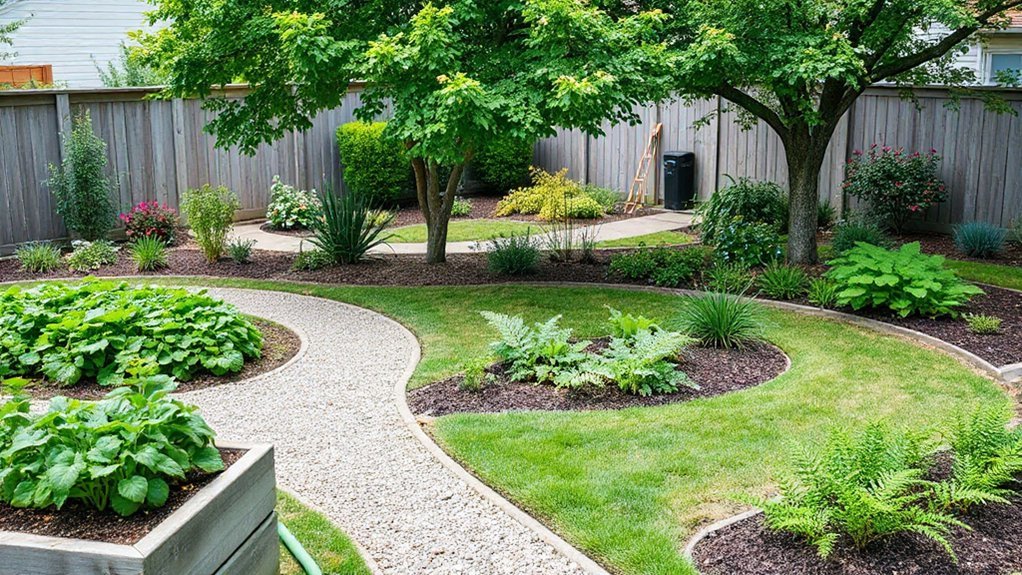
Use Clean Bed Shapes to Simplify the Layout
After you’ve grouped plants into low- and high-care zones, lock that efficiency in with bed shapes you can read at a glance. Use simple geometry—rectangles, arcs, or clean ovals—so each bed has a single, unbroken outline. You’ll plan irrigation, spacing, and access faster because the footprint stays consistent from season to season.
- Mirror the curve of a garden pond with one sweeping bed line, not multiple wobbling bends.
- Repeat one radius around corners so beds align visually and measurements stay predictable.
- Anchor focal points—like decorative statues—inside a centered oval bed so planting radiates evenly.
Keep bed sizes proportional to your maintenance bandwidth: smaller for detail-heavy plantings, larger for massed, low-input blocks. You’ll reduce decision fatigue and layout errors.
Edge Beds and Paths for a Sharper Look
Because crisp boundaries do most of the visual work, you’ll get a cleaner, more intentional garden by edging beds and paths with a consistent, repeatable detail. Choose steel, brick, or cut-stone set flush to grade so mowers track cleanly and gravel stays contained.
Keep your edge line continuous; break it only at gates or drains. Set a compacted base and stake flexible edging every 18–24 inches to prevent heave. Maintain a 2–3 inch trench between turf and bed to stop grass creep and improve drainage.
Integrate Garden lighting by tucking low-voltage fixtures just inside the edging, aimed down to avoid glare.
Preserve Wildlife habitats by leaving small gaps at ground level for beetles, frogs, and movement corridors.
Add One Focal Point to Anchor the Space
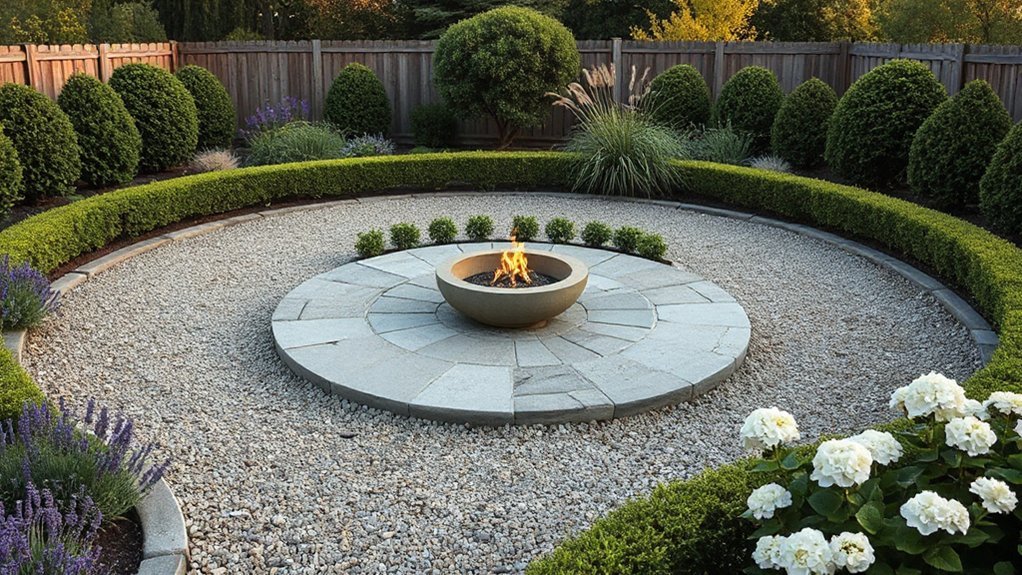
One strong focal point gives your garden an instant hierarchy, so every bed line, path, and planting choice reads as intentional. Place it where sightlines naturally land—end of a path, center of a view corridor, or just beyond a doorway.
Keep it singular and high-contrast so it doesn’t compete with surrounding texture. Use visual anchoring techniques like symmetry, hard edges, and framing to lock the view.
Choose durable, low-maintenance focal point ideas that read at distance:
- A sculptural boulder or clipped sphere in gravel
- A small water bowl or birdbath with a clean rim
- A painted bench or trellis panel on axis
Match scale to your space: too small disappears, too large overwhelms. Repeat its material once elsewhere for cohesion.
Layer Plant Heights for Better Structure
To give your beds clean structure, you’ll layer plant heights from back to front. Place tall plants behind to build a visual backdrop and keep shorter species from getting shaded out.
Edge the bed with low growers to sharpen the border, improve sightlines, and create a finished profile.
Place Tall Plants Behind
A simple layered-height rule brings instant structure to any bed: keep your tallest plants in back (or at the center of island beds), then step down through medium growers to low edging at the front. You’ll prevent shading of shorter selections, preserve sightlines, and create a clear visual hierarchy.
Tall plants also work as living screens, boosting garden privacy without hard barriers. Place them where they block unwanted views, not sun paths, and confirm mature height, spread, and wind load before planting.
Anchor the “back row” with a repeatable rhythm so the layout reads intentional from every angle.
- Use tall grasses or canes to add vertical mass without heaviness.
- Stagger heights to avoid a flat hedge effect.
- Keep access gaps for watering, pruning, and inspection.
Edge With Low Growers
After you’ve set the back row with tall plants, lock the whole bed in by edging with low growers at the front line. This height step-down creates a clean visual boundary, reduces leggy shading, and makes irrigation more efficient by directing overspray into the bed, not the path.
Choose compact, spreading plants that knit quickly and tolerate trimming: creeping thyme, ajuga, dwarf mondo grass, sedum, or low boxwood. Keep the edge band consistent—typically 8–14 inches deep—so your garden edges read as a deliberate frame.
Space plants to meet at maturity, then shear lightly after bloom to maintain a crisp profile. If you need extra definition, run a narrow spade-cut trench or install steel edging to hold lines.
Repeat a Few Plants to Unify the Design
Even if your garden includes a wide mix of species, repeating a small set of plants across beds instantly imposes structure and cohesion. Use plant repetition to guide the eye, reduce visual noise, and create design unity without limiting biodiversity.
Pick 2–4 “anchor” plants with long seasons, stable form, and compatible culture, then echo them at consistent intervals.
- Repeat the same grass clump at path turns to signal movement and rhythm.
- Mirror a signature shrub at bed endpoints to lock in proportions and balance.
- Reuse one flower color in drifts to connect separate zones and simplify maintenance.
Keep spacing, mulch color, and edging consistent around repeats so the pattern reads clearly. You’ll get a layout that feels intentional and easy to navigate.
Go Vertical to Save Space and Add Privacy
Two vertical layers can transform a cramped bed: add height with trellises, arbors, wall planters, or narrow columnar shrubs. Then train vines or espaliered fruit to occupy airspace instead of valuable soil.
In Vertical gardening, you’ll increase light capture and airflow while keeping root zones open for groundcovers or drip lines. Set supports on the north or west edge to reduce shading on sun-loving perennials, and anchor posts below frost depth for stability.
For privacy screens, choose dense, fine-textured climbers or tightly spaced uprights, and stagger them to break sightlines without creating wind tunnels. Prune to a flat plane to maintain circulation and prevent mildew. Use stainless wire or coated cable for espalier so tension stays consistent across seasons.
Use Containers to Fill Gaps and Add Seasonal Color

When your beds look finished but still show awkward gaps, containers let you plug holes instantly and rotate color on demand. Use pots as modular “tiles” to correct spacing, soften hard edges, and test plant pairings before committing to in-ground changes.
Prioritize Container diversity—mix heights, diameters,, and materials—to control sightlines and create intentional rhythm along paths and patios. For Seasonal blooms, swap plantings on a 6–8 week cadence, and keep a few pre-potted backups to replace anything that stalls.
- Place tall containers behind low perennials to hide bare stems.
- Cluster three pots (odd numbers) for a stable focal point.
- Standardize irrigation with drip stakes and saucer-free drainage.
Frequently Asked Questions
What’s the Best Time of Year to Redesign a Garden Layout?
Redesign in early spring or fall, when soil’s workable and plants aren’t heat-stressed. You’ll align Seasonal planting cycles, manage Weather considerations like frost risk and rainfall, and establish roots before summer heat or winter dormancy.
Do I Need Permits or HOA Approval to Change My Garden Layout?
You might—about 60% of HOA-governed homeowners need exterior-approval. Check your HOA covenants first. For major grading, retaining walls, fences, or irrigation, you’ll need municipal sign-off and plant permits. Use garden zoning to document scope.
How Much Does a Typical Garden Layout Upgrade Cost?
You’ll typically spend $500–$5,000, depending on hardscape, plants, irrigation, and labor. For cost considerations, price materials first, then add 10–20% contingency. Budgeting tips: phase upgrades, reuse edging, DIY low-skill tasks.
Which Garden Layout Changes Boost Home Value the Most?
You boost home value most by reshaping pathways, defining outdoor rooms, and framing entries—like a key turning. Prioritize landscape aesthetics, clean hardscapes, layered plant arrangements, and low-maintenance lighting; you’ll signal permanence, function, and curb appeal.
How Can I Make a Garden Layout Safer for Children and Pets?
You’ll make your garden safer by fencing hazards, adding soft surfacing, locking gates, and covering water features. Follow child proofing tips: remove sharp tools, anchor furniture. Choose pet safe plants, avoid toxic mulch.
Conclusion
You’ve walked the ground, mapped the beds, and set a clear route like a traveler plotting safe passage through a small kingdom. Each secondary path becomes a patrol line, each zone a district with its own low-maintenance rules. By layering heights and repeating key plants, you build order, not clutter. Vertical elements raise walls without stealing soil. Containers act like visiting merchants—swapping color with the season. Keep refining, and your garden runs itself.