Like the best adaptive re‑use projects you’ve seen in converted chapels and coach houses, a stone built gatehouse asks you to balance restraint with invention. You’ll need listed-building consent clarity, a defect-led survey, and a decision on what stone stays exposed before you touch insulation, glazing, or services. Keep interventions slim, honest, and reversible, and route modern comfort discreetly so arches, quoins, and patina stay in charge—but one early choice can lock in everything that follows…
Key Takeaways
- Secure early planning and heritage consent with a clear statement showing minimal, reversible change and retained historic fabric.
- Start with a conservation structural and moisture survey to map defects, settlement, and water ingress before any strip-out.
- Fix damp at source using breathable lime repairs, compatible repointing, and corrected drainage and rainwater goods.
- Design new glazing and joinery to respect original proportions, using slim profiles, honest contemporary detailing, and discreet frames.
- Resolve junctions with intentional reveals and reversible fixings anchored in mortar joints, keeping services hidden and avoiding masonry damage.
Confirm Planning and Listed-Building Consent Early
Before you sketch layouts or price up contractors, confirm what the local planning authority will actually permit—and whether the gatehouse is listed or sits within a conservation area—because that status will shape every design decision. Request pre-application advice, map constraints (heritage, flood, access, ecology), and ask which changes trigger listed-building consent versus standard planning.
Build your case around Historic preservation: retain significant fabric, avoid unnecessary alteration, and justify any intervention with a heritage statement and measured impact. Then show Modern integration in a way planners recognise as “honest”: lightweight glazing, reversible partitions, and contemporary services routed discreetly.
Align materials with local precedent, but don’t fake age. Keep drawings coordinated, include a schedule of works, and agree conditions early to prevent redesign and delay.
Survey Your Gatehouse Conversion: Structure and Defects
Although you might feel tempted to jump straight into layouts, a proper building survey should come next because stone‑built gatehouses hide defects that only show up under close inspection.
Commission a conservation-accredited surveyor and a structural engineer who understand Historic preservation and how traditional masonry behaves. You’ll want crack mapping, level checks, and moisture profiling to spot settlement, bulging walls, failed lintels, and salt damage.
Ask for roof structure review, rainwater goods assessment, and chimney stability notes, since water ingress drives most decay.
Specify mortar analysis to confirm compatibility and flag harmful cement repairs.
Request scoped openings only where justified, then record everything for your method statement.
A clear defects schedule lets you prioritise Structural integrity work, cost accurately, and avoid surprises during strip-out.
Choose Which Stone Stays Exposed (and Why)
Once you’ve logged defects, decide deliberately where exposed stone will earn its keep, because stripping back everything isn’t “authentic”—it can destabilise moisture balance, highlight mismatched repairs, and lock you into harder-to-heat, noisier rooms.
Prioritise reveal zones that read as original: arches, quoins, fireplace inglenooks, or a single feature wall that frames views and lighting. Leave working elevations, bedrooms, and circulation walls skimmed for comfort and acoustic control.
Keep patches of Natural weathering where they tell the building’s story, but avoid showcasing friable faces or salt-blown joints. For stone preservation, you’ll specify gentle cleaning, tight repointing lines, and discreet limewash toning to unify colour without faking age.
Test small areas first under your actual lighting.
Fix Damp First, Then Insulate Breathable Walls
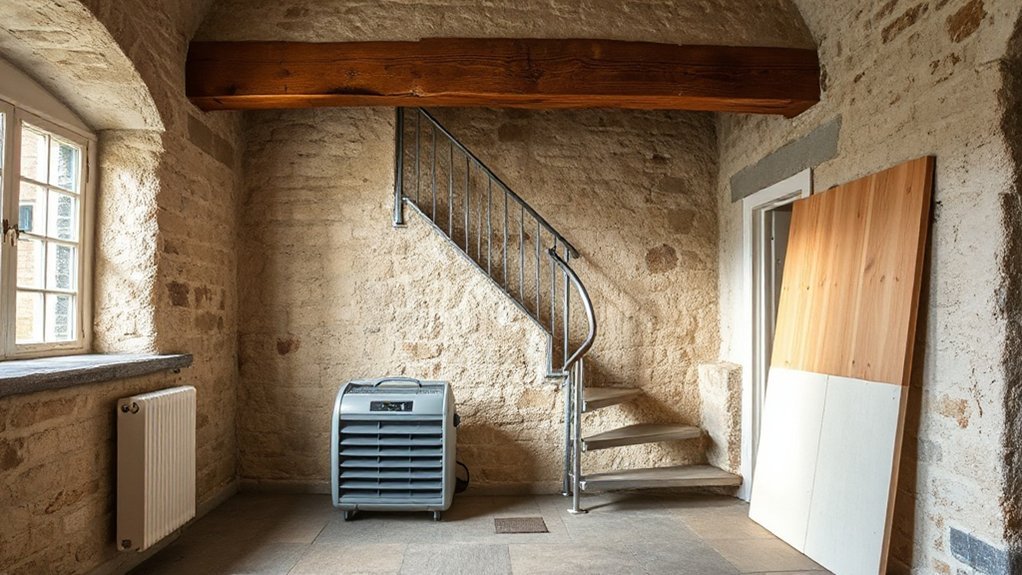
Exposing select stone changes how the gatehouse dries, so you’ve got to get damp under control before you add any insulation. Start by tracing moisture paths: check rainwater goods, ground levels, pointing failure, and internal condensation. Use lime-based repairs and let walls dry; don’t trap water with hard cement or impermeable paints.
Once readings stabilise, insulate in a way that still lets vapour move. Specify hygroscopic, capillary-active materials (wood fibre, calcium silicate, hemp-lime) and pair them with breathable membranes where wind-wash or dusting is an issue. Avoid plastic moisture barriers on historic solid stone unless your hygrothermal model proves they won’t create interstitial condensation.
Detail junctions tightly, maintain ventilation, and monitor humidity after occupancy so performance stays predictable year-round.
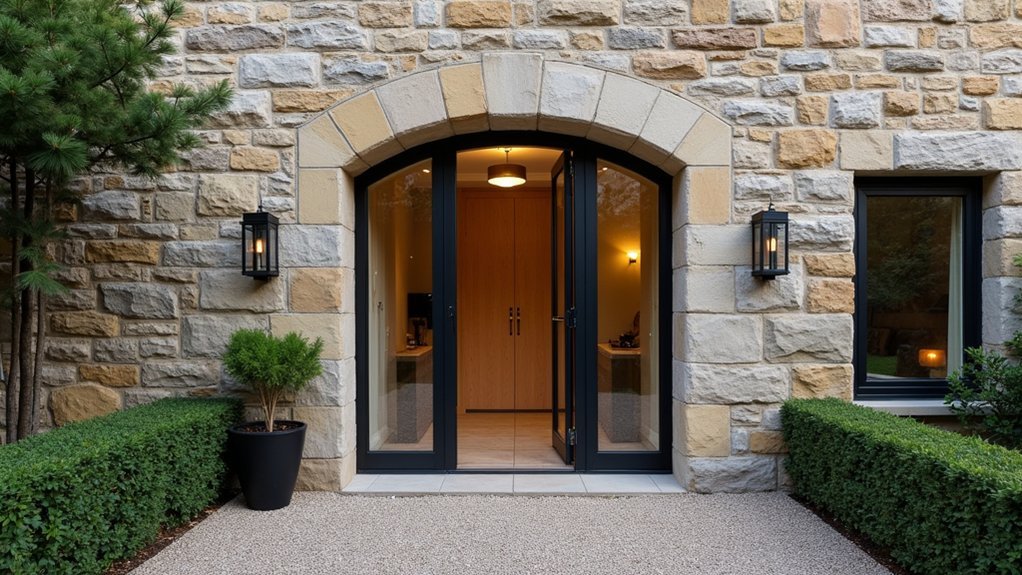
Upgrade Arches and Openings Without Losing Character
When you upgrade arches and openings in a stone-built gatehouse, you’ve got to keep the original proportions—rise, span, and reveal depth—so the rhythm of the façade stays intact.
You can still hit today’s performance targets by specifying slim-profile, thermally broken frames and high-spec glazing that sit discreetly behind the masonry line.
Treat every opening as a heritage detail first and a building-envelope upgrade second, and you’ll modernise without erasing character.
Respecting Original Arch Proportions
Although you may want to widen a medieval arch or square off an opening for modern glazing, the original proportions should lead every decision, because they’re the gatehouse’s visual “grammar.” Start by mapping each arch’s spring line, rise-to-span ratio, and voussoir rhythm, then design any upgrade—insulated glass, secondary frames, discreet weather seals—to sit within that geometry rather than overwrite it.
Prioritise Historical preservation by keeping the crown height and haunch thickness legible from key viewpoints. Check Architectural symmetry across paired openings: align imposts, match soffit depth, and maintain consistent reveals so new interventions read as quiet, not corrective.
Where you must adjust thresholds or head heights for access, step changes back from the face stone and keep mortar joints continuous to protect the original reading.
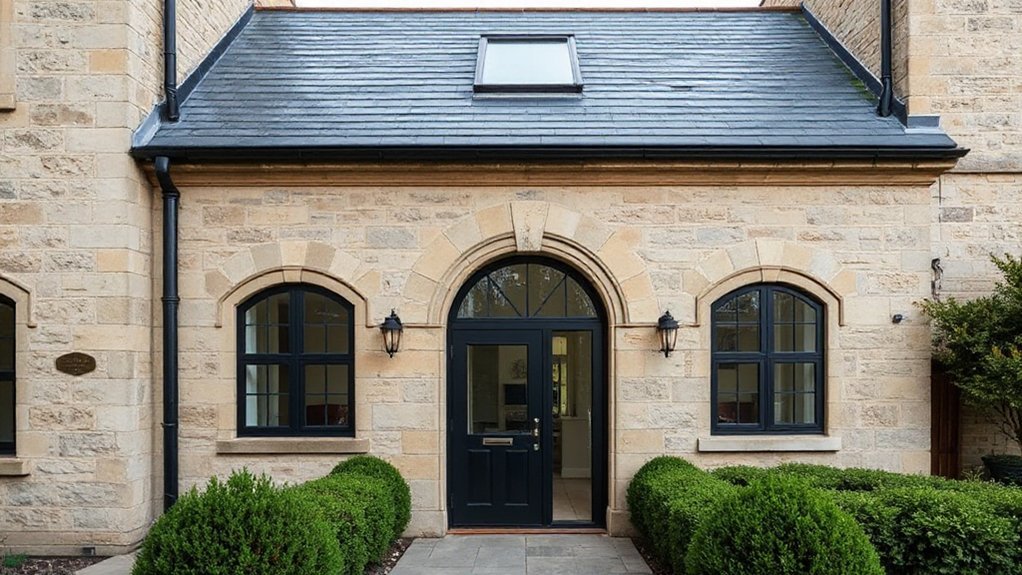
Discreet Modern Frame Upgrades
Because the eye reads the frame as part of the opening—not an add‑on—you should upgrade arches and reveals with systems that visually recede while materially outperforming the original. Specify slim-profile steel or thermally broken bronze frames set back within the reveal so the stone remains dominant. Keep sightlines consistent by matching existing soffit depths and maintaining the springing line of the arch.
For Historic preservation, choose reversible fixings and avoid grinding historic arrises; instead, use packed shims and lime-compatible bedding where needed. Prioritize Material compatibility: isolate dissimilar metals to prevent galvanic staining, and pair breathable perimeter seals with capillary breaks.
Fit acoustic gaskets and concealed trickle ventilation to meet comfort targets without visible vents. Finish in muted oxide tones, not glossy powder coats, so the upgrade reads calm and intentional.
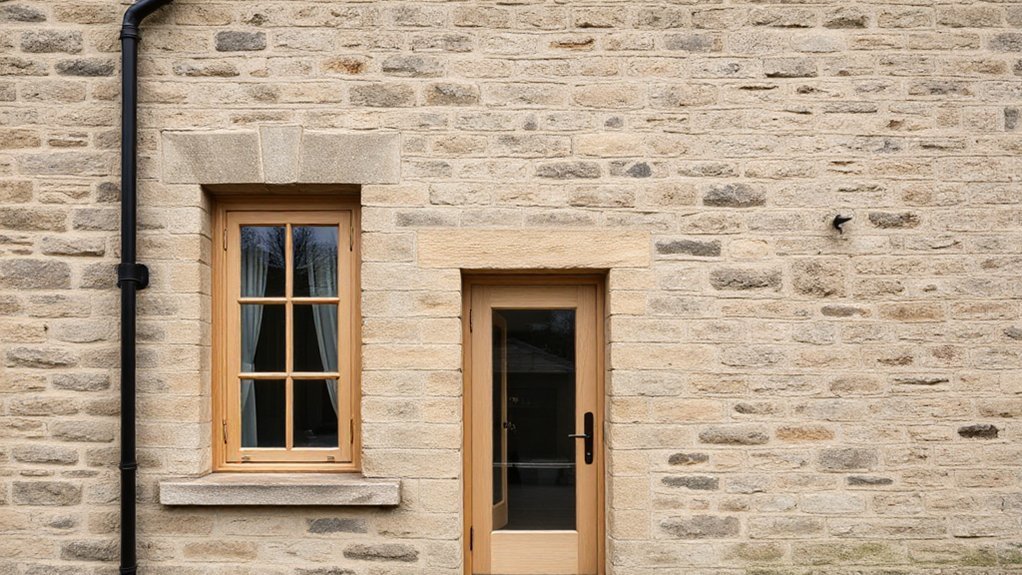
Add Gatehouse Conversion Glazing That Fits Proportions
If you want new glazing to look like it’s always belonged in a stone‑built gatehouse, start by matching the building’s original proportions rather than chasing oversized panes. Read the Historic context in the masonry openings: head heights, jamb reveals, and mullion spacing usually set a quiet rhythm you shouldn’t break.
Use Preservation techniques that keep the aperture legible—repair stone arrises, retain deep shadow lines, and let glass sit back from the face.
- Match pane ratios to existing window and door geometry
- Keep sightlines slim but not razor-thin; avoid “gallery glass”
- Align muntins with lintels, sills, and key stone joints
- Specify low‑iron or lightly toned glass to reduce glare and reflectivity
Plan a Gatehouse Conversion Layout Around Light and Flow
When you plan the internal layout, let daylight and movement lead every decision, not furniture-first assumptions. Map sun paths through existing openings, then place high-use zones where light lingers: kitchen, dining, and a work nook.
Keep circulation clear by aligning doorways and sightlines so you can move from entry to garden without pinch points. Use thresholds to shift mood—tight, sheltered arrival; then a brighter, taller core—while respecting the gatehouse’s historic context.
Put services and storage in darker edges to free perimeter walls for views and ventilation. Strengthen landscape integration by orienting seating to key outlooks and positioning exterior doors where routes already want to form.
Test the plan at night, too, so lighting supports flow.
Design Modern Joinery That Sits Quietly in Stone
You’ll keep modern joinery calm against rugged stone by prioritising minimal sightlines while packing in maximum function—think flush doors, concealed storage, and shadow-gap pulls.
You’ll control the conversation at every junction with crisp material shifts and deliberate reveals that separate new work from old without shouting.
You’ll specify fixings that respect stone—reversible, mortar-joint anchored, and isolated from moisture—so the fabric stays intact and the detailing reads intentional.
Minimal Sightlines, Maximum Function
Although the stonework sets the visual tempo, the joinery has to do the hard labour without calling attention to itself. You keep frames slim, align mullions with existing openings, and let glazing read as a quiet void, preserving historical context while supporting landscape integration through clear outward views.
Specify hardware that disappears in use and prioritise access, airflow, and security without visual noise. Treat every line as intentional: fewer breaks, fewer shadows, cleaner performance.
- Concealed hinges and flush pulls to reduce visual clutter
- Deep-set, high-performance glazing for thermal and acoustic control
- Multi-point locking and trickle ventilation integrated into profiles
- Coordinated sightlines across doors, windows, and fixed panes
You also plan maintenance: removable beads, accessible seals, and standardised modules that simplify future repairs.
Material Transitions And Reveals
Because stone never forgives sloppy junctions, you treat every shift between masonry and modern joinery as a designed reveal, not a gap to be hidden. You set a consistent shadow line—often 8–12mm—so irregular stone reads intentional, and the new work sits calmly within it.
You align trims to bed joints or quoin edges, then keep frames flush to a single datum so sightlines stay crisp.
Where oak meets lime-plastered returns, you specify a fine arris and a recessed stop to prevent chipping and to telegraph craft, not caulk.
In historical restoration, you match tones without mimicking: darkened bronze, oiled timber, and neutral sealants that disappear.
You detail drip edges, end-grain protection, and stable substrates to back material durability, especially at thresholds and window heads.
Fixings That Respect Stone
Where stone surrounds your new joinery, you anchor it with restraint and reversibility so the masonry stays legible and intact. You’ll avoid chasing deep fixings into historic faces; instead, set frames on packers and aim loads into sound joints, not fragile arrises. Specify stainless fixings, isolate dissimilar metals, and keep movement gaps honest so timber or aluminium doesn’t bind during seasonal shifts.
After stone cleaning, check friable edges and re-bed only where needed, using mortar matching that’s softer than the host stone.
- Use resin anchors only in proven, non-decorative zones
- Prefer joint-based fixings with lime-compatible sleeves
- Add thermal breaks to prevent cold-spot staining
- Detail removable cover plates for future service access
Route Services Neatly: Heating, Electrics, Ventilation
Once you’ve fixed the layout, plan your service routes before you close up walls or repoint stone, since retrofitting later can force ugly surface trunking and unnecessary chasing. Map vertical drops in cupboards, behind joinery, or within new stud linings so you protect historical accuracy and maintain material compatibility with lime-based builds.
For heating, run low-temperature pipework in accessible zones and use slim fan convectors where radiators won’t fit; keep penetrations to a minimum and sleeve through stone.
For electrics, cluster loads to reduce runs, specify metal back boxes, and route cables in safe zones with RCD/AFDD protection.
For ventilation, prefer demand-controlled MVHR with discreet terminals; avoid cutting large grilles into dressed masonry and use existing flues only after proper lining and airtightness checks.
Pick Floors, Finishes, and Lighting to Keep Patina
After you’ve nailed the service routes, choose floors, finishes, and lighting that read as “original” without slipping into pastiche. You’ll keep patina by mixing honest materials with disciplined detailing and restrained color. Let the stone and timber set the palette, then use Flooring patterns to guide movement and zoning—think simple runs, not showy borders. Specify finish textures that feel hand-touched: limewash, waxed oak, and aged brass beat high-gloss every time.
- Lay wide-plank oak or reclaimed flagstone; keep transitions minimal
- Use breathable paints and lime plasters; avoid vinyl and acrylic skins
- Pick lighting with warm dimming, opal glass, and blackened metal
- Add discreet task lights; hide drivers and cabling to protect sightlines
Frequently Asked Questions
How Much Does a Stone Gatehouse Conversion Typically Cost per Square Metre?
You’ll typically pay £2,500–£4,500 per m² for a stone gatehouse conversion, rising to £5,500+ with premium finishes. Historical significance, Architectural styles, surveys, structural repairs, insulation upgrades, services, and approvals drive costs.
How Long Does a Gatehouse Conversion Project Usually Take From Start to Finish?
You’ll usually finish in 9–18 months—because paperwork loves “historic preservation.” You’ll spend 3–6 months on surveys, design, and consents, then 6–12 months building, where architectural integration tweaks and site surprises stretch timelines.
Can I Add an Extension, or Must Changes Stay Within the Original Footprint?
You can add an extension, but you’ll need planning consent and often heritage approval. Prioritize Historical preservation, keep massing subordinate, and use contemporary detailing for Modern interior design, with clear old/new junctions and reversible interventions.
Will Converting a Gatehouse Increase Resale Value or Affect Insurance Premiums?
Sure, converting a gatehouse can boost resale value—because buyers just love paperwork. You’ll raise value with Historical preservation plus Modern amenities; premiums may rise for heritage fabric, yet drop with updated wiring, security.
What Maintenance Schedule Should I Expect for Stonework, Roofs, and Drainage?
You’ll inspect stonework annually and after freezes, repoint every 10–25 years for Historical preservation. You’ll check roofs each spring/fall, service gutters quarterly, and jet/rod drains yearly; Modern renovation adds sensors and membrane checks.
Conclusion
You’re not “modernising” a stone gatehouse so much as giving it a quieter future. Lock in consent early, map defects, and let worthy stone stay visible while you put damp issues to bed. Use breathable insulation, slim glazing, and reversible details so arches, quoins, and reveals keep speaking. Plan light-led flow, keep joinery low-key, and tuck services out of sight. Finish with patinated floors and warm, layered lighting.