
You fix damp properly by finding the moisture source first: log RH and temperature, inspect gutters, ground levels, vents, and use a calibrated moisture meter to map wet areas. Identify the type—condensation, rising damp, or leaks—then stop ingress by repairing defects, improving drainage, and shutting off water if needed. Dry materials with ventilation, dehumidification, and gentle heat before repainting or replastering, and remove mould only after moisture is controlled. Next, you’ll see the exact steps.
Key Takeaways
- Identify the damp type (condensation, rising damp, leaks, ingress) using symptoms, humidity logs, photos, and moisture meter comparisons.
- Stop the water source fast: shut off supplies, clear gutters, tarp openings, and divert runoff away from walls and foundations.
- Fix root causes: repair plumbing, flashings, pointing, and cracks; restore drainage and maintain clear subfloor vents and cavities.
- Dry the structure properly with ventilation, dehumidification, and gentle heat; confirm safe moisture levels before replastering or redecorating.
- Remove mould only after moisture control, using PPE and containment; replace salt-contaminated plaster and use breathable, compatible finishes.
Damp Signs to Spot (and Quick Checks)
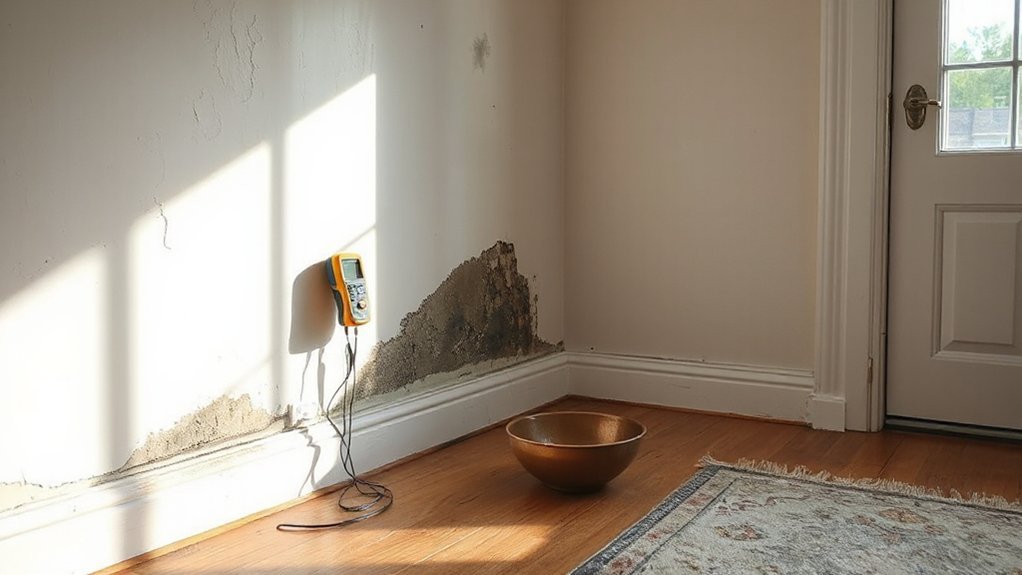
Before you start chasing causes, confirm you’ve actually got a damp issue by checking for the most reliable tell‑tales: tide marks or staining on walls, blistering/peeling paint, crumbling plaster, powdery white salts (efflorescence), persistent musty odours, cold “sweaty” surfaces, and visible mould growth in corners or behind furniture.
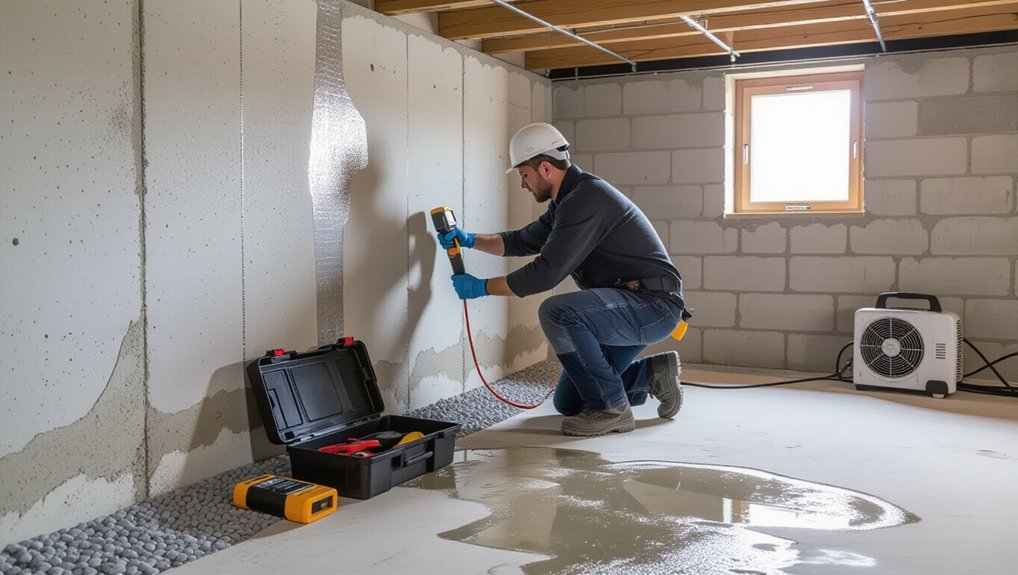
Then run quick checks: log room RH and temperature for 48 hours, photograph marks with a date, and map affected areas on a floor plan.
Use a calibrated moisture meter in comparative mode only; verify with carbide or gravimetric sampling if readings drive decisions.
Inspect external ground levels and gutters, and confirm subfloor vents are clear.
In Historic architecture, avoid sealing walls; note impermeable paints.
Prefer eco friendly materials for test patches and repairs.
Which Damp Type Is It: Condensation, Rising, or Leaks?
You need to classify the moisture source first, because remediation must match the defect in line with good building practice.
If you’re seeing surface mould, streaming windows, and high indoor RH with cold-bridge patching, you’re likely dealing with condensation.
If you’ve got low-level “tide marks,” salt deposits, or a defined wetting line after rainfall or plumbing use, you should suspect rising damp or leaks and verify by checking DPC continuity, rainwater goods, and pipework.
Spotting Condensation Clues
Although damp patches can look similar at first glance, condensation leaves a distinct set of clues that helps you separate it from rising damp or leaks: it shows up as fine water droplets or a thin surface film on cold, non-absorbent areas (windows, tiles, metal frames), often with mould speckling in corners, behind furniture, or at ceiling-to-wall junctions where airflow is poor.
You’ll notice it after showers, cooking, or overnight, then it clears when you heat and ventilate. Check for streaming glass, damp window reveals, and a musty odour without stained plaster edges.
Use a hygrometer and log RH and temperature; persistent RH above 60% raises risk. In a Historical building, cold bridges and reduced moisture absorption at sealed finishes intensify symptoms.
Diagnosing Rising And Leaks
Where does the moisture start, and does it rise, run, or bead on the surface? Start with location and pattern. Rising damp begins at the base of walls, forms a horizontal “tide mark,” and often carries salts. Leaks track downward from a defect and create irregular staining after rain or plumbing use. In a Historical building, don’t assume a failed damp-proof course—confirm before you alter breathable fabric.
- Measure: use a calibrated moisture meter, then verify with carbide (“speedy”) testing for masonry, per BS 6576 guidance.
- Trace: check gutters, flashings, roof voids, and plumbing; run timed tests to correlate wetting.
- Specify: repair the moisture source first, then re-plaster with Eco friendly materials like lime-based, vapour-open systems to maintain drying.
Stop the Water First: Immediate Damage Control
Before any drying, cleaning, or mold remediation starts, stop the water at its source to prevent ongoing saturation and secondary damage. Shut off the mains, isolate the branch line, or cap the feed, then confirm the flow has stopped.
If rainwater intrusion is the issue, tarp the opening and clear gutters and downpipes to restore discharge away from the wall.
Contain spread with towels, wet vacs, and temporary berms, and protect electrics: switch off affected circuits and keep appliances off damp surfaces.
Remove saturated soft finishes that can’t be salvaged and elevate stored items.
Document moisture extent with meter readings and photos for traceability.
Don’t rely on Waterproof coatings or mold resistant paints until substrates dry and defects are repaired.
Fix Condensation Damp With Ventilation and Heating
Once you’ve stopped liquid water ingress, tackle condensation damp by controlling indoor humidity at the source and keeping surface temperatures above dew point. You’ll need balanced ventilation and steady, low-level heat, aligned with manufacturer data and good building practice, so humid air doesn’t stagnate on cold corners.
- Ventilate to standard: Run extract fans in kitchens/bathrooms with timed overrun, keep trickle vents open, and verify airflow rates. Focus on Airflow optimization through clear paths from supply to extract.
- Heat evenly: Avoid short blasts; use consistent heating to lift internal surface temperatures and reduce cold-spot risk behind furniture.
- Control moisture: Use lids, dry clothes outdoors/vented areas, and maintain moisture barriers at cold interfaces where specified to limit vapor migration and interstitial risk.
Fix Penetrating Damp in Walls, Roofs, and Gutters
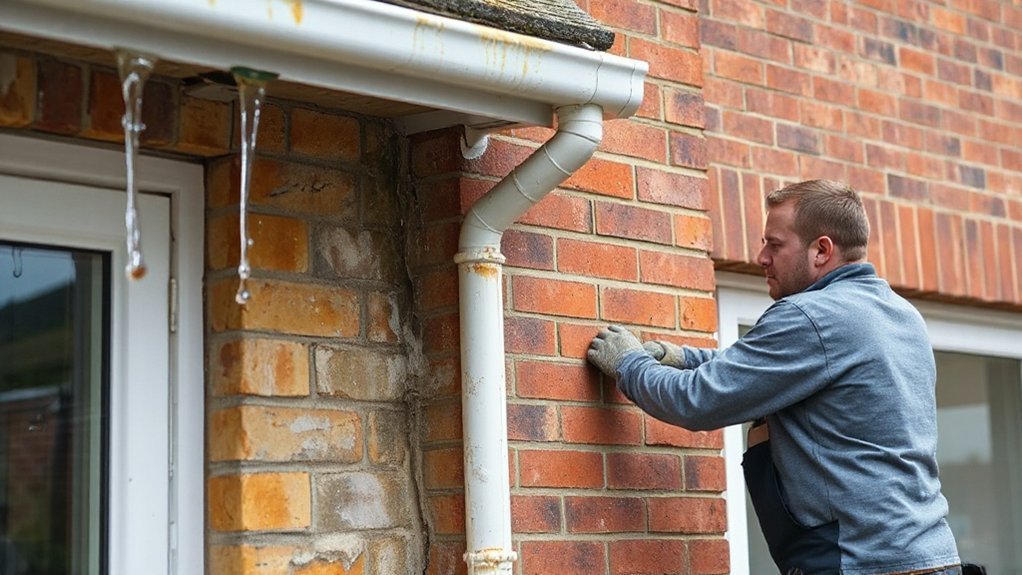
Although condensation can mimic it indoors, penetrating damp starts outside and moves inward through defects in the building envelope, so you’ll fix it by tracing the water path and repairing the first point of entry.
Start at the roof: replace slipped or cracked tiles, renew flashings to manufacturer details, and clear valleys. Check gutters and downpipes for leaks, failed joints, poor falls, and overflowing at corners; add brackets and seals, and extend discharges away from walls.
On masonry, repoint open joints with compatible mortar, seal cracks, and repair spalled bricks; don’t trap moisture behind impermeable coatings. Keep cavities clear and confirm weeps.
After drying, renew interior decor with breathable finishes. You’ll also protect energy efficiency by keeping insulation dry and continuous.
Fix Rising Damp: DPC, Plaster, and Ground Levels
When moisture rises from the ground by capillary action, you’ll only stop it by reinstating a continuous damp-proof course (DPC) and removing any bridges that bypass it.
Start by confirming historical causes: raised paths, retrofitted floors, and cement renders that trapped salts. Then apply a standards-led sequence aligned with good practice for building materials compatibility and drying.
- Expose the DPC line and remove bridging: lower external ground, clear cavities, and keep a minimum 150 mm gap to finished ground.
- Install or repair the DPC: inject to manufacturer spec in sound masonry, or use physical membranes where accessible.
- Replace contaminated plaster: hack off to at least 1 m or 300 mm above tide marks, then use salt-resistant base and breathable finish.
Recheck moisture after curing; don’t seal walls with impermeable coatings.
Fix Damp From Plumbing Leaks and Hidden Bursts
Rising damp needs a continuous DPC and clear ground levels, but localised wet patches, sudden spikes on a moisture meter, or staining that tracks along joists and ceilings usually point to plumbing leaks or hidden bursts. Isolate the supply, then confirm the source: check stopcock-to-meter flow, pressure-test circuits, and trace pipe routes before you open finishes.
Use hidden pipe inspections with thermal imaging and acoustic leak detection, then verify with targeted access panels.
Repair to standard: replace compromised pipework, use correct fittings, and support pipes to prevent vibration wear. Dry the fabric with controlled ventilation and dehumidification, then reinstate plaster only once readings stabilise.
Prevent recurrence through plumbing maintenance: lag cold lines, maintain sealants at sanitaryware, and service valves and flexible connectors annually.
Fix Damp Basements and Crawl Spaces (Drainage + Seals)
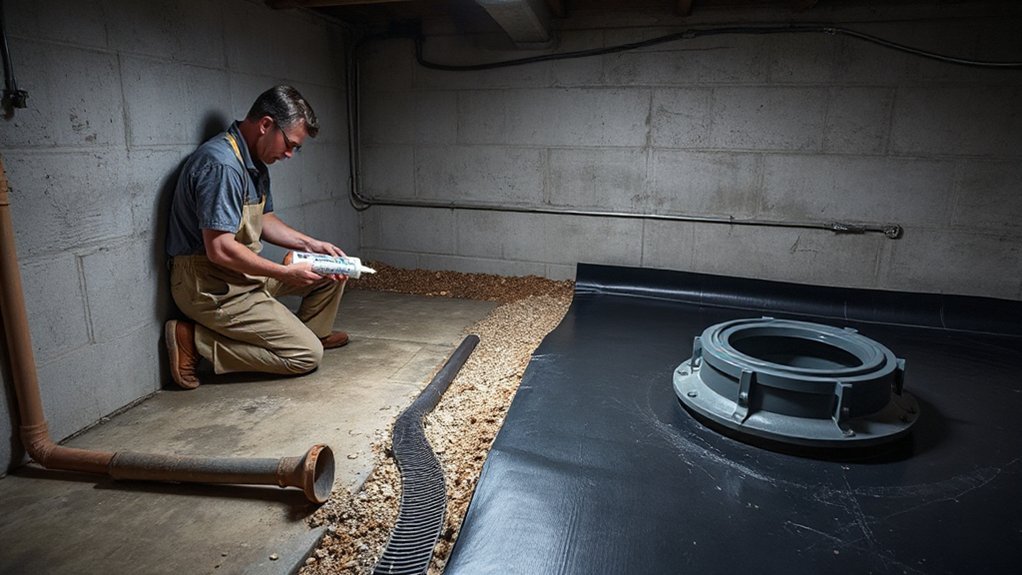
Because basements and crawl spaces sit below external ground level, you’ll usually beat damp by controlling water at the boundary—first with drainage, then with sealing that meets the substrate and the load. Start by proving where water is coming from: surface run-off, perched groundwater, or capillary rise. Use Basement drainage that complies with manufacturer design rates and provides a maintained discharge point (sump, gravity outfall), then manage internal vapour and liquid water.
- Grade and drain: correct falls, add perimeter drains or a channel-and-sump system, and keep inspection points accessible.
- Seal correctly: prep masonry, repair cracks, then apply compatible cementitious or membrane systems to walls and floor joints.
- Control the void: install crawl space sealing with a taped, lapped ground vapour barrier, sealed piers, and mechanical ventilation/dehumidification if required.
Fix Damp Around Windows and Doors (Seals + Flashing)
Although damp patches around openings can look like “condensation,” you’ll usually fix the issue by restoring the window/door weather line.
Start outside: check head flashing, jamb flashings, and sill pan for laps, end dams, and a clear drainage path; repair to manufacturer details and local code.
Replace failed perimeter sealant with the correct backer rod and a compatible, tooled bead to maintain sealant durability; don’t bridge weep holes.
Refit or replace compressed gaskets and sweep seals, then confirm the frame is plumb and fasteners aren’t distorting it.
Inside, reinstate window frame insulation with low-expansion foam or mineral wool, then tape/air-seal the interior perimeter to stop moist air reaching cold surfaces.
Finally, water-test and inspect during wind-driven rain.
Fix Bathroom and Kitchen Damp (Fans + Habits)
In bathrooms and kitchens, you’ll control damp fastest by upgrading to correctly sized extractor fans and verifying they meet current building ventilation requirements.
You should place extraction where moisture is generated—over the shower/bath and at the cooktop—with effective duct runs to outside and backdraft protection.
You’ll also cut daily moisture load by running fans during and after use, keeping lids on pans, wiping down wet surfaces, and avoiding indoor drying without dedicated ventilation.
Upgrade Extractor Fans
When steam, grease, and everyday humidity can’t escape fast enough, they condense on cold surfaces and feed mould, so upgrading your extractor fans becomes a first-line control for bathroom and kitchen damp.
Choose units rated for continuous duty, low sone, and the right extraction rate for the room volume, then verify performance at the grille. Integrate them into whole-home Ventilation systems so they don’t depressurise combustion appliances, and keep Moisture barriers intact by exhausting, not recirculating, wet air.
Prioritise controls that lock in good habits and compliance:
- Fit humidistat or timer overrun (15–30 min) so you don’t forget.
- Use backdraft shutters and insulated ducting to cut cold-soak condensation.
- Clean grilles and replace filters quarterly to maintain design airflow.
Targeted Vent Placement
Where does the moisture actually originate, and how quickly can you capture it?
In bathrooms, place the extract grille at the shower/bath zone, not over the door, so steam reaches the fan before it cools and condenses.
In kitchens, locate capture at the hob line: a ducted hood that discharges outdoors, with the shortest, straightest run you can achieve.
Apply targeted venting by aligning inlets and make-up air paths so the fan pulls from the wet source toward the exhaust, not from hallways.
Seal the duct connections, insulate any runs through cold voids, and fit a backdraft damper to meet good practice.
Maintain Moisture barriers at ceilings and penetrations to stop moist air leaking into cavities.
Moisture-Reducing Daily Habits
Good capture ventilation sets the baseline, but your daily routines determine how long moisture stays in the room and whether it ever reaches cold surfaces.
In bathrooms, run the exhaust fan during showers and for 20 minutes after; verify it vents outdoors and meets ASHRAE 62.2 flow targets.
In kitchens, use the range hood on high from preheat through cooldown, and keep lids on pots to cut latent load and improve humidity control.
- Squeegee glass and wipe wet tile; you’ll reduce evaporation and shorten drying time.
- Keep doors shut while exhausting, then open to equalize when surfaces are dry.
- Maintain caulk, grout, and under-sink seals as moisture barriers, and fix drips within 24 hours.
Prevent Damp With Insulation and Airtightness (Properly)
Although insulation and airtightness reduce heat loss, they can also trap water vapour if you don’t design and install them as a moisture-controlled system. You should treat the building envelope as layers: weather control outside, airtightness on the warm side, and a vapour control layer where calculations justify it.
Choose insulation materials that tolerate incidental moisture and suit the risk (e.g., closed-cell where exposure is higher), and keep them continuous at junctions to prevent cold bridges.
You must install airtight barriers with taped, tested joints and service penetrations sealed to a clear air-leakage line. Follow manufacturer details and target verifiable performance (e.g., blower-door testing).
Provide controlled ventilation sized to occupancy so airtightness doesn’t raise indoor humidity, and maintain drainage and rain-screen gaps externally.
Dry Damp Walls and Floors Safely (No Trapped Moisture)
Before you try to “dry out” damp masonry, screeds, or timber floors, stop the moisture source and choose a drying strategy that won’t seal water in behind new finishes. You’ll avoid failure by drying to measurable targets, not guesswork, and keeping materials vapour-open until readings stabilise. Use ventilation, dehumidification, and gentle heat; don’t blast high heat that drives salts and warps timber. Track progress with Humidity sensors and moisture meters, and document results like a site QA record.
- Remove impermeable coverings and open up edges so moisture can escape safely.
- Verify the slab or wall can dry before you install Moisture barriers or membranes.
- Refinish only when moisture content meets manufacturer limits and local standards for floors and plasters.
Remove Mold Safely Once Damp Is Fixed
Once you’ve stopped the moisture source and your readings show the structure is drying, remove mould with controls that prevent spore spread and protect your lungs and skin. Isolate the work area with closed doors and, where possible, polyethylene sheeting; keep airflow contained and exhaust to outdoors.
Wear Safety precautions: FFP3/N100 respirator, nitrile gloves, goggles, and disposable coveralls; avoid dry brushing or sanding. Mist surfaces lightly to suppress dust, then wipe using a detergent solution; rinse and dry promptly.
Bag waste double and seal before leaving the area. HEPA-vacuum adjacent surfaces after cleaning.
If growth covers more than about 1 m², involves insulation/HVAC, or you’re immunocompromised, use competent remediation. Confirm success with visual inspection and post-clean moisture readings for compliance.
Damp-Proofing Products: What to Use (and Avoid)
With mould removed and moisture readings trending down, you can focus on damp-proofing products that support the diagnosed cause rather than masking symptoms. Choose systems that meet relevant British Standards, are compatible with your substrate, and allow planned drying where required.
- Cementitious tanking slurries: Use on sound masonry for below-grade or retained walls. Prepare to a clean, keyed surface; control salts and follow cure times to prevent debonding.
- Liquid-applied Moisture barriers (DPMs): Use under floor finishes on concrete with verified RH limits. Prime as specified, respect film thickness, and lap to wall DPC lines.
- Avoid “miracle” paints and injected creams as universal fixes: They often hide defects, trap moisture, and fail when bridging, voids, or high salts persist.
When to Call a Damp Professional (and What to Ask)
Although you can tackle minor condensation and small leaks yourself, you should call a damp professional when moisture persists after basic fixes, readings stay high or rebound, or you see risk indicators such as widespread mould, salt contamination, timber decay, or below-ground water ingress.
You’ll want a surveyor who follows BS 6576 and uses calibrated moisture meters, hygrometers, and salts testing, not guesswork. Ask for the moisture source diagnosis, not just a treatment quote, and request a written specification covering ventilation rates, DPC/DPM continuity, and remedial plaster systems.
Confirm they’ll check for bridging, guttering faults, and ground levels before you restart interior decoration. Also ask whether they’ll coordinate pest control if wood-borers or fungal decay are present, and what guarantee terms exclude ongoing leaks or lifestyle humidity.
Frequently Asked Questions
Does Home Insurance Cover Damp Damage or Only Sudden Leaks?
Home insurance usually covers sudden, accidental leaks, not long-term damp from poor ventilation or rising moisture. You’ll need strong evidence for Insurance claims, and you should install moisture barriers to meet standards and reduce exclusions.
How Long Does Damp Take to Dry After Repairs?
You’ll typically see damp dry in 2–8 weeks after repairs, depending on humidity levels and substrate thickness. You’ll accelerate drying by applying ventilation strategies, maintaining 40–60% RH, using dehumidifiers, and verifying moisture-meter readings.
Can Damp Problems Affect Mortgage Approvals or Property Value?
Yes—damp delays deals: lenders may downvalue or decline, and buyers discount, reducing property value. You’ll need surveys identifying Damp causes and documented Moisture mitigation to meet valuation standards, insurance requirements, and mortgage underwriter criteria.
Are Damp Readings From Handheld Moisture Meters Always Reliable?
No, handheld damp readings aren’t always reliable. You should treat a moisture meter as a screening tool, then perform reliability testing: verify calibration, compare multiple locations, account for salts/metal, and confirm with gravimetric sampling.
What Documentation Should I Keep After Fixing Damp for Future Buyers?
Like a clear audit trail, you’ll keep moisture detection reports, photos, and dated repair documentation. Include contractor invoices, warranties, materials datasheets, ventilation specs, and post-remedial verification results. File building-control approvals and maintenance logs to satisfy buyer due diligence.
Conclusion
If you spot damp, you can’t “treat” it—you’ve got to control the moisture source, then dry the fabric to safe levels before you redecorate. Start by identifying the mechanism (condensation, rising, or penetration), then apply the right fix: ventilation/heat balance, defect repairs, or damp-proofing only where justified. Mold cleanup comes last. In housing studies, around 1 in 5 homes show damp or mold indicators—so standards-led checks and measured drying aren’t optional.


