You’ll get the best results with natural stone flooring if you choose the right stone and build-up for how you use your kitchen. Pick mid-tone limestone, slate, travertine, or honed granite to hide crumbs and improve grip, then match undertones to cabinets and worktops. Make certain the subfloor is stiff and flat, plan thresholds early, and use flexible adhesives with movement joints. If you want underfloor heating, confirm thickness and thermal response. Next, you’ll see how to fine-tune each choice.
Key Takeaways
- Choose a stone that fits your lifestyle: honed granite or slate for busy kitchens; limestone or marble for classic looks.
- Pick mid-tone, mottled colours and manageable veining to hide crumbs, scuffs, and everyday marks better than very pale floors.
- Select a safe finish: honed, brushed, or tumbled for grip; avoid polished in wet zones unless slip-rated R10+.
- Plan tile size and layout to suit the room: larger tiles reduce grout lines; run rectangles lengthways in galley kitchens.
- Prepare subfloors and UFH properly: ensure stiffness and flatness, use uncoupling membranes, and seal stone—especially near sinks and dishwashers.
Is Natural Stone Right for Your Kitchen?
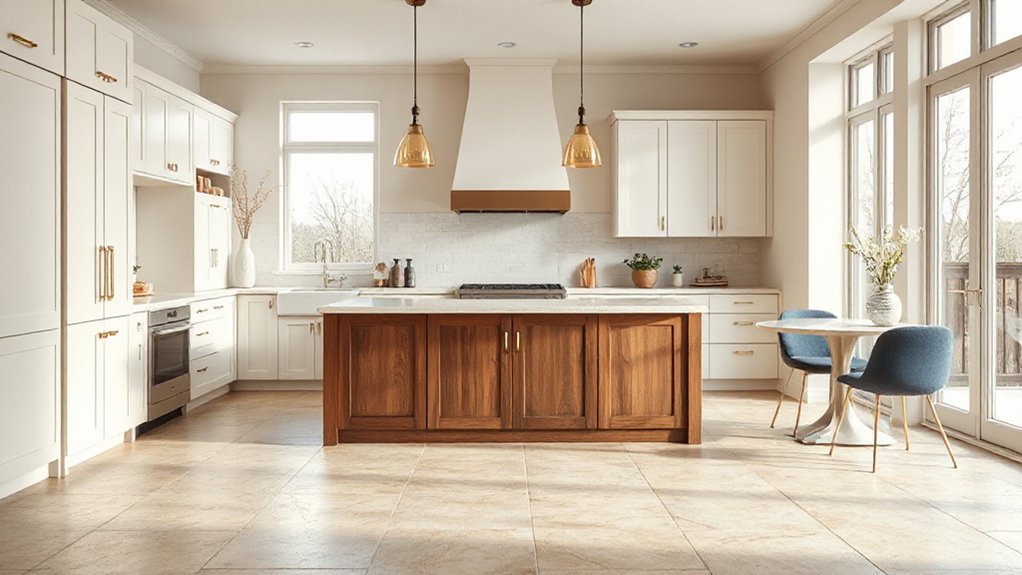
If you’re weighing up a kitchen redesign, natural stone flooring can be the right choice when you need a surface that stands up to daily wear and adds long-term value. In UK homes, you’ll typically choose from limestone, slate, granite, or marble, each with distinct porosity and maintenance demands. You should expect to seal most stones and reseal to schedule, especially around sinks and dishwashers, to limit staining. Check slip resistance ratings, and specify a honed or textured finish where splash risk is higher. You’ll also need a level subfloor and suitable flexible adhesive to reduce cracking. Pair stone with Decorative wall accents for cohesion, and plan Lighting enhancement to reveal veining without harsh glare.
Best Stone Floors by Use Case (Busy, Pets, Resale)
If your kitchen sees constant footfall, you’ll need a stone floor that resists scratching, staining, and slip risks without demanding intensive upkeep. For busy households, opt for hard-wearing, low-porosity choices like granite or properly finished porcelain-look alternatives, and prioritise a matt or honed finish over high polish. If you’ve got pets, choose stones that handle claws and accidents well, and plan for effective sealing, easy-clean grout lines, and realistic maintenance to protect your investment.
High-Traffic Kitchen Choices
Because kitchens in busy UK homes take a daily battering from muddy shoes, dropped pans, prams, and pet claws, you’ll get the best long-term result by matching the stone to your real use case rather than choosing purely on looks. Prioritise Outdoor durability, slip resistance, and Acoustic properties, especially in open-plan layouts and terraced houses.
- For relentless footfall, choose honed granite for hardness and stain resistance.
- For family kitchens, opt for dense limestone with a sealed, brushed finish for grip.
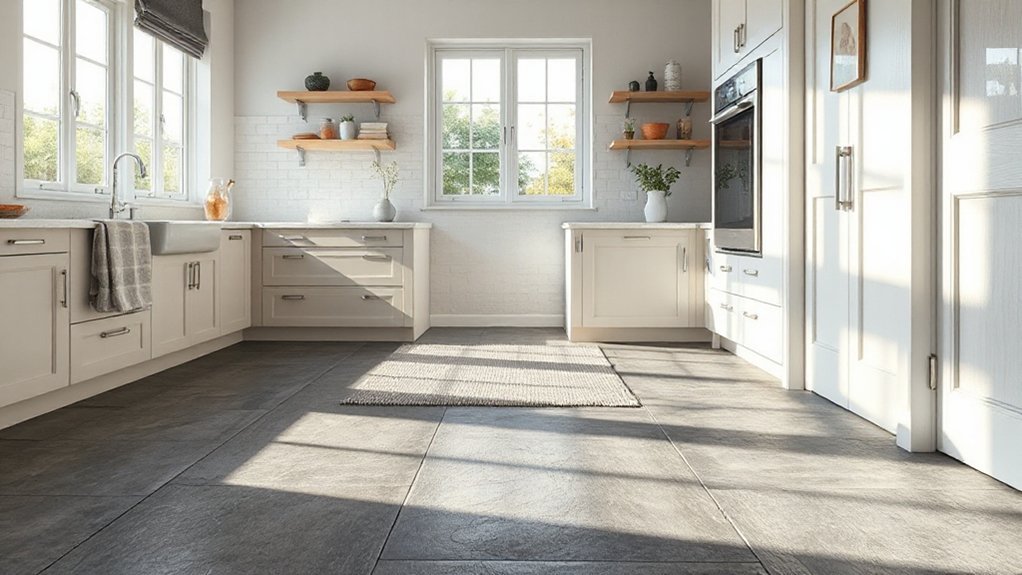
- For period homes, use riven slate to hide grit and add texture.
- For resale, pick neutral-toned travertine with consistent tiles and tight grout lines.
- For hallway-through kitchens, specify thicker flags and robust thresholds to prevent edge chipping.
Pet-Friendly Stone Options
Busy kitchens are one thing, but paws and claws add a different kind of wear: repeated scratching, wet footprints, and the occasional accident that can etch or stain porous stone. In UK homes, choose dense, low-porosity options: porcelain-look isn’t stone, so stick to honed granite, basalt, or slate for grip and resilience. Avoid polished marble and limestone in pet zones; acids and urine can mark them quickly.
For Pet safe finishes, specify a honed or brushed surface plus a high-performance impregnating sealer tested for kitchens. Keep grout tight and stain-resistant; epoxy grout reduces odours. For pet friendly maintenance, wipe spills fast, use pH-neutral cleaner, and refresh sealer to the manufacturer’s schedule. If resale matters, neutral-toned granite or slate reads premium and practical.
Kitchen Stone Options: Marble, Slate, Travertine, Granite
Whether you’re aiming for classic elegance or a hard-wearing family kitchen, choosing the right natural stone flooring comes down to how each material performs in a UK home—underfoot comfort, slip resistance, maintenance demands, and how it copes with our damp seasons and indoor heating. You’ll also want to weigh historical significance and cultural symbolism, especially in period properties or heritage-led refurbishments.
- Marble: veined, formal, suits Georgian/Victorian schemes and bold islands.
- Slate: fine-cleft texture, grounded look, pairs with Shaker units and wood.
- Travertine: warm, porous character, complements open-plan kitchens and limestone palettes.
- Granite: tight-grained, contemporary polish or leathered finishes, ideal with UFH.
- Finish choice: honed/tumbled for softer glare; brushed for more grip in wet zones.
Pros and Cons of Each Stone Type
While marble, slate, travertine, and granite can all look superb in a UK kitchen, each brings a different mix of durability, slip resistance, sealing needs, and compatibility with underfloor heating and everyday spills. Marble’s Historical origins suit period homes, but it etches with lemon or vinegar and needs frequent sealing—classic maintenance challenges. Slate resists staining, grips well when wet, and tolerates muddy wellies, yet it can flake at weak clefts and still benefits from sealing. Travertine feels warm underfoot and works nicely with UFH, but its voids demand filling and vigilant resealing to stop tea and oil darkening. Granite offers top hardness and heat resistance, usually low porosity, though some varieties need sealing and can feel cold without UFH.
Pick a Finish: Honed, Polished, Brushed, Tumbled
Once you’ve chosen your stone, you’ll need to pick a finish that suits your kitchen’s light levels, foot traffic, and cleaning routine. Honed finishes give you a smooth, matte look with better slip resistance, while polished finishes maximise shine but can show scratches and water marks more readily. Brushed finishes add subtle texture and soften the stone’s pattern, whereas tumbled finishes create a more rustic, aged appearance with rounded edges and extra grip.
Honed Vs. Polished
Before you choose a natural stone for your kitchen floor, you’ll need to decide on a finish, because honed and polished surfaces behave very differently under UK day-to-day wear. Honed stone has a matte look that hides scratches and etch marks from tea, wine, and lemon better, and it grips more when wet—useful in busy family kitchens. Polished stone reflects light and makes compact UK kitchens feel larger, but it shows scuffs, smears, and limescale more quickly.
- Choose honed for slip resistance around sinks and patio doors
- Choose polished for maximum brightness under downlights
- Expect different Acoustic properties: polished can sound “harder”
- Plan sealing: both need it, honed often looks more even
- Consider Outdoor durability if you run the same stone through to outside
Brushed Vs. Tumbled
If you want natural stone that feels less formal than a high polish but still stands up to everyday UK kitchen traffic, brushed and tumbled finishes give you two very different “lived-in” looks. Brushed stone is mechanically textured, so you get gentle grain, softened Natural patterns, and controlled slip resistance without looking distressed. It suits modern shaker kitchens, works well with underfloor heating, and hides light scratches from chair legs.
Tumbled stone is barrel-aged, rounding edges and opening pits and veining for deeper surface textures. It reads more rustic—ideal for cottages and period renovations—but it can trap grime unless you seal it well and clean with a pH-neutral stone cleaner. Choose brushed for refined practicality; choose tumbled for character, but accept higher upkeep.
Slip Resistance: What’s Safest When Wet
Although natural stone looks refined in a kitchen, you need to prioritise slip resistance because splashes, steam and spills can turn a smooth surface into a hazard. In the UK, check slip ratings and choose finishes that keep grip when wet, especially by sinks, dishwashers and external doors. If you’re adding decorative edging, keep profiles square or lightly eased so water doesn’t pool; good colour coordination won’t compensate for a slippery floor.
- Choose honed, brushed, or tumbled surfaces over polished.
- Specify an R-rating (aim R10+ for wet-prone zones).
- Use smaller tiles or tighter joints to increase traction.
- Seal correctly, but avoid high-gloss “wet look” sealers.
- Add mats and underfloor drainage near main splash areas.
Color and Veining: Hide Crumbs vs. Show Drama
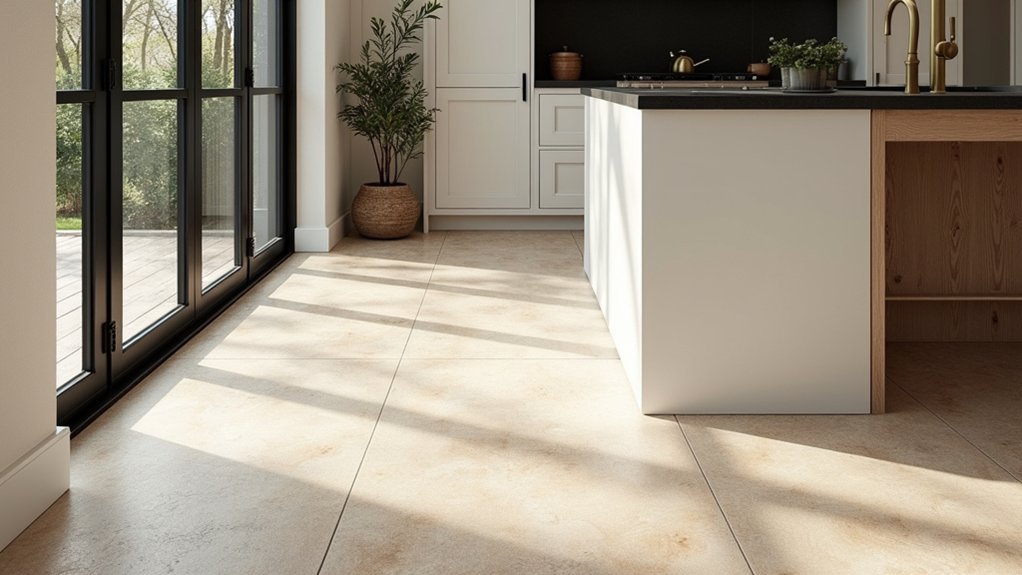
Choose your stone colour with daily kitchen reality in mind: mid-tones, warm greys, and gently mottled finishes hide crumbs and scuffs far better than flat, pale floors. Control the look by specifying veining scale and contrast—fine, low-contrast veining reads quieter and cleaner, while bold, high-contrast movement spotlights every speck between wipes. If you want maximum impact, you can commit to a dramatic slab-style statement that sets the room’s tone, but you’ll need to accept that it shows the drama as well as the dirt.
Crumb-Hiding Color Palettes
Because kitchen floors take the brunt of daily spills and snack fallout, your stone’s colour and veining should work as camouflage—or as a deliberate statement that shows every speck. For crumb-hiding, favour mid-tones and mottled movement; they forgive toast crumbs, tea drips, and flour dust between clean-ups.
- Warm greige limestone: hides biscuit crumbs and suits UK shaker kitchens.
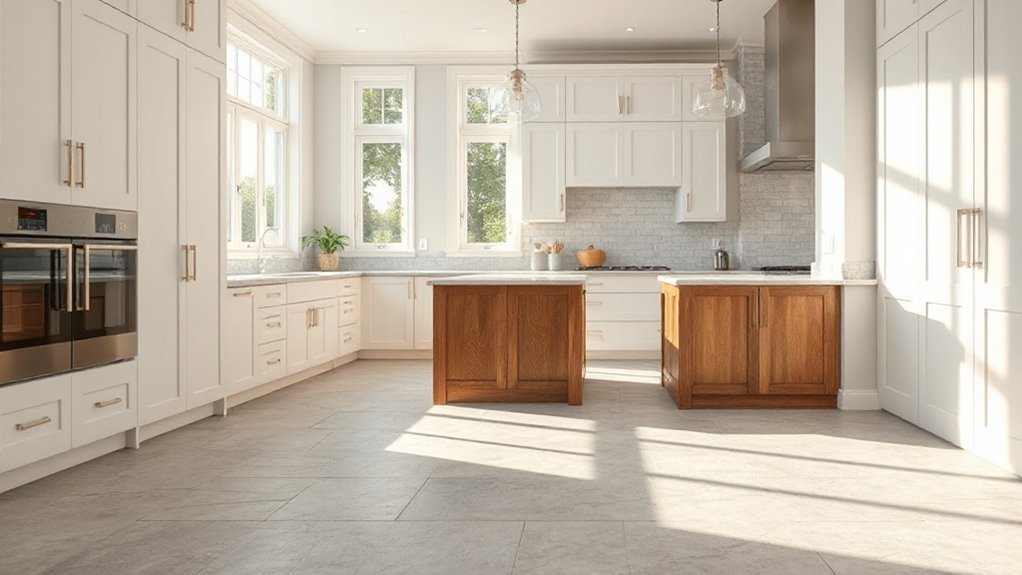
- Mid-grey slate: masks pet hair and pairs with brushed stainless.
- Taupe travertine: reads calm through colour psychology, softening north light.
- Multi-tonal granite: delivers Artistic patterns without looking busy.
- Smoky beige sandstone: reduces contrast against grout, so mess disappears.
You’ll get the best results when you match the floor to your worktops and cabinetry undertones, then choose a satin finish to avoid spotlighting debris.
Veining Scale And Contrast
When you get the veining scale and contrast right, your stone floor either disguises everyday grit or turns it into part of the theatre. In busy UK kitchens, medium veining scale with gentle Contrast levels masks crumbs, dried splashes, and dog hair without looking muddy. Fine, linear veining reads calmer from standing height but can highlight dust if the base colour is uniform. Large, bold veining gives movement, yet it can visually “track” across the room, so align it with the main sightline from doorway to island. Keep Contrast levels tied to your cabinetry: high-contrast floors fight patterned worktops; low-contrast floors suit timber fronts and warm metals. Always view full tiles in daylight and under LEDs.
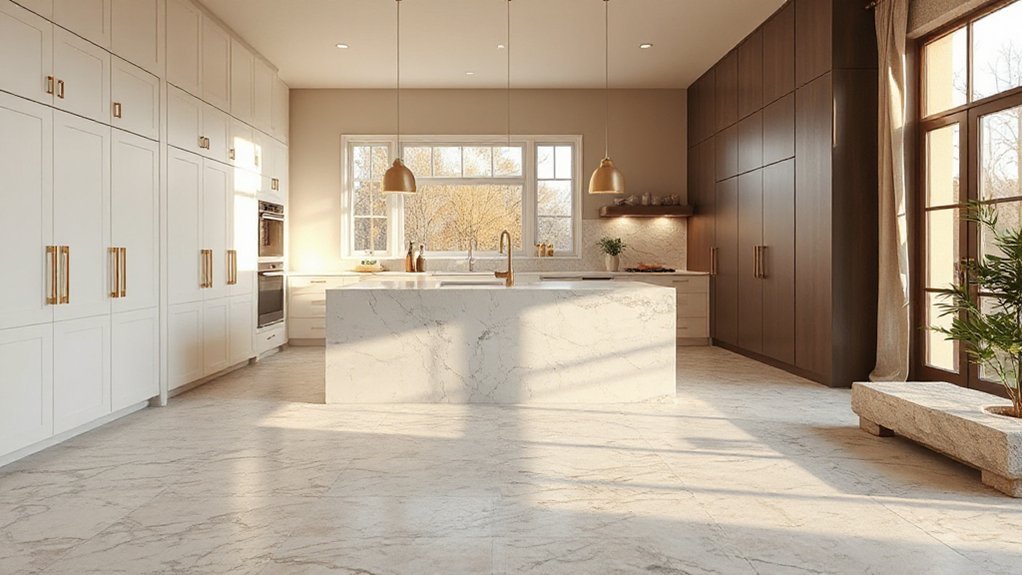
Dramatic Slab Statement Looks
Although a bookmatched stone slab floor can steal the show in a kitchen redesign, you still need to decide whether you want it to camouflage daily crumbs or dial up the drama. In UK kitchens, pale limestones and softly mottled marbles hide grit, while inky slates and high-contrast veining broadcast every speck but reward you with gallery-level impact.
- Choose warm greys to mask flour, dog hair, and tea drips.
- Use bold Calacatta-style veining to lead sightlines to an island.
- Match grout tone to the background colour to reduce visual noise.
- Specify honed finishes for safer wet zones and subtler patterning.
- Ask for Sustainable sourcing and check suitability for Historical preservation if you’re in a listed home.
You’ll balance practicality with statement, and the slab will feel intentional, not showy.
Tile Size and Patterns That Flatter Kitchens
To get natural stone flooring looking purposeful rather than busy, you’ll want to match tile size and laying pattern to your kitchen’s proportions and sightlines. In compact UK kitchens, larger-format tiles (600x600mm or 600x300mm) reduce grout lines and visually widen the room, but you’ll need a flatter subfloor to avoid lipping. In long, galley layouts, run rectangular tiles lengthways to emphasise flow; in open-plan spaces, a herringbone or French pattern adds structure without shouting if you keep joints tight. Choose a grout colour close to the stone to calm the grid. Plan Sealing techniques early, because porous limestone and travertine need protection before grouting. Expect installation challenges around door thresholds, underfloor heating, and cutting cleanly around islands and service penetrations.
Match Stone Floors to Cabinets and Countertops
Because your stone floor covers the largest uninterrupted surface in the kitchen, it should set the undertone that your cabinets and worktops then echo, not fight. Start by identifying the stone’s dominant temperature: warm (honey limestone, travertine) or cool (grey slate, blue limestone). Then mirror that in cabinet paint, timber stain, and countertop veining, keeping contrasts deliberate rather than accidental.
- Match undertones: creamy stones with off-whites; blue-greys with crisp whites
- Repeat one colour twice: floor, then quartzite fleck or cabinet hardware
- Control grain direction: linear stones suit shaker; busy veining suits slabs
- Use Decorative patterns sparingly, so joinery reads calm
- Borrow historical inspirations: encaustic-style borders with classic oak, or Welsh slate with painted cabinetry
Budget: Material, Labor, Waste, and Upkeep
While stone flooring can look like a single line item on a quote, you’ll get a more accurate kitchen budget by splitting it into four parts: material, labour, waste, and upkeep. Material costs vary by stone type, finish, thickness, and grading; ask whether pricing reflects UK supply, Stone quarrying standards, and any Environmental impact reporting. Labour depends on layout complexity, edge detailing, thresholds, and the installer’s experience with natural stone; get an itemised day rate or m² rate. Waste covers cuts, breakages, and pattern matching—allow a sensible percentage and confirm it’s included in your order. Upkeep includes sealing, pH-neutral cleaners, and periodic resealing; budget for products and a maintenance visit if you won’t DIY.
Subfloor and Underlayment Requirements for Stone Tile
A realistic budget only holds up if the floor build-up can actually carry stone without flexing or cracking, so check the subfloor before you order tiles. In UK kitchens, aim for a stiff base: stone typically needs no more than L/720 deflection, so verify joist spans and centres, then correct any bounce before tiling. Your Subfloor preparation should include re-fixing loose boards, removing contaminants, and adding ply where required to create a flat, stable deck. Choose Underlayment options to suit moisture and movement control:
- 18–22mm WBP ply over boards, screwed not nailed
- Cement backer boards for rigidity and thin build-up
- Uncoupling membranes over sound, level substrates
- Suitable primer and levelling compound for flatness
- Waterproofing kit in splash zones, per manufacturer data
Transitions and Thresholds (Tile to Wood, LVP, Etc.)
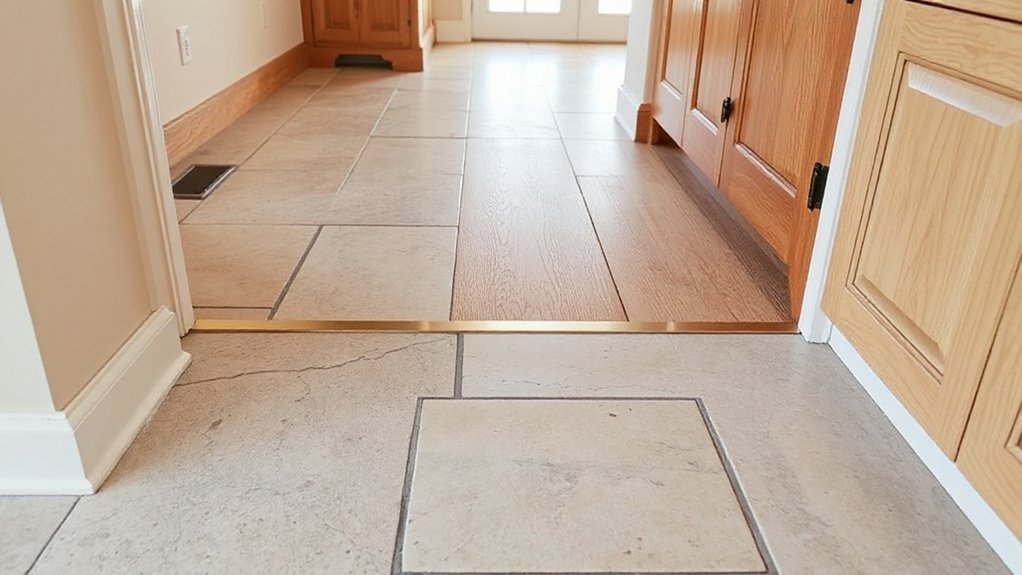
Even if your stone floor goes down perfectly flat, the job won’t look finished—or wear properly—unless you plan the changes and thresholds to neighbouring finishes. Start by measuring finished floor heights, including adhesive and underlay, so your stone meets timber, engineered boards, or LVP without a trip edge.
Use an appropriate connector: a slim brass or stainless strip for tight joints, or a tapered oak threshold where levels differ. Allow a small movement gap and mask it with a cover strip, not grout, especially at doorways. In UK period homes, pick profiles that suit Historical styles—aged brass, stone saddles, or timber ramps—so the junction looks intentional. For Outdoor installation at a patio door, specify a weathered threshold and ensure drainage fall away from the frame.
Radiant Heat Under Stone: What to Know
If you’re fitting radiant heat beneath natural stone in your kitchen, you’ll need to confirm your chosen stone type can handle steady thermal cycling without cracking or discolouring. You should plan the build-up carefully—insulation boards, heating mat or pipe layout, and the right adhesive and grout all matter for safe, compliant installation in UK homes. Done properly, you’ll get efficient, even warmth, but you must protect the floor with sensible temperature limits and stone-appropriate sealing and cleaning.
Compatibility With Stone Types
- Choose limestone or marble for fast, even heat response.
- Pick granite when you need toughness and steady thermal mass.
- Use slate if you want riven texture; check thickness for warm-up time.
- Avoid very porous stones unless you’ll seal well against kitchen spills.
- Specify suitable adhesives/grout for movement and temperature cycling.
If you’re matching existing period floors, prioritise like-for-like thickness to keep performance predictable.
Heat System Installation Basics
Before you lay a single tile, choose between electric mats and hydronic (water-based) pipes and make sure your subfloor meets flatness and strength requirements, because stone won’t forgive movement. In UK kitchens, you’ll typically embed heating within a decoupling membrane or reinforced screed, then bed stone with a flexible, rapid-set S1/S2 adhesive suitable for underfloor heating. Keep sensor probes in conduit and site the thermostat away from cookers and direct Natural lighting to avoid false readings. Maintain perimeter expansion gaps and honour movement joints through doorways and large bays. You’ll need an RCD-protected electrical feed for mats, or properly insulated pipe loops pressure-tested before pour for hydronic. Plan Kitchen ventilation routes so ducting doesn’t compromise joists or insulation layers.
Efficiency And Floor Care
Once your heating mats or pipe loops are installed and the stone’s bedded on a flexible system, efficiency comes down to how you run it and how you look after the floor day to day. Use a programmable thermostat, keep flow temperatures low, and avoid rapid on/off cycling that can stress grout and adhesive. In UK kitchens, pair UFH with good insulation and a sensible schedule to cut running costs while keeping warmth even. For longevity, treat stone like a finish with Historical context and Artistic inspiration: preserve its character while protecting its surface.
- Set timed setbacks, not constant high heat
- Keep rugs breathable; avoid thick rubber backing
- Seal porous stone; re-seal to product spec
- Clean with pH-neutral stone cleaner only
- Wipe spills fast; salts and acids can etch
Seal and Maintain Stone Floors to Prevent Stains
Although natural stone feels rugged underfoot, it’s still porous enough to absorb cooking oils, wine, tea, and acidic splashes if you don’t protect it properly. Start with the right Sealing techniques: use a UK-approved impregnating sealer for limestone, sandstone, or travertine, and apply it after the floor’s fully dry. Work in manageable sections, keep edges wet, then buff off residue before it hazes. Test with a few drops of water; if it darkens, reseal.
Lock in protection with disciplined Maintenance routines. Sweep grit daily, mop weekly with pH-neutral cleaner, and avoid vinegar, bleach, and steam mops. Wipe spills immediately, use mats by sinks and hobs, and fit felt pads under stools. Re-seal every 1–3 years, depending on traffic.
Frequently Asked Questions
What’s the Typical Timeline for Ordering and Installing Natural Stone Kitchen Floors?
You’ll typically allow 2–6 weeks for ordering and 3–7 days for installation. You’ll schedule sealing techniques after grouting, then follow maintenance tips. UK suppliers’ lead times and subfloor prep can extend it.
Can I Install Natural Stone Flooring Myself, or Should I Hire a Pro?
You can attempt DIY installation, but you should hire a pro for best results; stone laying can become a “learning opportunity.” Professional expertise guarantees proper subfloor prep, UK compliance, accurate cuts, sealing, and long-lasting finishes.
Will Natural Stone Flooring Increase My Home’s Resale Value or Appraisal?
Yes, you’ll often boost resale value and support a stronger home appraisal, especially with quality stone and professional fitting. You must keep records, seal it properly, and match local UK buyer tastes and comparable sales.
How Do I Repair Chipped, Cracked, or Loose Stone Tiles in a Kitchen?
You’ll repair chipped, cracked, or loose stone by lifting the tile, cleaning and re-bedding it, then doing crack repair with epoxy. Regrout, let cure, and finish with tile sealing to protect.
Are There Eco-Friendly or Locally Sourced Natural Stone Options for Kitchens?
Yes—you’ve probably walked past them on a UK high street: Eco friendly sourcing exists via verified quarries and reclaimed stockists. Choose Local stone options like Welsh slate, Purbeck limestone, or Cornish granite to cut transport impacts.
Conclusion
Natural stone can anchor your kitchen redesign like a well-laid keel: solid, timeless, and quietly confident. If you’ve matched the right stone to your lifestyle, chosen a sensible finish, and checked your subfloor’s rigidity, you’re set up for decades of use. Get thresholds and passages right, especially between timber, LVP, and tile, and plan radiant heat properly. Seal it, clean it thoughtfully, and you’ll keep stains at bay and value high.