Start by checking stability, joints, and wood type—skip swollen particleboard or pest damage. You’ll get the biggest lift from a deep clean: mild soap or vinegar-water, minimal moisture, then dry fast. Fix wobble by tightening screws, re-gluing loose joints, and adding shims or corner blocks. Choose stain to show grain, paint to hide flaws, or just polish if the finish is intact. Scuff-sand 120–220, dust off, then seal with poly, wax, or hardwax oil. Keep going for easy upgrades like new hardware and upholstery tweaks.
Key Takeaways
- Inspect joints, wood type, and pest damage to decide if the piece is worth refreshing.
- Choose clean, paint, or stain based on finish condition, veneer flaws, and your desired look.
- Degrease thoroughly, rinse lightly, and dry fully so primer, paint, or stain bonds properly.
- Sand in stages (80→150→220), follow the grain, and remove all dust before finishing.
- Apply thin, even coats of paint or stain, then protect with polyurethane or hardwax oil for durability.
Is This Old Furniture Worth Saving?
Before you strip, sand, or shop for new hardware, take a hard look at what you’re starting with—because not every “vintage” find deserves your time or money. Check structure first: wobble, racking, split joints, and soft wood around screws signal costly repairs. Flip it over and look for solid wood, quality plywood, dovetails, and old-growth grain; stapled particleboard usually isn’t worth it. Scan for labels, stamps, and maker’s marks to place its Furniture history, then compare similar pieces online to gauge antique value. Smell for smoke or mildew, and inspect for active powderpost beetles (fresh holes, dust). Trend-wise, prioritize clean-lined mid-century and well-made traditional pieces; skip overly damaged, overly ornate, or mass-produced “brown” furniture.
Pick Your Refresh Plan: Clean, Paint, or Stain
Start by checking the surface: note grime buildup, sticky old wax, peeling finish, water rings, and any veneer chips that could change your approach. If the wood grain is worth highlighting, you’ll lean stain; if you want a modern, uniform look or need to hide flaws, you’ll choose paint. Either way, map your prep—degrease, rinse, scuff-sand, and tack-cloth—so your new finish bonds cleanly and lasts.
Evaluate Surface Condition
Once you’ve hauled that piece into good light, scan the surface like a pro: check for deep scratches, peeling finish, sticky residue, water rings, and any wobble or soft spots that signal damage below the topcoat. Run your hand over it to read the surface texture—raised grain, dents, or gummy varnish tell you what prep you’ll need.
Next, assess moisture levels. Smell for mustiness, look for dark stains around joints, and press a paper towel to suspect areas to spot dampness. Open drawers and inspect undersides for swelling, veneer lift, or powdery rot. Tighten loose hardware and test every leg for racking by gently pushing side to side. Finally, note wood species and veneer thickness so you don’t sand through.
Choose Paint Or Stain
Your surface check tells you how far you can push the makeover, so now pick a refresh plan that matches the piece and your tolerance for prep: clean and revive, paint for a high-impact update, or stain to showcase the wood. Choose clean-and-revive when the finish is intact but dull; you’ll keep patina and save time. Choose paint when damage is visible or you want to shift style fast—matte black, warm white, and muted sage are trending Color palettes that modernize instantly. Choose stain when grain is worth showing; go lighter for Scandinavian vibes or richer for heritage warmth, and confirm Material compatibility with the existing wood species and veneer thickness. If you’re unsure, test in a hidden spot and commit only after it looks right.
- Clean + revive: keep character
- Paint: cover flaws, update style
- Stain: highlight grain, tone wood
Plan Cleaning Prep Steps
Before you touch sandpaper or primer, map out cleaning and prep steps that match your refresh plan—because “clean + revive,” paint, and stain each need a different level of de-greasing, scuffing, and repair to look current and hold up. Start by labeling problem areas: sticky residue, water rings, chipped veneer, loose joints. For “clean + revive,” use Cleaning techniques like diluted dish soap, then a degreaser, and finish with a conditioner or wax after drying fully. For paint, prioritize surface preparation: remove hardware, fill dents, caulk seams, scuff-sand to dull sheen, then vacuum and tack-cloth before bonding primer. For stain, strip or sand to bare wood, raise grain with a damp wipe, and sand again for an even, on-trend finish.
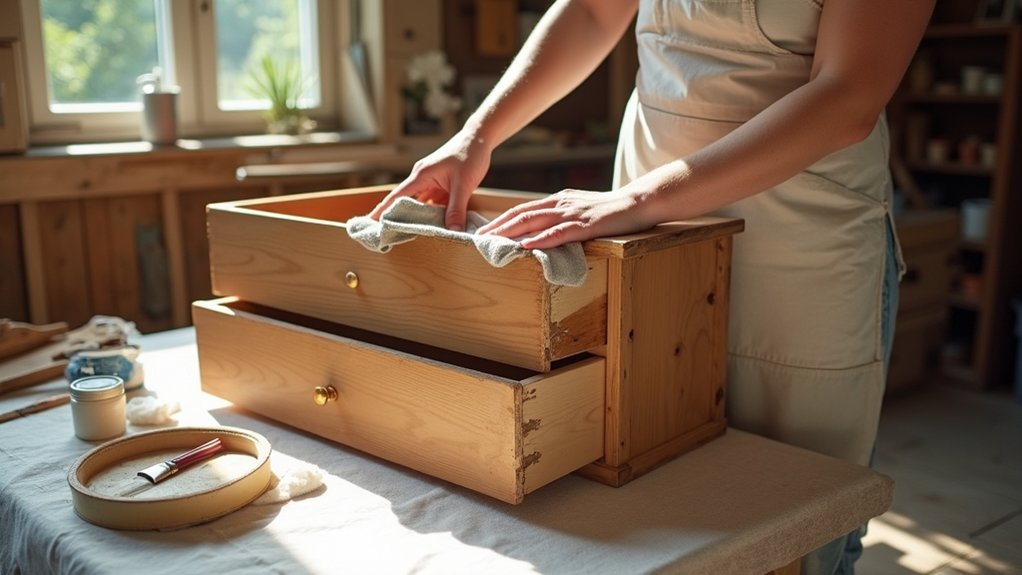
Clean Old Furniture the Right Way
Start by checking what you’re working with—solid wood, veneer, laminate, or metal—and whether the finish is waxed, oiled, painted, or sealed, so you don’t accidentally strip it. Use a gentle, modern go-to mix (like a few drops of dish soap in warm water) and a microfiber cloth, spot-testing first and keeping moisture minimal. Dry fast with a clean towel, then protect the surface with an appropriate topcoat or conditioner so it stays fresh-looking longer.
Assess Material And Finish
Although it’s tempting to grab an all-purpose cleaner and go to town, take a minute to assess the furniture’s material and existing finish so you don’t strip patina, cloud a topcoat, or lift veneer. Start by identifying solid wood versus veneer or laminate; check edges and seams for peeling or bubbles. Next, read the finish: is it oil, wax, shellac, lacquer, or polyurethane? Spot-check in a hidden area for tackiness, whitening, or color transfer to gauge finish durability before you touch the show surfaces. Note hardware and inlays that may react differently, and plan your wood treatment accordingly.
- Inspect joints, veneer corners, and water rings under angled light
- Feel for roughness, sticky buildup, or flaking topcoat with a dry hand
- Photograph labels, grain, and damage so you track changes while invigorating
Use Gentle Cleaning Solutions
Once you’ve ID’d the material and finish, choose the mildest cleaner that’ll cut grime without softening the topcoat or washing out patina. Start with a barely damp microfiber cloth and a drop of pH‑neutral dish soap in warm water; wipe with the grain and change cloth faces often. For Eco friendly cleaning, lean on Natural solutions: diluted castile soap for painted pieces, and a 1:10 vinegar-and-water mix only on sealed surfaces after a spot test. Skip vinegar on marble, unsealed wood, and shellac. Use cotton swabs for crevices and a soft toothbrush for carvings, keeping moisture minimal. If you hit sticky residue, try a tiny amount of mineral spirits on a cloth, test first, and work fast.
Dry And Protect Surfaces
Before you move on to polishing or touch-ups, dry the piece thoroughly so leftover moisture doesn’t haze the finish, swell joints, or trap grime in corners. Blot with lint-free cloths, then air-dry with drawers open so hidden cavities don’t stay damp. Match your method to the surface texture: carved details need a soft brush and low airflow, while flat tops handle a quick wipe-down. Next, protect the cleaned finish with a thin, reversible barrier that respects material compatibility—wax for sealed wood, a conditioning oil for thirsty unfinished wood, and a microfiber buff for laminates and metal.
- Use a dry toothbrush for grooves and turnings
- Keep heat low; avoid hair dryers on veneer
- Test protection products in an inconspicuous spot first
Fix Wobble, Chips, and Loose Joints
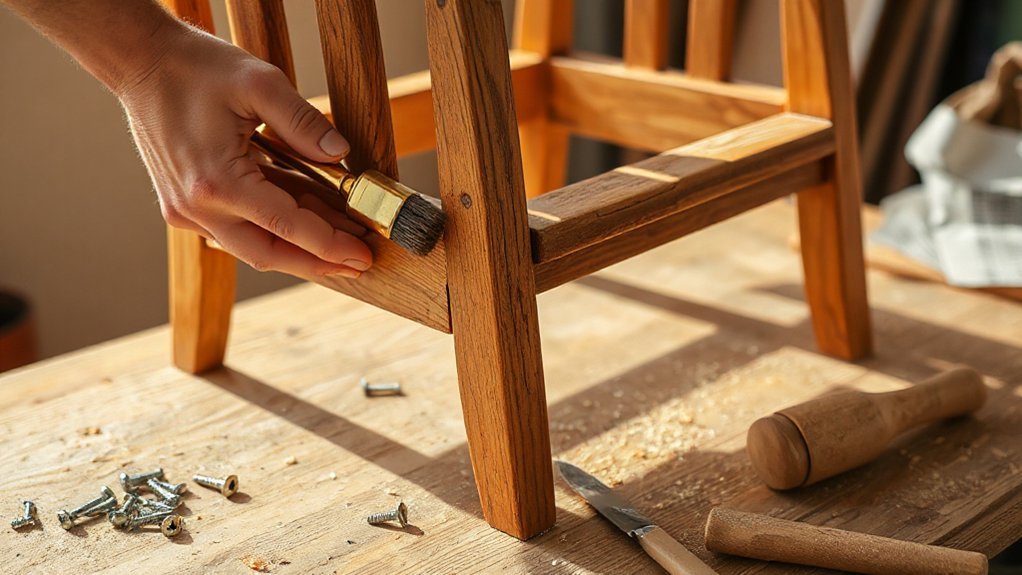
If your refreshed piece still rocks, rattles, or shows battle scars, fix those structural and surface issues first so your paint or stain doesn’t fail later. Start with wobble repair: set the piece on a flat floor, press opposite corners, and mark the short leg. Tighten screws, then add adhesive felt pads or a thin shim for a clean, modern fix.
For loose joints, pull the joint apart only if it moves easily. Scrape out crumbly glue, inject fresh wood glue, clamp square, and wipe squeeze-out with a damp rag. Replace missing corner blocks, and add hidden L-brackets where strength matters. Fill chips and dents with stainable wood filler or epoxy putty, then level it carefully with a putty knife. Let everything cure fully.
Sand Smarter for a Smoother Finish
Start with the right grit—coarser to strip and level, then step up gradually to a finer grit for that modern, paint-ready smoothness. Keep your sander moving with light pressure and follow the grain so you don’t leave swirl marks that show through stain or matte finishes. Between coats, vacuum and tack-cloth the surface to clear fine dust, so each new layer bonds cleanly and looks glass-smooth.
Choose The Right Grit
Although sanding looks straightforward, the grit you choose decides whether your refreshed piece feels silky or ends up with swirls you can’t unsee under paint or stain. Smart grit selection starts with evaluating the surface: heavy wear, old varnish, or only a dull topcoat. Then match Sandpaper types to the job—aluminum oxide for general wood, silicon carbide for slick finishes, and sanding sponges for curves and trim. Work through a simple progression so you remove damage fast, then refine for today’s clean, matte, “natural wood” look.
- Start at 60–80 grit for thick finish removal or deep scratches
- Move to 120–150 grit to level and prep for primer or stain
- Finish with 180–220 grit for paint-ready smoothness on most hardwoods
Prevent Swirl Marks
Choosing the right grit sets you up for success, but your technique determines whether the surface looks clean and modern or ends up with faint “pigtails” that show through paint and stain. Keep your sander moving and overlap passes by about a third, following the wood grain whenever possible. Don’t tip the tool onto an edge; that’s how swirl marks get burned in. Let the machine’s weight do the work, and ease up near corners and profiles.
Switch sheets as soon as they clog, and avoid skipping grits—each step should erase the last pattern. For curves, wrap paper around a flexible pad so pressure stays even. Between passes, use simple cleaning techniques: brush off loaded grit so it can’t scratch on the next stroke.
Dust Removal Between Coats
Once you’ve laid down a coat of paint, stain, or clear finish, the dust you leave behind becomes the next layer’s problem—creating gritty texture, nibs, and weak adhesion. Before any coat in between, sand smarter: use 320–400 grit on cured finishes, and a fine sanding sponge on profiles. Keep pressure light so you level dust, not cut through edges. Then do a quick dust inspection under raking light; your phone flashlight works. Clean in a modern, low-lint sequence so you don’t recontaminate the surface.
- Vacuum with a soft brush attachment, hitting corners and carvings.
- Wipe with a slightly damp microfiber, then let it fully dry.
- Finish with a tack cloth or waterborne-compatible tack wipe, lightly.
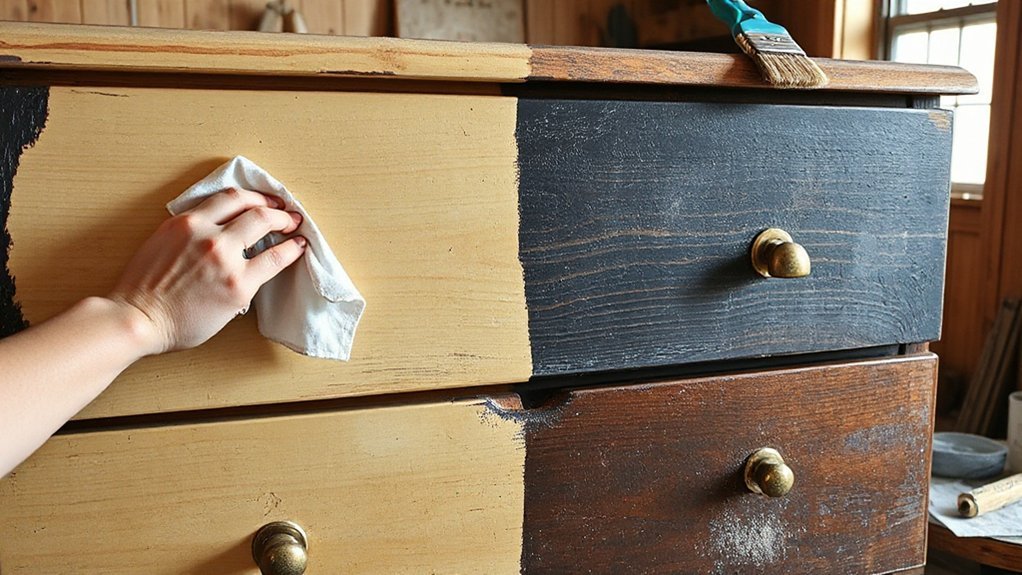
Paint Old Furniture for a Modern Look
If you want an instant style upgrade without replacing what you already own, painting old furniture gives you the biggest visual payoff for the least cost. Start by choosing a Color palette that matches your room: warm whites, muted sage, dusty blue, or matte black for a modern edge. Clean, scuff-sand, then apply a bonding primer so paint grips slick laminate or varnish. Use a high-density foam roller for flat panels and an angled brush for corners to keep strokes tight. Apply two thin coats, letting each cure fully. For Finish durability, topcoat high-touch pieces with a water-based polyurethane in matte or satin, and skip heavy gloss unless you’re going glam. Swap hardware to brass or black to finish the refresh.
Stain Old Furniture to Restore Wood Grain
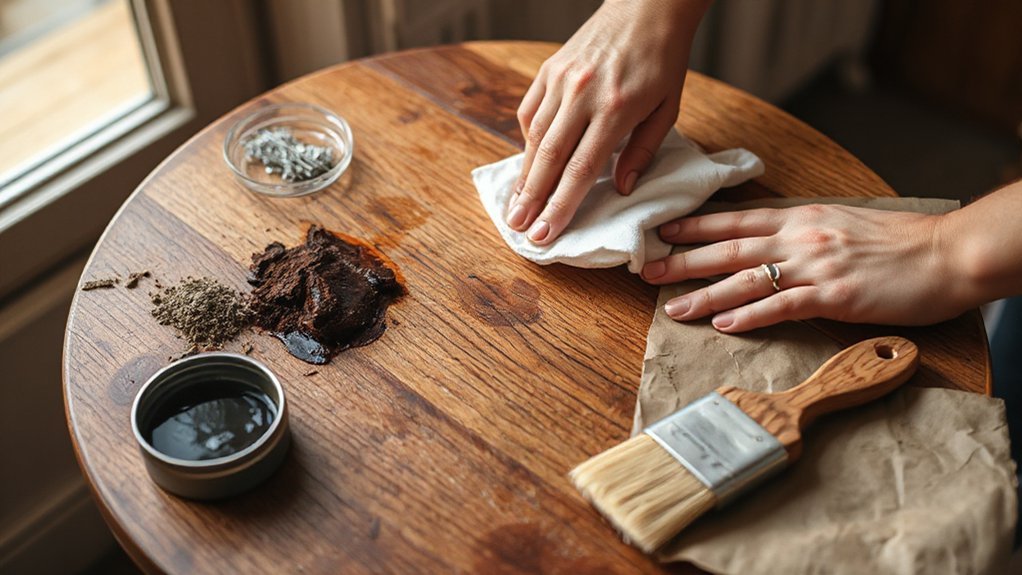
Want that rich, layered look that paint can’t deliver? Stain brings Wood grain back to life, especially on vintage oak, walnut, or mahogany. Start by stripping or sanding to clean, bare wood, then vacuum dust and wipe with mineral spirits so color absorbs evenly. Test on the underside first; today’s trend is medium-warm tones that read natural, not orange. Use controlled staining techniques: work in small sections, flood the surface, then wipe with the grain for definition. If your piece looks blotchy, apply a pre-stain conditioner and restain lightly, building color in thin passes. Finish by buffing dry after each coat.
- Gel stain for vertical surfaces and even color
- Dye stain for bold, transparent depth
- Wipe-on stain for quick, low-mess control
Seal and Protect the Finish (Poly, Wax, Oil)
After your stain cures, lock in that color and add real-world durability with the right topcoat: water-based poly for a clear, modern look that won’t amber, oil-based poly for warmer depth and tougher wear, hardwax oil for a low-sheen “natural wood” trend finish that’s easy to spot-repair, or paste wax for light-duty pieces where you want a soft, hand-rubbed feel.
For poly, sand lightly with 320 grit, tack off dust, then brush or wipe thin coats with the grain; apply 2–3 coats, scuff-sanding between for smoothness. For hardwax oil, wipe on, wait, then buff off excess to avoid tackiness; add a second coat after drying. For wax, buff in whisper-thin layers. These Protective finishes improve Surface sealing and fight water rings, grime, and UV fading.
Refresh Upholstery With Quick DIY Fixes
While a fresh finish makes the wood look new, tired fabric can still date the whole piece—so tackle the upholstery with fast, high-impact upgrades you can do in an afternoon. Start with Upholstery cleaning: vacuum seams, lift pet hair with a rubber glove, then spot-treat stains using a fabric-safe enzyme cleaner. Let it dry fully, and finish with a light fabric protector for everyday durability.
If the textile’s faded, scratchy, or smells embedded, plan a simple Fabric replacement. Measure the old panels, buy performance velvet or bouclé for a current look, and staple from the center outward to keep tension even.
- Steam creases, then brush nap direction for a uniform sheen
- Replace sagging foam with high-density inserts, then add batting
- Reattach loose trim with fabric glue and hidden staples
Swap Hardware and Add Small Custom Upgrades
Even if the finish and fabric look fresh, dated knobs and tired pulls can instantly give the piece away—so swap the hardware first for a quick, high-impact update. Measure hole spacing (center-to-center) before you shop, and bring one pull to match screw size. Try warm brass, matte black, or acrylic for a trend-forward Hardware update, and use backplates if old holes show.
Next, add small Custom embellishments that look intentional: wrap drawer fronts with cane webbing, apply thin molding to create shaker panels, or add leather tab pulls for a soft modern touch. You can line drawer interiors with peel-and-stick paper, swap in felt bumpers to quiet slams, and add corner guards on trunks. Seal new details with clear wax so they wear well.
Frequently Asked Questions
How Do I Remove Musty Odors From Old Furniture Safely?
Air out the piece outdoors, then vacuum and wipe with diluted vinegar. Sprinkle baking soda for Odor absorption overnight, then vacuum. Keep humidity low for Mold prevention. Use activated charcoal bags inside drawers for lingering smell.
What Are the Best Eco-Friendly Products for Refinishing Furniture?
You’ll get the best eco-friendly refinish by choosing sustainable finishes like water-based low-VOC poly, plant-based hardwax oils, and milk paint. Think of your dresser as a forest: natural cleaning with castile soap clears the path.
How Can I Refresh Furniture Without Strong Fumes Indoors?
You can refresh furniture indoors by choosing low-VOC, water-based finishes, ventilating with fans, and curing pieces near open windows. Try Furniture painting with acrylics, plus upholstery cleaning using steam, baking soda, and enzyme sprays.
When Should I Hire a Professional Instead of DIY?
Hire a professional when your piece feels like a fragile heirloom: loose joinery, veneer lift, structural cracks, or unknown finishes. You’ll need antique restoration, plus furniture appraisal, before sanding, stripping, or modern coatings.
How Do I Transport Restored Furniture Without Damaging the Finish?
Wrap pieces in moving blankets, then stretch-wrap without touching the finish. Pad corners, remove hardware, and keep items upright. For Furniture restoration, plan Safe transportation: use tie-downs, avoid heat, and cure fully first.
Conclusion
You don’t need a full workshop—or a big budget—to make old furniture look current again. If you’re thinking, “I’ll mess it up,” start with the lowest-risk wins: deep clean, tighten joints, and swap in modern hardware. Then sand lightly and choose stain for grain, paint for a fresh color-block look, or wax/oil for a soft matte finish. Seal it, patch the upholstery, and you’ll get a durable, custom piece fast.