You’re not starting with a “blank canvas,” you’re inheriting a building project such as rebuilding a ruined farmhouse, that’s had a hard life. You secure it first: permissions, a structural survey, and a clear map of cracks, lean, and damp. You prop and stitch walls with the lightest touch, then stop water at the roofline, gutters, and drainage. You specify breathable lime repairs and reversible framing fixes so moisture can’t get trapped. Next you’ll face the one choice that decides whether it stays honest or turns generic…
Key Takeaways
- Secure the site: control access, clear debris safely, brace unstable walls and openings, and document every temporary intervention.
- Confirm permissions early: check listed status, conservation constraints, and agree repair principles with conservation officers before design decisions.
- Commission a structural survey and map defects: record cracks, wall lean, damp sources, and timber decay to prioritise reversible stabilisation.
- Stop water first: patch roof, fix gutters and drainage, cap wall heads, and lower external ground levels to prevent ongoing saturation damage.
- Repair with breathable, compatible materials: use lime mortars and traditional masonry detailing, avoiding cement and impermeable insulation that traps moisture.
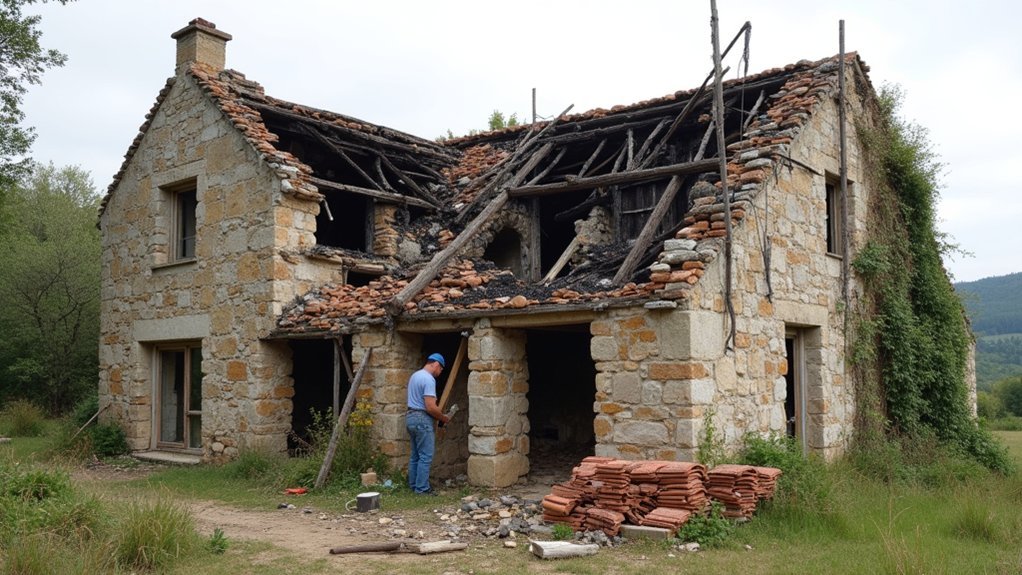
Make the Ruined Farmhouse Safe First
Before you think about aesthetics or layout, you must make the ruined farmhouse safe to enter and work in. Start with a controlled access plan: fence the perimeter, post signage, and keep a single entry route.
Clear loose debris only after you’ve assessed collapse risks from gable ends, chimneys, and leaning walls. Brace unstable openings with temporary shoring, and cap exposed wall heads to shed water.
Strip invasive vegetation at the base, but don’t yank roots that may be binding masonry. Ventilate and isolate mouldy rooms; wear respiratory protection and cut power to any suspect wiring.
Document every intervention so temporary fixes don’t compromise Historical accuracy or aesthetic preservation later. Keep materials reversible and visually discreet.
Check Permissions and Book a Structural Survey
Before you sketch interventions, you’ll confirm the planning context, including whether the farmhouse is listed and any curtilage constraints that affect materials, openings, and scope.
You’ll then align your stabilisation strategy with what consent will actually permit, so design intent and compliance move together.
Next, you’ll commission a structural survey to map load paths, wall stability, and foundation performance, giving you hard evidence for what can be repaired, what must be rebuilt, and how to do it safely.
Confirm Planning And Listed Status
Even if the farmhouse looks beyond saving, you can’t set a design direction until you’ve confirmed its planning constraints and any listed status. Start with the local planning portal and land charges search, then verify boundaries, access, and any enforcement history.
Check whether the site sits in a conservation area, national park, AONB, flood zone, or archaeological sensitivity zone, because each alters what you can repair, replace, or rebuild.
If it’s listed, request the list entry and mapping, read the statement of significance, and identify which elements are protected—fabric, setting, outbuildings, even interiors.
Align your concept with historic preservation principles and current conservation guidelines, then book a pre-application discussion with the conservation officer to test material choices, massing, and detailing before you draw.
Commission A Structural Survey
Once you’ve confirmed the site’s planning and heritage constraints, commission a chartered structural engineer to survey the farmhouse and set a safe, buildable strategy. Ask for a measured condition report covering foundations, wall plumb, lintels, floor spans, roof thrust, and any progressive collapse risks.
Insist on opening-up recommendations so you can expose hidden decay without over-demolishing fabric of historic significance.
Check your permissions: some investigations need listed building consent, scheduled monument consent, or ecology sign-off before intrusive probes. Book access scaffolds, temporary propping, and exclusion zones so the survey can record crack patterns and movement accurately.
Request options that prioritise repair over replacement, specify compatible lime mortars, and quantify environmental impact through reuse, minimal new steel, and staged stabilisation.
Then brief your designer with engineering conclusions and constraints.
Survey the Farmhouse: Cracks, Lean, and Damp
Although the farmhouse may look like a simple shell, you should treat it as a live structural system and survey it accordingly: map every crack (width, direction, and whether it steps through masonry or slices cleanly), measure any lean in walls and chimneys with a plumb line or laser, and trace damp to its source rather than its stain.
Photograph elevations square-on, tag locations on a plan, and date-stamp each record so you can spot change. Note where cracks align with openings, floor joist bearings, or past alterations that affect farmhouse aesthetics and historical significance.
For damp, log tide marks, salts, and musty zones; check gutters, flashings, ground levels, and blocked vents. Record timber moisture and beetle flight holes, but don’t disturb fragile fabric.
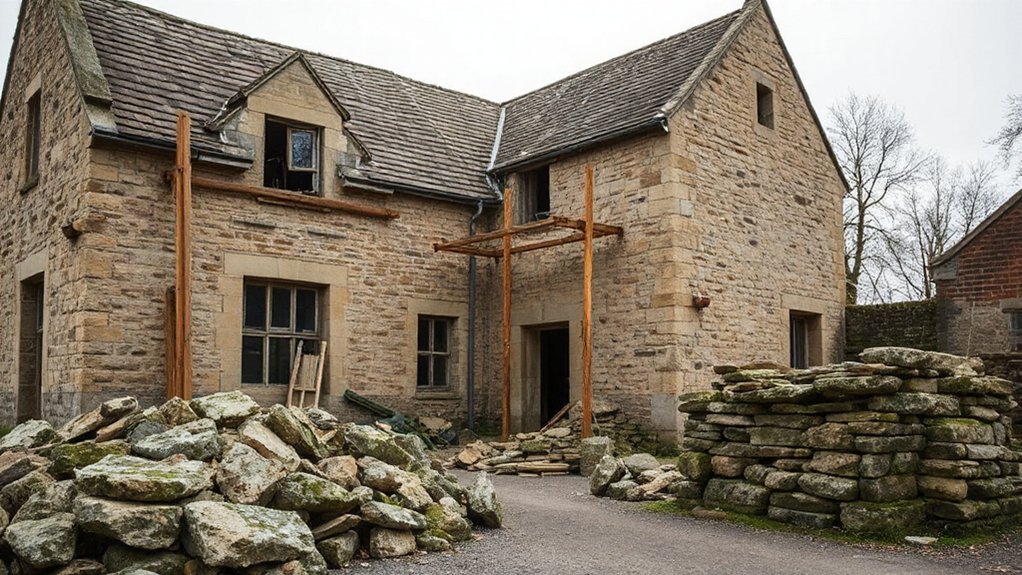
Prop and Stitch Walls With Minimal Movement
Before you try to “straighten” anything, stabilise the masonry exactly where it sits so you don’t trigger progressive collapse or shed historic fabric. Set adjustable acrow props on sole plates, add strongbacks to spread load, and brace corners with raking shores; tighten gradually and monitor gauges so movement stays near zero.
Then stitch, don’t rebuild. Rake joints only to sound depth, pin across cracks with stainless helical bars bedded in lime grout, and tooth-in replacement stones only where faces have lost bearing. Use Traditional techniques—through-stones, lime mortar, and discreet pinning—while choosing modern materials for hidden reinforcement and crack control.
Keep interventions reversible: isolate steel from lime with sleeves, avoid rigid cement, and record every prop point and stitch line for the conservation file.
Stop Water Ingress: Roof, Gutters, Drainage
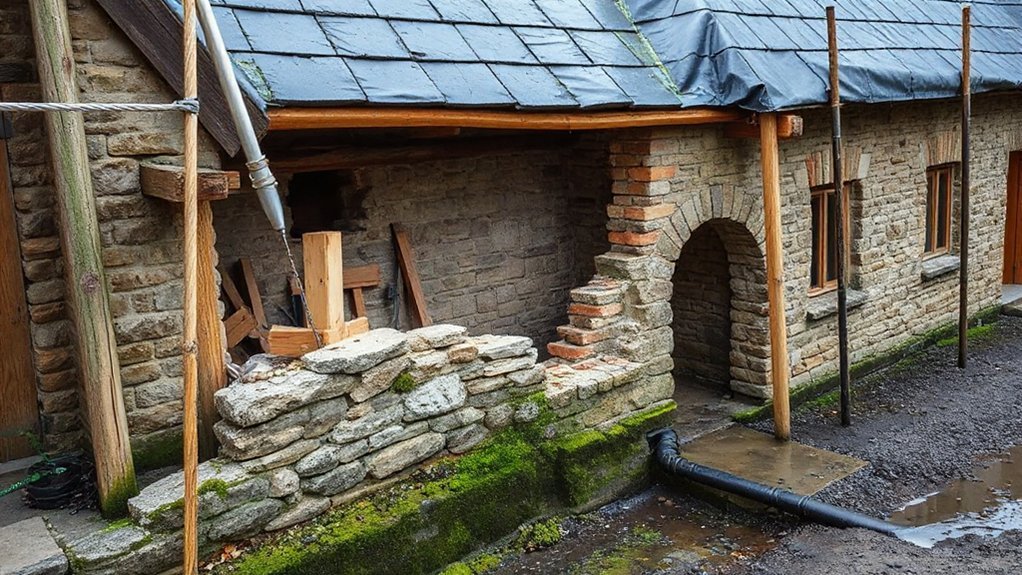
Because water drives most masonry failures, you should treat the roof, gutters, and site drainage as the first “structural” repair and make them weathertight fast, not pretty. Patch missing slates, refix loose ridge tiles, and cap exposed wall heads with temporary flashing or a sacrificial cover.
Clear valleys and abutments so water can’t back up under courses, and check roof timbers for active leaks before you close anything in.
Rehang gutters to consistent falls, replace failed unions, and extend downpipes into gullies or surface channels that discharge away from foundations.
Build in gutter maintenance access with leaf guards and rodding points.
Regrade the yard, cut a shallow French drain at the perimeter, and consider Rainwater harvesting to reduce overflow and control discharge routes.
Choose Breathable Materials for Farmhouse Repairs
Once you’ve stopped water ingress, you need repairs that let the building dry and move without cracking.
You’ll specify lime mortar and lime plaster to keep masonry vapour-open, sacrificial, and visually consistent with the farmhouse’s original texture.
You’ll pair that with natural insulation—wood fibre, hemp, or sheep’s wool—so walls manage moisture safely while improving comfort without trapping damp.
Lime Mortar And Plaster
Although cement-based mixes can look like a quick fix, they trap moisture in old farmhouse walls, so you’ll get salt bloom, spalled stone, and failing joints instead of a stable repair.
Specify lime mortar to match the original softness and porosity, letting masonry dry to both faces. Rake out defective joints by hand, keep arrises intact, then repoint flush or slightly recessed to shed water without creating hard ledges.
Control suction: pre-dampen stone, and cure slowly with light misting and protection from wind and sun.
Inside, choose lime plastering for uneven substrates; it bridges minor movement and tolerates seasonal humidity.
Finish with breathable finishes—limewash, mineral paint, or clay-compatible coatings—so the wall system stays vapour-open and visually coherent with historic texture.
Natural Insulation Options
Breathable lime mortars and plasters keep moisture moving through an old farmhouse wall, so your insulation choice has to respect that same vapour-open logic.
Choose natural insulation that buffers humidity: wood fibre boards on uneven masonry, hemp-lime infill where you’re rebuilding, or sheep’s wool between new timber studs.
Specify capillary-active products with tested vapour permeability, and pair them with lime-based adhesives and finishes so you don’t create cold, damp traps.
Detail junctions like a designer: keep insulation continuous at window reveals, wrap wall-to-floor edges, and use airtight but vapour-open membranes behind internal linings.
Avoid foil-faced PIR, cement renders, and closed-cell sprays; they’ll lock water in.
Use sustainable materials with low embodied carbon and reversible fixings for future repairs.
Repoint and Repair Masonry With Lime Mortar
Before you touch the joints, treat repointing as a structural and aesthetic repair: lime mortar should match the farmhouse’s original fabric, move with the masonry, and shed moisture without trapping it.
Rake out failed cement or friable joints by hand to a sound depth, keeping arrises crisp and stones unbruised. Vacuum dust, pre-wet the wall, then pack new Lime mortar in tight lifts, fully bedding against the joint sides.
Tool to the historic profile—often flush or lightly recessed—so shadow lines stay calm and rain doesn’t sit. Stitch hairline cracks with lime-based grouts and pinning only where movement’s proven.
Protect fresh work from sun, wind, and frost; cure slowly under damp hessian. Good Masonry restoration reads quiet, not new.
Repair Floors and Framing Without Trapping Moisture
Once the walls can shed water through sound lime joints, turn to the floors and frame, because a dry-looking farmhouse can still rot from moisture trapped at joist ends and beneath impermeable finishes.
Lift finishes and inspect bearings, then cut back decay to sound timber and splice with matching species; treat only what you must, and keep details breathable.
Don’t wrap joists in cement or foam; instead, re-seat them on slate or oak plates with a capillary break, and ventilate voids.
Use Moisture barriers selectively: a vapour-open membrane above earth, not polythene that seals damp in.
For Floor reinforcement, sister joists or add discreet flitch plates, but keep load paths clear and allow movement.
Finish with limecrete or boards, never glossy sealers.
Upgrade Services Discreetly and Phase the Budget
While you’ve got floors up and walls open, route new electrics, plumbing, and data in the least intrusive paths—service voids behind skirtings, within cupboards, or along secondary partitions—so you don’t chase historic masonry or weaken framing. Specify Discreet upgrades that read as joinery, not interventions, and keep all penetrations reversible and well-sealed.
Let phased budgeting drive sequencing: make safe, make weather-tight, then make comfortable, and only then refine finishes.
- A shallow oak skirting duct hiding cables, shadow-lined and removable.
- A utility cupboard spine with manifolds, isolators, and labelled runs.
- Surface-mounted heritage conduit in outbuildings, not principal rooms.
- A plant nook sized for future heat pump and buffer tank.
Frequently Asked Questions
How Do I Insure a Ruined Farmhouse During Restoration Work?
You insure a ruined farmhouse by getting a specialist unoccupied-buildings policy with restoration coverage, listing works and values. Compare insurance options, require contractor liability, schedule inspections, and document progress so the insurer maintains terms.
What Are the Best Ways to Source Matching Reclaimed Stone and Timber?
Like fitting weathered puzzle pieces into a wall, you’ll source matching reclaimed stone and timber by visiting local salvage yards, quarries, and demolition sites; document profiles, check patina, confirm species, and test Matching mortar. Prioritise sourcing salvage online.
How Can I Maintain Original Character While Meeting Modern Energy Standards?
You’ll maintain original character by prioritizing historic preservation and architectural authenticity: insulate internally with vapor-open systems, upgrade airtightness discreetly, fit slim-profile double glazing, and specify reversible services. You’ll also commission hygrothermal modeling.
How Long Does a Sensitive Farmhouse Rebuild Typically Take?
You’ll typically need 12–24 months, depending on Heritage preservation requirements and Structural integrity findings. You’ll spend 3–6 months on surveys, design, consents; 6–15 on construction; plus weather, crafts lead times.
Which Grants or Tax Reliefs Might Apply to Farmhouse Restoration?
You can pursue Heritage grants from national heritage bodies, local councils, and conservation charities, and you can claim Tax reliefs like listed-building VAT concessions, repair deductions where eligible, and energy-efficiency incentives, subject to approvals.
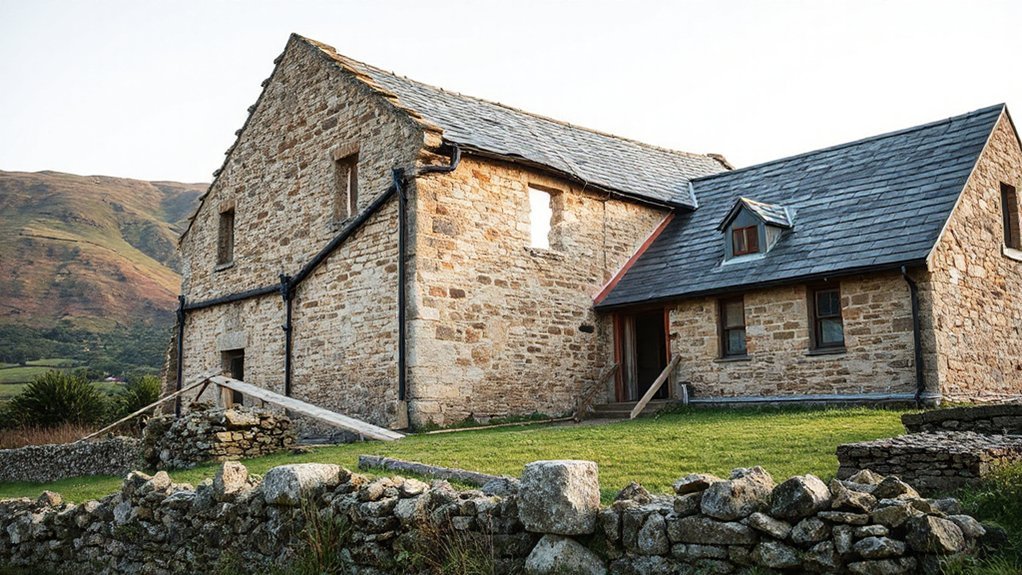
Conclusion
You’ve made it safe, surveyed every crack, stitched the walls, and stopped the water—yet the real test is next. As you repoint with lime, repair floors without sealing in damp, and tuck new services out of sight, you’re deciding what stays and what quietly changes. Keep your interventions breathable, minimal, and reversible. Phase the spend, lock in weather-tightness, then comfort. When you finally remove the props, you’ll discover whether the farmhouse stands—on its own.